
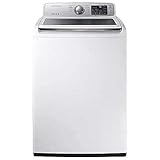
Is a Samsung Top Load Washing Machine Right for You?

A heavy wash cycle suddenly grinds to a halt with a loud thud, leaving a soggy pile of towels trapped inside. A modern top-loading washer cleans large family loads with ease, but long-term satisfaction depends on keeping the tub balanced. These deep machines handle bulky blankets without fuss, yet bunched fabrics can quickly cause frustrating spin errors.
How well the machine works depends on what goes into the hamper each week. A tall center post scrubs stubborn ground-in dirt from work clothes, while a flat wash plate provides open room for fluffy comforters. Quiet cycles also require adjusting the leveling feet on solid flooring and draping garments evenly around the rim. Here is how each drum design performs and how to prevent off-balance pauses before they start.
An Impeller Cleans Gentle Bedding While Agitators Scrub Dirt
The main difference in modern top loaders comes down to how the machine turns your clothes inside the wash basket. Traditional top loaders rely on a tall center post that turns clothes back and forth through the water. This center agitator post uses plastic fins to grab fabrics, twisting them downward toward the bottom before pushing them back up to the surface. That vigorous rubbing motion scrubs away stubborn mud, thick garden dirt, and greasy work grease from heavy cottons and denim jeans.
Agitator posts clean heavily soiled workwear well, but that continuous twisting can take a toll on delicate garments. Long sweatshirt drawstrings, bra straps, and thin knit shirts can catch on the fins, causing stretching or tangled knots. If your household washes lots of durable work uniforms, children's sports gear, and heavily stained cottons, a center agitator provides the aggressive scrubbing action needed to lift ground-in dirt without pre-soaking every item.
In contrast, an impeller model uses a flat wash plate at the drum bottom instead of a tall center post. This flat disc uses low-profile fins and high-speed pulses to create turbulent water currents that lift and spin garments across each other. Because the center of the tub stays completely open, clothes glide freely through the suds without snagging. This gentle action prevents thin fabrics, sweaters, and dress shirts from pulling out of shape during regular wash cycles.
An open wash plate design also makes loading large items much easier. You can slide a thick comforter or bulky sleeping bag straight into the tub without trying to wrap it around a plastic pole. The trade-off is that an impeller relies on fabric rubbing against fabric rather than plastic fins scrubbing the cloth. If you pack an impeller tub too full, clothes sitting near the top may stay dry or fail to circulate down into the soapy water. If you are currently deciding between a front loader or top loader washer, understanding how these drum styles move laundry helps you pick the right design for your wardrobe.
Level Legs and Even Loads Stop Violent Spin Shaking
The most frustrating issue with high-efficiency top loaders is violent shaking during the final spin cycle. When wet clothes bunch up on one side of the tub, the inner wash basket spins off-center at several hundred revolutions per minute. The off-balance safety sensor that pauses spinning and beeps when bulky towels or blankets bunch up on one side will stop the motor to prevent the basket from damaging the steel cabinet. When this happens, the machine often pumps in fresh cold water to re-float and re-balance the laundry, leading to endless rinse cycles and soaking-wet clothes.
You can prevent almost all spin balance errors by following five simple operational steps before and during laundry day:
- Check cabinet level with a bubble tool. Place a small torpedo level across the front edge of the washer cabinet, then check along the side edge. A machine that tilts even slightly forward or sideways will naturally slide wet laundry to the low side of the tub during the wash cycle.
- Adjust all four leveling legs firmly. Loosen the locking nuts on the bottom corner feet with an adjustable wrench. Turn the threaded leveling legs until all four rubber pads press flat against the floor. Lean your body weight against opposite diagonal corners of the washer; if the cabinet rocks or clicks, lower that leg until the frame feels solid as rock.
- Sort laundry loads by fabric weight. Never wash lightweight athletic shirts or thin pillowcases in the same load as heavy denim jeans or plush bath sheets. Wet cotton towels absorb massive amounts of water and weigh down one side of the drum, leaving lightweight items unable to counter the spinning force.
- Distribute clothing in balanced rings. Drop clothes loosely around the perimeter of the inner wash basket in a balanced donut pattern. Keep the middle area over the flat wash plate clear. Never drape large sheets or pants straight across the center, and never bundle dry items into tight balls.
- Run an empty calibration cycle. If your machine displays balance error codes regularly, reset the internal weight sensors. Consult your printed user manual for the exact button combination (often pressing Temp and Delay End together for three seconds) to run a calibration routine that measures the empty drum resistance.
If your washer still walks across the floor after completing these checks, inspect the subfloor beneath the appliance. Top loaders installed on upper-level wooden joists often shake because flexible subflooring bounces under high spin speeds. Placing a dense rubber anti-vibration mat under the leveling legs dampens movement and stops the cabinet from vibrating through your floorboards.
Spreading Bulky Blankets Around the Drum Prevents Spin Halts
Washing king-size duvets, heavy quilts, and thick fleece blankets requires specific preparation to keep the tub from thumping out of balance. Because bedding holds several gallons of water when soaked, poor placement will instantly trigger the off-balance safety sensor. Follow this practical checklist every time you load bulky household items into your top loader:
- Form a loose circle along the tub wall: Feed the blanket into the inner wash basket in loose, accordion folds around the outside perimeter. The center of the wash plate must stay visible so water can pump upward through the middle without getting blocked.
- Select the dedicated Bedding or Heavy Duty cycle: These specific cycles add more water to float heavy fabrics and use a slower, ramped spin profile. Fast spin speeds on normal cycles will crush wet blankets against the drum wall before the load has time to distribute its own weight.
- Balance single large items with matching weight: Never wash a single heavy bath rug or one water-resistant jacket alone. Add two or three dry bath towels of similar fabric weight on the opposite side of the basket to provide an even counterweight during the spin phase.
- Use low-suds HE (High Efficiency) detergent: Standard laundry soap creates massive soap bubbles that become trapped inside heavy quilt batting. Excess suds create artificial air pockets that lift one side of the blanket, causing uneven water drag and triggering pump errors.
- Verify the load sits below the plastic guard ring: Push the dry bedding down gently with your hands. If the blanket puffs up past the top balance ring of the stainless steel clothes tub, the fabric will rub against the lid during agitation and stall the spin motor.
- Avoid washing water-resistant mattress covers on regular settings: Waterproof pads trap water like giant balloons, preventing the drain pump from pulling water through the fabric. Wash water-resistant covers only on the Delicates or Waterproof cycle to keep trapped water from throwing the basket off balance.
Hot Self-Clean Cycles Remove Trapped Laundry Residue and Smells
Many homeowners assume only front loaders develop sour, mildew odors, but top loaders face a similar problem. Because modern high-efficiency machines use significantly less water than older traditional washers, excess detergent and thick fabric softeners do not always wash away completely. Over time, an oily layer of soap scum, body oils, and fabric lint coats the hidden outer surface of the stainless steel clothes tub.
When moist air sits inside a closed washer lid, bacteria and mold feed on this trapped residue, creating a musty smell that transfers straight onto freshly washed towels. To eliminate this film, run the self-clean cycle (a drum wash cycle run without laundry) once every month or after every twenty to thirty wash loads. This cycle fills the tub with hot water, agitating and spinning at high speeds to scrub scum away from the outer drum walls.
To run this maintenance cycle properly, make sure the inner wash basket is completely empty. Turn the cycle selector dial to Self Clean or Pure Cycle. If your machine displays a blinking drum icon on the control board, the washer is reminding you that it is time for this cleaning process. Do not add regular laundry detergent to the dispenser during this run, as detergent will only create more soap scum. If the drum already smells sour, add a liquid washing machine cleaner tablet or one cup of liquid chlorine bleach directly into the empty tub before starting the cycle.
Between deep cleanings, simple daily habits will keep sour odors from returning. Always leave the washer lid cracked open a few inches after finishing your final load of the day. Keeping the lid open allows room air to circulate through the tub, evaporating leftover droplets before mildew can grow. Pull the detergent drawer open to let the dispensing cups dry, and wipe down the top glass lid and the rim of the tub with a dry microfiber cloth once a week to catch stray lint.
Larger Drum Capacities Handle Bulky Bedding and Family Laundry
Choosing the right tub capacity depends directly on how many people live in your home and how often you wash bulky items like comforters and heavy jackets. Automatic top-load washers generally fall between 4.0 and 5.5 cubic feet of drum space. Picking a size that matches your routine prevents both overfilling the basket and wasting water on tiny loads.
A washer tub with around 4.5 cubic feet provides generous room for a household of two to three people. This size easily holds three full laundry baskets of mixed clothing, a complete set of queen bed sheets, or several heavy work jackets in a single pass. It fits comfortably in standard laundry closets while still giving you enough drum width to wash a queen-size comforter without jamming the fabric against the cabinet.
Homes with four or more family members, busy schedules, or heavy athletic routines benefit from a larger capacity of 5.0 to 5.2 cubic feet. These extra-deep drums swallow huge piles of children's clothes, bulky towels, and king-size bedding sets with ease. You can cut your weekly laundry routine down by several loads, saving valuable hours on busy weekends.
Keep physical dimensions and body reach in mind before choosing the largest drum available. A 5.2 cubic foot top-load washer is exceptionally deep. If you are shorter than five feet four inches, reaching all the way to the bottom of the stainless steel clothes tub to grab small baby socks or washcloths requires leaning heavily over the metal front rail. Before settling on a specific size, think about your daily comfort. If bending deeply or reaching downward feels uncomfortable for your back, choosing whether a top-load or front-load washer is better for your physical needs can prevent years of daily strain.
Check Floor Space and Reach Depth Before Buying
Before purchasing a new top-load washer, inspect your laundry space to confirm the machine will install cleanly and run without balance problems. Start by checking the construction of your laundry room floor. High-efficiency top loaders spin at high speeds to extract as much moisture as possible, requiring a firm, level subfloor. A concrete slab or a reinforced first-floor subfloor handles this spinning force easily, whereas second-floor laundry closets built on flexible wooden joists may need an anti-vibration pad to prevent rumbling through living areas.
Next, measure your installation footprint with a tape measure. You need to account for the physical width and depth of the washer cabinet, plus an extra 4 to 6 inches of rear clearance for the hot and cold water supply hoses and the standpipe drain line. Do not forget vertical overhead space. Measure the distance from the top of the washer to the bottom of any overhead storage cabinets or shelving to ensure you can raise the top glass lid completely upright without it hitting the wall or cabinets.
Finally, check your utility connections. A modern top-load washer requires a standard 120-volt 3-prong grounded wall outlet within reach of the factory power cord. Never connect an appliance to a lightweight extension cord or an ungrounded adapter, as motor surges can trip electrical breakers or create safety risks. Ensure your hot and cold water shutoff valves turn smoothly by hand without leaking from the valve stems. If your shutoff valves feel stiff, corroded, or frozen in place, have a licensed professional plumber replace them before your new washing machine arrives.

- TAR Score9.0
TAR Score is a ranking system developed by TopAppliancesReviews.com. TAR score has no relationship or impact from any manufacturers or sales agent websites. Learn more
- BrandSamsung
- TAR Score8.2
TAR Score is a ranking system developed by TopAppliancesReviews.com. TAR score has no relationship or impact from any manufacturers or sales agent websites. Learn more
- BrandSamsung

- TAR Score7.1
TAR Score is a ranking system developed by TopAppliancesReviews.com. TAR score has no relationship or impact from any manufacturers or sales agent websites. Learn more
- BrandSamsung
Last update on 2026-10-31 / Affiliate links / Images, Product Titles, and Product Highlights from Amazon Product Advertising API


10 Best Washing Machine For King Size Comforter of 2026 For Bulky Bedding

11 Best Semi Automatic Washing Machine Under 10000 of 2026 For Apartments and RVs

9 Best Compact Refrigerator For Beer Bottles of 2026 For Upright Bottle Fit

10 Best Quality Semi Automatic Washing Machine of 2026 For Leak-Free Laundry

11 Best Small Washer Machine of 2026 For Everyday Laundry

12 Best Vibration Pads For Washing Machine of 2026 To Stop Walking and Shaking

11 Best Selling Front Load Washing Machine of 2026 For Quiet Odor-Free Laundry

11 Best Washing Machine For King Size Bedding of 2026 To Prevent Cycle Errors





