
How to Use a Zwilling Knife Sharpener Without Ruining the Blade

Sharpening a dull kitchen blade feels risky, but there is really nothing to worry about. Set the base flat on the counter, rest the heel of the knife (the back corner near the handle) in the slot, and pull the blade straight back with light pressure. Never saw back and forth, as a few smooth, single-direction strokes are all it takes to refresh the edge safely.
The exact routine changes slightly depending on the tool in your hand. Handheld slot sharpeners work differently than upright alignment rods, and heavily worn edges need a coarse slot before touching a fine ceramic wheel. Blade styles also matter, since thinner Japanese knives need a different angle than standard Western chef knives. Here is how to match the right motion to your specific tool so every slice feels effortless again.
Identifying Your Zwilling Sharpener and Blade Compatibility
Zwilling makes a few distinct sharpening tools for home kitchens. Before you run your blade across an abrasive wheel, identify the exact tool sitting on your counter. Using the wrong slot or applying the wrong motion can scratch the blade face or damage the angled cutting edge, known as the bevel.
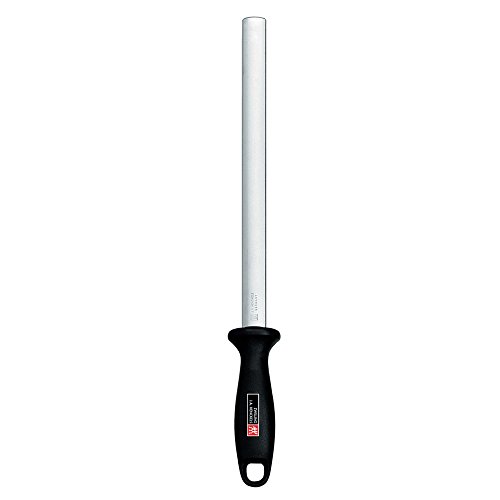
The most common style is the manual pull-through sharpener. This handheld unit sits flat on your countertop and uses internal V-shaped wheels made from hard carbide, diamond abrasives, or ceramic stones. Some versions feature two stages, while multi-stage models offer separate slots for Western cutlery, thinner Japanese blades, and kitchen shears. Another popular option is the V-Edge sharpener, an upright pull-through unit that uses angled ceramic bars held in place by plastic adapters. Knife blocks often include an alignment rod, commonly called a honing steel or sharpening steel, which is a long metal or diamond-coated rod with a handle.
Your knife style determines which tool and slot you should choose:
- Western kitchen knives: Standard chef knives, santokus, and paring knives made from rust-resistant stainless steel generally feature an angled cutting edge of 15 to 20 degrees per side. They match standard two-stage pull-through units, V-Edge sharpeners, and traditional alignment rods.
- Japanese kitchen knives: Delicate blades made from harder high-carbon steel often carry a steep 15-degree slicing edge per side. These require a multi-stage sharpener with dedicated Japanese slots or specialized ceramic V-Edge rods so you do not strip away excess metal.
- Handheld alignment rods: These tools do not grind away metal to rebuild a dull edge. Instead, they push the microscopic teeth of a blade back into line after normal kitchen prep bends them out of true.
- Serrated bread knives: Never pull a scalloped or serrated bread knife through fixed pull-through slots. The abrasive wheels grind down the high points of the serrations and ruin the blade profile.
If you prepare meals with sturdy German high-carbon steel knife sets, standard two-stage sharpeners and steel rods work well. For thinner high-carbon Japanese chef knives, verify that your sharpener offers a dedicated fine slot calibrated for narrower angles.
Step-by-Step Guide for Zwilling Pull-Through and V-Edge Sharpeners
A pull-through sharpener is simple to use, but proper technique separates a razor edge from a scratched blade. The most common mistake is treating the sharpener like a hand saw. Dragging a blade back and forth strips metal unevenly, creates dips along the cutting edge, and scratches the polished sides. Pull the blade in one direction only, moving smoothly from heel to tip.
- Secure the unit on your counter. Set the sharpener on a clean, dry, flat surface such as a wooden cutting board or a smooth countertop. Grasp the handle firmly with your non-dominant hand. Keep your knuckles and fingers wrapped around the grip behind the built-in safety guard. Never hold the sharpener loosely in the air while pulling a sharp knife toward your body.
- Pick the right grit stage. Most pull-through sharpeners offer coarse and fine stages. The coarse slot uses aggressive abrasive wheels to reshape dull metal and fix tiny nicks. If your knife feels completely dull and slides across an onion skin without biting, start in the coarse slot. If the knife is already reasonably sharp and just needs a touch-up, bypass coarse and go straight to the fine ceramic slot. Using the coarse slot too often grinds away metal unnecessarily and shortens blade life.
- Position the heel of the blade. Place the heel, which is the back corner of the blade near the handle, straight down into the V-shaped slot. Hold the knife perfectly vertical, so the blade forms a 90-degree angle with your counter. Do not tilt the blade left or right. Tilting causes the abrasive wheels to grind one side of the edge flat while blunting the other.
- Draw the knife smoothly backward. Pull the blade straight back toward your chest in one fluid, continuous stroke. As you reach the curved belly of the knife near the front, gently lift the handle upward slightly so the tip stays in direct contact with the sharpening wheels. Continue pulling until the tip clears the slot completely. The motion should take about two to three seconds from heel to tip.
- Keep your downward pressure light. Let the abrasive wheels do the work. Pressing down hard will not make the knife sharper. Heavy pressure causes the blade to chatter against rollers, gouging the steel and scratching the blade face. Apply only light, steady pressure, roughly equal to the natural weight of your arm.
- Count your strokes carefully. For a dull blade, make four to six smooth pulls through the coarse stage. Next, move the blade to the fine ceramic slot. Make four to six pulls through the fine slot using even lighter pressure. This polishing stage smooths out rough grinding marks and removes the burr, which is the microscopic wire edge or curved sliver of metal that forms on the opposite side during sharpening.
- Clean and inspect the blade. Metal dust gathers along the edge during sharpening. Wipe the blade clean from heel to tip using a damp dishcloth, keeping the sharp edge pointed away from your hands. Dry the steel completely with a clean towel. Verify sharpness by gently slicing through a ripe tomato or scrap paper. If the knife catches or tears the paper, give it two more light passes through the fine ceramic slot.
How to Use an Alignment Rod Safely on a Cutting Board
Many cooks watch television chefs hold a sharpening steel in midair and swipe a knife back and forth at lightning speed. Doing that at home without practice is an easy way to nick knuckles or ruin the factory edge angle. An alignment rod does not grind away heaps of steel. It simply pushes the bent microscopic teeth of the cutting edge back into alignment. To control your angle and keep hands safe, use the vertical cutting board method.
- Anchor the rod vertically. Place a damp kitchen towel on your counter and set a sturdy wooden cutting board on top to prevent slipping. Hold the handle of your alignment rod firmly in your non-dominant hand. Place the protective tip of the rod straight down against the center of the cutting board so the shaft stands straight up like a flagpole.
- Set your alignment angle. Place the heel of your knife blade against the top of the rod, right below the handle guard. Hold the blade perpendicular to the rod to find a 90-degree angle. Tilt the blade halfway toward the steel to reach 45 degrees, then halve that distance once more to settle at roughly 20 to 22 degrees. If you are honing a delicate Japanese blade, tilt it just slightly closer to the rod to match a 15-degree edge. Keep your wrist locked at this angle.
- Slice downward with light pressure. Draw the knife down along the rod while pulling the blade toward you. Start at the heel near the top of the rod and finish with the tip touching the bottom just above the cutting board. Think of this motion as slicing a thin sheet off the side of the rod. Keep pressure light. You are simply pushing the curled cutting edge back into a straight line.
- Alternate sides evenly. Lift the knife and place it on the opposite side of the rod. Match the same angle and slice downward from heel to tip. Perform four to six alternating passes on each side of the blade. Count your strokes carefully to keep both sides of the cutting edge balanced and symmetrical.
- Wipe away metal dust. Even though an alignment rod removes very little metal, friction can dislodge tiny metal particles. Wipe the blade down with a clean, dry towel before prepping food. Wash and dry your knife by hand immediately rather than soaking it in a sink or running it through a dishwasher.
Selecting the Best Blade Maintenance Setup for Your Kitchen
Choosing the right tool to keep your kitchen cutlery in top condition depends on your knife collection, cooking habits, and comfort level with manual sharpening. Different maintenance tools serve distinct roles across the lifespan of a blade, so understanding how they work helps you build a practical kitchen routine.
For everyday upkeep, a handheld alignment rod or diamond-coated steel is ideal. Cooks who prepare meals daily should use an alignment rod once or twice a week. Realigning the microscopic edge prevents dullness and delays the need for abrasive grinding. Look for an oval or flat rod surface, which offers broader contact with the cutting edge than traditional round rods and speeds up your honing strokes.
When an alignment rod can no longer restore a crisp bite, you need an abrasive sharpener with ceramic or carbide wheels to remove metal and rebuild the edge. A two-stage pull-through sharpener is the simplest option for Western-style chef knives. If your knife block contains a mix of Western knives, thin Japanese blades, and kitchen shears, consider a multi-stage unit with dedicated angle guides for each knife style. Before selecting a sharpener, verify that the unit features a wide, non-slip base and a solid safety handle to keep your workspace secure.

- TAR Score9.4
TAR Score is a ranking system developed by TopAppliancesReviews.com. TAR score has no relationship or impact from any manufacturers or sales agent websites. Learn more
- BrandZWILLING
- TAR Score9.4
TAR Score is a ranking system developed by TopAppliancesReviews.com. TAR score has no relationship or impact from any manufacturers or sales agent websites. Learn more
- BrandZWILLING

- TAR Score9.4
TAR Score is a ranking system developed by TopAppliancesReviews.com. TAR score has no relationship or impact from any manufacturers or sales agent websites. Learn more
- BrandZWILLING

- TAR Score9.0
TAR Score is a ranking system developed by TopAppliancesReviews.com. TAR score has no relationship or impact from any manufacturers or sales agent websites. Learn more
- BrandZWILLING

- TAR Score9.0
TAR Score is a ranking system developed by TopAppliancesReviews.com. TAR score has no relationship or impact from any manufacturers or sales agent websites. Learn more
- BrandZWILLING

- TAR Score8.8
TAR Score is a ranking system developed by TopAppliancesReviews.com. TAR score has no relationship or impact from any manufacturers or sales agent websites. Learn more
- BrandZWILLING

- TAR Score8.6
TAR Score is a ranking system developed by TopAppliancesReviews.com. TAR score has no relationship or impact from any manufacturers or sales agent websites. Learn more
- BrandZWILLING

- TAR Score8.6
TAR Score is a ranking system developed by TopAppliancesReviews.com. TAR score has no relationship or impact from any manufacturers or sales agent websites. Learn more
- BrandZWILLING

- TAR Score8.0
TAR Score is a ranking system developed by TopAppliancesReviews.com. TAR score has no relationship or impact from any manufacturers or sales agent websites. Learn more
- BrandZWILLING
Last update on 2026-10-30 / Affiliate links / Images, Product Titles, and Product Highlights from Amazon Product Advertising API
Frequently Asked Questions
How often should you sharpen a knife versus using an alignment rod?
Use an alignment rod frequently, such as every two to three kitchen sessions, to keep the blade straight and aligned. A pull-through sharpener removes metal, so you only need to use it every few months when the knife no longer responds to the rod. Overusing the coarse slot on a sharpener will wear down your blade unnecessarily over time.
Can you sharpen serrated bread knives with a Zwilling pull-through sharpener?
No, you should never run a serrated knife through standard V-shaped pull-through slots. The preset ceramic and carbide wheels only contact the high points of the serrations, grinding them flat while missing the recessed gullets. To sharpen a serrated blade properly, use a specialized tapered ceramic rod that fits into each individual serration, or send the knife to a professional sharpener.
Why does a blade feel scratchy or rough after pulling it through the sharpener?
A scratchy edge usually happens when you skip the fine finishing slot or press down too hard during your strokes. The coarse stage creates deep grinding grooves and leaves behind a burr, which is a microscopic wire edge of bent metal. Always finish with four to six gentle passes through the fine ceramic slot using minimal pressure to polish the steel smooth.


Top Best Quiet Portable Generator Electric Start 2026 - (2026 Updated)

The 10 Best Portable Power Station For Tailgating 2026

10 Best Washing Machine For King Size Comforter of 2026 For Bulky Bedding

11 Best Semi Automatic Washing Machine Under 10000 of 2026 For Apartments and RVs

The Best Concrete Floor Buffer 2026 - Top Choices

Best Cooling Fan with HEPA Filter: Our 2026 Top Picks for Cleaner Air

Best poulan chainsaw 2026 - Reviews & Buying Guides

Value Picks: 10 Vitamix 5300 Best Price of 2026




