
How to Use a Work Sharp Knife Sharpener Without Ruining the Tip

Getting a razor-sharp edge comes down to resting the blade flat against the guide and drawing it smoothly from heel to tip with light pressure. That rhythm changes depending on whether the tool uses a motorized belt or a manual stone clamp. With either setup, stopping each stroke right as the tip reaches the middle of the abrasive keeps the point sharp instead of grinding it round.
Blade style and edge wear also change your approach. Thin kitchen knives need a narrower fifteen-degree angle, while outdoor pocket knives hold up better with a broader bevel (the angled slope that forms the edge). Blunt blades need a coarse grit to reshape dull steel, while usable knives only need a few fine passes to remove the burr (the tiny rough ridge of bent metal). Matching the right angle and grit to your blade lets you restore a clean edge without scratching the steel.
Different Knives Require Specific Sharpening Angles
Every cutting tool is built for a specific job, and matching your sharpening angle to that job keeps the blade working properly. The bevel is the angled slope that forms the sharp cutting edge. Grinding at the wrong bevel angle will either leave your blade too weak to cut hard items or too thick to slice cleanly through food.
Kitchen cutlery generally uses a narrow bevel angle between 15 and 17 degrees per side. A steep 15-degree slicing edge per side allows kitchen blades to glide through firm vegetables, raw meats, and delicate herbs without wedging or splitting the food. Thin culinary blades, such as those found in high-carbon Japanese chef knife sets, require these narrower angles to preserve their precise slicing performance. On the other hand, many European culinary blades from German high-carbon steel premium knife block sets use a slightly broader 20-degree angle per side to resist dulling against hard cutting boards.
Outdoor knives, hunting tools, and an everyday carry pocket knife (often called an EDC knife) need a wider angle between 20 and 25 degrees per side. Pocket knives cut cardboard, trim zip ties, scrape materials, and carve dense wood. That rough utility work requires a thicker wedge of steel directly behind the apex to prevent chips. If you sharpen a heavy camp knife at 15 degrees, the edge will roll over or chip during its first outdoor task. If you sharpen a paring knife at 25 degrees, the blade will crush an apple rather than cut it.
Work Sharp sharpeners come with interchangeable or adjustable angle guides marked with degree numbers. Before you place any metal against an abrasive, check the markings on your guide. Select the 15-degree or 17-degree guide slot for your thin kitchen blades. Switch to the 20-degree or 25-degree setting for your pocket knives, outdoor tools, and heavy utility blades.
Pull Powered Belts Evenly and Stop at the Tip
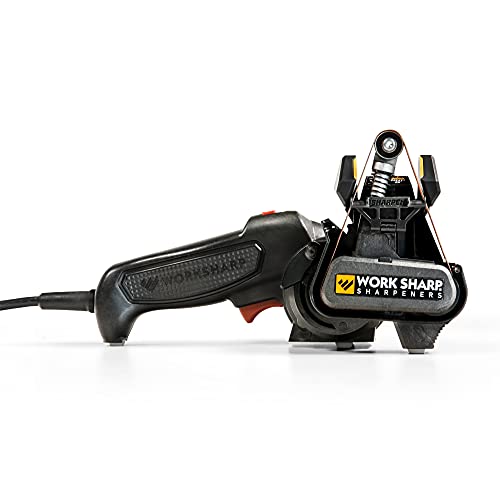
Electric belt sharpeners use flexible abrasive belts moving over motor-driven pulleys. These machines remove metal rapidly, which restores a blunt tool in minutes but also requires careful hand control. You do not use water or honing oil on these belts. The flexible abrasives are engineered to run completely dry. Adding liquids can loosen the belt backing, cause the belt to slip off the drive wheels, and create a serious risk of electrical shock near the motor housing.
Follow these steps to sharpen safely on a powered belt unit:
- Choose your starting grit. Grit refers to the abrasive roughness rating. Use a coarse grit belt (such as 80 or 220 grit) only if the knife edge has visible chips or is completely flat. For routine dullness, start with a medium grit belt to preserve blade life, and save fine belts for final polishing.
- Set the heel against the guide face. The heel is the back part of the blade closest to your hand. Rest the flat side of the knife blade against the guide surface with the cutting edge pointing downward before you start the motor. Keep your grip relaxed, holding the handle with just enough fingers to keep the blade steady.
- Pull at a steady pass speed of one inch per second. Switch on the motor and draw the blade smoothly toward yourself. A standard eight-inch chef blade should take about eight seconds to travel from heel to point. Keep the knife completely horizontal as you pull. Moving too fast creates an uneven bevel, while pausing in one spot grinds a permanent hollow spot into the steel.
- Stop the stroke right as the tip hits the belt center. This is the most critical step on a powered belt machine. Pull the blade until the tip rests directly in the middle of the abrasive belt, then release the power switch or lift the blade straight off. Never drag the tip all the way across and off the far edge of a spinning belt. When the tip slips off the belt edge, the flexible belt wraps around the thin point and sands it down instantly, leaving you with a rounded, blunt tip.
- Alternate sides evenly. Move the knife to the guide slot on the opposite side of the machine. Repeat the same smooth, level stroke from heel to point using the same speed and the same light pressure. Sharpening both sides with an equal number of passes keeps the cutting apex centered along the spine of the knife.
Manual Guided Systems Need Steady Clamping and Light Strokes
Manual guided sharpeners replace motorized belts with an adjustable stone holder and a blade clamp. These setups give you total control over every stroke, making them ideal for expensive folding blades, delicate fillets, or anyone worried about removing steel too quickly on a powered motor. Because you guide the abrasive stone by hand across a stationary blade, you can observe the edge develop stroke by stroke.
Follow these steps to sharpen on a manual clamp system:
- Clamp the blade along its center balance point. Slide the spine of the knife into the clamp jaws, keeping the clamp roughly halfway between the handle and the tip. Tighten the clamp screw until the knife cannot wiggle. If the blade flexes during sharpening, the angle will shift across the bevel. For knives with tapered spines, adjust the clamp tension screws so the jaws stay completely parallel to the blade face.
- Set the angle rod to your target bevel. Slide the guide rod collar to the desired degree mark on the sharpener tower. Tighten the locking thumb screw firmly so the rod does not drift up or down while you work.
- Sweep the abrasive stone from heel to tip with light strokes. Place the stone flat against the edge bevel at the heel. Push the stone forward and slightly across the cutting edge, sweeping smoothly out toward the point. Use light downward pressure. The diamonds or ceramic particles do the cutting naturally. Pressing down hard will dislodge the abrasive grains from the stone plate and create deep scratches along the edge.
- Flip the blade using the rotating clamp. After working the first side until you raise a burr, release the clamp lock and swivel the knife 180 degrees. Lock the clamp back into place and repeat the exact same number of strokes along the second side. The rotating mechanism keeps both bevels perfectly symmetrical without having to unclamp and realign the blade.
Feel for a Raised Wire Edge Before Changing Belts
Knowing when to switch to a finer abrasive is the secret to getting a razor edge. You should never switch to a finer belt or stone just because you finished a set number of passes. You only move to the next grit stage after you form a distinct burr along the entire cutting edge. A burr is the microscopic wire edge or curved sliver of metal that forms on the opposite side during sharpening. As the abrasive cuts away steel on one side of the bevel, the metal becomes paper-thin at the very edge and curls over away from the abrasive stone.
Check for the burr using this safe confirmation process:
- Turn off the machine or rest the guide rod. Never check for a burr while the sharpener motor is running or while your hands are balancing the tool. Unplug electric sharpeners before touching the steel.
- Wipe metal dust off the blade. Use a clean microfiber cloth or dry paper towel to wipe metal swarf away from the bevel. Loose steel powder can fool your fingers into feeling a rough wire edge that is not actually there.
- Sweep your thumb upward from the spine toward the edge. Place the pad of your thumb against the side of the blade flat, well away from the sharp edge. Slide your thumb gently upward toward the spine, or from the bevel face off the edge. You are feeling for a slight rough ridge or metal lip that catches the ridges of your fingerprint.
- Never slide your finger along the cutting edge. Sliding your finger lengthwise along the edge will slice into your skin. Always move across the blade from the side out past the edge.
- Confirm the burr from heel to tip. Check the back heel, the belly curve, and the very point. If the burr is present along the back but missing near the tip, return to your coarse or medium abrasive and make another pass focused on that dull section.
- Flip the burr before switching grits. Make one or two light passes on the opposite side to push the burr in the other direction. Once you feel that wire edge along both sides of the knife, your bevels have met in the center. Now you can safely install your finer belt or rotate to a fine ceramic stone to polish the apex and remove the wire edge entirely.
Avoid Heavy Downforce and Never Drag the Tip Past Abrasives
Most sharpening accidents happen because of three simple mistakes: pressing too hard, rushing the pull, and dragging the point off the abrasive. Avoiding these errors protects your knife from costly cosmetic and structural damage.
Heavy downforce is the most common reason blades lose their factory shape. When using a powered belt sharpener, the belt has a small amount of flexible slack. If you push the knife down hard into that slack, the belt bends around the cutting apex. Instead of forming a crisp, flat cutting bevel, the belt wraps up onto the sides of the blade, creating a thick, rounded edge that will not slice cleanly. On manual systems, pushing hard dislodges diamond particles from the hone and causes the guide rod to flex, changing your angle mid-stroke. Keep your touch as light as guiding a pen across paper.
A rounded tip happens when the knife point slips off the edge of the belt. The belt tension causes the abrasive ribbon to wrap around the corner of the point, grinding away the sharp tip in a split second. If this has already happened to your knife, you can fix it, but you must be patient. Never grind the cutting edge upward to recreate the point, because doing so creates an ugly recurve dip in the blade belly. Instead, place the spine of the knife flat against a coarse stone or belt and slowly grind the spine downward toward the edge until a fresh, sharp needle point is formed.
Scratched blade flats occur when the knife rocks side to side inside the plastic guide. As you pull the knife through an electric unit, keep the blade held lightly against the flat plastic guide face. If you tilt the handle outward, the spine can rub roughly against internal housing surfaces. If you are working on expensive collector knives or polished Damascus patterns, such as those on Japanese Damascus steel chef knife sets under 1000 dollars, place a single layer of blue painter's tape across the blade flats before sharpening. The tape shields the steel finish while leaving the cutting bevel fully exposed to the abrasive.
Choose Abrasives and Sharpening Tools That Fit Your Blades
Selecting the right knife sharpening equipment comes down to how many knives you maintain, what blade steels you own, and how much control you want over the process. Different knife collections require different abrasive setups to stay in top cutting condition.
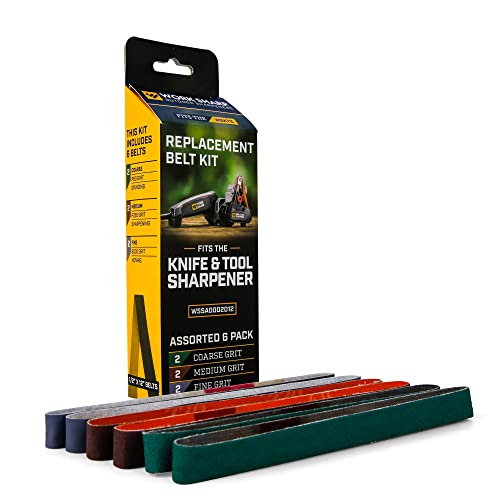
If you own dozens of working tools, large outdoor blades, or multiple kitchen sets, an electric belt sharpener offers unmatched speed and versatility. Look for models that feature variable speed motors and flexible belt options. Slower belt speeds let you sharpen hard tool steels without building up friction heat that could soften the steel temper. Ensure the system includes replacement belt options ranging from coarse shaping grits up to ultra-fine polishing grits so you can handle everything from major chip repairs to quick weekly touch-ups.
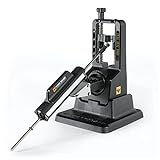
If you primarily sharpen pocket knives, hunting folders, or high-end kitchen blades with unique edge geometries, a manual guided clamp system is the safer choice. Check that the clamp design has enough clearance for narrow blades like paring knives and enough jaw width to grip thick hunting spines securely. Look for systems that offer continuous angle adjustments, solid metal guide rods, and multi-sided abrasive stones that include both coarse diamond plates for fast metal removal and smooth ceramic stones for razor-sharp finishing.

- TAR Score9.6
TAR Score is a ranking system developed by TopAppliancesReviews.com. TAR score has no relationship or impact from any manufacturers or sales agent websites. Learn more
- BrandWORK SHARP
- TAR Score9.4
TAR Score is a ranking system developed by TopAppliancesReviews.com. TAR score has no relationship or impact from any manufacturers or sales agent websites. Learn more
- BrandWORK SHARP
- TAR Score9.4
TAR Score is a ranking system developed by TopAppliancesReviews.com. TAR score has no relationship or impact from any manufacturers or sales agent websites. Learn more
- BrandWORK SHARP

- TAR Score9.4
TAR Score is a ranking system developed by TopAppliancesReviews.com. TAR score has no relationship or impact from any manufacturers or sales agent websites. Learn more
- BrandWORK SHARP

- TAR Score9.4
TAR Score is a ranking system developed by TopAppliancesReviews.com. TAR score has no relationship or impact from any manufacturers or sales agent websites. Learn more
- BrandACCUSHARP

- TAR Score9.4
TAR Score is a ranking system developed by TopAppliancesReviews.com. TAR score has no relationship or impact from any manufacturers or sales agent websites. Learn more
- BrandWORK SHARP

- TAR Score9.2
TAR Score is a ranking system developed by TopAppliancesReviews.com. TAR score has no relationship or impact from any manufacturers or sales agent websites. Learn more
- BrandWORK SHARP
- TAR Score9.2
TAR Score is a ranking system developed by TopAppliancesReviews.com. TAR score has no relationship or impact from any manufacturers or sales agent websites. Learn more
- BrandWORK SHARP

- TAR Score9.0
TAR Score is a ranking system developed by TopAppliancesReviews.com. TAR score has no relationship or impact from any manufacturers or sales agent websites. Learn more
- BrandWORK SHARP

- TAR Score8.6
TAR Score is a ranking system developed by TopAppliancesReviews.com. TAR score has no relationship or impact from any manufacturers or sales agent websites. Learn more
- BrandWORK SHARP
Last update on 2026-10-01 / Affiliate links / Images, Product Titles, and Product Highlights from Amazon Product Advertising API


Top Rated Best Quality Range Hoods: 2026 Expert Picks

The 12 Best Small Solar Generators 2026

10 Best Quality Semi Automatic Washing Machine of 2026 For Leak-Free Laundry

11 Best Small Washer Machine of 2026 For Everyday Laundry

12 Best Vibration Pads For Washing Machine of 2026 To Stop Walking and Shaking

11 Best Selling Front Load Washing Machine of 2026 For Quiet Odor-Free Laundry

11 Best Washing Machine For King Size Bedding of 2026 To Prevent Cycle Errors

10 Best Small Front Loader Washing Machine of 2026 For Tight Closets






