
How to Use a Whetstone to Sharpen a Knife

Holding a steady angle sharpens any blade. Wet the stone, lock your wrist at a consistent tilt, and glide the metal smoothly across the surface. Working one side until a burr (a tiny rough metal lip) forms tells you the new edge has met in the middle. Flipping the knife to match that scratch pattern and finishing on a smoother surface will restore a crisp kitchen edge without scuffing the steel.
A few small details shape how you prepare. Water stones require a full soak in water, while oil stones need a thin coat of mineral oil. Japanese knives cut cleanly at a narrow 15-degree lean, but sturdier Western blades hold up better at about 20 degrees. Truly dull knives also need a rough grit to reshape the metal, while routine touch-ups only require a medium block. Getting that clean cut comes down to setting up properly and keeping your hands relaxed.
Preparing Your Whetstone and Workspace
Sharpening a knife begins with preparing your stone and arranging a firm, level work surface. Most kitchen sharpening stones are waterstones, which are sharpening stones that use water instead of oil to wash away metal particles. Traditional oil stones require mineral honing oil to float away tiny steel filings, but pouring oil onto a waterstone permanently clogs its open pores. Always verify whether your block requires water or oil before getting started.
If your waterstone requires soaking, place it in a bowl or baking dish filled with room-temperature tap water. Keep the block submerged for 10 to 15 minutes until tiny air bubbles stop rising to the water surface. Splash-and-go waterstones do not require a full soak, but you still need to splash clean water across the working face before touching steel to stone.
- Submerge soaking stones completely: Keep the stone underwater until bubbles stop rising, which ensures the interior stays wet and prevents dry drag across your steel.
- Anchor your sharpening base: Place the stone inside a fitted rubber base or on top of a damp kitchen towel folded flat against the countertop to keep the stone from sliding during forward strokes.
- Keep a water cup within arm's reach: Having a small bowl or spray bottle nearby allows you to moisten the stone face without walking back and forth to the sink.
- Clean and dry the blade: Wipe away any kitchen grease or food debris from the blade face so dirt does not foul the porous abrasive grit.
Finding and Holding the Proper Sharpening Angle
The bevel is the angled slope that forms the cutting edge of your knife. The main secret to manual sharpening is keeping that angled bevel flat against the whetstone from the start of each stroke to the finish. Lifting the blade too high grinds away the edge apex and blunts the knife, while laying it too flat scratches the polished blade face above the cutting line.
Different styles of kitchen knives demand different sharpening angles. Delicate, thin-ground Japanese chef knives perform best with a steep 15-degree slicing edge per side, which glides through meats and soft vegetables with minimal resistance. Sturdier Western blades, such as German high-carbon steel knives, use a wider 20-degree utility edge per side to withstand chopping through squash, dense root vegetables, and poultry joints without chipping.
You can estimate a 15 to 20-degree angle without expensive measuring tools. Hold your knife upright with the cutting edge resting on the stone and the spine pointing directly at the ceiling, creating a 90-degree angle. Lean the blade halfway down toward the stone to find 45 degrees, lean it halfway down again to reach roughly 22 degrees, and then drop the spine just a sliver lower. Stacking two ordinary pennies on the stone and resting the spine of a standard chef knife on top of them creates an angle of roughly 15 degrees.
Once you settle on the correct tilt, lock your wrist completely rigid. The natural urge is to flex your wrist as the blade sweeps across the stone, like brushing paint on a canvas. Wrist movement rounds off the crisp bevel and ruins blade geometry. Instead, hold your wrist stiff and move your entire arm from your elbow and shoulder.
How to Sharpen Your Blade Step by Step
Manual sharpening works through steady, rhythmic repetition. Focus on consistent hand placement, moderate downward pressure, and smooth contact across the full length of the blade.
- Place the coarse grit side upward in the stone base. The coarse side, indicated by a lower grit number like 400, grinds away metal quickly to reshape blunt edges, correct minor chips, and re-establish a flat cutting bevel.
- Position the heel of the knife across the stone at your target angle. Starting at the heel allows you to control the movement across the full length of the cutting edge without running out of stone surface.
- Rest the fingertips of your non-dominant hand flat on the blade face. Placing your fingers near the cutting edge distributes gentle downward pressure directly over the point of contact, preventing the blade from chattering or rocking.
- Push the blade forward and across the stone in a smooth diagonal sweep. Moving the blade away from your body keeps your hands safe while letting the abrasive grains slice cleanly across the steel.
- Maintain light pressure on the forward stroke and release pressure on the return pull. Grinding occurs primarily on the push, while releasing downward pressure on the return stroke protects the stone from accidental gouging.
- Divide longer kitchen knives into three overlapping sections. Knives longer than six inches cannot contact a flat stone all at once, so working the heel, the middle belly, and the curved tip in distinct segments guarantees even sharpness.
- Lift your elbow slightly as you reach the curved tip. Raising your elbow just an inch allows the upward curve of the knife tip to stay flush against the stone without altering your established bevel angle.
- Splash fresh water onto the stone whenever the surface feels dry or sticky. Water mixes with ground stone and steel filings to form a gray paste, but letting that paste dry out creates friction heat and clogs the stone.
Detecting the Burr and Knowing When to Flip the Knife
The burr is the microscopic wire edge or curved sliver of metal that forms on the opposite side of the blade during sharpening. As you grind away steel along the bevel, the metal becomes thinner and thinner until it meets the back side of the edge. Eventually, that paper-thin layer bends over away from the abrasive stone, creating a faint metal lip.
Feeling a burr is the only reliable way to know that you have ground enough metal to reach the very center of the edge apex. Never rely on counting strokes alone. A slightly dull kitchen knife might form a burr in 10 strokes, while a severely neglected blade could take 40 passes before the steel folds over.
To inspect for the burr, set the knife down on its spine or hold it steady with the cutting edge pointing away from your body. Lay your thumb flat against the unsharpened side of the blade and gently sweep your thumb outward, moving from the middle spine off the cutting edge. Never slide your finger along the length of the edge, which can easily slice your skin. If the burr has formed, your thumb will feel a distinct rough catch or wire-like ridge running along the edge.
Check the entire length of the blade, from the heel to the tip. If you feel a rough ridge along the heel and belly but the tip feels smooth, place the knife back on the stone and work the tip section until the ridge is continuous. Once the burr extends from heel to tip, flip the knife over and repeat the exact same sharpening process on the opposite side until the burr folds back the other way.
Switching Grits to Refine and Polish the Edge
Grit refers to the roughness rating of the sharpening stone particles. While a coarse 400 grit stone cuts steel quickly to set an angle, it leaves microscopic jagged teeth and deep scratch patterns across the bevel. A medium or fine stone, such as a 1000 grit waterstone, smooths out those rough grooves to give your knife clean slicing power and long-lasting edge retention.
Before flipping your dual-sided whetstone to the finer grit, rinse both the stone and your knife under cold tap water. This removes coarse mineral grains that could otherwise migrate to the fine surface and scratch your polished bevel. Reseat the stone in its non-slip rubber base with the fine grit facing up, and splash it with clean water.
Sharpen both sides on the fine stone using the exact same angle and sweeping stroke you used on the coarse side, but lighten your finger pressure significantly. Think of this stage as gentle polishing rather than aggressive metal removal. Work each side with five to ten smooth passes to refine the scratch marks.
To finish the process, you must remove the delicate wire burr that remains clinging to the edge apex. Perform light, alternating single strokes on the fine stone: sweep the right side once from heel to tip, flip the blade, and sweep the left side once with almost zero downward pressure. This alternating motion snaps the microscopic wire edge off cleanly. Wash the blade thoroughly with dish soap and warm water, and dry it completely with a clean towel to prevent water spots.
Mistakes That Dull Your Blade or Scratch the Steel
Sharpening by hand is a physical skill that improves with practice, but several simple oversights can undo your hard work or damage the appearance of your knife.
- Wobbling your wrist mid-stroke: Allowing your wrist to roll upward or downward as you push changes the angle constantly, creating a rounded, blunt edge rather than a sharp V-shaped point.
- Letting the waterstone run dry: Sharpening on a dry waterstone causes ground metal filings to pack tightly into the abrasive pores, creating friction heat and scratching the steel.
- Applying heavy muscular force: Pressing down hard on the blade does not sharpen the knife faster; it flexes thin kitchen steel, distorts the edge angle, and can cause deep cosmetic scratches along the side of the blade.
- Flipping the knife before the burr forms: Switching sides based on an arbitrary number of strokes leaves dull flat spots along the edge where the two bevels fail to meet.
- Sharpening on an unstable surface: A whetstone that slides across the counter ruins your angle consistency and creates a severe safety hazard if your hand slips forward.
Choosing the Right Sharpening Stones and Accessories
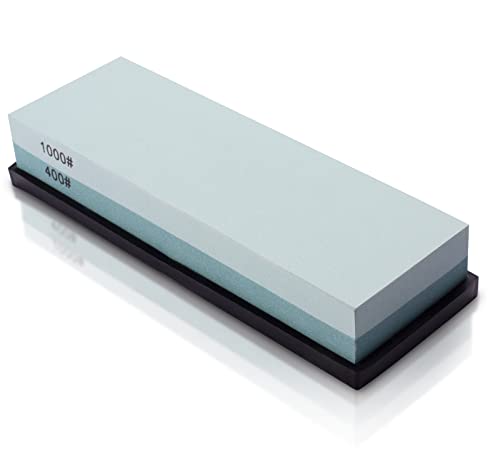
Selecting the right sharpening equipment makes learning this skill much simpler. For everyday kitchen knives, a combination waterstone featuring two distinct grits on a single block is the most practical choice. A dual block with a coarse 400 grit side for reshaping worn edges and a medium 1000 grit side for refining provides everything needed to keep household blades sharp without buying multiple individual stones.
Always verify that any stone you consider includes a secure, non-slip base. High-friction silicone boots or solid bamboo cradles fitted with rubber feet grip the kitchen counter firmly, keeping the abrasive surface completely stationary under forward hand pressure. The stone should also measure at least seven inches in length to ensure you have enough room to stroke a standard eight-inch chef knife smoothly.
For beginners who worry about holding a steady hand, clip-on sharpening angle guides provide practical training help. These compact accessories clip directly onto the spine of your kitchen knife. As you slide the blade across the stone, the ceramic base of the guide rests lightly on the abrasive, keeping your blade tilted at a consistent 15-degree angle until your hands develop natural muscle memory.

- TAR Score9.2
TAR Score is a ranking system developed by TopAppliancesReviews.com. TAR score has no relationship or impact from any manufacturers or sales agent websites. Learn more
- BrandHiramWare

- TAR Score9.2
TAR Score is a ranking system developed by TopAppliancesReviews.com. TAR score has no relationship or impact from any manufacturers or sales agent websites. Learn more
- BrandIntelitopia

- TAR Score9.2
TAR Score is a ranking system developed by TopAppliancesReviews.com. TAR score has no relationship or impact from any manufacturers or sales agent websites. Learn more
- Brandryerum

- TAR Score9.2
TAR Score is a ranking system developed by TopAppliancesReviews.com. TAR score has no relationship or impact from any manufacturers or sales agent websites. Learn more
- BrandKEENBEST

- TAR Score9.0
TAR Score is a ranking system developed by TopAppliancesReviews.com. TAR score has no relationship or impact from any manufacturers or sales agent websites. Learn more
- BrandHMPLL
- TAR Score9.0
TAR Score is a ranking system developed by TopAppliancesReviews.com. TAR score has no relationship or impact from any manufacturers or sales agent websites. Learn more
- BrandMIDO Professional Abrasive

- TAR Score9.0
TAR Score is a ranking system developed by TopAppliancesReviews.com. TAR score has no relationship or impact from any manufacturers or sales agent websites. Learn more
- BrandWhetstone Cutlery

- TAR Score6.4
TAR Score is a ranking system developed by TopAppliancesReviews.com. TAR score has no relationship or impact from any manufacturers or sales agent websites. Learn more
- BrandGeneric
Last update on 2026-10-01 / Affiliate links / Images, Product Titles, and Product Highlights from Amazon Product Advertising API
FAQs
How do you know when a whetstone needs more water?
A whetstone needs more water when the surface starts to look dry, feels sticky under the blade, or forms a thick, pasty mud that drags against the steel. The knife should always glide smoothly across a slick film of moisture. Simply sprinkle a few drops or a small splash of clean water across the stone whenever you feel friction increasing.
Do you push or pull when sharpening on a whetstone?
You can move the blade in both directions, but you should only apply downward finger pressure on the forward pushing stroke. Pushing the cutting edge forward against the stone cuts away steel cleanly and forms an even bevel. Relieve hand pressure on the backward pull so you do not gouge the wet stone or roll the thin edge backward.
Can you sharpen a serrated bread knife on a flat whetstone?
A standard flat whetstone cannot sharpen the curved gullets of a serrated bread knife because the stone surface cannot fit inside the individual teeth. Sharpening serrated blades requires a narrow, cylindrical ceramic or diamond sharpening rod that fits into each scalloped curve. You can, however, lay the flat, un-beveled back side of a serrated knife flush against a fine whetstone to buff away tiny wire burrs.
How can you check if the knife is truly sharp without cutting food?
You can verify edge sharpness by holding a standard sheet of printer paper loosely in one hand and slicing downward through the top edge with the knife. A truly sharp blade will bite into the paper instantly and slice cleanly from heel to tip with zero tearing or snagging. If the blade catches, crinkles the paper, or slides off the edge without cutting, return the knife to the stone to rework the dull section.


Top Rated Best Quality Range Hoods: 2026 Expert Picks

The 12 Best Small Solar Generators 2026

10 Best Quality Semi Automatic Washing Machine of 2026 For Leak-Free Laundry

11 Best Small Washer Machine of 2026 For Everyday Laundry

12 Best Vibration Pads For Washing Machine of 2026 To Stop Walking and Shaking

11 Best Selling Front Load Washing Machine of 2026 For Quiet Odor-Free Laundry

11 Best Washing Machine For King Size Bedding of 2026 To Prevent Cycle Errors

10 Best Small Front Loader Washing Machine of 2026 For Tight Closets






