
How to Use a Lansky Knife Sharpener for an Even Edge

A pocket knife slides harmlessly over thick cardboard, leaving a kitchen table covered with loose metal rods, color-coded stones, and an unfamiliar clamp. Getting a crisp cutting edge starts by clamping the blade firmly along the spine and sweeping the guided stone from heel to tip through your chosen angle hole.
Your exact routine changes with the tool in your hand and the stones in your case. Thin kitchen knives need a narrower angle than thick outdoor blades, while curved tips take a gentle rolling motion to keep the bevel (the slanted cutting edge) even. Standard stones also call for a drop of mineral oil to float away metal dust, whereas diamond hones run dry. Here is how to lock down your blade, choose the right slot, and sharpen with confidence.
Assembling the Guide Rods and Clamping the Blade Securely
The guided sharpening system works by holding your knife still while a guide rod controls the path of the sharpening stone block, also called a hone. If the blade moves inside the clamp or the guide rod sits crooked, the bevel (the slanted cutting edge) will end up uneven and rounded. Setting up the parts correctly on your table takes only a few minutes and prevents damage to your knife finish.
The clamp consists of two aluminum jaws controlled by two separate screws. The front screw, adjusted with a flat-head screwdriver, sets the thickness gap for your blade. The rear plastic thumbscrew acts as a lever pivot that pushes the back of the jaws apart, forcing the front jaws to pinch tightly onto the steel. Clamping mistakes happen when users tighten the front screw completely flat while leaving the back loose. That creates an uneven pinch, causing the blade to wobble during your strokes.
Bare aluminum jaws can also leave light scuffs or rub marks on polished steel. To protect your knife, place a small strip of blue painter's tape or electrical tape over the sides of the blade where the clamp will sit. Slide the spine of the knife into the jaws so the clamp grips the blade roughly halfway between the handle and the tip. For standard drop-point blades and pocket knives, clamp about one-half inch to five-eighths of an inch down from the spine. Keep the knife blade extending straight out from the front of the clamp so the distance from the clamp pivot to the edge stays uniform.
- Attach the guide rod to the hone: Loosen the small thumbscrew on the hone handle. Slide the straight end of the guide rod through the hole until it sits inside the channel.
- Level the rod on a flat table: Set the hone face-down on a flat tabletop with the rod extending straight out across the surface. Press down lightly on both the stone and the rod so they sit completely flush against the table, then tighten the thumbscrew firmly. This step ensures the rod stays parallel with the stone surface rather than tilting upward or downward.
- Insert the blade into the clamp jaws: Back out the rear red thumbscrew several turns. Adjust the front screw until the jaws slide over your taped blade spine.
- Lock the clamp pressure: Tighten the front screw until it makes snug contact with the blade flats, but do not crank it down fully yet. Now, tighten the rear red thumbscrew down hard. As the rear screw pushes the back jaws apart, the front jaws clamp down with extreme force. Give the knife handle a gentle wiggle to confirm the blade cannot shift.
Selecting the Proper Angle Hole for Your Knife
The clamp features four distinct guide holes on each side, labeled 17, 20, 25, and 30 degrees. Choosing the right hole matches the stone to the knife's intended job. A steep angle produces a fine, razor-sharp edge that slices cleanly but dulls quickly if it hits hard materials. A wider angle leaves more steel behind the cutting apex, creating a sturdy working edge that resists chipping during rough chores.
Delicate slicing blades, such as those found in specialized kitchen prep tools or high-carbon Japanese chef knife sets, benefit most from the 17-degree setting. This shallow angle delivers razor-sharp cuts through boneless meats, fish, and soft vegetables, but the delicate steel apex will roll or chip if pressed into hard cutting boards or frozen foods. The 20-degree hole serves as the standard choice for general culinary blades, including knives in German high-carbon steel premium knife block sets, as well as an everyday carry pocket knife (an EDC knife) used for slicing fruit, opening envelopes, and cutting light cordage.
For harder work, use the wider holes. The 25-degree setting works best for outdoor blades, hunting knives, and utility knives that slice tough cardboard, carve wood, or scrape dirty surfaces. The 30-degree setting is built for heavy-duty tools like machetes, cleavers, and camp choppers that chop through thick branches or split kindling. Sharpening at 30 degrees creates a thick, durable wedge that withstands blunt impacts without denting.
Use this quick guide to choose the right angle for your blade:
- 17 Degrees: Fillet knives, paring knives, and thin Japanese culinary blades that require effortless slicing.
- 20 Degrees: Everyday chef knives, slicing pocket knives, and boning blades needing a balance of sharpness and edge holding.
- 25 Degrees: Hunting knives, utility blades, and folding knives intended for heavy outdoor or shop tasks.
- 30 Degrees: Heavy choppers, cleavers, and machetes designed for rough impact cutting.
If you want to match your knife's existing factory bevel rather than reshaping it, use the permanent marker trick. Color the slanted cutting edge completely with a black felt-tip marker. Slide your hone rod into the 20-degree hole and take two light sweeping passes across the blade with a fine stone. Inspect the colored edge under a bright light. If the stone removes ink only along the very shoulder (the top of the bevel), your angle is too low; move up to 25 degrees. If the stone scrapes ink only off the very tip of the edge, your angle is too steep; drop down to 17 degrees. When the stone wipes away the black ink evenly from the shoulder down to the apex, you have found the exact factory match.
The Sharpening Stroke, Honing Oil, and Progressing Grits
Once your knife is clamped and your angle is set, slide the free end of the guide rod through your chosen angle hole on the clamp. Rest the hone against the heel of the blade, where the cutting edge begins near the handle. The proper stroke moves into the blade edge rather than trailing away from it. Think of the motion as trying to slice a paper-thin shaving off the top of the stone block.
Push the stone forward across the cutting edge while sweeping it diagonally toward the knife tip. Keep your fingers resting in the molded safety grooves on the plastic hone holder, keeping your fingertips away from the exposed edge. Apply light, even pressure. Pressing down too hard does not sharpen the knife faster; it simply flexes the thin guide rod, which changes the angle and rounds the cutting edge. Let the abrasive particles on the stone do the cutting work.
If you use standard ceramic or alumina oxide stones, apply two to three drops of mineral honing oil to the stone surface before you begin. As the stone removes metal, it creates swarf (the fine gray metal paste formed by steel particles and oil). The oil suspends this metal dust, preventing it from packing into the pores of the stone and glazing the surface smooth. Wipe the stone with a clean rag whenever the oil turns dark gray, then add a fresh drop. If you use diamond hones, do not use honing oil. Diamond plates should be used dry or with a light mist of clean water, as heavy oils can gum up the diamond surface.
Start your sharpening session with your coarsest hone, such as a coarse 120-grit stone (grit refers to the roughness level of the stone). Work along the blade from heel to tip using overlapping diagonal strokes until you raise a burr. A burr is the microscopic wire edge or curved sliver of metal that forms on the opposite side of the blade during sharpening. You cannot always see the burr with your eyes, but you can feel it. Slide the soft pad of your thumb from the spine of the knife outward across the flat side opposite the stone. When the burr forms, you will feel a distinct, rough snag along the entire length of the edge from heel to tip. Do not flip the knife or change stones until that rough wire edge is present along the entire side.
Flipping the Clamp, Finishing the Edge, and Deburring
After you feel an even burr running along the opposite side from the heel to the point, it is time to work the other bevel. One of the best features of this guided system is that you do not remove the knife from the clamp to do the second side. Loosen the guide rod from the angle hole, flip the entire clamp assembly over, and rest it on your table or mount. The knife stays locked in place, guaranteeing that both sides are sharpened at the exact same distance and angle.
- Slide the rod into the matching hole: Insert your guide rod into the identical angle hole on the second side of the clamp. If you used the 20-degree hole on the first side, use the 20-degree hole here.
- Work the second side to reverse the burr: Apply a couple of drops of honing oil to your coarse hone. Use the same forward sweeping strokes from heel to tip. Count your passes or work until you feel the rough wire burr fold back over to the first side of the blade.
- Step up through finer grits: Once both bevels are fully formed and meet cleanly at the apex, wipe away the gray swarf with a clean towel. Switch your guide rod to a medium hone (typically around 280 to 600 grit). Repeat the process on both sides, using moderate pressure to erase the deep scratch marks left by the coarse stone. Follow with a fine hone to polish the cutting edge.
- Remove the wire burr: To finish the knife, you must remove the microscopic wire burr so it does not fold over during your first cut. With your finest stone installed, take one light forward stroke from heel to tip. Flip the clamp over and take one light stroke on the other side. Repeat this alternating pattern three or four times, using only the weight of the stone. This gentle alternating pressure cleanly snaps the fragile wire burr off the apex without rolling the steel.
Wipe the blade clean and remove the tape from the blade flats. To verify sharpness safely, hold a sheet of standard copy paper by the top corner and rest the knife edge against the top rim. Slide the blade forward with gentle downward pressure. A sharp, properly deburred edge will slice through the paper silently without catching, tearing, or snagging along the path.
Choosing Accessories and Mounts for Guided Sharpening
Using a guided sharpening kit by hand requires gripping the aluminum clamp with one hand while guiding the stone with the other. Holding the clamp steady on a tabletop for twenty minutes can tire your fingers, which often causes small slips that rattle the guide rod. Adding a dedicated mount to your setup eliminates this problem entirely.
A pedestal stand or universal clamp mount fastens directly to your workbench or table edge, holding the aluminum clamp upright. This frees up both hands: one hand guides the hone smoothly across the edge, while the other supports the knife handle to eliminate blade flex. A solid mount keeps the clamp at a comfortable working height and stops the assembly from sliding across the table during heavy strokes.
You can also expand your setup with specialty hones based on the specific knives you own. Standard ceramic stones work well on traditional stainless steel (a rust-resistant, easy-to-clean metal) and high-carbon steel. However, modern pocket knives often use advanced tool steels that resist wear and take a long time to shape on standard ceramic. Upgrading to diamond hones cuts through hard tool steels quickly without dishing out the stone face. For finishing touches, leather stropping hones and ultra-fine ceramic stones help create a mirror polish on your bevels for effortless push-cutting.
For quick edge maintenance between full sharpening sessions, keeping a compact pull-through sharpener or a dual-grit pocket stone in your vehicle or tackle box provides instant touch-ups in the field when carrying a full clamp kit is impractical.

- TAR Score9.2
TAR Score is a ranking system developed by TopAppliancesReviews.com. TAR score has no relationship or impact from any manufacturers or sales agent websites. Learn more
- BrandLansky

- TAR Score9.2
TAR Score is a ranking system developed by TopAppliancesReviews.com. TAR score has no relationship or impact from any manufacturers or sales agent websites. Learn more
- BrandLansky

- TAR Score9.0
TAR Score is a ranking system developed by TopAppliancesReviews.com. TAR score has no relationship or impact from any manufacturers or sales agent websites. Learn more
- BrandLansky

- TAR Score9.0
TAR Score is a ranking system developed by TopAppliancesReviews.com. TAR score has no relationship or impact from any manufacturers or sales agent websites. Learn more
- BrandLansky

- TAR Score9.0
TAR Score is a ranking system developed by TopAppliancesReviews.com. TAR score has no relationship or impact from any manufacturers or sales agent websites. Learn more
- BrandLansky

- TAR Score9.0
TAR Score is a ranking system developed by TopAppliancesReviews.com. TAR score has no relationship or impact from any manufacturers or sales agent websites. Learn more
- BrandLansky

- TAR Score8.8
TAR Score is a ranking system developed by TopAppliancesReviews.com. TAR score has no relationship or impact from any manufacturers or sales agent websites. Learn more
- BrandLansky

- TAR Score8.8
TAR Score is a ranking system developed by TopAppliancesReviews.com. TAR score has no relationship or impact from any manufacturers or sales agent websites. Learn more
- BrandLansky

- TAR Score8.8
TAR Score is a ranking system developed by TopAppliancesReviews.com. TAR score has no relationship or impact from any manufacturers or sales agent websites. Learn more
- BrandLansky

- TAR Score8.8
TAR Score is a ranking system developed by TopAppliancesReviews.com. TAR score has no relationship or impact from any manufacturers or sales agent websites. Learn more
- BrandLansky
Last update on 2026-10-23 / Affiliate links / Images, Product Titles, and Product Highlights from Amazon Product Advertising API
FAQs
How do I stop the guide rod from bending during sharpening?
Keep your fingers on the molded plastic handle of the hone and let the stone abrasive do the cutting. Pressing down hard on the rod flexes the thin metal wire, which changes your bevel angle and rounds the cutting edge. Support the rod gently with your fingers and use light, gliding strokes across the blade.
Can I sharpen a long kitchen knife with this clamp system?
Yes, but blades longer than seven inches require repositioning or careful stroke management. If you clamp the knife directly in the center, the distance to the tip and heel becomes longer than the distance to the middle, slightly widening the angle at the ends. For very long carving or chef knives, either sharpen in sections by moving the clamp down the blade or focus on maintaining an even sweep across the length.
Why does my knife edge tear paper instead of slicing cleanly?
Paper tearing usually means the microscopic wire burr was never fully removed, or the two bevels have not yet met at a sharp point. Check the edge under a direct light bulb; any bright reflection along the cutting line indicates a flat, dull spot. If no light reflects, make several alternating, very light strokes with your finest hone to snap off any lingering wire burr.
Related guides: how to use a lansky knife sharpener.


Top Best Quiet Portable Generator Electric Start 2026 - (2026 Updated)

The 10 Best Portable Power Station For Tailgating 2026

10 Best Washing Machine For King Size Comforter of 2026 For Bulky Bedding

11 Best Semi Automatic Washing Machine Under 10000 of 2026 For Apartments and RVs

The Best Concrete Floor Buffer 2026 - Top Choices

Best Cooling Fan with HEPA Filter: Our 2026 Top Picks for Cleaner Air
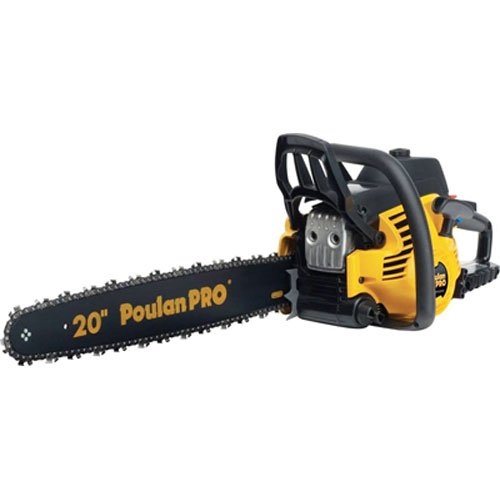
Best poulan chainsaw 2026 - Reviews & Buying Guides

Value Picks: 10 Vitamix 5300 Best Price of 2026






