How to Use a Henckels Knife Sharpener Without Ruining Blades

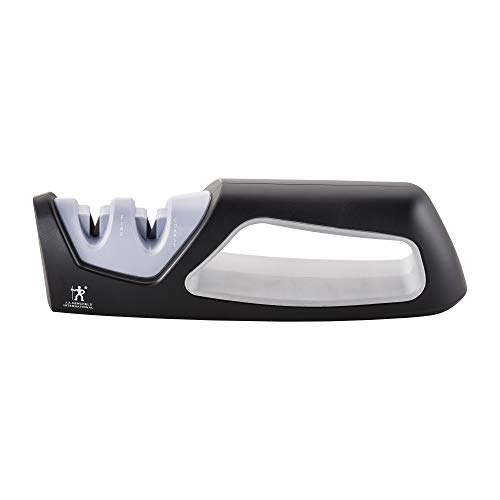
Set the sharpener flat on a dry counter and grip the handle firmly. A steady base prevents slips while you pull the blade straight back with light pressure. Draw the knife smoothly from heel (the wide end near the handle) to tip, using three to five pulls in the coarse slot and finishing in the fine slot. Never push forward or saw back and forth, which can quickly chew up the steel.
The right method depends on your knife and its condition. A dull edge needs the coarse slot to rebuild the cutting angle, but a blade that just feels sluggish only needs the fine ceramic or a handheld honing rod. Standard straight kitchen knives work cleanly here, but serrated bread knives and brittle Japanese blades need different care to avoid grinding teeth or chipping thin metal. The guide below walks through each step to keep your cutlery sharp and safe.
Identify Whether You Need to Sharpen or Just Hone Your Blade
Before you touch a blade to any tool, look closely at what is sitting on your counter. Many cooks confuse a handheld pull-through sharpener with a long metal rod found in a wooden knife block. These two tools do completely different jobs, and using the wrong one at the wrong time will wear out your cutlery much faster than necessary.
A handheld pull-through sharpener actually removes steel. Inside its small slots, angled ceramic wheels or carbide cutters shave away tiny ribbons of metal. This process grinds away old, blunt steel to create a brand-new bevel (the angled cutting edge). You only need to use this tool when your knife has gone dull and no longer cuts cleanly through a soft tomato skin or an onion layer.
A long metal rod is a sharpening steel, but in practical kitchen terms, it is a honing rod. To hone means to straighten the edge without shaving metal away. When you chop vegetables on a cutting board, the thin cutting edge does not immediately turn dull. Instead, the microscopic edge bends or folds to one side. A honing rod pushes that bent steel back into a straight line. If your knife was cutting well yesterday but feels slightly sluggish today, it needs quick realignment on a steel, not a grinding session in a pull-through sharpener.
Standard Western kitchen knives, such as those found in German high-carbon steel premium knife block sets, usually feature a durable 20-degree cutting bevel on each side. These blades handle pull-through sharpeners very well when they lose their bite. Once you know whether you need to reshape dull metal or simply realign a folded edge, you can choose the correct tool and protect your knives from unnecessary wear.
Pull Your Knife Through the Two-Stage Slots in One Smooth Motion
Using a two-stage handheld sharpener is simple, but the exact order and physical motion matter. If you rush through the process, you can create high and low spots along the blade. Follow these steps to restore a clean, razor-sharp edge safely on your kitchen counter.
- Anchor the sharpener on a stable surface. Place the sharpener flat on a clean, dry countertop or a heavy cutting board. Grip the handle firmly with your non-dominant hand. Make sure your fingers rest behind the protective hand guard so they are completely clear of the sharpening slots.
- Start with the coarse slot for dull blades. If your knife is truly dull, begin in slot 1, which uses coarse grit. Grit refers to the roughness of the sharpening ceramic or carbide wheels. This coarse stage reshapes blunt metal and creates a fresh cutting bevel. If the knife is already moderately sharp and just needs a quick touch-up, you can skip this coarse stage entirely and go straight to the fine slot.
- Insert the heel of the blade into the slot. Place the heel (the back part of the blade next to the handle) straight down into the V-shaped notch. Hold the knife perfectly vertical at a 90-degree angle to the countertop. Do not tilt the blade to the left or right, because tilting will grind one side of the edge flat while missing the other.
- Pull the blade back toward your chest. Draw the knife backward in one smooth, continuous motion from the heel all the way through to the tip. Use light, even pressure. Let the weight of the knife do most of the work. As you reach the curved belly near the tip, raise your wrist slightly so the rounded tip stays in direct contact with the internal wheels. Each pull should take about two to three seconds.
- Repeat three to five times. Run the blade through the coarse slot three to five times. That is plenty of passes to reset the edge. Running a blade through the coarse slot ten or twenty times only removes healthy metal and shortens the lifespan of your knife.
- Polish the edge in the fine slot. Move the blade to slot 2, which contains fine ceramic wheels. Repeat the exact same pulling motion three to five times with very light pressure. This stage smooths down the burr (the microscopic wire edge or curved sliver of metal that forms on the opposite side during sharpening) and polishes the fresh bevel.
- Wash and dry the knife immediately. Sharpening leaves fine steel dust clinging to the blade. Wipe the knife with a damp sponge or wash it with warm, soapy water, and dry it completely with a clean towel before using it on food. Never put the blade in the dishwasher.
Avoid Heavy Downward Force and Never Saw the Blade Back and Forth
Most damaged kitchen knives do not fail from poor steel. They fail because someone applied too much muscle or used the wrong motion in a pull-through sharpener. Keep this short checklist in mind every time you pick up your tool at the kitchen counter.
- Never saw the blade forward and backward. Pull-through sharpeners are strictly one-way tools. The internal ceramic wheels are angled to cut and polish metal as the blade moves backward. Pushing the knife forward catches the thin edge against the wheels, bending the steel backward and creating small chips or rough notches along the cutting bevel. Always lift the knife out at the end of a pull, return the heel to the slot, and pull again.
- Do not bear down with heavy body weight. Pressing hard does not make a knife sharper. In fact, heavy pressure jams the edge deep into the ceramic V-notch, tearing the steel unevenly and creating a wavy profile. Use light pressure, similar to the force you would use to slice a ripe peach.
- Keep the spine pointing straight at the ceiling. Leaning the knife sideways changes the factory sharpening angle. If you lean the knife, you will grind a flat shoulder onto one side of the edge while leaving the cutting apex completely dull. Keep your wrist locked straight.
- Do not stop halfway through a pull. Stopping the knife in the middle of a stroke creates a tiny divot in the metal. Always finish each pass in one uninterrupted sweep from the heel through to the tip.
- Never skip the fine ceramic stage. Stopping after the coarse slot leaves a jagged, raw edge full of microscopic burrs. While that toothy edge might tear through tough food for a day, it will quickly fold over and dull. The fine ceramic slot polishes away those burrs so the edge stays sharp for weeks.
Anchor Your Honing Steel on a Cutting Board for Safe Daily Alignment
If your knife block came with a 9-inch or 10-inch steel honing rod, using it once or twice a week keeps your knives cutting like new without grinding away metal. Many home cooks try to mimic television chefs by waving a steel in the air. That freehand technique is dangerous because the blade can easily slip toward your fingers, and it makes maintaining a consistent angle nearly impossible. The cutting-board method is far safer and produces much better results.
- Set up a non-slip workstation. Place a damp kitchen towel on your counter and lay a wooden or plastic cutting board on top. Hold the honing steel vertically with the plastic or metal tip pressed firmly down into the center of the board. Keep your non-dominant hand wrapped firmly around the handle at the top, behind the wide protective guard.
- Set your angle against the rod. Hold your chef knife in your dominant hand. Place the heel of the blade against the top of the steel rod. To find a 20-degree angle, imagine holding the knife perpendicular to the rod at 90 degrees. Cut that angle in half to 45 degrees, and cut that in half again to roughly 22 degrees. Tilt the knife just a fraction closer to the steel. That gives you the ideal angle for Western kitchen knives.
- Glide the blade down and back. With light pressure, sweep the blade downward toward the cutting board while pulling the knife toward you. You want the entire cutting edge, from the heel to the pointed tip, to slide smoothly across the steel rod in one fluid motion. Think of it like trying to shave a very thin layer off the surface of the rod.
- Alternate sides with each stroke. After one pass on the right side of the rod, lift the knife and place the heel on the left side. Sweep down and back in the same way. Perform four to six gentle passes per side. You do not need speed. Slow, controlled passes straighten the bent edge far more effectively than fast, aggressive strokes.
- Wipe the blade clean. Honing does not grind away large amounts of metal, but it can dislodge microscopic steel flakes. Wipe the blade down with a dry cloth or wash and dry it before prepping your next meal.
Keep Serrated Bread Knives and Thin Asian Blades Out of the Slots
A standard two-stage pull-through sharpener is built specifically for standard Western straight-edge kitchen knives, such as chef knives, santokus, utility knives, and paring knives. Certain specialized blades will be permanently ruined if you pull them through these ceramic wheels.
Never run a serrated bread knife or a scalloped utility knife through a pull-through sharpener. Serrated knives have pointed teeth with rounded hollows between them. V-shaped sharpening wheels cannot reach inside those curved hollows. Instead, the wheels will grind down the sharp points of the teeth, turning your bread knife into a jagged, flattened saw that tears through loaves rather than slicing them cleanly. Serrated knives require a specialized narrow sharpening rod that fits inside each individual groove.
Be extremely cautious with delicate Asian cutlery. Premium blades found in Japanese Damascus steel chef knife sets under $1,000 are typically forged from very hard high-carbon steel and sharpened to a steep 15-degree slicing edge per side. A standard Western sharpener is fixed at a wider 20-degree angle. If you pull a thin 15-degree Japanese blade through a 20-degree pull-through notch, the wheels will strip away metal from the delicate cutting bevel, blunt the original profile, and potentially chip the hard, brittle steel. These knives should be sharpened on flat whetstones or serviced by a professional sharpener.
You should also avoid putting knives with visible chips or deep dents through the slots. If an edge has a deep notch from hitting a bone or a hard surface, a pull-through wheel will catch on that notch. The blade will snag, potentially tearing out a larger chunk of steel or causing the knife to jerk out of your hand. Chipped blades need to be ground flat on a bench stone to reset the entire bevel before they can ever use a pull-through slot again.
Choose the Right Sharpener Style to Match Your Kitchen Routine
When selecting a sharpening tool to maintain your kitchen knives, look for a design that matches how often you cook and how much time you want to spend on blade upkeep. A good tool should make blade care easy rather than stressful.
If you prefer quick, convenient maintenance with zero guesswork, a two-stage handheld pull-through sharpener is the best choice. Look for a model with a wide, slip-resistant base that stays planted on smooth granite or laminate counters. A comfortable, ergonomic handle with a built-in safety guard is essential to keep your fingers protected while drawing the blade back. Ensure the unit features clearly marked stages, using coarse ceramic or carbide for reshaping dull blades and ultra-fine ceramic wheels for polishing and removing burrs.
If you already enjoy daily prep and want to keep your knives slicing effortlessly without shaving metal off the bevel, add a steel honing rod to your setup. Choose a rod that measures at least 9 or 10 inches long so you can comfortably hone an 8-inch chef knife in a single stroke without running out of room. Look for a solid grip with a wide guard above the handle to stop slipping blades, and verify that the tip has a rubber or sturdy plastic cap that will not gouge your wooden cutting boards when anchored down.

- TAR Score10.0
TAR Score is a ranking system developed by TopAppliancesReviews.com. TAR score has no relationship or impact from any manufacturers or sales agent websites. Learn more
- BrandHENCKELS

- TAR Score9.4
TAR Score is a ranking system developed by TopAppliancesReviews.com. TAR score has no relationship or impact from any manufacturers or sales agent websites. Learn more
- BrandACCUSHARP

- TAR Score9.4
TAR Score is a ranking system developed by TopAppliancesReviews.com. TAR score has no relationship or impact from any manufacturers or sales agent websites. Learn more
- BrandZWILLING

- TAR Score9.2
TAR Score is a ranking system developed by TopAppliancesReviews.com. TAR score has no relationship or impact from any manufacturers or sales agent websites. Learn more
- BrandHENCKELS

- TAR Score9.0
TAR Score is a ranking system developed by TopAppliancesReviews.com. TAR score has no relationship or impact from any manufacturers or sales agent websites. Learn more
- BrandHENCKELS

- TAR Score9.0
TAR Score is a ranking system developed by TopAppliancesReviews.com. TAR score has no relationship or impact from any manufacturers or sales agent websites. Learn more
- BrandZWILLING
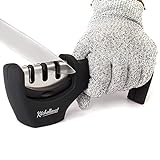
- TAR Score9.0
TAR Score is a ranking system developed by TopAppliancesReviews.com. TAR score has no relationship or impact from any manufacturers or sales agent websites. Learn more
- BrandKITCHELLENCE

- TAR Score8.8
TAR Score is a ranking system developed by TopAppliancesReviews.com. TAR score has no relationship or impact from any manufacturers or sales agent websites. Learn more
- BrandZWILLING
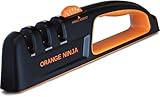
- TAR Score8.8
TAR Score is a ranking system developed by TopAppliancesReviews.com. TAR score has no relationship or impact from any manufacturers or sales agent websites. Learn more
- BrandSharp Pebble
- TAR Score7.8
TAR Score is a ranking system developed by TopAppliancesReviews.com. TAR score has no relationship or impact from any manufacturers or sales agent websites. Learn more
- BrandHENCKELS
Last update on 2026-10-01 / Affiliate links / Images, Product Titles, and Product Highlights from Amazon Product Advertising API
FAQs
Which slot should I start with if my knife is not completely dull?
If your knife still cuts reasonably well but has lost its keen edge, skip the coarse slot and start directly in the fine ceramic slot. The fine slot gently polishes the existing bevel and removes tiny microscopic burrs without grinding away unnecessary steel. Reserve the coarse slot for knives that have gone completely blunt and struggle to cut through soft produce.
How often should I run my kitchen knives through a pull-through sharpener?
For most home cooks who prepare meals daily, running straight-edge knives through a pull-through sharpener once every two to three months is plenty. In between those sharpening sessions, use a honing rod once or twice a week to keep the edge aligned. Overusing the coarse slot of a sharpener removes metal too quickly and can wear down your blade in just a few years.
Can I wash my pull-through knife sharpener in water or the dishwasher?
No, you should never submerge a pull-through sharpener in water or run it through a dishwasher. Water gets trapped inside the wheel housing, which can rust internal metal components and ruin the unit. To clean the sharpener, simply wipe the exterior with a damp cloth and tap the unit gently upside down over a trash can to dislodge accumulated steel dust.
How do I check if my knife is sharp enough after using the sharpener?
The safest and most reliable way to check your edge is the paper slice test. Hold an ordinary sheet of printer paper vertically by one corner, place the blade against the top edge, and slice downward. A sharp knife will slice cleanly through the paper with minimal pressure and without snagging or tearing the sheet.

Top Rated Best Quality Range Hoods: 2026 Expert Picks
The 12 Best Small Solar Generators 2026

10 Best Quality Semi Automatic Washing Machine of 2026 For Leak-Free Laundry

11 Best Small Washer Machine of 2026 For Everyday Laundry

12 Best Vibration Pads For Washing Machine of 2026 To Stop Walking and Shaking

11 Best Selling Front Load Washing Machine of 2026 For Quiet Odor-Free Laundry

11 Best Washing Machine For King Size Bedding of 2026 To Prevent Cycle Errors

10 Best Small Front Loader Washing Machine of 2026 For Tight Closets