
How to Use an Electric Knife Sharpener Safely

Rest the heel (the back end of the blade near the handle) into the guided slot and pull smoothly toward you using only the knife's natural weight. How many passes each side needs depends entirely on the starting shape of the steel. Moving at a steady pace of about three to four seconds per pull lets the spinning wheels do the work without chewing away good metal or overheating the edge.
Blade styles change the routine as well. Thinner Asian knives need narrower guide slots than sturdy Western blades, while serrated bread knives should only touch the fine polishing stage to keep from grinding down the teeth. Knives that have not seen care in years require several passes through the coarse stage, whereas maintained blades only need a quick touch-up. Here is the step-by-step way to work through each slot cleanly and keep your blades in peak shape.
Preparing Your Counter and Knives Before Sharpening
Electric knife sharpeners work quickly because motorized abrasive wheels spin at high speeds inside internal slots. Before plugging in your unit, you need a stable setup and clean equipment to prevent scratches, slipping, or ruined edges.
Grinding grit and metal dust will permanently score a blade if trapped against the internal guides. Food residue can gum up the internal wheels, causing them to slip or glaze over. Take a minute to prepare your work area and cutlery before turning on the power switch.
- Wash and dry the knife completely: Grease, oils, and dried food bits will stick to the abrasive wheels and ruin their texture. Always wash your knife with warm dish soap, wipe it dry with a towel, and check that no moisture remains near the handle.
- Clear a flat, dry countertop: Set the sharpener on a clean counter near a wall outlet so the cord does not stretch or snag. Make sure the rubber feet on the base grip the counter surface firmly so the machine cannot slide during a pass.
- Identify your knife style: Check whether your blade is a standard Western knife with a sturdy 20-degree utility edge or a thin Asian knife with a steep 15-degree slicing edge per side. Matching the blade to the correct slot angle keeps you from grinding off unnecessary metal.
- Inspect the blade for serious damage: Look down the cutting edge under good light. Small dull spots are easy to fix, but deep chips or bent tips may require extra time in the coarsest slot to grind the steel flat again.
How to Pull the Knife Through an Electric Sharpener
Using an electric sharpener requires smooth movement rather than physical effort. The built-in angle guides hold the steel in position, while the spinning abrasive discs shave away dull metal. Follow these six steps to establish a clean edge without wearing down your blade.
-
Grip the handle with a relaxed wrist: Hold the handle firmly with your dominant hand, keeping your fingers tucked behind the bolster or finger guard.
Reason: A tense hand or stiff wrist causes you to twist the knife sideways, which tilts the bevel (the slanted cutting edge) unevenly against the guide walls. -
Rest the heel of the blade flat against the slot guide: Turn the machine on, place the heel (the back end of the blade near the handle) into the left slot of stage one, and let the side of the blade rest lightly against the guide face.
Reason: Starting squarely at the heel ensures you sharpen the entire length of the blade, preventing an unsharpened flat spot right in front of the handle. -
Let the knife rest under its own weight without pushing down: Lower the blade until the cutting edge touches the spinning wheel, applying zero downward muscle force.
Reason: Pushing down into the spinning wheel cuts deep gouges into the steel, overheats the metal, and can stall the motor. -
Pull the blade toward you in one smooth motion: Draw the knife backward toward your chest at a steady pace, taking about three to four seconds for an eight-inch chef knife or two seconds for a paring knife.
Reason: Moving at an even speed exposes every section of the edge to the abrasive wheel for the exact same amount of time, preventing uneven dips in the blade profile. -
Follow the upward curve of the blade as you reach the tip: As the curved belly of the knife approaches the guide, lift your wrist slightly so the point remains in contact with the wheel as it exits the slot.
Reason: If you keep the blade completely horizontal, the tip will drop off the wheel early or catch on the edge, rounding off the fine point. -
Alternate immediately to the matching right-side slot: Insert the blade into the right slot of the same stage and repeat the pull at the identical speed and light contact.
Reason: Sharpening both sides equally keeps the cutting edge centered along the blade spine rather than pushing the edge off to one side.
Managing Sharpening Stages from Coarse Shaping to Fine Honing
Most electric units feature two or three separate stages, each housing wheels with a different grit (the roughness of the grinding wheel). Using these stages in the correct order saves your knives from premature wear.
Stage one uses a coarse abrasive designed to reshape a blunt edge. When a knife feels completely round or struggles to cut soft fruit, it needs this reshaping stage. Make two to three alternating pairs of pulls through stage one. After these passes, you should feel a burr (the microscopic wire edge or curved sliver of metal that forms on the opposite side during sharpening). To check for this burr safely, wipe the blade clean with a cloth, then slide the pad of your thumb up the flat side of the blade toward the spine, never along the sharp edge. When you feel a faint, rough lip running the full length of the blade, the coarse stage has finished its job.
Stage two or three is for honing (polishing and smoothing the finished edge). This stage uses fine ceramic or diamond wheels to shave away the burr and polish the bevel to a razor finish. If you maintain quality knives, such as traditional German high-carbon steel knives, you rarely need the coarse slot for routine upkeep. Running your knives through only the fine stage once every month or two cleans up the edge in seconds while preserving the thickness of the blade steel.
Common Sharpening Mistakes to Avoid
Electric sharpeners make sharpening fast, but small mistakes in your technique can quickly alter the shape of your blade. Avoid these common habits to keep your edges straight and true.
- Sawing back and forth inside the slot: Never push the knife forward against the rotation of the wheels. Always pull the blade toward yourself in one direction from heel to tip. Pushing forward can cause the blade to dig into the internal wheels, gouging notches into the cutting edge.
- Pausing or lingering on the tip: Home cooks often slow down right as the tip leaves the machine. Stopping the pull for even half a second leaves a visible hollow spot near the tip of your blade. Maintain your pull speed all the way out of the slot.
- Applying heavy downward pressure: Trust the angle guides and let gravity do the work. Pressing down creates friction, which can overheat the steel and ruin its heat treatment, leaving the metal soft and unable to hold an edge.
- Skipping the cleaning step after sharpening: Sharpening leaves behind microscopic metal dust. Wiping the blade thoroughly with a damp paper towel or washing it before slicing food prevents steel particles from contaminating your meals.
Checking the Edge Safely Without Touching the Blade
Never run your bare fingers or thumb across a freshly sharpened blade to check its edge. Even a light touch can cause a deep cut if the edge has a fresh, sharp burr. Instead, use clean, contactless checks that tell you right away if the blade is ready for meal prep.
The standard paper slice check is the simplest and most reliable method. Hold a single sheet of standard copy paper by the top corner with your free hand. Place the heel of your knife against the top edge of the paper and push downward and forward with light pressure. A properly sharpened knife will slice cleanly through the paper from heel to tip with zero tearing, catching, or ragged sounds. If the blade snags or rips the sheet, notice where the catch happened along the edge. That spot still has a rolled burr or a dull patch that needs another pass through the fine honing stage.
You can also check the edge against the skin of a ripe tomato or a smooth bell pepper. A dull knife slides right off the slick surface or crushes the tomato before puncturing it. A well-sharpened edge will bite into the skin instantly under the knife's own weight, slicing thin, translucent sheets without releasing excess juice. Storing your sharpened blades safely on wall racks or magnetic knife block sets keeps these delicate edges from banging against other utensils in crowded kitchen drawers.
Sharpening Bread Knives, Scissors, and Specialty Blades
Not every cutting tool in your kitchen can go through standard electric sharpener slots. Understanding which blades are compatible keeps you from ruining specialized edges.
Serrated bread knives feature scalloped teeth designed to tear through crusty loaves. You must never run a serrated knife through coarse or medium sharpening slots, because the spinning wheels will grind down the pointed teeth and flatten the serrations. If your machine manual allows serrated knives, use only the final fine polishing stage. The flexible ceramic or diamond wheels in the polishing slot reach into the gullets between the teeth to smooth out burrs without flattening the profile. Make only a few slow pulls through the fine slot to refresh the teeth.
Delicate Asian cutlery, like high-carbon Japanese chef knives, requires extra caution. Many Japanese blades feature steep 15-degree angles or single-bevel grinds, where the blade is flat on one side and beveled on the other. Running a single-bevel knife through standard dual-bevel slots will permanently alter its traditional geometry. Check your sharpener manual to confirm it supports steep slicing angles before inserting high-end Japanese steel.
For kitchen shears, only sharpen them if your unit includes a dedicated scissor slot. Household shears have wide, blunt bevels that grind at very different angles than chef knives. Forcing scissors into knife slots will ruin both the tool and the sharpener guides.
What to Look for in an Electric Knife Sharpener
If you are shopping for a sharpener to care for your kitchen tools, matching the machine to your knife collection makes maintenance simple and stress-free. The right unit saves you from sending blades out for commercial grinding while keeping your prep work effortless.
First, look at the sharpening angles supported by the internal guides. If your kitchen uses a mix of thick European chef knives and thin Asian slicers, look for a model that offers dual-angle settings or versatile multi-stage slots. Units with magnetic guides or spring-loaded slot walls make it much easier to keep the blade straight as you pull, preventing beginner mistakes.
Next, consider the abrasive material and staging. Sharpeners with genuine diamond abrasive wheels grind efficiently without generating excessive heat, which protects the temper of hard steel. A machine with at least two distinct stages, one coarse for repairing dull profiles and one fine for daily honing, provides complete control. Removable metal dust collection trays and compact countertop footprints also make routine cleaning and storage simple.

- TAR Score10.0
TAR Score is a ranking system developed by TopAppliancesReviews.com. TAR score has no relationship or impact from any manufacturers or sales agent websites. Learn more
- BrandKiseely
- TAR Score9.8
TAR Score is a ranking system developed by TopAppliancesReviews.com. TAR score has no relationship or impact from any manufacturers or sales agent websites. Learn more
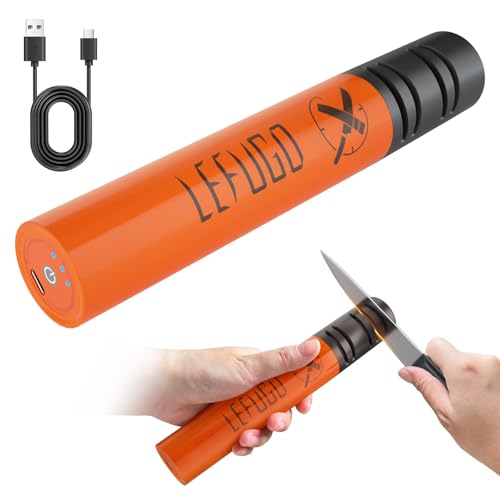
- BrandLEFUGO
- TAR Score9.0
TAR Score is a ranking system developed by TopAppliancesReviews.com. TAR score has no relationship or impact from any manufacturers or sales agent websites. Learn more
- BrandPresto

- TAR Score8.8
TAR Score is a ranking system developed by TopAppliancesReviews.com. TAR score has no relationship or impact from any manufacturers or sales agent websites. Learn more
- BrandNarcissus

- TAR Score8.8
TAR Score is a ranking system developed by TopAppliancesReviews.com. TAR score has no relationship or impact from any manufacturers or sales agent websites. Learn more
- BrandNorthmas
- TAR Score8.8
TAR Score is a ranking system developed by TopAppliancesReviews.com. TAR score has no relationship or impact from any manufacturers or sales agent websites. Learn more
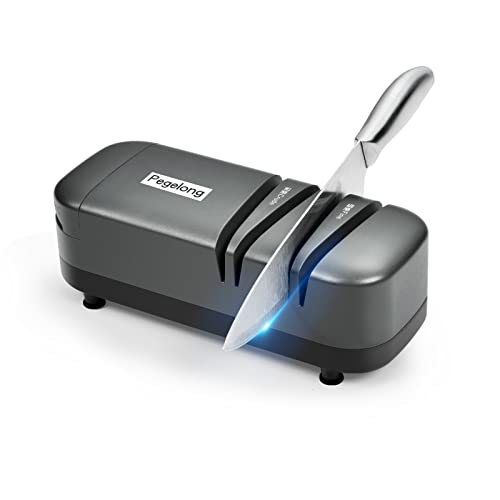
- BrandPegelong

- TAR Score8.6
TAR Score is a ranking system developed by TopAppliancesReviews.com. TAR score has no relationship or impact from any manufacturers or sales agent websites. Learn more
- BrandWORK SHARP

- TAR Score8.6
TAR Score is a ranking system developed by TopAppliancesReviews.com. TAR score has no relationship or impact from any manufacturers or sales agent websites. Learn more
- BrandCeelpeopar

- TAR Score8.4
TAR Score is a ranking system developed by TopAppliancesReviews.com. TAR score has no relationship or impact from any manufacturers or sales agent websites. Learn more
- BrandSecura
Last update on 2026-10-31 / Affiliate links / Images, Product Titles, and Product Highlights from Amazon Product Advertising API
FAQs
How hard should I press down when pulling a knife through the slot?
You should apply zero downward pressure. Let the natural weight of the blade rest against the spinning abrasive disc while the guide slot holds the angle. Pushing down grinds away excess steel, creates uneven dips in the blade, and can cause the motor to stall.
How fast should I pull the knife through the machine?
Pull the blade at a steady rate of about one second for every two inches of steel. An eight-inch chef knife should take roughly four seconds to travel from heel to tip. Pulling too quickly leaves dull patches, while pulling too slowly grinds down too much metal in one spot.
Can I sharpen serrated bread knives in an electric sharpener?
You can only sharpen serrated blades if your machine specifically supports them, and you should use only the final fine honing stage. Never run a serrated knife through coarse sharpening slots, as the grinding wheels will grind off the pointed teeth and ruin the scalloped edge.
How do I know when to move from the coarse stage to the fine stage?
Move to the fine stage as soon as you feel a continuous burr along the entire cutting edge on the opposite side of your last pull. This tiny wire curl indicates that you have removed enough metal to create a fresh apex. Continuing in the coarse stage after the burr appears simply wastes blade steel.


Top Best Quiet Portable Generator Electric Start 2026 - (2026 Updated)

The 10 Best Portable Power Station For Tailgating 2026

10 Best Washing Machine For King Size Comforter of 2026 For Bulky Bedding

11 Best Semi Automatic Washing Machine Under 10000 of 2026 For Apartments and RVs

The Best Concrete Floor Buffer 2026 - Top Choices

Best Cooling Fan with HEPA Filter: Our 2026 Top Picks for Cleaner Air

Best poulan chainsaw 2026 - Reviews & Buying Guides

Value Picks: 10 Vitamix 5300 Best Price of 2026




