
How to Use a Work Sharp Knife Sharpener?

Getting a clean, sharp edge comes down to resting the blade flat against the guide and pulling it smoothly from heel to tip with almost no pressure. The exact motion changes depending on whether the tool uses a flexible powered belt or a manual guided rod. Working both sides evenly until you feel a tiny rough ridge of metal lets you know the steel is ready for a finer grit to polish the edge smooth.
Kitchen knives generally need a narrower twenty-degree angle for clean food prep, while thick outdoor blades hold up better at twenty-five degrees. Heavily worn knives also call for rougher abrasives to reshape the slanted cutting edge, while everyday touch-ups only need a few light strokes on a ceramic or fine belt. Taking a careful look at your knife first helps you pick the right settings so you can sharpen with confidence.
Choosing Your Angle Guide and Starting Grit
Setting up your sharpener correctly takes all the guesswork out of sharpening. The angle guide holds the knife at a fixed slope against the abrasive, while the grit determines how much metal you strip away. Matching these two settings to your specific blade prevents you from grinding away good steel or ending up with an edge that dulls after two slices.
Before you plug in the machine or line up your manual guides, check your knife against this quick setup checklist:
- Choose a 15-degree to 20-degree angle for kitchen knives: Kitchen cutlery requires a narrow, razor-sharp edge to slice through vegetables and raw meat effortlessly. Thin slicing blades, such as those found in high-carbon Japanese chef knife sets, perform best at a steep 15-degree angle per side. Sturdier kitchen blades, such as those in German high-carbon steel knife block sets, typically use a 20-degree angle per side to balance clean slicing with long-lasting durability.
- Choose a 25-degree angle for outdoor and pocket knives: An everyday carry pocket knife (often called an EDC knife) and outdoor hunting blades face harder chores, such as cutting cardboard, carving wood, or trimming rope. A 25-degree bevel (the slanted surface that forms the cutting edge) gives the blade extra shoulder support so the edge will not roll or chip under heavy pressure.
- Select coarse grit only for damaged blades: Coarse grit (roughness level between 80 and 220) removes steel quickly. Use this level only if your blade has visible nicks, a broken tip, or is completely blunt. If your knife can still slice soft paper with a little snagging, skip the coarse abrasive entirely to preserve your blade steel.
- Start with medium grit for general dullness: Medium abrasive belts or diamond plates (around 220 to 400 grit) are your everyday workhorses. They re-establish a crisp cutting edge on tired knives without shaving away unnecessary metal.
- Finish with fine grit or ceramic to hone: Fine abrasives (such as 6000 grit belts or ceramic plates) hone the steel. To hone means to polish and straighten the cutting edge without removing much metal. This final step turns a toothy, rough grind into a mirror-polished edge that glides through food.
How to Pull the Blade from Heel to Tip
The motion you use to draw the blade across the abrasive determines how even your edge will be. Work Sharp sharpeners do the heavy lifting for you, so your only job is guiding the knife steadily along the guide slot. Follow these steps in order on every pass.
- Rest the blade flat against the angle guide before starting: Place the heel of your knife flat against the plastic guide surface with the cutting edge lightly touching the belt or stone before turning on the power or beginning your stroke. Reason: If you bring a moving belt down against an unguided knife, the abrasive can catch the edge, causing it to chatter and create uneven gouges in the steel.
- Use neutral, gentle downward pressure: Hold the knife handle with just enough grip to keep the blade flat against the guide face, letting the tool support the weight of the steel. Reason: Pushing the blade down hard flexes the abrasive belt inward, which rounds off the crisp bevel and leaves your edge duller than when you started.
- Pull the knife backward at a smooth, steady pace: Draw the blade toward your body from the heel toward the point, moving at a consistent rate of about one inch per second. Reason: Pausing or slowing down in one spot grinds away more steel in that area, creating low spots and a wavy cutting profile.
- Lift your wrist slightly as you reach the curved belly: Follow the natural upward curve of the blade belly by lifting your hand upward just enough to keep the cutting edge perpendicular to the abrasive surface. Reason: Keeping your hand flat as the blade curves upward causes the abrasive to miss the tip entirely or grind into the side of the blade face.
- Stop the motor before the tip slips off the abrasive: Pull the blade until the very tip rests directly in the middle of the belt, then release the power switch and let the belt stop before lifting the blade away. Reason: Pulling the tip completely past a running belt allows the flexible abrasive to wrap over the sharp point, instantly rounding it into a blunt nub.
- Alternate identical passes on both sides of the blade: Switch the knife into the opposite guide slot and perform the exact same pull stroke, matching the number of passes stroke for stroke. Reason: Sharpening one side more than the other pushes the center line of the blade off balance, causing the knife to veer sideways whenever you slice downward.
How to Protect the Blade Tip from Rounding
The most common mistake people make with an electric belt sharpener is rounding off the pointed tip of their knife. A kitchen knife or pocket blade needs a clean, piercing tip to start cuts, puncture packaging, and trim delicate ingredients. When that point turns into a rounded butter-knife shape, fixing it requires grinding down the entire spine of the blade.
Rounding happens because of how flexible belts behave. When the blade is resting across the belt, the belt remains flat against the steel. The instant you pull the tip past the outer edge of the belt, the belt snaps forward slightly. That tiny snap wraps the abrasive around the fine point, buffing it away in a fraction of a second.
To keep your tips sharp and needle-like, master the center-stop habit. Watch the point of your knife as you draw it through the guide. As soon as that point reaches the center line of the belt, release the power trigger with your index finger. Wait half a second for the belt to come to a complete stop, then lift the knife straight out of the guide. If you are using a manual guided system rather than an electric belt, simply stop your stone stroke before the edge of the stone rides off the point.
Never sweep the knife past the guide like you are swinging a wand. Treat the pull stroke like parking a car: you guide the knife steadily, slow your motion slightly as you reach the tip, and stop firmly on your mark.
Checking for the Burr to Know When You Are Done
You should never guess how many passes a knife needs. Steel hardness, blade thickness, and dullness differ from knife to knife, meaning one blade might need four passes while another needs twelve. Instead of counting strokes, check for a burr.
A burr is the microscopic wire edge or curved sliver of metal that forms on the opposite side during sharpening. As the abrasive cuts away steel along the bevel, the metal becomes thinner and thinner until it reaches a zero-point edge. Once the abrasive reaches the absolute apex of the edge, the paper-thin steel folds over away from the grinding surface. Feeling this burr proves that you have removed enough metal to create a brand-new cutting edge.
Check for the burr using safe finger placement. Never drag your finger along the sharp edge from heel to tip, as any sharp spot will slice your skin open. Instead, place your thumb flat against the side of the blade near the spine, then slide your thumb outward past the cutting edge into open air. If the burr is present, you will feel a distinct, rough ridge that catches your fingerprint, similar to the edge of a torn foil wrapper.
Check the entire length of the blade, from the heel all the way to the tip. If you feel the rough ridge along the whole side, switch to the other guide slot and repeat the process until the burr flips over to the first side. Once you have formed and flipped the burr with your medium grit, switch to your fine honing belt or ceramic rod. The fine abrasive gently breaks that wire ridge off, leaving a perfectly straight, razor-sharp edge behind.
Sharpening Serrated Blades and Specialty Pocket Knives
Standard plain-edge kitchen knives are straightforward, but serrated bread knives, pocket knives, and multi-tools require slight adjustments. Misusing an electric belt on a specialty edge can ruin the teeth or scratch delicate locking mechanisms.
Use these tips when working with non-standard edges:
- Sharpen only the flat side of serrated knives: Serrated bread and utility knives feature ground pockets (called gullets) on one face and a completely flat surface on the other. Never run the grooved side against a powered abrasive belt. Instead, place the flat back of the blade against a fine honing belt for two light, quick passes to knock away metal burrs. To sharpen inside each individual tooth, use a small round ceramic rod by hand.
- Clear thumb studs on folding pocket knives: An everyday carry folding knife often features thumb studs or opening disks mounted directly on the blade. Check that these hardware pieces do not bump against the top of the angle guide during your pull stroke. If a thumb stud hits the plastic guide, it tilts the blade mid-stroke and creates an uneven angle near the heel.
- Protect the pivot and lock on folding knives: Folding knives rely on small internal parts, such as a liner lock (the spring bar inside the handle that snaps behind the open blade to stop it from closing on your fingers). Keep these mechanisms away from belt dust. Wipe the blade clean before closing it so metal grit does not work its way into the folding pivot washers.
- Use steady support for slender boning knives: Slender, flexible blades made to slice close to bone and skin fish bend under light pressure. Support the spine of a flexible boning knife with your guiding fingers to prevent the blade from bowing sideways against the belt.
What to Look for in Knife Sharpening Accessories
A good sharpener gives you total control over edge angles, but having the right accessories on your workbench makes maintenance faster and protects your blades from unnecessary wear. Choosing the right add-ons comes down to matching your knife collection with the correct abrasives.
First, look at abrasive belt variety. A set that includes coarse, medium, and ultra-fine polishing belts allows you to handle everything from nicked lawn tools to fine kitchen cutlery. Premium belts with flexible cloth backings conform to curved edges and convex bevels without overheating the steel. Avoid using worn-out belts that have lost their rough texture, as a smooth, glazed belt creates friction and heat instead of cutting clean metal.
Second, consider guide flexibility. If you own both thin Japanese slicers and thick outdoor hunting blades, look for systems that offer adjustable angle settings rather than a single fixed slot. Having separate guide profiles for 15, 20, and 25 degrees ensures every knife in your kitchen block or tool roll gets the exact edge geometry it was designed to carry.
Finally, keep a compact manual field stone or folding ceramic hone in your gear bag. While powered sharpeners are unmatched for restoring neglected blades at home, a lightweight manual guide allows you to touch up working edges at a campsite or job site without relying on a wall outlet.

- TAR Score9.6
TAR Score is a ranking system developed by TopAppliancesReviews.com. TAR score has no relationship or impact from any manufacturers or sales agent websites. Learn more
- BrandWORK SHARP

- TAR Score9.4
TAR Score is a ranking system developed by TopAppliancesReviews.com. TAR score has no relationship or impact from any manufacturers or sales agent websites. Learn more
- BrandWORK SHARP
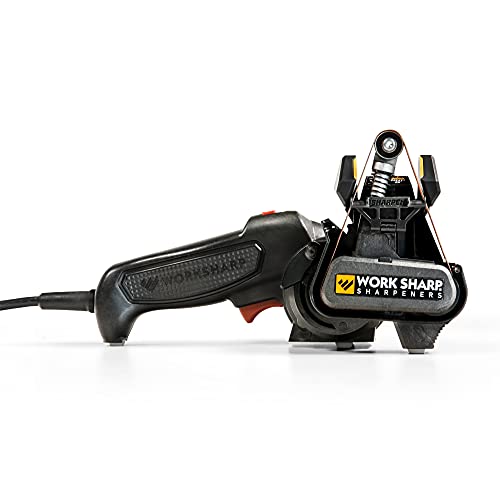
- TAR Score9.4
TAR Score is a ranking system developed by TopAppliancesReviews.com. TAR score has no relationship or impact from any manufacturers or sales agent websites. Learn more
- BrandWORK SHARP
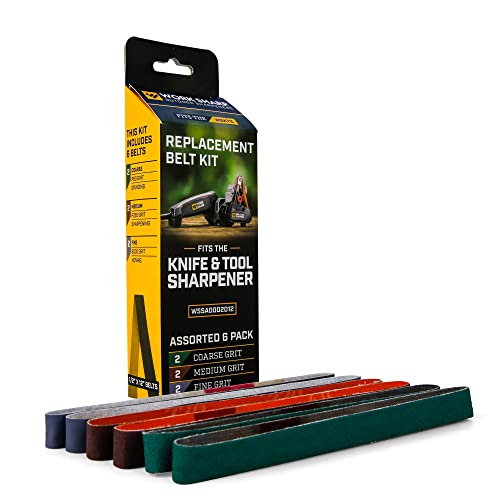
- TAR Score9.4
TAR Score is a ranking system developed by TopAppliancesReviews.com. TAR score has no relationship or impact from any manufacturers or sales agent websites. Learn more
- BrandWORK SHARP

- TAR Score9.2
TAR Score is a ranking system developed by TopAppliancesReviews.com. TAR score has no relationship or impact from any manufacturers or sales agent websites. Learn more
- BrandWORK SHARP

- TAR Score9.2
TAR Score is a ranking system developed by TopAppliancesReviews.com. TAR score has no relationship or impact from any manufacturers or sales agent websites. Learn more
- BrandWORK SHARP
- TAR Score9.0
TAR Score is a ranking system developed by TopAppliancesReviews.com. TAR score has no relationship or impact from any manufacturers or sales agent websites. Learn more
- BrandWORK SHARP

- TAR Score9.0
TAR Score is a ranking system developed by TopAppliancesReviews.com. TAR score has no relationship or impact from any manufacturers or sales agent websites. Learn more
- BrandWORK SHARP

- TAR Score8.6
TAR Score is a ranking system developed by TopAppliancesReviews.com. TAR score has no relationship or impact from any manufacturers or sales agent websites. Learn more
- BrandWORK SHARP

- TAR Score8.6
TAR Score is a ranking system developed by TopAppliancesReviews.com. TAR score has no relationship or impact from any manufacturers or sales agent websites. Learn more
- BrandWORK SHARP
Last update on 2026-10-01 / Affiliate links / Images, Product Titles, and Product Highlights from Amazon Product Advertising API
FAQs
How much downward pressure should I use when drawing the blade?
Use only the natural weight of the blade against the sharpener guide. Heavy downward pressure compresses the flexible belt or scratches your blade face against the guide. Guide the knife with a relaxed hand and let the speed of the abrasive remove the metal.
How do I know when an abrasive belt needs replacement?
An abrasive belt needs replacement when it feels slick like smooth paper and takes twice as many passes to form a burr. You may also notice the blade steel getting warm to the touch during use. Glazed belts create rubbing friction rather than clean cutting, which can overheat and soften the steel edge.
Will an electric belt sharpener grind away too much steel from my knives?
An electric sharpener will not grind away too much steel if you use light pressure and choose the correct grit. Most blade loss happens when users start on a coarse grit when they only need a light touch-up. Reserve coarse belts for damaged blades, and stick to fine belts or ceramic hones for routine edge maintenance.
Can I sharpen scissors on my Work Sharp sharpener?
You can sharpen scissors only if your specific model includes a dedicated scissor guide. Scissors use a flat, single-sided bevel between 60 and 65 degrees, which is much steeper than a knife bevel. Sharpening scissors in a standard knife guide will ruin the shearing edge.


Top Rated Best Quality Range Hoods: 2026 Expert Picks

The 12 Best Small Solar Generators 2026

10 Best Quality Semi Automatic Washing Machine of 2026 For Leak-Free Laundry

11 Best Small Washer Machine of 2026 For Everyday Laundry

12 Best Vibration Pads For Washing Machine of 2026 To Stop Walking and Shaking

11 Best Selling Front Load Washing Machine of 2026 For Quiet Odor-Free Laundry

11 Best Washing Machine For King Size Bedding of 2026 To Prevent Cycle Errors

10 Best Small Front Loader Washing Machine of 2026 For Tight Closets






