
How to Use a Whetstone to Sharpen a Knife

A dull chef knife slips across the waxy skin of a ripe tomato, squishing the flesh instead of cutting clean. Getting that factory edge back simply requires learning to hold a steady angle while sweeping the steel across a wet stone. Working one side until a tiny ridge of metal curls over the cutting line, then repeating the motion on the other side, rebuilds a true razor edge.
The exact tilt depends on the blade, since thick Western knives usually sit at a twenty-degree angle while thinner Japanese steel needs a flatter fifteen-degree slope. The starting surface changes too, because deeply chipped edges demand a coarse stone, while routine kitchen touch-ups do fine on medium grit. With a couple of easy hand tricks to prevent wobbling, anyone can sharpen their blades at home with complete confidence.
How Do You Prepare Your Whetstone for Sharpening?
A whetstone needs water before steel touches it. Modern stones are waterstones that use moisture to float away ground metal and expose fresh abrasive grit. Grit refers to the roughness size of the stone particles. Taking a few minutes to soak the stone and anchor your work surface stops the stone from skidding and protects your blade.
- Submerge the stone in cool water: Place the stone in a shallow dish of cool tap water, keeping it covered under an inch of water. Air bubbles will rise from the porous material. Soak until the bubbles stop rising, which takes 10 to 15 minutes. Splash-and-go stones only need a surface mist, but soaking stones must absorb water completely.
- Lock down a non-slip base: Set your station on a flat, solid counter. Lay a damp cloth, wet paper towel, or silicone rubber mat flat on the counter, then set the stone holder directly on top. Press firmly with your palm to verify that the base does not slip or wobble.
- Face the coarse grit upward: Start with the rough side facing up, typically marked with a lower number like 400 or 1000. Coarse grit reshapes dull, rounded steel quickly.
- Keep water nearby: Keep a small cup of water or spray bottle nearby. Sprinkling water onto the surface keeps the stone lubricated as you sharpen.
How Do You Find the Right Sharpening Angle?
Sharpening a knife means rebuilding its bevel, which is the slanted slope that forms the cutting edge. Holding the blade too flat scratches the blade face without sharpening the apex. Lifting the spine too high blunts the edge like a chisel. Consistency matters far more than matching an exact mathematical degree.
Different blade styles require different angles. Most Western blades, such as German high-carbon steel knives, use a sturdy 20-degree utility edge per side. This wider angle gives everyday chef knives the strength to chop dense vegetables and meats without chipping. Delicate Japanese blades, such as high-carbon Japanese chef knives, typically use a steep 15-degree slicing edge per side for precision cutting through soft produce.
You can find these angles with simple visual checks. Hold the blade straight up at 90 degrees to the stone. Tilt it halfway down to 45 degrees, then cut that space in half to reach roughly 22 degrees, which suits Western knives. For a 15-degree edge, lower the spine until you can slide two stacked quarters or a matchbook under it. Once set, lock your wrist to keep that angle steady.
How Do You Sharpen the First Side Correctly?
Once your angle is locked, grind the first bevel systematically from heel to tip with smooth, rhythmic motions.
- Set your grip: Hold the handle firmly with your dominant hand, resting your index finger along the spine. Place two or three fingertips of your guide hand flat on the blade face, just above the cutting edge, to apply downward pressure.
- Position the blade diagonally: Lay the knife across the stone at a 45-degree angle to the stone length. Start at the heel, the rear section nearest the handle.
- Push forward with light pressure: Apply moderate downward pressure with your guide fingers as you push the blade forward across the stone. Keep your dominant wrist stiff. Ease off pressure on the return pull, because grinding happens on the forward push.
- Work in sections: Divide the curved edge into three zones: heel, belly, and tip. Make 10 to 15 steady forward strokes on the heel. Shift your guide fingers to the middle belly for 10 to 15 strokes, then move to the tip. Lift your elbow slightly at the curved tip to keep the bevel flat.
- Preserve the gray slurry: Water mixes with stone particles and steel filings to create a gray paste called slurry. Do not wash this mud away; it speeds up sharpening and cushions the bevel. Add a few drops of water if it turns sticky.
- Check for the burr safely: A burr is the microscopic wire edge or curved sliver of metal that forms on the opposite side during sharpening. It proves you ground enough steel to reach the cutting apex. To check, place your dry thumb pad on the flat face of the unsharpened side and stroke gently downward past the edge. Never slide your thumb lengthwise along the sharp edge. If the steel catches your skin with a faint wire roughness from heel to tip, side one is done.
How Do You Even Out the Other Side?
Sharpening only one side leaves the knife lopsided. Replicating your work on the second side centers the cutting edge.
- Flip the blade over: Turn the knife so the unground side rests on the stone. Keep your dominant hand on the handle with the blade pointing toward you, which most beginners find easiest.
- Match your sharpening angle: Re-establish the exact same 15- or 20-degree clearance. Symmetrical bevel angles ensure straight, effortless cuts.
- Match your stroke count: Use the same moderate pressure and perform the exact same number of strokes across the heel, belly, and tip to keep both sides balanced.
- Confirm the burr flipped: Check the original side by sliding your thumb pad downward off the edge. When you feel the rough wire edge has folded back over to the first side from heel to tip, both slopes have converged at the apex.
- Center the edge with alternating passes: Make single, light sweeping strokes from heel to tip while alternating sides. Sweep the left side once, flip, sweep the right side once, and repeat five times to weaken the heavy wire edge.
How Do You Polish and Finish the Edge?
Your coarse stone creates the sharp V-shape, but leaves coarse scratches behind. Finishing on fine grit polishes away scratches and aligns the steel for smooth slicing.
- Switch to the fine grit side: Turn your combination stone over to the fine side (typically 3000 to 6000 grit) or place your polishing stone on the base. Wipe your blade clean first so you do not drag coarse grit onto the fine surface, then add water.
- Use featherlight pressure: Fine grit refines rather than removes bulk steel. Maintain your angle, but reduce pressure to roughly the weight of the knife itself to avoid folding the delicate apex.
- Make alternating polishing strokes: Sweep the entire blade from heel to tip in one smooth motion. Make one stroke on side one, flip the knife, and make one stroke on side two. Complete 10 to 15 light passes per side.
- Strop the edge clean: Strop means to wipe the edge against leather or cardboard to align the edge. Lay smooth leather or flat cardboard on your counter. Pull the knife backward across it, spine leading and edge trailing, at your sharpening angle. Do three light backward pulls on each side to clean off leftover micro-filings.
- Confirm sharpness on paper: Hold a sheet of scrap printer paper by one corner. Slice downward through the paper with the knife heel pushing forward. A sharp blade glides through cleanly with a light hiss rather than snagging or ripping the page.
What Mistakes Make Your Knife Duller on a Stone?
If your knife feels duller after sharpening, one of these common mistakes is usually the cause:
- Wobbling your wrists: Tilting your hand angle up and down during a stroke rounds off the cutting apex instead of forming a sharp V-shape. Keep your wrist rigid and move from your elbows.
- Moving to fine grit too early: If you do not raise a full burr along the entire edge on your coarse stone, the blade is still dull. Fine stones only polish; they cannot form a blunt apex.
- Pressing with heavy body weight: Bearing down hard gouges the stone, scratches the blade face, and crushes the thin wire edge before it aligns cleanly.
- Letting the stone run dry: Sharpening on a dry waterstone clogs the pores with metal filings and creates friction heat that can soften the tempered steel. Keep the stone wet.
- Washing away the slurry: The gray paste contains suspended abrasive particles that smooth the bevel. Keep the paste on the stone and only add water when it gets dry.
- Checking the edge unsafely: Never run your thumb lengthwise along the cutting edge. Always stroke across the blade face and off the edge to check for burrs safely without cutting your skin.
What Kind of Sharpening Stone Should You Buy?
A dual-grit waterstone made of aluminum oxide corundum provides the most practical setup for learning knife sharpening. Choosing a combination stone that pairs a medium coarse side (around 400 to 1000 grit) with a fine polishing side (around 3000 to 8000 grit) lets you reshape dull blades and polish them to a razor edge on a single block. Waterstones cut quickly, clean up with tap water, and avoid messy oils.
Stability and angle control are the most critical features to look for before buying. Look for a stone that includes a silicone rubber holder and a solid bamboo base with non-slip feet. This stops the stone from sliding across a wet counter. If you feel nervous about holding a consistent angle by hand, choose a kit that includes a clip-on plastic angle guide. The guide slides onto the knife spine and rests against the stone, holding the exact angle for you until muscle memory takes over.

- TAR Score9.2
TAR Score is a ranking system developed by TopAppliancesReviews.com. TAR score has no relationship or impact from any manufacturers or sales agent websites. Learn more
- BrandSD.TIANPENG

- TAR Score9.2
TAR Score is a ranking system developed by TopAppliancesReviews.com. TAR score has no relationship or impact from any manufacturers or sales agent websites. Learn more
- BrandIntelitopia

- TAR Score9.2
TAR Score is a ranking system developed by TopAppliancesReviews.com. TAR score has no relationship or impact from any manufacturers or sales agent websites. Learn more
- BrandSharp Pebble

- TAR Score9.2
TAR Score is a ranking system developed by TopAppliancesReviews.com. TAR score has no relationship or impact from any manufacturers or sales agent websites. Learn more
- BrandKEENBEST

- TAR Score9.0
TAR Score is a ranking system developed by TopAppliancesReviews.com. TAR score has no relationship or impact from any manufacturers or sales agent websites. Learn more
- BrandSUWAJUME

- TAR Score9.0
TAR Score is a ranking system developed by TopAppliancesReviews.com. TAR score has no relationship or impact from any manufacturers or sales agent websites. Learn more
- BrandHMPLL
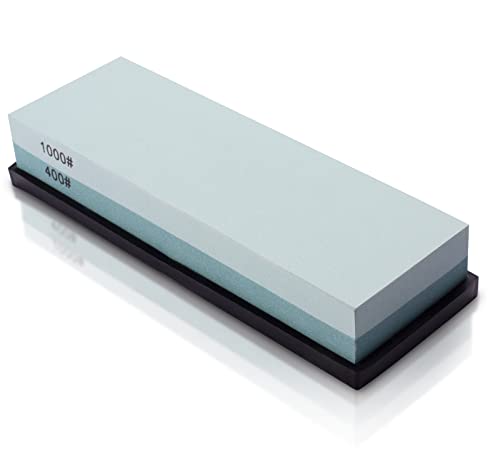
- TAR Score9.0
TAR Score is a ranking system developed by TopAppliancesReviews.com. TAR score has no relationship or impact from any manufacturers or sales agent websites. Learn more
- BrandMIDO Professional Abrasive

- TAR Score9.0
TAR Score is a ranking system developed by TopAppliancesReviews.com. TAR score has no relationship or impact from any manufacturers or sales agent websites. Learn more
- BrandBABOSTOW

- TAR Score8.4
TAR Score is a ranking system developed by TopAppliancesReviews.com. TAR score has no relationship or impact from any manufacturers or sales agent websites. Learn more
- BrandCUISINEBEATS
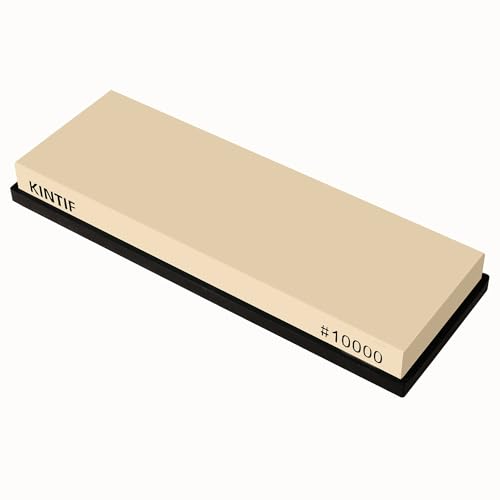
- TAR Score7.6
TAR Score is a ranking system developed by TopAppliancesReviews.com. TAR score has no relationship or impact from any manufacturers or sales agent websites. Learn more
- BrandKINTIF
Last update on 2026-10-01 / Affiliate links / Images, Product Titles, and Product Highlights from Amazon Product Advertising API
FAQs
Do you soak the stone in water or use oil?
Waterstones use only clean tap water, while traditional oilstones require mineral honing oil. Never apply oil to a waterstone. Oil saturates the porous structure, prevents water from penetrating, and ruins the abrasive action. Check your stone packaging to confirm whether it requires a water soak or honing oil.
How do you check for a burr safely?
Never slide your thumb lengthwise down the cutting edge. Instead, place the dry pad of your thumb flat against the side of the blade near the spine. Stroke gently downward across the bevel and off the edge into open air. If you feel a rough, faint wire ridge catching your skin, the burr has formed.
How many strokes does each side need?
There is no fixed stroke count because blade dullness and steel hardness vary. Most moderately dull kitchen knives require roughly 30 to 50 strokes per side on a 1000-grit stone, worked in sets of 10 to 15 per section. Routine touch-ups on a fine stone might only take 10 to 15 alternating passes total.
Can a whetstone permanently ruin a kitchen knife?
A whetstone will not permanently destroy a knife, but inconsistent hand angles can scratch the blade face or round over the cutting edge. Those surface scratches are cosmetic and can be polished out, and a rounded bevel can be reshaped on coarse grit. Work slowly, lock your wrists, and use light pressure to protect your blade.


Top Rated Best Quality Range Hoods: 2026 Expert Picks

The 12 Best Small Solar Generators 2026

10 Best Quality Semi Automatic Washing Machine of 2026 For Leak-Free Laundry

11 Best Small Washer Machine of 2026 For Everyday Laundry

12 Best Vibration Pads For Washing Machine of 2026 To Stop Walking and Shaking

11 Best Selling Front Load Washing Machine of 2026 For Quiet Odor-Free Laundry

11 Best Washing Machine For King Size Bedding of 2026 To Prevent Cycle Errors

10 Best Small Front Loader Washing Machine of 2026 For Tight Closets






