
How to Use a Whetstone to Sharpen a Dull Knife

Sharpening on a whetstone comes down to sliding the blade across a wet block at a steady tilt until a tiny rough lip of metal forms along the edge. The exact tilt you hold depends on the shape of your knife. Once that thin metal ridge appears, you flip the blade, repeat the smooth passes, and finish on the finer side to polish the steel. The motion quickly becomes second nature once your hands find the rhythm.
Japanese cutlery needs a narrow 15-degree angle, while sturdier Western chef knives sit closer to 20 degrees. Your stone type matters too, since water blocks need a full soak beforehand while oil stones just take a quick coat of oil. If the steel has small nicks, starting on a coarse grit fixes the damage before the fine side takes over. Here is how to steady your hands and restore clean cutting sharpness step by step.
Soaking Your Stone and Setting Up a Stable Base
Your sharpening surface needs proper lubrication before metal touches stone. Most kitchen whetstones are water stones, which require water rather than oil. Submerge your stone in a bowl of clean, room-temperature water. Watch for tiny air bubbles rising to the top. Once the bubbling stops, usually after ten to fifteen minutes, the stone has absorbed enough water. If you own an oil stone made of natural Arkansas stone or silicon carbide meant for oil, never soak it in water. Coat the surface with a few drops of food-safe mineral oil instead.
A sliding stone ruins your angle and risks cuts. Place your stone inside a rubber or silicone sleeve to catch water and prevent sliding. Set that sleeve into a wooden base, or lay the stone on a damp kitchen towel folded flat on your counter. Push against the stone with your palm to verify it stays put. A firm base protects your countertop and keeps your sharpening strokes steady.
Finding and Holding the Correct Sharpening Angle
A sharp knife requires a consistent bevel. The bevel is the angled cutting slope leading down to the edge. Changing your angle with every stroke rounds off that slope and leaves it dull. Kitchen knives generally fall into two styles. Thin slicing blades, such as those in high-carbon Japanese chef knife sets, need a steep 15-degree slicing edge per side. Everyday utility knives, like blades in German high-carbon steel knife sets, require a 20-degree utility edge per side to resist chipping against hard boards.
You can find your angle without special tools. Set the blade straight up on the stone at a 90-degree angle. Tilt it halfway down to 45 degrees, then cut that space in half to reach roughly 22 degrees. Lower the spine just slightly for a 20-degree German edge, or drop it a bit more for a 15-degree Japanese edge. For an eight-inch chef knife, resting the spine on two stacked pennies matches a 15-degree tilt.
Keep your wrist completely rigid. The sharpening movement must come from your elbows and shoulders. Treat your wrist and forearm as one locked unit throughout each stroke.
Step-by-Step Guide to Sharpening the Blade
Sharpening requires controlled strokes across the coarse side of your stone. Follow these numbered steps to restore the edge:
- Place the blade heel across the coarse grit side: Grit is the roughness rating of the stone, and starting around 400 to 1000 grit removes blunt steel quickly to shape a fresh edge.
- Lock your wrist at your chosen angle: A locked wrist keeps the bevel flat against the abrasive surface rather than rounding into a blunt curve.
- Rest two fingertips of your guide hand near the edge: Gentle fingertip pressure over the contact point keeps the cutting bevel flat on the stone.
- Sweep the blade across the stone from heel to tip: Moving in a smooth curve guarantees that the heel, curved belly, and tip receive equal grinding.
- Press forward and ease off on the pull stroke: The stone grinds steel on the forward push, while easing pressure on the return prevents stone gouging.
- Splash water on the stone whenever it dries: Water blends with loose particles to form a muddy slurry that lubricates the blade and clears away ground metal.
- Repeat ten to fifteen strokes per section: Working across each section ensures even steel removal from heel to tip.
How to Check for the Burr Before Switching Sides
Never flip your knife until you feel a burr. A burr is the tiny rough metal lip (a microscopic wire edge that folds over to the opposite side) created when you grind past the old edge. Without a burr, the two sides have not met at a sharp point. Check for it with these steps:
- Rinse and wipe the blade dry: Washing away stone slurry lets you feel the bare steel edge cleanly.
- Place your dry thumb pad on the upward-facing side: Touch the side opposite the one that just rubbed against the stone.
- Slide your thumb from the spine outward past the edge: Moving across the edge catches the rough wire lip, while sliding lengthwise could cut you.
- Confirm the catch along the full length: Verify that the rough lip runs continuously from heel to tip.
- Rework smooth sections before flipping: If any spot feels smooth, grind that section for five more strokes until the wire lip appears.
Polishing the Edge and Removing the Wire Burr
A coarse stone leaves tiny saw-like teeth along the edge. Moving to a fine finishing stone smooths those scratches and removes the fragile wire burr. Complete these steps to finish:
- Flip the stone to the fine grit side: A fine grit rating between 3000 and 6000 polishes rough grind marks into a smooth slicing edge.
- Match the exact angle used on the coarse side: Using the identical angle refines the slope without forming an unwanted secondary bevel.
- Make five light sweeping strokes on the first side: Gentle pressure polishes the steel without rolling a new heavy burr.
- Flip and make five matching strokes on the other side: Equal strokes keep the cutting apex centered along the blade.
- Alternate single light passes from side to side: Alternating single strokes weakens the tiny wire lip until it breaks free.
- Strop the edge across clean leather or cardboard: A strop is a leather strip used for final edge smoothing, and trailing the blade backward across it wipes away leftover foil fragments.
Common Beginner Sharpening Mistakes to Avoid
Most sharpening problems stem from small hand errors. Watch out for these common mistakes while you work:
- Rocking your wrist during passes: Changing your tilt mid-stroke rounds off the cutting slope and ruins sharpness.
- Pushing down with excessive force: Heavy pressure gouges the stone surface, scratches the blade sides, and creates uneven bevels.
- Working on a dry stone: Dry grinding causes heat friction and clogs the stone surface with trapped metal dust.
- Lifting the handle too high at the tip: Raising your hand too far when reaching the curve flattens and blunts the delicate point.
- Flipping the knife before feeling a burr: Switching sides on stroke counts alone leaves dull spots where the bevels fail to meet.
What to Look for in a Home Sharpening Stone Setup
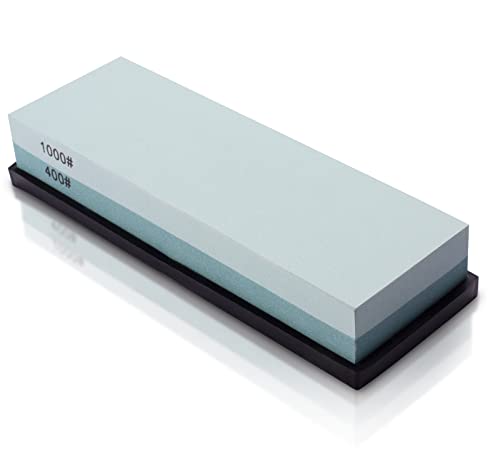
A reliable home sharpening setup focuses on balanced grits and non-slip stability. A dual-grit combination stone works best for home cooks. A medium-coarse side around 400 to 1000 grit reshapes dull edges and fixes small nicks, while a fine side around 3000 to 6000 grit polishes the edge for clean food prep.
Stability is equally important for safety. Look for stones with a snug silicone holder seated in a heavy wooden base with rubber feet. This design stops the stone from shifting on wet granite or laminate counters. If you worry about keeping a steady hand, check for a set with a clip-on angle guide. An angle guide attaches to the blade spine to keep the angle fixed while you build muscle memory.

- TAR Score9.4
TAR Score is a ranking system developed by TopAppliancesReviews.com. TAR score has no relationship or impact from any manufacturers or sales agent websites. Learn more
- BrandLeking

- TAR Score9.4
TAR Score is a ranking system developed by TopAppliancesReviews.com. TAR score has no relationship or impact from any manufacturers or sales agent websites. Learn more
- BrandBABOSTOW

- TAR Score9.2
TAR Score is a ranking system developed by TopAppliancesReviews.com. TAR score has no relationship or impact from any manufacturers or sales agent websites. Learn more
- BrandIntelitopia

- TAR Score9.2
TAR Score is a ranking system developed by TopAppliancesReviews.com. TAR score has no relationship or impact from any manufacturers or sales agent websites. Learn more
- BrandSharp Pebble

- TAR Score9.2
TAR Score is a ranking system developed by TopAppliancesReviews.com. TAR score has no relationship or impact from any manufacturers or sales agent websites. Learn more
- Brandryerum

- TAR Score9.0
TAR Score is a ranking system developed by TopAppliancesReviews.com. TAR score has no relationship or impact from any manufacturers or sales agent websites. Learn more
- BrandHMPLL
- TAR Score9.0
TAR Score is a ranking system developed by TopAppliancesReviews.com. TAR score has no relationship or impact from any manufacturers or sales agent websites. Learn more
- BrandMIDO Professional Abrasive

- TAR Score9.0
TAR Score is a ranking system developed by TopAppliancesReviews.com. TAR score has no relationship or impact from any manufacturers or sales agent websites. Learn more
- BrandWhetstone Cutlery
Last update on 2026-10-01 / Affiliate links / Images, Product Titles, and Product Highlights from Amazon Product Advertising API
FAQs
How do I know if my water stone needs soaking or just a splash of water?
Standard water stones are porous and must soak in water for ten to fifteen minutes until air bubbles stop rising. Dense splash-and-go stones do not absorb water and only need surface wetting. To check your stone, place a few drops of water on the dry surface. If the water absorbs within seconds, soak it fully. If the water beads on top, a quick splash is enough.
How can I check if my knife is sharp without cutting myself?
Avoid running your bare finger along the edge. Instead, hold a sheet of scrap paper by one corner and slice downward from the top edge. A sharp knife cuts cleanly through the paper with light pressure and zero tearing. You can also rest the blade on a ripe tomato. A sharp edge cuts through the skin under its own weight without flattening the fruit.
Can I sharpen a serrated bread knife on a flat whetstone?
Flat whetstones cannot reach inside the curved teeth of a serrated blade. Rubbing serrations on a flat stone grinds off the points and ruins the knife. Use a round ceramic or diamond sharpening rod that fits the size of the serration curves instead. You can only use a flat stone to make one or two flat passes on the smooth back side to remove loose burrs.
How often should kitchen knives be sharpened on a whetstone?
Most home cooks only need a whetstone two to four times a year. Using a smooth honing steel between stone sessions straightens the edge without grinding metal away. When your knife begins sliding off slippery onion skins, bruising herbs, or requiring heavy downward pressure to slice a tomato, the blade needs sharpening on the stone.


Top Rated Best Quality Range Hoods: 2026 Expert Picks

The 12 Best Small Solar Generators 2026

10 Best Quality Semi Automatic Washing Machine of 2026 For Leak-Free Laundry

11 Best Small Washer Machine of 2026 For Everyday Laundry

12 Best Vibration Pads For Washing Machine of 2026 To Stop Walking and Shaking

11 Best Selling Front Load Washing Machine of 2026 For Quiet Odor-Free Laundry

11 Best Washing Machine For King Size Bedding of 2026 To Prevent Cycle Errors

10 Best Small Front Loader Washing Machine of 2026 For Tight Closets






