How to Use a Whetstone Knife Sharpener at the Right Angle

Soak the stone and hold one angle. Submerge the block in water for several minutes, set it on a damp towel, and glide the blade heel to tip across the surface. Keep your hands relaxed but steady at a gentle tilt, about the height of two stacked pennies. Continue until you feel a tiny raised metal lip along the opposite side, which signals it is time to flip the knife over.
The exact routine shifts with your gear. Traditional water stones need a full soak, while diamond plates only need a splash. Slender Japanese blades require a slightly flatter tilt than sturdier Western kitchen knives. Very dull blades also need a coarse grit (the roughness rating of the stone) before moving to a fine polishing surface. Here is how to prepare your workspace, hold the blade securely, and sharpen each edge with confidence.
Prepping Your Whetstone and Workspace Before You Start
Sharpening a knife works best when your stone stays firmly in place and holds enough water to float away metal shavings. A loose stone slips across the counter, which changes your cutting angle and risks nicking your fingers. Taking five minutes to set up your station makes the entire process calm, predictable, and safe.
Traditional water stones are porous blocks of bonded abrasive material. They absorb liquid like a hard sponge, so they need a full water bath before steel ever touches them. Diamond plates and splash-and-go ceramic stones do not need soaking, but classic water stones will drink water rapidly if you start dry.
Work through this checklist to prepare your bench before sharpening:
- Submerge the stone in clean water: Place your coarse and medium stones in a bowl or tray of cool tap water for 5 to 10 minutes. Watch the surface. When the stream of air bubbles stops rising, the stone is fully saturated.
- Anchor your sharpening base: Set a rubber stone holder or a damp kitchen towel directly on a flat, solid countertop. Place the stone into its base with the coarse grit (the lower number) facing up. Press down on the edges to confirm the stone does not rock or slide.
- Keep extra water nearby: Fill a small squeeze bottle, spray bottle, or water cup and keep it within arm's reach. Your stone will slowly dry out while you work, requiring a quick splash every few minutes.
- Prepare a clean cotton rag: Set a folded kitchen towel next to the stone. You will need to wipe metal dust and water paste off your blade repeatedly to check your progress.
- Orient your body comfortably: Stand square to the counter with your feet shoulder-width apart. Set the stone perpendicular or slightly angled to your torso so your elbows can move smoothly without bumping your ribs.
How to Find and Hold the Correct Blade Angle
The secret to a sharp knife is not muscle, but consistency. When you sharpen, you are reshaping the bevel, which is the slanted cutting surface of the blade that tapers down to the sharp edge. If your hands wobble up and down with every pass, you round off that bevel and leave the knife blunt.
Different knives require different edge slopes. Sturdy kitchen knives, like those found in German high-carbon steel premium knife block sets, typically take a 20-degree angle on each side. That broader slope supports heavy chopping through squash, carrots, and poultry joints. Thinner blades, like fine Japanese slicers, perform better at a steep 15-degree slicing edge per side, which glides through onions and fish with minimal resistance.
You can find your target angle easily without technical measuring tools. Rest the knife blade upright on the stone at a 90-degree angle, with the sharp edge down and the spine pointing to the ceiling. Tilt the blade halfway toward the stone to find 45 degrees. Tilt it halfway again toward the stone surface to reach roughly 22.5 degrees. Lower the spine just a hair further, and you are right at 20 degrees. For a 15-degree edge, lower it slightly more, about the height of two stacked quarters under the spine of an average chef knife.
To lock that angle in place, rest the thumb of your dominant hand on the flat face of the blade, with your index finger extended along the spine. Use your other hand to place two or three fingertips flat against the face of the blade near the cutting edge. Keep your wrists locked straight. Move your blade across the stone using your elbows and shoulders rather than bending your wrists. That locks your hands at a constant height above the stone.
Step-by-Step: Sharpening the Blade from Heel to Tip
Once your stone is wet and your hands are positioned, you are ready to reshape the dull edge. Work in deliberate, smooth motions. Count your passes or work in small sections so you remove an equal amount of steel along the entire length of the blade.
-
Align the heel of the blade across the coarse stone.
Set the rear corner of the blade, nearest the handle, flat on the wet coarse grit at your chosen 15 to 20-degree slant. Starting at the heel establishes a clean baseline before you travel along the trickier curved sections of the edge.
-
Push the blade diagonally across the stone surface.
Sweep the knife forward and slightly across the stone, moving from the heel out toward the middle belly of the blade. A diagonal sliding path uses the full length of the stone and grinds the steel evenly across the cutting bevel.
-
Apply firm, moderate pressure only on the forward push.
Press down with your fingertips as the cutting edge moves forward into the stone, then release the downward pressure as you pull the blade back. Pushing hard on the return stroke can roll the soft edge backward or gouge the surface of your water stone.
-
Lift your elbow slightly as you reach the curved tip.
When your sharpening stroke moves past the straight belly toward the tip, raise your knife handle slightly off the stone while keeping the same bevel tilt. Raising the handle ensures the curved sweep of the tip makes full contact with the flat stone instead of floating in the air.
-
Let the muddy paste build up on the stone.
As you grind, a gray mud called slurry will form from loose water and stone grit. Add a few drops of clean water if the stone turns sticky, but do not wipe this mud away. This muddy water paste carries loose abrasive particles that actively help hone and smooth the steel.
-
Repeat for 10 to 15 smooth passes along the first side.
Work the blade in overlapping sections from heel to tip until you have covered every inch of that side with equal strokes. Repeating uniform strokes along one side guarantees you grind the steel down to a single continuous plane.
Feeling for the Burr to Know When You Are Done
The biggest question beginners face is knowing when to stop sharpening the first side and flip the knife over. If you stop too early, you leave a flat, dull spot. If you grind too long, you waste good blade steel. The physical sign that tells you to switch is the burr.
A burr is the tiny curled metal lip on the opposite edge that forms when you grind away enough steel from the bevel to reach the apex. As the two sides of the edge meet, the excess metal folds over away from the stone. You cannot always see it with your eyes, but you can easily feel it with your fingertips.
To check for the burr, take the knife off the stone and wipe the blade clean with your damp rag. Lay the blade flat against your palm with the cutting edge pointing away from you. Lightly slide the pad of your thumb from the middle flat part of the blade outward past the cutting edge. Always move your thumb perpendicular to the blade, straight off the edge, never along the sharp length of the knife.
If the edge feels rough, gritty, or catches your skin like a microscopic wire hook along the entire length from heel to tip, the first side is finished. If any spot still feels smooth, put the knife back on the coarse stone and make a few more passes on that specific section. Once you confirm the rough lip runs from heel to tip, flip the knife over and repeat the exact same process on the second side until you push that metal ridge back the other direction.
Polishing the Edge and Caring for Your Stone
After you form and flip the burr on both sides of your coarse stone, your knife is thin, but the edge is rough and toothy. Coarse stones (around 400 grit) remove metal quickly to shape the edge, while medium and fine stones (1000 grit and higher) refine the scratch pattern into a polished, razor-sharp edge that glides effortlessly through delicate ingredients.
Flip your water stone over to the finer grit side, or switch to your finishing stone. Splash it generously with clean water. Repeat your sharpening strokes using the exact same angle you held on the coarse stone, but cut your downward hand pressure in half. The fine stone needs only the weight of the knife and light finger guidance to polish away coarse scratch marks.
To remove the final microscopic burr, finish with alternating single strokes. Make one light pass on the left side, flip the knife, and make one light pass on the right side. Do this five to ten times, lightening your touch with every single pass. This gentle back-and-forth action snaps off the tiny wire edge, leaving a clean, straight cutting apex. If you own fine kitchen tools like Japanese Damascus steel chef knife sets, this final step provides the crisp slicing feel those thin blades were designed to deliver.
Proper tool cleanup preserves both your knife and your whetstone:
-
Wash and dry the knife immediately.
Rinse the blade under warm running water to remove all slurry residue, then dry it completely with a clean towel. Carbon steels will develop rust spots within minutes if left wet on a counter.
-
Rinse the stone under cool tap water.
Rinse away the gray metal paste using your hands or a soft brush without soap. Cleaning the surface prevents metal particles from clogging the open pores of the stone.
-
Air dry the stone thoroughly before storage.
Stand the stone on its side in an open, well-ventilated room for at least 24 to 48 hours. Storing a damp water stone inside a closed plastic case or wooden box traps moisture, which leads to mold growth or causes softer stones to crumble over time.
What to Look for in a Beginner Sharpening Setup
If you are getting started with stone sharpening, keeping your setup simple will save you frustration. You do not need a large collection of specialized stones to achieve professional results at home. A single dual-grit combination water stone gives you everything needed to restore completely dull knives and maintain working kitchen edges.
Look for a combination stone that pairs a coarse grit side with a medium-fine grit side. A 400 grit side works quickly to repair minor edge nicks and reset the cutting angle on neglected knives. A 1000 grit side smooths out those coarse grinding lines, leaving an edge that bites smoothly into tomato skins and crusty bread without slipping.
Stability is critical for beginners. Choose a stone that includes a tight-fitting molded rubber base, or pair your stone with an adjustable rubber sink bridge. The rubber grip isolates the stone from table vibrations and stops sliding on slick stone or laminate counters. If you struggle to feel the correct slant with your bare hands, pick up an inexpensive clip-on sharpening angle guide. These small plastic wedges slide onto the spine of your blade, maintaining an exact, steady distance above the stone while you build your muscle memory.

- TAR Score9.2
TAR Score is a ranking system developed by TopAppliancesReviews.com. TAR score has no relationship or impact from any manufacturers or sales agent websites. Learn more
- Brandwucgea

- TAR Score9.2
TAR Score is a ranking system developed by TopAppliancesReviews.com. TAR score has no relationship or impact from any manufacturers or sales agent websites. Learn more
- BrandKEENBEST

- TAR Score9.2
TAR Score is a ranking system developed by TopAppliancesReviews.com. TAR score has no relationship or impact from any manufacturers or sales agent websites. Learn more
- BrandIntelitopia

- TAR Score9.2
TAR Score is a ranking system developed by TopAppliancesReviews.com. TAR score has no relationship or impact from any manufacturers or sales agent websites. Learn more
- Brandryerum

- TAR Score9.0
TAR Score is a ranking system developed by TopAppliancesReviews.com. TAR score has no relationship or impact from any manufacturers or sales agent websites. Learn more
- Brandgoodjob
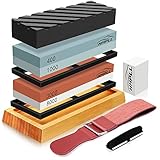
- TAR Score9.0
TAR Score is a ranking system developed by TopAppliancesReviews.com. TAR score has no relationship or impact from any manufacturers or sales agent websites. Learn more
- BrandHMPLL
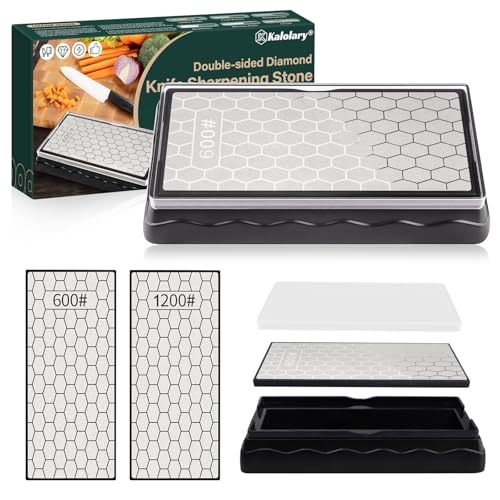
Double-Sided Diamond Sharpening Stone, Kalolary Knife Sharpener Stone Whetstone Honeycomb
View on Amazon- TAR Score8.8
TAR Score is a ranking system developed by TopAppliancesReviews.com. TAR score has no relationship or impact from any manufacturers or sales agent websites. Learn more
- BrandKalolary

- TAR Score8.0
TAR Score is a ranking system developed by TopAppliancesReviews.com. TAR score has no relationship or impact from any manufacturers or sales agent websites. Learn more
- BrandSHARPAL
Last update on 2026-10-01 / Affiliate links / Images, Product Titles, and Product Highlights from Amazon Product Advertising API
FAQs
Do I soak the stone in water or use oil?
Traditional water stones should only be soaked in water, never treated with oil. Mineral oil soaks deep into the porous stone structure and prevents water from penetrating later, permanently clogging the stone surface. If your stone instructions say water stone, use plain tap water.
Should I wipe away the muddy paste on top of the stone?
Leave the muddy paste on the stone while you work. That gray slurry contains water mixed with microscopic abrasive particles that break free from the stone, helping smooth out your blade faster. Only add a few drops of water if the slurry becomes thick, dry, or sticky.
Which grit side should I start on?
Start on the coarse side, usually around 400 grit, if your knife is completely dull, chipped, or has not been sharpened in over a year. If your blade is already relatively sharp and just needs a quick routine touch-up, start directly on the 1000 grit side to avoid unnecessary steel wear.
How often do kitchen knives need whetstone sharpening?
Most home cooks only need to use a whetstone every three to six months for their primary chef knife. Routine edge maintenance between stone sessions can be done with a smooth honing steel, which straightens a rolled edge without removing blade metal.


Top Rated Best Quality Range Hoods: 2026 Expert Picks
The 12 Best Small Solar Generators 2026

10 Best Quality Semi Automatic Washing Machine of 2026 For Leak-Free Laundry

11 Best Small Washer Machine of 2026 For Everyday Laundry

12 Best Vibration Pads For Washing Machine of 2026 To Stop Walking and Shaking

11 Best Selling Front Load Washing Machine of 2026 For Quiet Odor-Free Laundry

11 Best Washing Machine For King Size Bedding of 2026 To Prevent Cycle Errors

10 Best Small Front Loader Washing Machine of 2026 For Tight Closets