
How to Use a Stone Knife Sharpener Safely

Many people believe sharpening on a stone takes years of professional kitchen training to avoid ruining a good knife. In reality, anyone can restore a dull blade by keeping a steady 15 to 20-degree angle and sweeping the edge across a wet block until a tiny ridge forms. Smoothing that fine metal ridge on the finer side gives you back a clean, effortless cut.
The exact steps shift slightly depending on your tools. Water stones need a quick soak first, whereas traditional oil stones call for a few drops of mineral oil to float away metal shavings. Knife style matters as well: thicker Western blades thrive at a sturdier 20-degree tilt, while delicate Japanese knives cut best around 15 degrees. Heavily nicked steel also requires a rougher grit surface to reshape the bevel before polishing. The steps below show how to anchor your workspace and guide each stroke safely from heel to tip.
The Short Version
- Soak and stabilize: Submerge a water stone in clean tap water until air bubbles stop rising, then seat it firmly on a damp cloth or rubber base so it cannot budge while you work.
- Match your bevel: Hold Japanese kitchen blades at roughly 15 degrees per side and Western chef or everyday pocket knives at about 20 degrees per side.
- Form a burr: Slide the blade across the medium-grit side using light, smooth strokes until a tiny rough ridge of bent metal forms along the entire back edge, then repeat the process on the second side.
- Polish and verify: Switch to the fine-grit side to smooth the edge and remove the tiny metal ridge, then test the blade by slicing through a sheet of scrap paper.
Setting Up Your Sharpening Stone and Work Area
Sharpening a knife on a whetstone (a sharpening stone block) is safe and predictable once your work area is properly arranged. Most sharpening mistakes and slipping accidents happen because the stone slides across the counter while the user is applying downward pressure. Setting up a stable, clean space solves this problem before the knife ever touches the abrasive surface.
- Identify your stone lubricant: Check what kind of stone you have before adding any liquid. Water stones, which are often made of aluminum oxide or synthetic corundum, need clean tap water to float away metal shavings. If you have a traditional water stone, submerge it completely in a bowl of room-temperature water for 10 to 15 minutes. Watch the surface; once air bubbles stop floating to the top, the stone is fully saturated. Splash-and-go synthetic stones and diamond plates only need a light spray of water right before use. Natural oil stones require a few drops of mineral honing oil. Never put oil on a water stone, because the oil will soak into the pores and ruin its ability to absorb water.
- Anchor the base to the counter: Place your sharpening block on a flat, solid countertop at a comfortable standing height. If your stone came with a fitted silicone sleeve or a wooden cradle, fit the stone snugly inside. To ensure the base never skids, fold a damp kitchen cloth or wet paper towel flat and place it directly beneath the base. Press down on the top of the stone with your open palm and try to slide it. If it moves even a fraction of an inch, re-wet the towel underneath until the stone stays completely still.
- Position the stone and your water supply: Place the stone pointing straight away from your chest, or angle it slightly toward your dominant hand if that feels more natural for your wrists. Set the stone with its coarse or medium grit facing up. In sharpening, grit refers to the roughness number of the stone surface; lower numbers like 400 or 1000 indicate rougher surfaces that remove steel quickly. Keep a small cup of clean water and a cloth nearby so you can splash fresh moisture across the surface whenever it begins to look dry or pasty.
Finding and Holding the Correct Sharpening Angle
The secret to a sharp knife is holding a consistent angle across every stroke. The bevel is the angled slope ground into the steel that leads down to the cutting edge. When you sharpen, your goal is to rest this bevel flat against the stone so you grind away dull metal without scratching the side of the blade or rounding off the tip.
Different knives need different angles. Thin, delicate blades such as those found on high-carbon Japanese chef knife sets perform best with a steep 15-degree slicing edge per side. This narrow profile glides through raw fish and vegetables with very little friction. Thicker blades, including utility knives, pocket knives, and sturdy German high-carbon steel knife sets, need a 20-degree utility edge per side. That wider angle supports the cutting apex so the steel can chop through hard winter squash or split kindling without chipping.
You do not need fancy measuring tools to find these angles at home. To visualize 20 degrees, hold the knife with the blade standing straight up at a 90-degree right angle to the stone surface. Tilt the knife halfway down toward the stone to find 45 degrees. Cut that gap in half again to reach roughly 22 degrees, and lower the spine just a tiny fraction more. For a 15-degree angle, you can use two standard pocket quarters: stack two quarters flat on the stone, rest the spine of an average chef knife on top of the coins with the cutting edge touching the abrasive, and note that height. Remove the coins and keep the spine at that exact height off the block.
To keep the angle steady, lock your wrist completely. Beginners often wobble their wrists like paintbrushes, which rounds over the edge and makes it duller. Instead, keep your wrist and forearm stiff, and move your upper arms from your shoulders and elbows. This keeps the blade at the same tilt through the entire stroke.
Working the Rough Side to Form a Burr
Sharpening takes place on the coarse or medium side of your stone, typically between 400 and 1000 grit. This stage grinds away fatigued, blunted metal until the two sides of the blade meet cleanly at a sharp point.
- Grip the knife correctly: Grasp the handle firmly with your dominant hand, placing your index finger along the spine of the blade for lateral stability. Place two or three fingertips of your other hand flat against the face of the blade, right above the cutting bevel. Your non-dominant hand guides the pressure and keeps the blade flat against the stone. Always keep your fingertips curled slightly back and well away from the sharp edge.
- Execute smooth, sweeping strokes: Rest the heel of the knife (the rear corner closest to the handle) on the far end of the stone at your chosen angle. Draw the blade backward toward your body while sliding it sideways across the stone in one fluid motion, finishing at the pointed tip just as you reach the near end of the stone. Push forward or pull backward according to what feels comfortable, but apply light, even pressure, about three to four pounds of force, which feels like pressing an apple firmly onto a table. Let the gritty particles of the stone cut the steel; never lean your body weight into the knife.
- Sharpen in sections on long blades: If you are sharpening an eight-inch chef knife on a standard seven-inch stone, break the blade into three zones: the straight heel, the curved belly, and the tip. Give the heel section five to eight steady passes, move your guide fingers to the middle section for the same number of passes, and finish with the curved tip. When working the curved tip, lift your knife handle slightly off the counter so the curved edge stays in full contact with the flat stone.
- Feel for the burr: Continue making passes on the first side until you raise a burr. A burr is the microscopic wire edge or curved sliver of metal that forms on the opposite side during sharpening. It tells you that you have ground away enough metal for the two bevel slopes to meet. To check for it safely, wipe the blade dry on a cloth. Rest your thumb pad flat against the unsharpened side of the blade near the spine, and slide your thumb gently downward and off the edge. If the steel feels rough or catches on your skin like a row of tiny wire whiskers, your burr has formed. Check from the heel all the way to the tip. If one section still feels slick and smooth, give that section a few more passes.
- Flip and repeat: Turn the knife over to sharpen the second side. Match your original tilt, position your guide fingers on the blade face, and make the same number of strokes until you feel the wire edge flip over to the first side.
Polishing the Edge on the Fine Grit Side
Once you have raised a burr along both sides of the blade, the cutting geometry is restored, but the edge is still covered in coarse microscopic scratches. Polishing on a fine-grit stone, usually rated between 3000 and 8000 grit, smooths the metal bevel, removes the rough wire ridge, and leaves an edge that glides effortlessly through food.
- Rinse the equipment: Wash the metal slurry and loose grit off your knife under running water. If you are using a double-sided combination stone, flip it over so the fine polishing surface faces up. Rinse the stone thoroughly so coarse particles from the first step do not scratch your polished bevel. Splash a fresh layer of water across the fine surface.
- Refine the bevel: Place the blade back on the stone at the exact same angle you used before. Begin making smooth, full-length strokes from heel to tip. Cut your downward pressure in half so you are barely pressing at all. Make five to six passes on the first side, flip the knife, and make five to six passes on the second side. The fine grit will hone away the deep scratches left by the coarse stone.
- Remove the wire edge with alternating strokes: To cleanly strip away the remaining burr without folding it back and forth, switch to single alternating strokes. Make one light pass along the left side of the blade, flip the knife over, and make one light pass along the right side. Repeat this alternating pattern five or six times with feather-light touch. This cuts the thin wire edge away completely, leaving a clean, crisp apex.
- Clean and dry the steel: Wash the knife thoroughly with warm water and mild dish soap to remove all stone dust and metal particles. Dry the blade immediately using a clean towel. If you sharpened a blade made of high-carbon steel (a harder metal that stays sharp longer but requires dry wiping and light oiling to prevent rust spots), rub a drop of mineral oil over the blade face before storing it.
How to Safely Check if Your Blade Is Sharp
Never run your finger or thumb along the length of a blade to see if it is sharp. That is the easiest way to suffer a painful, deep slice. Use these simple, hands-off checks instead:
- The paper slice check: Hold a loose sheet of standard printer paper by one corner with your non-dominant hand. Place the heel of your knife against the top edge of the paper and push gently forward and down. A sharp knife will slice cleanly through the paper with a quiet hiss and leave clean, smooth paper edges. If the blade catches, crinkles the paper, or tears it raggedly, you still have a dull spot or a folded wire burr that needs more attention on the stone.
- The tomato skin check: Place the knife edge gently on the surface of a ripe tomato. Without applying any downward force at all, pull the knife backward across the skin. A properly sharpened blade will bite into the slick skin instantly under its own weight and slide into the flesh without crushing the tomato or squirting juice.
- The light reflection check: Stand under a bright overhead ceiling light and look directly down at the cutting edge of your knife with the spine facing your chest. A dull edge has width and flat spots, which catch the overhead light and shine back at you like thin silver threads. A truly sharp edge is microscopic and cannot reflect light; it will look completely dark from heel to tip.
Common Mistakes That Dull or Scratch Blades
If your knife does not feel sharp after working on a stone, one of these common mistakes is usually the culprit:
Lifting the spine too high: If you tilt the knife up too steep, you will grind directly into the delicate cutting point rather than along the bevel slope. This creates a blunt, thick edge that wedges in food rather than slicing cleanly. Conversely, dropping the spine too low causes the flat face of your blade to scrape against the stone, creating ugly scratches across the polished metal.
Rushing without checking for the burr: Flipping the knife before a burr forms along the full length of the edge is the most common reason blades stay dull. If you sharpen the second side before the first side reaches the center line, the two bevels will never meet at a sharp apex. Take your time, feel the opposite side carefully, and do not flip the blade until you feel that rough ridge from heel to tip.
Sharpening on a dry water stone: Letting a water stone dry out creates excessive friction heat and allows ground metal dust to pack tightly into the abrasive pores. This prevents the stone from cutting efficiently and can leave black streaks across the blade. Keep a cup of water at your station and splash a few drops onto the stone whenever the surface loses its wet shine.
What to Look for in a Beginner Sharpening Stone Setup
If you are gathering tools to maintain your kitchen or outdoor blades, choose equipment that builds confidence and prevents counter accidents. A dual-grit combination whetstone is the most practical choice for home use. A block with a 1000-grit medium side handles routine sharpening on dull knives, while a 4000- to 6000-grit fine side provides an ideal polished finish for clean slicing.
Look for sharpening sets that include a sturdy non-slip rubber or silicone shoe that wraps tightly around the stone. Many dependable kits place this rubber shoe inside an elevated wooden or bamboo block with non-skid feet. This elevation keeps your knuckles from scraping against the countertop while you sweep the blade across the stone.
Beginners who worry about hand wobble should also look for setups that include a clip-on plastic angle guide. These small guides snap onto the spine of your knife and rest directly on the stone surface, physically holding the blade at a steady angle while you learn the sweeping stroke. Finally, consider a set that includes a coarse flattening stone. As you use your whetstone, steel wears away the center faster than the edges, creating a shallow dip. Rubbing a flattening stone over the surface once every few months keeps your sharpening block dead flat and your bevels perfectly straight.

- TAR Score9.2
TAR Score is a ranking system developed by TopAppliancesReviews.com. TAR score has no relationship or impact from any manufacturers or sales agent websites. Learn more
- BrandIntelitopia

- TAR Score9.2
TAR Score is a ranking system developed by TopAppliancesReviews.com. TAR score has no relationship or impact from any manufacturers or sales agent websites. Learn more
- BrandHiramWare

- TAR Score9.2
TAR Score is a ranking system developed by TopAppliancesReviews.com. TAR score has no relationship or impact from any manufacturers or sales agent websites. Learn more
- BrandSharp Pebble

- TAR Score9.2
TAR Score is a ranking system developed by TopAppliancesReviews.com. TAR score has no relationship or impact from any manufacturers or sales agent websites. Learn more
- Brandryerum

- TAR Score9.2
TAR Score is a ranking system developed by TopAppliancesReviews.com. TAR score has no relationship or impact from any manufacturers or sales agent websites. Learn more
- BrandSD.TIANPENG

- TAR Score9.2
TAR Score is a ranking system developed by TopAppliancesReviews.com. TAR score has no relationship or impact from any manufacturers or sales agent websites. Learn more
- BrandKEENBEST

- TAR Score9.2
TAR Score is a ranking system developed by TopAppliancesReviews.com. TAR score has no relationship or impact from any manufacturers or sales agent websites. Learn more
- BrandKEENBEST
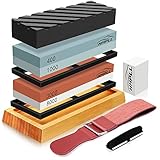
- TAR Score9.0
TAR Score is a ranking system developed by TopAppliancesReviews.com. TAR score has no relationship or impact from any manufacturers or sales agent websites. Learn more
- BrandHMPLL
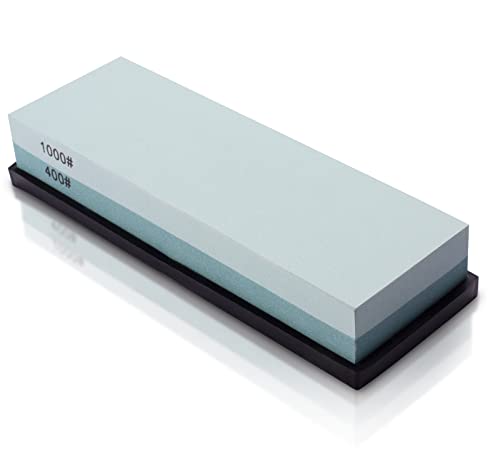
- TAR Score9.0
TAR Score is a ranking system developed by TopAppliancesReviews.com. TAR score has no relationship or impact from any manufacturers or sales agent websites. Learn more
- BrandMIDO Professional Abrasive

- TAR Score8.6
TAR Score is a ranking system developed by TopAppliancesReviews.com. TAR score has no relationship or impact from any manufacturers or sales agent websites. Learn more
- BrandTotety
Last update on 2026-10-24 / Affiliate links / Images, Product Titles, and Product Highlights from Amazon Product Advertising API
FAQs
Do I soak the stone in water or use oil?
Water stones must be soaked in water or splashed with water, while oil stones require mineral honing oil. You should never mix the two lubricants on the same stone, as oil permanently clogs the pores of a water stone. Always check the packaging or manufacturer instructions to confirm whether your block is a soaking water stone or an oil stone.
How do I know when it is time to flip the knife over?
You should only flip the knife after you feel a consistent burr running along the entire opposite side of the blade. Slide your dry thumb pad gently downward and off the back edge to check for that tiny wire ridge from the heel to the tip. If any section still feels smooth, keep working that area before turning the blade over.
How often should I sharpen my kitchen knives on a stone?
Most home cooks only need to sharpen their primary kitchen knives on a whetstone two to three times a year. You can keep the blade cutting smoothly between stone sessions by using a smooth ceramic or steel honing rod every couple of weeks to realign the edge. When the knife begins squishing soft tomatoes or slipping on onion skins even after honing, it is time to bring out the stone.
What should I do if my knife has deep chips or nicks in the edge?
Deep nicks require a very coarse stone, typically around 200 to 400 grit, to grind away enough steel to reset the cutting line past the damaged area. If the chip is deeper than a sixteenth of an inch, reshaping it by hand on a stone will take significant time and effort. In that case, taking the blade to a professional sharpening service with water-cooled grinding equipment is often the safest and fastest solution.


Top Best Quiet Portable Generator Electric Start 2026 - (2026 Updated)

The 10 Best Portable Power Station For Tailgating 2026

10 Best Washing Machine For King Size Comforter of 2026 For Bulky Bedding

11 Best Semi Automatic Washing Machine Under 10000 of 2026 For Apartments and RVs

The Best Concrete Floor Buffer 2026 - Top Choices

Best Cooling Fan with HEPA Filter: Our 2026 Top Picks for Cleaner Air

Best poulan chainsaw 2026 - Reviews & Buying Guides

Value Picks: 10 Vitamix 5300 Best Price of 2026




