
How to Use a Sharpening Stone to Sharpen a Knife

Set the stone on a damp cloth or rubber base so it cannot slide across the counter. A steady surface keeps the blade from wobbling so you can lock a consistent angle. Stroke the steel across the rough side until a tiny ridge of bent metal forms along the back edge. Flip the knife over to repeat the process, then polish the edge on the fine grit to clean away the loose wire.
The exact routine depends on your tools. Waterstones need a quick water soak, while oil stones take a few drops of honing oil. A chipped or badly blunted blade starts on coarse grit, but a knife that is just a bit dull can start on medium grit. Standard kitchen knives also need a wider tilt than thinner Japanese blades. Finding that steady hand is simple once you know what to feel for, and these steps show how to guide each pass.
Soak Your Stone And Lock Down A Non-Slip Work Area
Sharpening a knife works best when your stone stays wet and your workstation stays completely still. If the stone slides across your counter while you push down on a sharp blade, your angle shifts instantly and your hands can slip toward the cutting edge. Taking five minutes to set up your work area prevents scratches on your blade and keeps your fingers safe.
- Submerge your waterstone in cool tap water: Place the stone in a small tub or baking dish filled with water. Let it soak until bubbles stop rising to the surface, which usually takes five to ten minutes. Splash-and-go stones or oil stones do not need this soaking bath, but standard household waterstones require water to float away metal shavings and keep friction heat low.
- Wipe down a flat, solid countertop: Choose a clear counter space at comfortable elbow height. Clear away stray cutting boards, food scraps, or grease so you have plenty of room to move your arms.
- Anchor your sharpening base: Lay a damp kitchen towel or a silicone mat flat on your counter. Set your stone holder on top of the damp cloth. The cloth grips the counter and prevents the base from creeping around during your strokes.
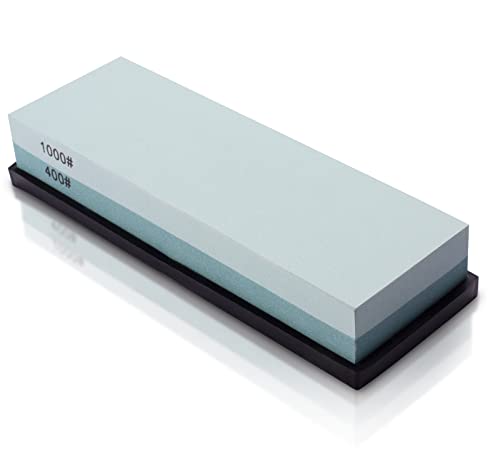
- Position the coarse grit side facing up: Insert the stone into its rubber holder or wooden base with the lower number side facing up. Grit refers to the roughness rating of the stone surface. A coarse surface between 240 and 400 grit reshapes dull metal, while a medium surface around 1000 grit sharpens normal household wear.
- Keep a splash bowl nearby: Fill a small cup or bowl with clean water and set it within arm reach. As you work, the stone surface will dry out, so you will need to flick water onto it with your fingers every couple of minutes.
Find Your Blade Angle By Matching The Slanted Edge
Holding a consistent angle is the most critical part of knife sharpening. Every kitchen knife has a bevel, which is the slanted slope that meets at the bottom to form the cutting edge. If you lift the blade too high, you grind into the delicate cutting edge and round it over. If you lay the knife too flat, you scratch the sides of your blade without ever touching the cutting apex.
Most kitchen blades use one of two standard angles. Heavy kitchen blades, such as sturdy German high-carbon steel knives, usually need a 20-degree angle on each side to withstand hard cutting boards and tough root vegetables. Thinner slicing tools, such as slender high-carbon Japanese kitchen knives, perform best with a steeper 15-degree angle per side for delicate vegetable slices and soft meats.
You can find your angle quickly with a simple visual check. Hold your knife straight up and down on the stone at a 90-degree right angle. Tilt the knife halfway down toward the stone to find 45 degrees. Tilt that remaining space halfway down again to reach roughly 22 degrees. Lower the spine just a tiny hair further, and you are resting right at the 20-degree mark. If you need a 15-degree angle, lower the spine until the gap between the stone and the spine is about the thickness of two quarters stacked together.
If you feel unsure, use the black marker trick. Color the narrow cutting bevel with a black dry-erase marker. Place the knife on the stone at what you think is the right tilt, and take two light strokes. Look at the bevel under a good light. If the ink is rubbed off in the middle of the bevel, your angle matches the factory edge. If the ink only scraped away at the very top of the slope, you are holding the knife too flat. If the ink only rubbed off at the very edge tip, you are holding the blade too steep.
Glide The Edge From Heel To Tip With Steady Hand Pressure
The secret to keeping your angle steady is locking your wrists. Do not flick your hands or roll your wrists as you push the blade across the stone. Instead, keep your wrists firm and move your whole upper body from your shoulders and elbows.
- Set your hand grip: Grip the handle with your dominant hand. Rest your index finger along the spine or on the flat side of the blade to give yourself better control over the tilt.
- Place your guide fingers: Place two or three fingertips of your non-dominant hand flat on the side of the blade, right above the cutting edge near the heel. The heel is the back corner of the blade closest to the handle. These guide fingers apply gentle downward pressure directly onto the sharpening zone.
- Push across the stone: Start with the heel resting on the far end of the stone. Push the blade forward and pull it slightly across the stone toward your body in one smooth, sweeping diagonal arc. Apply moderate, even pressure as you push forward. Think of using the same pressure you would use to scrub a stubborn spot off a countertop.
- Release pressure on the return: As you draw the knife back to reset for the next stroke, release the downward pressure. Let the blade skim lightly over the surface on the way back so you do not dull the edge you just ground.
- Work the blade in zones: A long chef knife cannot touch the stone all at once. Divide your blade mentally into three sections: the heel, the middle curve, and the tip. Take five to ten strokes on the heel section. Then slide your guide fingers to the middle section and repeat the strokes. Finally, move your guide fingers near the tip. When you reach the curved tip, lift your knife handle up slightly by half an inch so the curved belly stays flat against the stone.
During these strokes, you will notice a dark, muddy film forming across the stone. This film is slurry, which is the wet muddy paste of stone grit, water, and metal dust that builds up during sharpening. Do not wash this paste away. The loose grit in the slurry helps smooth the steel and speeds up the sharpening process. Only add a few drops of water when the surface starts to feel dry or sticky.
Feel Along The Spine For The Rough Wire Ridge
Many beginners make the mistake of counting strokes and flipping the knife too early. Counting strokes does not tell you if the knife is sharp. You only flip the knife when you can feel a burr, which is the microscopic wire edge or curved sliver of metal that forms on the opposite side during sharpening.
As your stone grinds away dull steel on the side facing down, the very peak of the edge becomes paper-thin. Eventually, that thin strip of steel folds over away from the stone and curls toward the top side of your blade. Feeling this bent metal ridge is your physical proof that you have ground metal all the way to the very edge.
Check for the ridge safely using your thumb. Wipe the wet slurry off the blade with a clean towel. Never run your finger along the length of the blade, because any slip will slice your skin. Instead, rest the fleshy pad of your thumb flat on the side of the blade facing up. Gently slide your thumb outward, moving from the spine straight off the cutting edge into thin air.
If you have worked the steel enough, you will feel a distinct, scratchy lip catching against the ridges of your thumb pad. It feels like rough sandpaper or a tiny wire hem running along the steel. Check this lip at the heel, in the middle, and out at the point. If the ridge is present at the heel but missing near the tip, set the knife back on the stone and take a few more passes on the tip. Once that wire ridge runs from one end of the blade to the other, flip the knife over and sharpen the second side with the exact same angle and stroke pattern until the wire ridge curls back the other way.
Smooth Away The Wire Edge On Your Fine Grit Surface
Once you raise and flip the wire ridge on your coarse stone, your knife has a fresh, sharp shape. However, the edge is still jagged and rough from the coarse stone minerals. To turn that rough edge into a smooth, lasting cutting tool, you need to switch to your fine grit surface.
- Rinse your blade and workstation: Wash the knife thoroughly under running water and wipe your hands. Coarse grit particles can easily transfer onto your fine stone. A single grain of coarse grit left on a fine stone will carve deep scratches into your polished edge.
- Flip to your fine grit stone: Turn your stone block over so the higher grit number faces upward. A 1000-grit side works well for general kitchen maintenance, while a 3000-grit to 6000-grit surface gives a razor-like polish. Splash clean water across the fine surface.
- Use feather-light pressure: Set your knife back on the stone at the exact same angle you used before. Take light, flowing strokes from heel to tip. Do not push down hard. Use only the weight of the knife and the light guidance of your fingers. Heavy pressure on fine grit will crush and warp the thin wire edge instead of polishing it away.
- Alternate your strokes: Take four strokes on the first side, then flip the knife and take four strokes on the second side. Next, take two strokes on each side. Finish with single alternating passes: one stroke on side A, flip, one stroke on side B. This back-and-forth motion weakens the wire ridge at its base until it breaks off completely.
- Strop the blade clean: Finish by pulling the blade backward across the stone or across a leather strop. Instead of pushing the edge forward into the stone, drag the blade spine-first away from the edge. This trailing stroke sweeps away any microscopic metal whiskers left clinging to the steel.
Check Your Edge With Simple Paper Slices And Light Tests
Before you take your knife back to the cutting board, run a few quick checks to confirm that the edge is truly sharp and even along its whole length.
- The sheet paper test: Hold a piece of ordinary printer paper by the top corner so it hangs loose in the air. Place the heel of your knife against the top edge of the paper and push gently forward and down. A sharp blade will glide silently through the sheet all the way to the tip without tearing, catching, or crumpling the paper. If the knife rips the paper in one specific spot, that section of your blade still has a tiny burr or flat spot that needs a few more passes on the fine stone.
- The overhead light reflection check: Stand directly under a bright ceiling bulb or kitchen lamp. Turn the knife so the cutting edge points straight up toward the light bulb. Look directly down the thin line of the edge. A dull blade or rolled spot will catch the light and shine like a bright, glittering white thread. A properly sharpened edge is so thin that it cannot reflect light at all, appearing completely invisible and dark under the lamp.
- The tomato skin grip check: Set a ripe, round tomato on your cutting board. Rest the belly of your knife against the slick outer skin without pushing down with your hand. Gently draw the knife backward toward yourself using only the knife's natural weight. If the edge immediately bites into the skin and creates a clean slice without bruising the flesh underneath, your edge geometry is set properly.
Pick A Dual-Grit Stone Kit With A Grippy Base
If you are gathering tools to sharpen your knives at home, a dual-grit combination waterstone provides the most practical and budget-friendly setup. These combination blocks bond two different grits together in one solid piece, giving you a rough shaping grit on one side and a fine finishing grit on the reverse. For normal kitchen use, look for a stone that pairs a coarse grit between 400 and 1000 with a polishing side between 3000 and 8000.
Make sure any sharpening stone you choose comes with a solid non-slip base. A molded rubber or silicone shoe that wraps tightly around the stone keeps the abrasive material from shifting while you work. Many kits place this silicone holder inside a heavy bamboo or wood platform fitted with rubber feet, which gives your knuckles extra clearance above the countertop during sweeping strokes.
Beginners who feel nervous about holding a steady hand will also benefit from a clip-on plastic angle guide. These small guides snap right over the spine of your knife and rest on the stone while you glide, holding the blade at a fixed 15-degree or 20-degree tilt. Finally, look for a kit that includes a small, coarse flattening stone. Waterstones wear down faster in the middle than at the edges, and rubbing a flattening stone across the surface every few months keeps your sharpening block flat and accurate for years of safe kitchen prep.

- TAR Score9.2
TAR Score is a ranking system developed by TopAppliancesReviews.com. TAR score has no relationship or impact from any manufacturers or sales agent websites. Learn more
- BrandKEENBEST

- TAR Score9.2
TAR Score is a ranking system developed by TopAppliancesReviews.com. TAR score has no relationship or impact from any manufacturers or sales agent websites. Learn more
- BrandSharp Pebble

- TAR Score9.2
TAR Score is a ranking system developed by TopAppliancesReviews.com. TAR score has no relationship or impact from any manufacturers or sales agent websites. Learn more
- BrandIntelitopia

- TAR Score9.2
TAR Score is a ranking system developed by TopAppliancesReviews.com. TAR score has no relationship or impact from any manufacturers or sales agent websites. Learn more
- BrandSD.TIANPENG

- TAR Score9.2
TAR Score is a ranking system developed by TopAppliancesReviews.com. TAR score has no relationship or impact from any manufacturers or sales agent websites. Learn more
- BrandHiramWare

- TAR Score9.2
TAR Score is a ranking system developed by TopAppliancesReviews.com. TAR score has no relationship or impact from any manufacturers or sales agent websites. Learn more
- BrandWANGSHIQI
- TAR Score9.0
TAR Score is a ranking system developed by TopAppliancesReviews.com. TAR score has no relationship or impact from any manufacturers or sales agent websites. Learn more
- BrandMIDO Professional Abrasive

- TAR Score9.0
TAR Score is a ranking system developed by TopAppliancesReviews.com. TAR score has no relationship or impact from any manufacturers or sales agent websites. Learn more
- BrandHMPLL

- TAR Score9.0
TAR Score is a ranking system developed by TopAppliancesReviews.com. TAR score has no relationship or impact from any manufacturers or sales agent websites. Learn more
- Brandryerum

- TAR Score9.0
TAR Score is a ranking system developed by TopAppliancesReviews.com. TAR score has no relationship or impact from any manufacturers or sales agent websites. Learn more
- BrandBABOSTOW
Last update on 2026-09-30 / Affiliate links / Images, Product Titles, and Product Highlights from Amazon Product Advertising API
FAQs
Do you push or pull a knife on a sharpening stone?
You can push or pull a knife across a stone, but you should only apply downward pressure when pushing the cutting edge forward. Pushing into the stone cuts away dull metal cleanly along the bevel without rolling the steel. As you pull the blade back to reset your position, ease off your hand pressure and let the knife skim lightly over the surface.
Can you ruin a knife on a whetstone?
You cannot easily destroy a knife on a stone, but you can scratch the sides of the blade or create an uneven edge if your wrist wobbles. Holding an inconsistent angle simply rounds off the cutting bevel, making the knife feel duller than when you started. If this happens, you can easily repair the edge by resting the stone on a firm base and grinding a fresh angle with slow, steady strokes.
How often should you sharpen your kitchen knives on a stone?
Most home cooks only need to sharpen their primary chef knives on a whetstone two to three times a year. In between full stone sessions, you can maintain the edge by running the blade along a smooth honing steel or leather strop to straighten minor bends. If your blade starts squishing ripe tomatoes or slipping on onion skins even after honing, it is time to bring out the stone.
Should you wash off the muddy paste while sharpening?
No, you should leave the muddy paste on the stone while you work. That dark slurry consists of worn abrasive particles and water, which cushions your strokes and helps grind the steel more evenly. Only add a few drops of clean water when the surface starts to feel dry or sticky, and rinse the stone clean only after you finish sharpening.


Top Rated Best Quality Range Hoods: 2026 Expert Picks

The 12 Best Small Solar Generators 2026

10 Best Quality Semi Automatic Washing Machine of 2026 For Leak-Free Laundry

11 Best Small Washer Machine of 2026 For Everyday Laundry

12 Best Vibration Pads For Washing Machine of 2026 To Stop Walking and Shaking

11 Best Selling Front Load Washing Machine of 2026 For Quiet Odor-Free Laundry

11 Best Washing Machine For King Size Bedding of 2026 To Prevent Cycle Errors

10 Best Small Front Loader Washing Machine of 2026 For Tight Closets






