
How to Use a Rod Knife Sharpener Safely

Plant the rod tip straight down. Resting the tip on a cutting board gives complete control while you glide the blade downward from the heel (the back edge by the handle) to the tip at a light angle. Alternating sides with smooth strokes resets the edge in seconds without the danger of slipping toward your fingers.
A few details shape the exact motion. A standard steel rod simply straightens a bent edge, while rough ceramic or diamond rods grind away dull metal to form a fresh edge. Sturdy Western chef knives need a wider 20-degree tilt, but delicate Asian blades call for a narrower 15-degree slant. Here is the calm, step-by-step way to set your stance and clean up your edge safely.
The Short Version
- Anchor the rod tip down: Rest the tip firmly on a damp cloth over a cutting board to stop it from slipping while you work.
- Match your blade angle: Tilt Western kitchen knives out to roughly a 20-degree angle, and tilt Japanese blades to a narrower 15-degree angle against the rod.
- Glide from heel to tip: Place the heel against the top of the rod and draw the blade down and back toward you with gentle pressure.
- Alternate sides evenly: Make four to six light strokes per side to straighten the bent edge without grinding away metal.
Steel Versus Diamond: Does Your Rod Straighten or Sharpen?
Many cooks call every rod in a knife block a sharpener, but plain metal rods do not actually sharpen blades. A standard metal rod performs honing, which means straightening a bent edge without shaving metal. When you chop vegetables or slice meat, the razor-thin cutting edge bends slightly out of line. The metal is still there, but the curled edge cannot bite into food cleanly. Swiping the blade against a smooth or ribbed steel pushes that bent edge straight again.
An abrasive rod works differently. An abrasive surface is a rough texture that grinds away metal to form a fresh cutting bevel, which is the angled cutting edge of the knife. Rods coated in diamond grit or made from ceramic act like files. They shave off fine particles of steel to rebuild an edge that has gone blunt.
Knowing which tool you own tells you what to expect. If your knife feels sluggish on tomato skin, a steel rod straightens it in seconds. If the blade has visible nicks or has not cut cleanly in months, a smooth steel cannot fix it. You will need an abrasive diamond rod or bench stone to grind a fresh bevel.
The Tip-Down Stance: Setting Up a Non-Slip Workstation
Television chefs often hold a steel in midair and swipe a knife toward their chest. That trick looks flashy, but it invites danger in a home kitchen. Swiping through open air offers no support, changes your blade angle on every pass, and puts your fingers in the path of a moving edge. Setting the rod down on a flat surface keeps you safe and gives you consistent results.
Set up a secure workstation before touching the knife to the rod:
- Dampen a kitchen towel: Wet a small towel, wring out excess water, and lay it flat on your cutting board. This stops your work surface from sliding.
- Place the tip on the towel: Set the tip of your rod directly in the center of the cloth. Hold the rod straight up and down like a pillar.
- Grip the handle securely: Hold the handle in your non-dominant hand. Keep your fingers tucked behind the hand guard, which is the widened rim between the handle and the rod.
- Clear your work area: Give your elbows plenty of room to move without bumping into cabinets or dishes.
This vertical stance locks the tool against the counter. If your blade slips, it travels harmlessly toward the board instead of your hands.
The Five-Step Stroke: Setting the Angle and Moving Heel to Tip
Restoring an edge comes down to holding one steady angle and sweeping the entire blade across the rod. Slow, controlled strokes produce a clean edge, while rushing leads to scratches.
- Find your target angle: Hold your blade flat against the standing rod at a 90-degree right angle. Tilt the knife out halfway to 45 degrees. Tilt it halfway again to reach roughly 22 degrees, then nudge it just a bit closer to the rod. Sturdy blades, such as those found in German high-carbon steel premium knife block sets, need roughly a 20-degree angle. Delicate slicers, such as blades in high-carbon Japanese chef knife sets, need a narrower 15-degree angle.
- Place the heel against the rod: Rest the heel, which is the back part of the blade next to the handle, against the top of the rod. Lock your wrist at your target angle.
- Pull down and back: Pull the blade downward toward the board while drawing the knife toward your body. Use light pressure, roughly the weight of an apple. Pressing hard will only roll the edge over.
- Finish at the tip: Time your stroke so the tip reaches the bottom of the rod just before the knife touches your board. Lift the blade away smoothly before it hits the counter.
- Alternate sides evenly: Move the knife to the opposite side of the rod at the same angle. Pull downward and back. Repeat four to six times per side to keep both sides of the bevel balanced.
The Paper Slice Check: Verifying Your Blade Edge
Never run your finger across a blade to check sharpness. Skin oils smudge the steel, and even a dull blade can cause a bad cut. A simple sheet of printer paper verifies the edge safely.
Hold a sheet of paper by the top corner with your free hand. Rest the heel of your knife on the top edge. Push the blade forward and downward through the paper in one smooth slice without sawing back and forth.
If the blade glides cleanly through the sheet with a quiet hiss, your edge is aligned and ready to work. If the knife snags or tears rough paper fibers, the edge is still out of line. A snag near the end of the slice means the tip needs another pass. Sometimes sharpening leaves a burr, which is the microscopic wire edge or curved sliver of metal that forms on the opposite side during sharpening. Two light strokes on each side of the rod will wipe that burr away.
Bad Habits That Dull Knives and Risk Injury
Most sharpening mistakes come from habits seen on cooking shows. Avoiding these errors protects your fingers and preserves your blades:
- Swiping in midair: Freehand waving wobbles your angle with every pass. This rounds off the cutting bevel and leaves the knife duller than when you started.
- Leaning in with heavy force: Pressing hard flexes thin steel and crushes the edge you want to straighten. Let light contact do the work.
- Counting strokes unevenly: Making eight passes on your easy side and only two on the other pushes the cutting edge off-center. An off-center blade drifts sideways during deep cuts.
- Smacking the blade against the rod: Striking the knife violently against steel chips hard metal and snaps tips. Start and end each stroke with controlled contact.
- Leaving metal dust on the blade: Honing and sharpening create fine metal dust. Wipe your blade with a clean towel before slicing food. Storing blades safely on premium magnetic knife block and knife set combos prevents the fresh edge from rolling against loose tools in a drawer.
What to Look for in a Sharpening Rod
If your knives stay dull after regular maintenance, you may have the wrong rod for your kitchen setup. Choosing the right tool depends on whether you need daily realignment or true blade sharpening.
First, check the rod material. Smooth or ribbed steel rods work strictly for routine honing. They suit home cooks who prep daily and want to keep blades aligned without losing metal. If your knives are blunt or made from very hard steel, choose an abrasive diamond-coated rod or ceramic stick. These abrasive tools grind away worn steel to set a fresh bevel.
Next, check the rod length. Your rod should be at least two inches longer than your longest knife. An eight-inch chef knife needs a ten to twelve-inch rod so you have enough room to sweep the entire blade. Compact rods work well for small pocket knives or outdoor boning knives.
Finally, inspect the handle and guard. A wide finger guard keeps your hand safe if the blade slips. Look for a textured, non-slip handle that feels secure even when your hands are damp.

- TAR Score9.4
TAR Score is a ranking system developed by TopAppliancesReviews.com. TAR score has no relationship or impact from any manufacturers or sales agent websites. Learn more
- Brandwgsajlo

- TAR Score9.2
TAR Score is a ranking system developed by TopAppliancesReviews.com. TAR score has no relationship or impact from any manufacturers or sales agent websites. Learn more
- BrandSmith's

- TAR Score9.2
TAR Score is a ranking system developed by TopAppliancesReviews.com. TAR score has no relationship or impact from any manufacturers or sales agent websites. Learn more
- BrandUtopia Kitchen
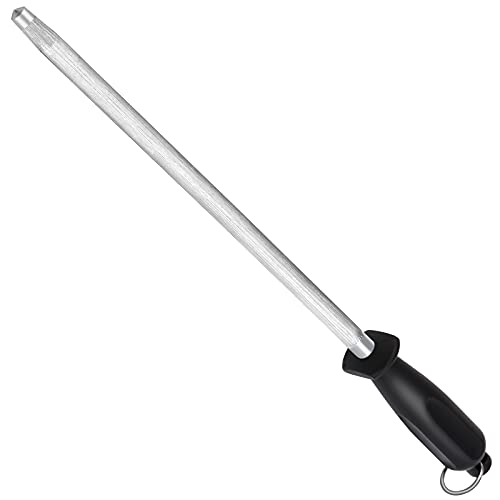
- TAR Score9.0
TAR Score is a ranking system developed by TopAppliancesReviews.com. TAR score has no relationship or impact from any manufacturers or sales agent websites. Learn more
- BrandAcoWELL
- TAR Score9.0
TAR Score is a ranking system developed by TopAppliancesReviews.com. TAR score has no relationship or impact from any manufacturers or sales agent websites. Learn more
- BrandKITCHELLENCE

Wolfride 2Pcs Serrated Knife Sharpener, Retractable Diamond Sharpening Rod Multifunctional
View on Amazon- TAR Score9.0
TAR Score is a ranking system developed by TopAppliancesReviews.com. TAR score has no relationship or impact from any manufacturers or sales agent websites. Learn more
- BrandWolfride

- TAR Score8.8
TAR Score is a ranking system developed by TopAppliancesReviews.com. TAR score has no relationship or impact from any manufacturers or sales agent websites. Learn more
- BrandFANERFUN
- TAR Score8.8
TAR Score is a ranking system developed by TopAppliancesReviews.com. TAR score has no relationship or impact from any manufacturers or sales agent websites. Learn more
- BrandKota Japan

- TAR Score8.6
TAR Score is a ranking system developed by TopAppliancesReviews.com. TAR score has no relationship or impact from any manufacturers or sales agent websites. Learn more
- BrandHOTEC
Last update on 2026-10-28 / Affiliate links / Images, Product Titles, and Product Highlights from Amazon Product Advertising API
FAQs
How often should I use a rod on my kitchen knives?
Use a smooth or ribbed honing steel every two or three times you cook, or whenever a knife starts sliding on onion skins. Frequent light honing keeps the edge straight so you rarely need to grind away steel. Reserve abrasive diamond rods for deeper maintenance every few months.
Can I use a sharpening rod on a serrated bread knife?
A standard straight steel rod cannot sharpen serrated knives because it bridges across the teeth without reaching the curved valleys between them. Sharpening serrations requires a narrow, tapered diamond rod that fits inside each individual scallop. Work through each serrated groove one at a time from the beveled side.
Why does my knife still feel dull after using a honing steel?
If a blade remains dull after several passes, the edge is likely worn flat or chipped rather than just bent out of line. Honing only straightens existing metal; it cannot rebuild a missing cutting edge. When a steel fails, use an abrasive diamond sharpener or stone to grind a fresh bevel.
How do I clean metal dust off my sharpening rod?
Wipe your rod with a dry cloth or paper towel after each session to collect loose metal filings. Some rods have magnetic steel that attracts filings to keep them contained. Never soak a rod in water or wash it in a dishwasher, as moisture trapped in the handle causes rust.


Top Best Quiet Portable Generator Electric Start 2026 - (2026 Updated)

The 10 Best Portable Power Station For Tailgating 2026

10 Best Washing Machine For King Size Comforter of 2026 For Bulky Bedding

11 Best Semi Automatic Washing Machine Under 10000 of 2026 For Apartments and RVs

The Best Concrete Floor Buffer 2026 - Top Choices

Best Cooling Fan with HEPA Filter: Our 2026 Top Picks for Cleaner Air

Best poulan chainsaw 2026 - Reviews & Buying Guides

Value Picks: 10 Vitamix 5300 Best Price of 2026




