
How to Use a Rada Knife Sharpener Without Damaging the Blade

A ripe tomato squashes flat under the knife instead of slicing cleanly, leaving juice across the cutting board. Fixing that dull edge takes just seconds by setting the sharpener flat on the counter and pulling the blade straight toward you between the crossing wheels. Keep the pressure light, and draw the knife in one direction from handle to tip instead of sawing back and forth.
How many passes you need depends on how dull the steel has become. A slightly worn edge usually perks up after four light pulls, while a neglected blade might need seven or eight strokes. Blade style matters just as much. This tool works wonders on smooth kitchen knives, but it will ruin serrated edges and can bind on thick hunting blades that cannot squeeze between the discs. Here is how to set up your knife, hold the base securely, and get a crisp edge every time.
Understand How the Crossing Metal Discs Reshape Your Edge
The secret behind this compact kitchen tool is its pair of hardened, crossing metal discs. Instead of grinding a blade against a flat, abrasive stone, you pull the blade through the small V-shaped notch where those two round wheels overlap. As the blade slides across that intersection, the hardened wheels shave and burnish both sides of the cutting edge angle (also called the bevel) at the exact same moment. This dual action centers the apex of your blade, straightening dull spots and peeling away tiny ribbons of tired steel.
Traditional sharpening methods require you to balance a knife at a steady fifteen or twenty-degree tilt with your wrist. If your hand wobbles on a stone, you get an uneven, wavy edge. The crossing discs remove that guesswork completely because the angle is built directly into the housing. When the knife sits upright in the channel, the overlapping wheels press against the steel at the proper angle automatically.
Because the discs are made from specially hardened high-carbon stainless steel, they are harder than the steel found in standard kitchen knives. When a harder metal rubs firmly against a softer metal, it pushes the softer steel back into alignment and shaves off rounded, dull edges. This makes the tool fast and practical, but it also means you must treat the edge with care. Knowing how those discs grip the steel helps you understand why light, steady movement works far better than brute force.
Follow the Safe Step-by-Step Sharpening Method
Sharpening a knife should never feel like a wrestling match. When you set up your workstation properly and use smooth, deliberate motions, you can restore a dull kitchen blade to clean slicing condition in less than a minute. Follow these five straightforward steps every time you pick up the tool.
- Anchor the base on a flat surface. Set the sharpener down on a clean, completely dry kitchen countertop or a sturdy wooden cutting board. Never hold the sharpener in mid-air while pulling a knife through it. Grip the small plastic base with your non-dominant hand, keeping your fingers tucked low and safely behind the raised guard fin.
- Insert the blade heel into the wheel junction. Take your knife in your dominant hand. Lower the blade heel (the back corner of the blade right next to the handle) directly into the V-shaped space between the crossing metal discs. Make sure the spine of the knife points straight up toward the ceiling, keeping the blade perfectly vertical rather than tilted to either side.
- Pull straight back toward your body with light pressure. Draw the knife smoothly backward in one continuous motion, moving from the heel all the way out to the pointed tip. Apply only light downward pressure, roughly equal to the weight of your hand resting on the handle. Let the hardened wheels do the cutting rather than forcing the blade down into the plastic body.
- Follow the natural curve of the blade tip. As you approach the front third of the knife, slightly raise your wrist to follow the upward curve of the belly and tip. This keeps the cutting edge in constant, even contact with the discs all the way to the very point. Complete the stroke by pulling the tip cleanly out of the wheels without flicking or twisting your wrist.
- Repeat four to six times and check your progress. Pull the knife through the wheels in that same single direction four to six times for routine kitchen touch-ups. If the blade was severely dull and crushing soft food, give it six to eight gentle pulls. Once finished, verify the edge by gently slicing through a scrap piece of paper or shaving into the skin of a ripe tomato. If it catches cleanly without tearing, the edge is ready.
Stop These Three Common Sharpening Mistakes Before They Ruin Steel
Most blade damage caused by pull-through sharpeners happens because of hurried technique. Avoiding three simple mistakes will protect your cutlery and keep your edges straight for years.
- Sawing the blade back and forth. Never push the knife forward into the wheels after pulling it back. Pushing the knife forward forces the thin cutting edge straight into the sharp, rotating edges of the discs at an unnatural angle. This causes the blade to chatter, leaves deep gouges or chips in the steel, and can cause the blade to jump out of the track toward your fingers. Always lift the knife after each pull, place the heel back between the wheels, and draw it toward you again in one direction.
- Pressing down with heavy hand force. Pushing down hard does not sharpen the knife faster; it simply strips away excessive amounts of good blade steel. Excessive pressure also creates a prominent burr (the microscopic wire edge or curved sliver of metal that forms on the opposite side during sharpening). If this wire edge rolls over or snaps off unevenly, the knife will feel rough and quickly turn dull again. Maintain a gentle touch so the wheels skim and shape the steel cleanly.
- Tilting the knife sideways while pulling. If you lean the knife to the left or right during a stroke, one wheel will dig into the side of the blade while the other wheel barely touches the opposite bevel. This creates an uneven, lopsided edge that pulls to one side whenever you try to chop an onion or slice a carrot. Keep your wrist locked straight and watch the spine of the blade from above to ensure it stays strictly vertical from heel to tip.
Know Which Knives Fit the Sharpener and Which Blades to Avoid
This compact sharpener is designed specifically for everyday kitchen prep, but it is not a universal tool for every blade in your home. Knowing what fits into the crossing wheels protects both your knives and the sharpener itself from permanent damage.
The tool works best on standard, straight-edge kitchen knives made with thin to medium blade stock. Paring knives, utility blades, standard chef knives, and boning knives glide through the wheels effortlessly. Everyday utility blades from traditional American or European collections, such as those found in German high-carbon steel premium knife block sets, respond exceptionally well because their tough, moderately flexible steel withstands the firm scraping action of the discs without chipping.
On the other hand, certain specialized blades should never touch this tool:
- Serrated bread and tomato knives: The crossing metal discs ride along the peaks of the serrations and completely flatten the scalloped teeth. Once the teeth are ground down by the wheels, the knife loses its ability to grip crusty bread. Serrated edges require specialized round ceramic or diamond rods rather than dual crossing wheels.
- Delicate Japanese cutlery with steep angles: Premium Japanese kitchen blades, like those featured in high-carbon Japanese chef knife sets, are crafted from very hard, brittle steel sharpened to an acute fifteen-degree angle per side. Forcing these hard, glass-like edges through steel discs can cause micro-chipping along the brittle apex. These fine tools should always be maintained on traditional water stones.
- Thick outdoor, hunting, or cleaver blades: Heavy-duty knives with thick spines or wide splitting wedges cannot slide down into the narrow wheel gap. Forcing a thick hunting knife or meat cleaver into the channel will jam the discs, scrape the sides of the blade flats, or crack the plastic sharpener base.
- Scissors and single-bevel blades: Scissors and traditional Japanese sashimi knives have a flat back on one side and a single cutting bevel on the other. Because the crossing wheels grind both sides at once, running a single-bevel blade or a pair of kitchen shears through the notch will ruin the flat back and destroy the tool geometry.
Wipe Away Metal Dust and Clean the Tool for Food Safety
Every time you draw a knife through the crossing metal discs, the friction shears away microscopic particles of steel. If you look closely at the sharpener after four or five strokes, you will notice a fine gray or black powder resting around the base of the wheels. Handling this metal dust correctly is vital for kitchen hygiene and tool longevity.
Never take a knife straight from the sharpener to the cutting board. If you slice into an apple or a piece of cheese right after sharpening, those loose metal shavings will transfer directly onto your food. As soon as you finish your final stroke, wipe the entire length of the blade with a damp paper towel, moving from the spine toward the edge to avoid cutting the towel. Follow up by washing the knife with warm, soapy water and drying it immediately with a soft cotton cloth. This removes all steel filings and keeps moisture from causing spot rust on your fresh edge.
The sharpener itself also needs regular attention. Over months of use, metal shavings collect inside the wheel housing. If this debris builds up, it can prevent the wheels from rolling smoothly, causing them to drag unevenly against your blades. To clean the sharpener, tap the base gently upside down over a trash can to dislodge loose powder. Use an old, dry toothbrush to sweep away stubborn grit stuck between the wheels. If the housing gets greasy from kitchen prep, rinse it under warm running water with a drop of liquid dish soap, shake out the excess water thoroughly, and leave it to air dry completely before storing it away.
Once your knives are clean, sharp, and dry, store them in a way that preserves their new cutting edges. Tossing loose knives into a cluttered drawer allows the sharpened bevels to bang against forks, spoons, and other steel blades, quickly dulling the apex. Placing your knives in slotted counter blocks or mounting them on premium magnetic knife blocks keeps the blades separated, dry, and ready for your next kitchen prep task.
Choose the Right Replacement Gear and Matching Blades for Your Kitchen
When you want fast, dependable edge maintenance without the learning curve of wet stones, matching your sharpener to the right style of kitchen knife makes daily cooking much smoother. If you are shopping for a new pull-through sharpener or looking for blades that pair naturally with this style of maintenance, keep a few practical design features in mind.
Look for sharpeners that feature hardened high-carbon stainless steel wheels mounted inside a compact, rigid body. Avoid cheap units that use soft zinc discs or unhardened metal, as softer wheels develop flat spots and deep grooves after only a few uses. The base of the sharpener should have a flat, stable footprint that rests securely on a counter, along with a raised guard fin that shields your holding fingers from the blade path.
If you need knives that work well with crossing-wheel sharpeners, look for kitchen knives made from resilient, high-carbon stainless steel with a standard symmetrical V-edge. Knives with a partial tang (where the blade metal narrows or stops inside the handle) or a full tang (one solid piece of blade steel extending all the way through the handle) both perform well, provided the blade stock is relatively thin. Thin paring knives, utility slicers, and lightweight chef knives are ideal because their flexible steel yields smoothly to the wheels, giving you a crisp, razor-sharp utility edge with minimal effort.
Over several years of regular home cooking, the steel wheels in your sharpener will eventually wear down. If you notice that the wheels have developed deep physical grooves, if they feel completely smooth rather than abrasive, or if four to six light strokes no longer restore a crisp bite to your kitchen knives, the wheels are past their prime. Replacing the sharpener or installing fresh wheel assemblies ensures your blades always get clean, even contact without unnecessary friction.

- TAR Score9.4
TAR Score is a ranking system developed by TopAppliancesReviews.com. TAR score has no relationship or impact from any manufacturers or sales agent websites. Learn more
- BrandRADA

- TAR Score9.4
TAR Score is a ranking system developed by TopAppliancesReviews.com. TAR score has no relationship or impact from any manufacturers or sales agent websites. Learn more
- Brandwgsajlo

- TAR Score9.4
TAR Score is a ranking system developed by TopAppliancesReviews.com. TAR score has no relationship or impact from any manufacturers or sales agent websites. Learn more
- BrandACCUSHARP

- TAR Score9.2
TAR Score is a ranking system developed by TopAppliancesReviews.com. TAR score has no relationship or impact from any manufacturers or sales agent websites. Learn more
- BrandRADA
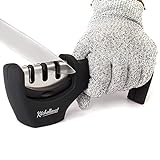
- TAR Score9.0
TAR Score is a ranking system developed by TopAppliancesReviews.com. TAR score has no relationship or impact from any manufacturers or sales agent websites. Learn more
- BrandKITCHELLENCE
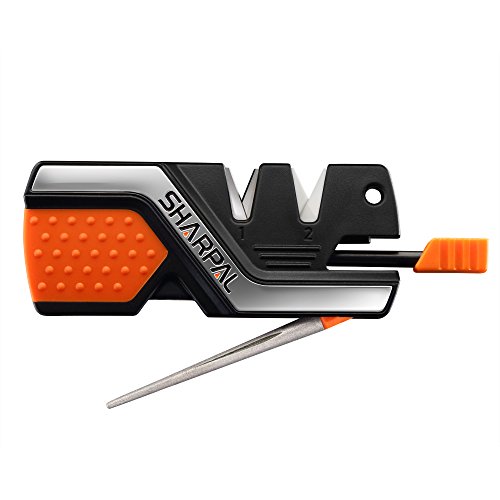
- TAR Score9.0
TAR Score is a ranking system developed by TopAppliancesReviews.com. TAR score has no relationship or impact from any manufacturers or sales agent websites. Learn more
- BrandSHARPAL

- TAR Score8.8
TAR Score is a ranking system developed by TopAppliancesReviews.com. TAR score has no relationship or impact from any manufacturers or sales agent websites. Learn more
- BrandFANERFUN

- TAR Score8.8
TAR Score is a ranking system developed by TopAppliancesReviews.com. TAR score has no relationship or impact from any manufacturers or sales agent websites. Learn more
- Brandlongzon
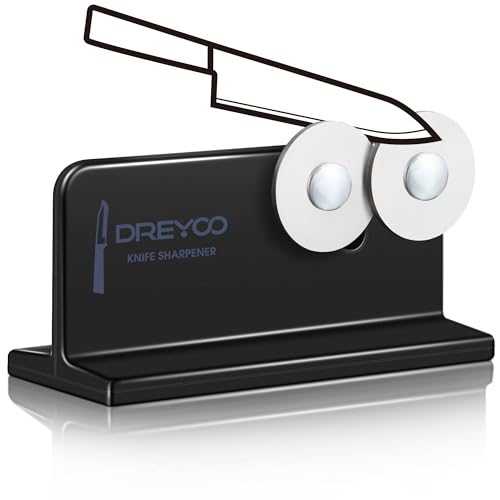
- TAR Score6.4
TAR Score is a ranking system developed by TopAppliancesReviews.com. TAR score has no relationship or impact from any manufacturers or sales agent websites. Learn more
- BrandDreyoo
Last update on 2026-10-22 / Affiliate links / Images, Product Titles, and Product Highlights from Amazon Product Advertising API
FAQs
Do I pull the knife in one direction or back and forth?
Always pull the knife in one single direction, moving smoothly from the heel out to the tip toward your body. Sawing back and forth pushes the edge directly against the turning wheels at an awkward angle, which can chip the steel and cause the blade to jump off track. Lift the knife completely out of the slot after each stroke and place the heel back into the wheels to start the next pull.
How much downward pressure should I use during sharpening?
Use very light downward pressure, roughly equal to the natural weight of your hand resting on the knife handle. The hardened steel discs are designed to shave and burnish the edge through friction, so pressing down hard is unnecessary. Heavy pressure strips away too much metal, creates an irregular wire burr, and can warp thin blades over time.
How many strokes does it take to make a dull knife sharp?
For standard touch-ups on a knife that has just started slipping on tomato skins, four to six light pulls are usually enough to realign the cutting edge. If the blade is noticeably dull and has not been sharpened in months, take six to eight steady strokes. Once the knife easily slices paper without catching or tearing, stop sharpening to preserve the steel.
Can I sharpen a serrated bread knife with this tool?
No, you should never run a serrated knife through crossing metal wheels. The discs will grind down the raised points of the serrations, flattening the teeth and permanently ruining the cutting pattern. Serrated knives must be sharpened individually along each scallop using a specialized tapered sharpening rod.
How do I know when the sharpening wheels need to be replaced?
Inspect the crossing discs under a bright light every few months. If the circular edges show deep grooves, flat spots, or noticeable nicks where blades have worn through the hardened surface, the wheels will no longer create an even edge. When the sharpener fails to restore a clean cutting bite after eight gentle strokes, it is time to replace the unit or swap in fresh wheels.


Top Best Quiet Portable Generator Electric Start 2026 - (2026 Updated)

The 10 Best Portable Power Station For Tailgating 2026

10 Best Washing Machine For King Size Comforter of 2026 For Bulky Bedding

11 Best Semi Automatic Washing Machine Under 10000 of 2026 For Apartments and RVs

The Best Concrete Floor Buffer 2026 - Top Choices

Best Cooling Fan with HEPA Filter: Our 2026 Top Picks for Cleaner Air

Best poulan chainsaw 2026 - Reviews & Buying Guides

Value Picks: 10 Vitamix 5300 Best Price of 2026




