
How to Use a Knife Sharpening Stone for a Sharp Edge

Restoring a dull blade with a stone works by holding the steel at a steady tilt and sweeping the edge across the surface until a tiny rough ridge forms along the back. How you handle the stone changes based on its material and how blunt the knife is. Flipping the blade over to repeat the stroke and finishing on a fine grit creates a crisp, clean cut.
Water stones require soaking before use, while oil stones need a few drops of honing oil to carry away loose metal. Heavy Western knives generally balance best at a twenty-degree angle, while thinner Japanese blades sit flatter at fifteen degrees. Heavily nicked blades need a coarse grit first, but ordinary dull knives can start right on a medium surface. Learning the right hand position stops the blade from wobbling, and the steps below walk you through every pass.
Preparing Your Stone and Work Area
A dull kitchen knife is dangerous because it skids off smooth ingredients, forcing you to push harder. Using a whetstone (a sharpening stone used with water) restores the cutting edge, but poor setup can scratch your blade or cause the stone to slip. Proper preparation provides the physical stability needed to sharpen safely.
Follow these preparation steps before starting:
- Confirm your stone type: Synthetic waterstones made from aluminum oxide need water to float away loose metal particles. Oil stones made from natural Arkansas or India stone require honing oil instead. Never put oil on a waterstone, as it permanently clogs the microscopic pores.
- Soak the waterstone: Submerge your stone in a dish of cool tap water until air bubbles stop rising, which takes roughly 10 minutes. If your stone packaging specifies a splash-and-go model, simply wet the surface without soaking.
- Set up a non-slip base: Place a damp kitchen towel flat on a level counter, then set your stone holder or bamboo base on top. A stone that slides during a stroke can gouge your blade or cut your hands.
- Keep water nearby: Keep a small bowl of water or spray bottle at your station. Grinding friction dries the surface, so splash fresh water whenever the stone starts to drag.
Finding and Holding the Correct Blade Angle
The biggest fear beginners face is scratching the blade sides or rounding off the bevel (the angled slope leading to the cutting edge). Holding an inconsistent angle blunts the edge by grinding the apex unevenly. You do not need fancy measuring tools to find the proper angle.
Use visual guides to find your angle. Rest the blade upright on the stone with the spine pointing at the ceiling for 90 degrees. Tilt it halfway down to reach 45 degrees, and cut that space in half again to reach roughly 22 degrees. Lower the spine slightly more to land at 20 degrees.
Match the angle to your knife style:
- Western kitchen knives: German and American chef knives, such as those in German high-carbon steel knife sets, perform best at 20 degrees per side. This angle creates a tough edge that handles squash, thick roots, and poultry without chipping. Stack two standard coins or a matchbook under the knife spine to gauge this height.
- Japanese slicing knives: Thinner blades, like Japanese chef knives, use harder steel sharpened to a steep 15-degree slicing edge per side. A 15-degree bevel glides through soft vegetables and fish with minimal resistance. Placing the spine over a single coin approximates this angle.
Lock your wrist to keep the angle steady. Move the knife using your elbow and shoulder rather than flexing your hands. Moving your entire arm as a single unit keeps the bevel flat and consistent from heel to tip.
Sharpening on Coarse Grit to Form a Burr
Start on the coarse side of your stone. Grit refers to the roughness level of the stone surface. Coarse grits from 400 to 1000 grind away blunt steel quickly to establish a new apex.
Your main goal here is raising a burr (the microscopic wire edge or tiny rough lip of bent metal along the edge). Grinding one side folds the thinned steel over to the opposite face. Feeling this rough ridge proves you ground completely through the dull bevel.
- Place the blade diagonally across the stone: Lay the knife near the far end at a 45-degree diagonal angle across the stone face. Reason: A diagonal path distributes contact across more surface area, producing a smoother stroke than pushing sideways.
- Position your guide fingertips: Grip the handle firmly with your dominant hand, and place two fingertips of your other hand flat on the blade near the cutting edge. Reason: Your fingertips deliver steady downward pressure directly over the grinding zone, preventing the blade from rocking.
- Push forward with moderate pressure: Sweep the blade forward across the stone leading with the cutting edge. Reason: Moving into the grit cuts away steel cleanly and stops the edge from biting unevenly into the stone.
- Release pressure on the return stroke: Ease up on your hands as you glide the blade back without lifting it off the surface. Reason: Bearing down on the return stroke can gouge the stone and round off the new bevel.
- Work the blade in overlapping sections: Divide the edge into the heel, middle, and tip, applying six to ten strokes per section. Reason: Working section by section ensures every part of the curved belly receives equal sharpening.
- Lift your elbow slightly near the tip: Raise your elbow and handle an inch as your guide fingers reach the curved point. Reason: Lifting your arm tracks the rising profile so the tip maintains the exact same angle as the flat heel.
- Check for the burr along the unsharpened side: Slide your thumb safely from the spine downward off the flat back side of the blade. Reason: Feeling that distinct rough lip along the entire length confirms you ground enough steel to reach the apex.
- Flip the knife and match the strokes: Turn the knife over, set the same angle, and work the other side with equal strokes and pressure. Reason: Grinding both sides equally centers the cutting apex so the knife cuts straight.
Refining the Edge and Removing the Burr on Fine Grit
Raising a burr on both sides creates a functional edge, but coarse grit leaves deep micro-scratches that snag on delicate foods. Moving to a fine finishing stone, typically 3000 to 6000 grit, polishes those scratches away and refines the cutting apex.
Turn your stone to the fine side and sprinkle it with water. Refining the edge requires a lighter touch and balanced strokes:
- Lighten your pressure: Use only the natural weight of the knife and light finger guidance. Heavy pressure on fine grit bends the delicate wire edge instead of polishing it.
- Use alternating single passes: Sweep the entire edge from heel to tip in one smooth stroke on one side, flip the knife, and sweep the other side.
- Remove the wire burr: Alternating single strokes prevents the burr from simply flipping back and forth. The gentle friction snaps the microscopic wire edge cleanly off the apex.
- Finish with light trailing strokes: Pull the blade backward away from the cutting edge three times per side across the wet stone to clear away leftover steel dust.
Checking the Edge and Cleaning Your Tools
Never run a bare finger along the edge to verify sharpness. A keen apex will cut deep with minimal contact. Use safe inspection checks to confirm the blade is ready for use.
Follow this simple inspection checklist:
- The light reflection check: Look at the cutting edge under an overhead light. Dull sections reflect bright white spots of light where the steel is rounded. A sharp apex is microscopically narrow and reflects zero light, looking completely dark.
- The paper slicing check: Hold a piece of printer paper loosely in one hand and slice downward with the blade heel to tip. A sharp edge glides cleanly through the sheet, while a dull spot or burr snags and tears the page.
- The ripe tomato check: Rest the blade on a ripe tomato skin and draw it backward using only the knife weight. A properly sharpened blade slices into the skin instantly without crushing the fruit.
After confirming sharpness, clean your gear. Rinse the stone under running tap water to remove the gray slurry (the mixture of water, stone grit, and metal filings). Never use dish soap or detergents on sharpening stones, as soap clogs the pores. Let the stone dry on a dish rack for at least 24 hours before storing it in a dark box to prevent mildew.
Wash your knife by hand with warm water, dry it immediately with a towel, and store it safely. High-carbon steel blades rust within minutes if left wet on a counter.
Choosing the Right Sharpening Stone Setup
Selecting beginner-friendly equipment simplifies sharpening and prevents early frustration. You do not need multiple individual stones to restore kitchen blades at home.
A double-sided combination waterstone is the most practical choice. A block featuring 400 or 1000 coarse grit on one side and 3000 or 6000 fine grit on the other handles both blunt edge repair and final polishing. Look for a kit with a silicone stone holder and a non-slip bamboo base with rubberized feet. This raised platform keeps the stone locked in place and provides knuckle clearance above the counter.
A clip-on angle guide is also helpful for beginners. Snapping the guide onto the blade spine maintains a steady height above the stone, keeping your bevel consistent while you develop muscle memory.

- TAR Score9.4
TAR Score is a ranking system developed by TopAppliancesReviews.com. TAR score has no relationship or impact from any manufacturers or sales agent websites. Learn more
- BrandBABOSTOW

- TAR Score9.2
TAR Score is a ranking system developed by TopAppliancesReviews.com. TAR score has no relationship or impact from any manufacturers or sales agent websites. Learn more
- BrandIntelitopia

- TAR Score9.2
TAR Score is a ranking system developed by TopAppliancesReviews.com. TAR score has no relationship or impact from any manufacturers or sales agent websites. Learn more
- BrandKEENBEST

- TAR Score9.2
TAR Score is a ranking system developed by TopAppliancesReviews.com. TAR score has no relationship or impact from any manufacturers or sales agent websites. Learn more
- BrandSharp Pebble

- TAR Score9.2
TAR Score is a ranking system developed by TopAppliancesReviews.com. TAR score has no relationship or impact from any manufacturers or sales agent websites. Learn more
- Brandryerum

- TAR Score9.2
TAR Score is a ranking system developed by TopAppliancesReviews.com. TAR score has no relationship or impact from any manufacturers or sales agent websites. Learn more
- BrandHiramWare

- TAR Score9.2
TAR Score is a ranking system developed by TopAppliancesReviews.com. TAR score has no relationship or impact from any manufacturers or sales agent websites. Learn more
- BrandSD.TIANPENG
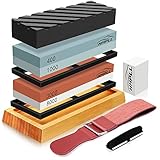
- TAR Score9.0
TAR Score is a ranking system developed by TopAppliancesReviews.com. TAR score has no relationship or impact from any manufacturers or sales agent websites. Learn more
- BrandHMPLL
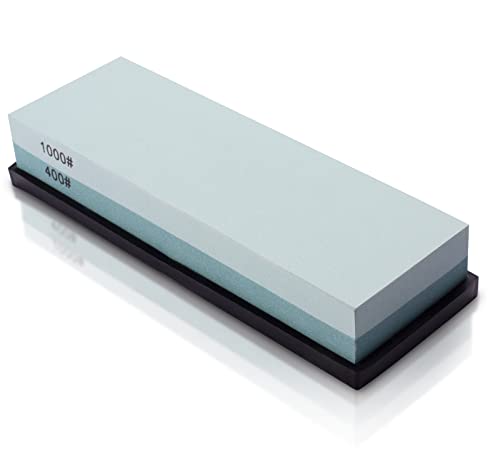
- TAR Score9.0
TAR Score is a ranking system developed by TopAppliancesReviews.com. TAR score has no relationship or impact from any manufacturers or sales agent websites. Learn more
- BrandMIDO Professional Abrasive
Last update on 2026-10-26 / Affiliate links / Images, Product Titles, and Product Highlights from Amazon Product Advertising API
Frequently Asked Questions
Do I soak my stone in water or put oil on it?
Check the packaging before adding liquid. Synthetic waterstones require water, and standard coarse stones need a 10-minute soak before use. Natural Arkansas or oil stones require honing oil to suspend metal filings. Never put oil on a waterstone, as oil ruins its porous surface.
How can I tell if I have raised a proper burr?
Gently slide your thumb downward from the knife spine over the edge on the unsharpened side. If you ground enough steel, you will feel a rough, catching ridge along the entire length. If the edge feels smooth, continue sharpening that side before turning the knife over.
Should I wash off the dark gray paste that forms while sharpening?
Leave the gray paste on the stone while you work. That slurry of water, stone abrasive, and ground metal filings actually speeds up sharpening and helps polish the bevel. Add a few drops of water if it becomes dry or sticky, and rinse the stone only when you finish.
Can using a sharpening stone scratch or ruin my knife?
A stone scratches knife sides only if you lay the blade too flat or wobble your wrist during a stroke. Locking your wrist keeps the abrasive contact confined strictly to the cutting bevel. You can apply blue painter's tape along the blade face above the edge for added protection.


Top Best Quiet Portable Generator Electric Start 2026 - (2026 Updated)

The 10 Best Portable Power Station For Tailgating 2026

10 Best Washing Machine For King Size Comforter of 2026 For Bulky Bedding

11 Best Semi Automatic Washing Machine Under 10000 of 2026 For Apartments and RVs

The Best Concrete Floor Buffer 2026 - Top Choices

Best Cooling Fan with HEPA Filter: Our 2026 Top Picks for Cleaner Air

Best poulan chainsaw 2026 - Reviews & Buying Guides

Value Picks: 10 Vitamix 5300 Best Price of 2026




