How to Use a Knife Sharpener Tool Safely

Most cooks assume sharpening requires bearing down hard or sawing a blade back and forth. That habit actually ruins the metal. The safe, correct technique is to pull the blade straight back from heel to tip using light, even pressure. Starting at the heel (the thick back part next to the handle) lets the built-in guides shape the edge without scraping the sides of your knife.
The exact steps depend on the shape of the blade and how dull it has become. A battered kitchen knife needs a rough coarse slot to reset blunt steel, while an edge that merely feels sluggish only needs a smooth ceramic slot to polish the metal. Wavy bread knives need separate care so the notches do not chew up the teeth. Here is how to work with your sharpener to get clean, crisp cuts in minutes.
The Short Version
- Lock the base in place: Set your sharpener on a clean, flat countertop or engage its suction lever so the unit cannot wobble while you work.
- Pull in one direction only: Insert the knife heel into the slot and pull straight back toward you, lifting the handle slightly to follow the curve toward the tip. Never push forward or saw back and forth.
- Use light downward pressure: Let the abrasive do the work. Pressing down hard strips away too much metal and ruins the cutting bevel (the angled slope of the cutting edge).
- Start coarse, finish fine: Run a dull blade through the coarse slot three to five times to reset the edge, then make three to five light passes through the fine ceramic slot to polish away rough burrs.
Match Your Tool Style and Blade Type Before Starting
Before you bring steel to stone, you need to know what kind of sharpener you have and what kind of blade you are holding. Manual sharpeners fall into three common designs: pull-through countertop blocks, suction-base sharpeners, and handheld units with safety grips. You might also have a steel honing rod stored in your kitchen block.
Pull-through tools use fixed abrasive wheels or crossed blades set inside plastic slots. The coarse slot (the rough notch that strips away worn steel) usually contains tungsten carbide blades or diamond abrasives. It reshapes a blunt, rounded edge into a crisp V-shape. The fine slot (the smooth ceramic notch that polishes the edge) uses ceramic bars to smooth out rough spots and create a clean cutting line. Suction-base sharpeners work the same way but lock onto smooth counters with a lever, keeping both hands clear of the blade path.
Blade metal and geometry also dictate how you sharpen. Most standard kitchen knives feature a sturdy 20-degree utility edge per side, which fits standard pull-through sharpeners. Many home cooks use German high-carbon steel premium knife block sets made from rust-resistant stainless steel (an easy-to-clean metal blend) that responds well to manual pull-through tools. In contrast, delicate Japanese blades often feature a steep 15-degree slicing edge per side made of harder, thinner metal that can chip if pulled through aggressive carbide notches.
Blade shape matters just as much. Straight-edge chef knives, santokus, utility knives, and paring knives work smoothly in standard slots. Serrated bread knives with wavy teeth require special care. Running a serrated blade through a standard coarse carbide V-notch will grind away the scalloped teeth and ruin the knife. Unless your tool manual clearly states that a specific ceramic slot accommodates serrated edges, sharpen only straight blades in manual pull-through slots.
Step-by-Step Guide to Using a Pull-Through Knife Sharpener
Pull-through sharpeners are simple, but small technique mistakes can damage your knife. Follow these seven steps to restore a clean, sharp edge safely.
- Anchor the tool on a flat, dry surface. Place the sharpener on your counter or a heavy cutting board. If your unit features a suction base, push it down firmly against a smooth, non-porous surface and flip the locking lever. If it has an ergonomic handle, grip it firmly with your non-dominant hand, keeping your fingers tucked behind the safety guard.
- Choose your starting slot. If your knife struggles to slice a ripe tomato or slips off an onion skin, start in the coarse slot. If the blade is already relatively sharp and just needs a quick touch-up before dinner prep, skip the coarse notch and go straight to the fine ceramic slot.
- Position the blade heel in the notch. Place the heel (the back part of the blade next to the handle) squarely into the center of the V-shaped slot. Hold the blade straight up at a 90-degree angle to the counter. Do not tilt the blade to the left or right, because tilting cuts an uneven bevel into the steel.
- Pull smoothly straight back toward your body. Draw the knife backward in one fluid motion from heel to tip. As you reach the curved belly of the knife near the front, lift the handle slightly so the abrasive stays in contact with the edge all the way to the point. Never push the blade forward, and never saw back and forth. Sawing creates deep gouges along the edge.
- Apply light, even downward pressure. You only need about two to three pounds of downward force, roughly the weight of your hand resting on the knife. The abrasives are designed to cut steel without heavy muscle. Pressing down hard removes excess metal, creates an irregular edge, and risks slipping across your counter.
- Repeat for three to five passes. Count your pulls so both sides of the blade receive balanced shaping. Three to five steady pulls through the coarse slot are usually enough to clear away dull, rolled steel and establish a fresh apex.
- Polish the edge in the fine slot. Move the knife to the fine ceramic slot. Make three to five light pulls from heel to tip, using even less downward pressure than before. This stage removes the burr (the microscopic wire edge or curved sliver of metal that forms on the opposite side during sharpening) and leaves the edge polished and smooth.
- Wipe and clean the knife. Sharpening leaves microscopic steel dust on the blade face. Wipe the knife clean with a damp dishcloth or paper towel, dry it thoroughly, and wipe any loose grit off your counter before cutting food.
Using Handheld Sharpeners and Honing Rods Safely
Handheld sharpeners and steel rods require a different physical approach because the tool itself moves, or both hands are actively engaged near the cutting edge.
For a handheld sharpener with a built-in knuckle guard, place your knife flat on a sturdy cutting board with the cutting edge pointing away from you. Hold the knife handle firmly against the board. Grip the sharpener handle with your other hand, making sure your fingers sit safely behind the protective flange. Place the sharpening head over the heel of the blade and draw the tool along the edge toward the tip with light, smooth pressure. Make three or four consistent passes, letting the tool follow the natural curve of the blade. Because the knife stays stationary on the board, your risk of slipping is minimal.
A steel honing rod works differently than a sharpener. Honing (straightening a bent microscopic edge without cutting away metal) realigns an edge that has rolled over from daily cutting. It does not grind away steel. Many cooks wave a honing rod in mid-air like a movie chef, but the vertical table method is much safer and more accurate for home kitchens.
- Anchor the rod tip. Place a damp kitchen towel on your counter, then place the tip of the honing rod vertically onto the center of the towel. The towel prevents the steel tip from sliding across the counter.
- Set your angle. Hold the rod handle firmly with your non-dominant hand. Place the knife heel against the top of the steel rod at roughly a 15 to 20 degree angle. A simple way to find 20 degrees is to hold the knife at a 90-degree right angle to the rod, cut that angle in half to 45 degrees, and cut that in half again.
- Glide down and back. Pull the knife downward and toward yourself in a gentle sweeping arc, starting at the heel and finishing at the tip just before the blade reaches the counter. Use very light pressure.
- Switch sides evenly. Move the blade to the opposite side of the steel rod and repeat the motion. Perform four to six alternating strokes per side to center the microscopic teeth of the blade edge.
Simple Ways to Check If the Edge Is Truly Sharp
Never run your thumb or finger along the cutting edge to check sharpness. Microscopic metal burrs can give you a deep, painful cut before you realize it. Instead, check the blade using these safe household methods.
- The printer paper slice check: Hold a standard sheet of printer paper loosely between two fingers. Place the heel of your knife against the top edge of the paper and slice downward with light forward motion. A sharp knife will slice cleanly through the paper without catching, tearing, or producing rough, ragged edges.
- The ripe tomato check: Rest the blade edge on the glossy skin of a ripe tomato without pressing downward. Pull the knife backward gently. A sharp blade will bite through the skin instantly under its own weight without crushing or flattening the soft fruit beneath.
- The visual light reflection check: Stand under a bright kitchen light and look directly down at the cutting edge with the spine pointed toward the floor. A completely sharp edge has no width, so it cannot reflect light. If you see bright spots, shiny glints, or white specks along the edge line, those are flat or rolled sections of steel that still need attention.
Mistakes That Ruin Blades or Cause Slips
Most damaged knives and kitchen slips happen because of rushed technique or incorrect pressure. Avoiding these common habits will keep your blades in good shape for years.
Applying heavy muscle: Forcing the knife down hard into tungsten carbide slots creates too much friction. This strips away thick curls of steel, creates uneven waves along the edge, and can cause the blade to chatter. Let the abrasive material do the cutting. If the knife is not getting sharp with light pressure, the slots are either worn out or the blade needs reshaping on a coarse bench stone.
Sawing back and forth: Dragging a knife forward into the sharpener catches the delicate tip and can bend or chip the blade apex. Always pull the blade backward in one continuous direction, lift it completely out of the slot, and place the heel back at the start for the next stroke.
Letting the tip drop off the end: When pulling through a slot, beginners often pull so fast that the knife tip snaps violently out of the notch. This can round off the pointed tip, scratch the side of the blade, or gouge your countertop. Slow down your stroke as you reach the last two inches of the blade and finish the pull with control.
Skipping the cleaning step: Sharpening creates fine metal filings. If you leave these filings on the blade, they transfer directly into the food you prepare. A quick wipe with a damp cloth and a thorough dry keeps your food clean and prevents rust spots from forming on high-carbon steel.
When to Stop Using a Sharpener Tool and Seek Professional Help
Manual pull-through sharpeners are built for routine maintenance on standard kitchen cutlery. They have set angles and narrow slots that cannot solve every edge problem. Knowing their limits prevents you from ruining valuable cutlery.
Stop using your pull-through sharpener if your knife has deep visible chips, nicks, or a snapped tip. Pulling a chipped blade through fixed carbide notches will only catch the broken metal, widening the chip and stripping away good steel on either side. Damaged blades must be ground down past the chip on a water-cooled grinding wheel or flat bench stone to establish a fresh profile.
You should also avoid standard manual pull-through tools on premium Japanese cutlery, including Japanese Damascus steel chef knife sets. These knives feature very hard, thin core steels that are sharpened to acute 15-degree angles. Standard manual sharpeners typically grind at 20 degrees, which alters the factory angle and can micro-chip brittle high-carbon steel. Send high-end Japanese blades to a professional sharpener who uses water stones, or learn to use flat whetstones at home.
Finally, check your blade profile after several months of use. If your knife develops a curved hollow near the heel (sometimes called a recurve), the heel is no longer contacting the cutting board flatly. This happens when the heel is pulled through carbide slots more frequently than the rest of the blade. A professional sharpener can regrind the bolster and flatten the profile so your knife chops cleanly again.
What to Look for in a Knife Sharpener Tool
When selecting a manual knife sharpener tool for routine home kitchen care, prioritize stability, stage versatility, and safety over compact novelty designs. A reliable sharpener should make edge maintenance quick and foolproof without requiring guesswork about angles.
Look for a model with at least two distinct stages: a coarse slot for reshaping dull edges and a fine ceramic slot for smoothing and daily finishing. Sharpeners with diamond or tungsten carbide coarse notches remove dull metal efficiently, while fine ceramic rods ensure a clean, burr-free finish. If you frequently use utility blades or scissors, check for specialized slots labeled specifically for those tasks.
Stability is critical for kitchen safety. Look for units equipped with wide, slip-resistant rubberized bases or strong lever-action suction pads that lock securely onto smooth surfaces. If you choose a handheld model, make sure the handle is ergonomically contoured and includes a wide protective barrier that separates your gripping hand from the blade path.

- TAR Score9.4
TAR Score is a ranking system developed by TopAppliancesReviews.com. TAR score has no relationship or impact from any manufacturers or sales agent websites. Learn more
- BrandACCUSHARP

- TAR Score9.4
TAR Score is a ranking system developed by TopAppliancesReviews.com. TAR score has no relationship or impact from any manufacturers or sales agent websites. Learn more
- BrandACCUSHARP

- TAR Score9.2
TAR Score is a ranking system developed by TopAppliancesReviews.com. TAR score has no relationship or impact from any manufacturers or sales agent websites. Learn more
- BrandIntelitopia
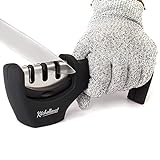
- TAR Score9.0
TAR Score is a ranking system developed by TopAppliancesReviews.com. TAR score has no relationship or impact from any manufacturers or sales agent websites. Learn more
- BrandKITCHELLENCE
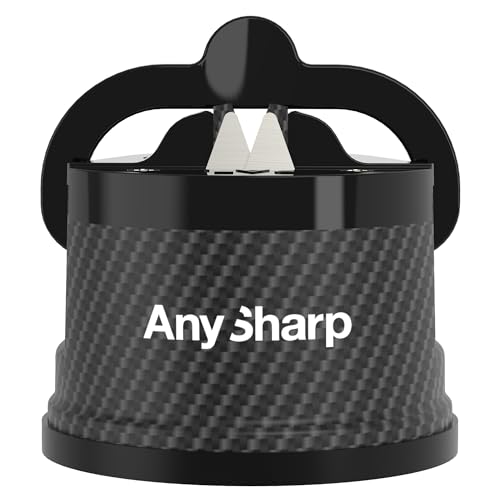
- TAR Score8.8
TAR Score is a ranking system developed by TopAppliancesReviews.com. TAR score has no relationship or impact from any manufacturers or sales agent websites. Learn more
- BrandAnySharp

- TAR Score8.8
TAR Score is a ranking system developed by TopAppliancesReviews.com. TAR score has no relationship or impact from any manufacturers or sales agent websites. Learn more
- BrandFANERFUN

- TAR Score8.6
TAR Score is a ranking system developed by TopAppliancesReviews.com. TAR score has no relationship or impact from any manufacturers or sales agent websites. Learn more
- Brandlongzon

- TAR Score8.6
TAR Score is a ranking system developed by TopAppliancesReviews.com. TAR score has no relationship or impact from any manufacturers or sales agent websites. Learn more
- BrandSHARPAL
Last update on 2026-10-18 / Affiliate links / Images, Product Titles, and Product Highlights from Amazon Product Advertising API
FAQs
How many pulls does it take to sharpen a dull kitchen knife?
A dull knife generally needs three to five steady pulls through the coarse slot, followed by three to five light pulls through the fine ceramic slot. If the blade has not been sharpened in over a year, it may require up to ten coarse pulls to establish a clean edge. Avoid making dozens of aggressive passes, which wears down the blade steel unnecessarily.
Can you sharpen serrated bread knives with a standard pull-through sharpener?
No, you should never run a serrated knife through standard V-shaped carbide sharpening slots. The fixed carbide blades will grind down the raised scalloped teeth and destroy the cutting profile. Only use sharpeners that feature a dedicated ceramic slot explicitly rated for serrated blades, or use a handheld ceramic sharpening rod designed to fit between individual teeth.
Why does my knife feel rough or tear food after using a sharpener tool?
A blade that tears food usually has a wire burr or jagged edge left behind by the coarse sharpening slot. This happens when you skip the fine ceramic finishing stage or press down too hard during the final passes. Run the blade through the fine ceramic slot three or four times using feather-light pressure to polish away the rough burr.
What is the difference between sharpening and honing?
Sharpening cuts away dull metal to establish a brand-new cutting edge with fresh bevels. Honing uses a steel or ceramic rod to push a bent or rolled microscopic edge back into straight alignment without removing metal. Honing should be done every few uses, while actual sharpening is only needed every few months.

Top Rated Best Quality Range Hoods: 2026 Expert Picks
The 12 Best Small Solar Generators 2026

10 Best Quality Semi Automatic Washing Machine of 2026 For Leak-Free Laundry

11 Best Small Washer Machine of 2026 For Everyday Laundry

12 Best Vibration Pads For Washing Machine of 2026 To Stop Walking and Shaking

11 Best Selling Front Load Washing Machine of 2026 For Quiet Odor-Free Laundry

11 Best Washing Machine For King Size Bedding of 2026 To Prevent Cycle Errors

10 Best Small Front Loader Washing Machine of 2026 For Tight Closets