
How to Use a Knife Sharpener Rod Safely

Most people assume the metal rod in a knife block grinds a dull blade into a razor-sharp edge. In reality, a standard rod does not remove metal; it simply straightens a rolled edge so the knife cuts cleanly again. The safest technique is to rest the tip down on a cutting board, hold the blade at a 15 to 20 degree angle, and glide it downward using gentle pressure.
A few simple details shape how you handle the rod. Thicker Western knives need roughly a 20-degree tilt, while thinner Japanese blades work best closer to 15 degrees. Smooth steel rods only nudge bent metal back into line, but textured ceramic or diamond rods shave off tiny steel shavings. If a blade is completely blunt, it needs a stone or mechanical grinder before a rod can help. Here is the simple routine to smooth your edge without risking your fingers.
A Honing Rod Realigns Metal Instead of Removing It
When a kitchen knife starts struggling with tomato skins or slipping on onions, the edge is rarely worn away. Under a magnifying lens, a sharp blade ends in a microscopic triangle of steel. Normal chopping against a cutting board pushes this delicate edge to one side, curling it like grass flattened by foot traffic.
This bent edge is where a honing rod helps. Honing means straightening a bent cutting edge without grinding metal away. The hard steel rod pushes that curled metal back toward the center so the blade cuts cleanly again.
Sharpening is completely different. Sharpening uses abrasive stones or grinding belts to remove steel, shaping a fresh bevel (the angled cutting edge of the blade). During sharpening, a burr forms along the edge. A burr is the microscopic wire edge or curved sliver of metal that forms on the opposite side during sharpening. A smooth honing rod does not grind off metal or produce a burr. It simply pushes the existing metal straight in a few seconds.
If you swipe a steel rod against a completely rounded, blunt knife, nothing happens. The rod cannot restore missing metal. But if your knife cut well yesterday and drags today, the rod is the exact tool you need.
Rest the Rod on a Cutting Board for Safety
TV chefs often hold the rod in mid-air, swiping the blade rapidly toward their fingers. That looks dramatic, but it is dangerous and imprecise. Holding the rod in the air lets your wrists wobble, which ruins your angle and risks slipping the blade toward your hand.
Working against a cutting board gives you total physical control. Place a damp kitchen towel flat on the counter, then set your wooden or plastic board on top to keep it from shifting.
Set up your safe honing position using these steps:
- Grip the rod handle with your non-dominant hand. Keep your fingers behind the safety guard, which is the flared rim between the handle and the steel rod.
- Turn the rod upside down so the tip points straight down. Press the rubber or metal tip firmly onto the center of your cutting board.
- Hold the rod completely vertical, straight up and down like a flagpole. Keeping the rod plumb makes it easy to judge your blade angle by eye.
- Hold your knife in your dominant hand with a relaxed grip. Position the blade horizontally, ready to meet the top of the rod.
This downward stance directs every swipe away from your body and hands. If the knife slips, it hits the cutting board instead of your fingers.
Match Your Blade Style to the Right Angle
The angle between your knife and the rod decides whether you straighten the cutting edge or dull it further. If the angle is too wide, you scrape the sharp edge blunt. If it is too flat, the rod rubs the sides of the blade without touching the cutting bevel.
Most kitchen knives fall into two main categories. German knives and standard Western cutlery use a sturdy 20-degree utility edge per side. These blades use slightly softer steel built for heavy chopping. If you own durable German cutlery, like the sets in our guide to German high carbon steel knife block sets, a 20-degree angle maintains that resilient cutting bevel.
Japanese knives use harder, thinner steel ground to a steep 15-degree slicing edge per side. If you use fine Japanese cutlery from our collection of high carbon Japanese chef knife sets, keep the knife at that tighter 15-degree tilt. A wider angle will quickly blunt their thin geometry.
Find these angles using a simple visual trick:
- Hold the knife flat against the vertical rod to form a 90-degree angle.
- Tilt the blade halfway down toward the rod to find 45 degrees.
- Tilt the blade halfway down again to reach roughly 22.5 degrees.
- For a Western knife, close the gap slightly to reach 20 degrees, about the thickness of two stacked quarters.
- For a Japanese knife, lower the spine until the gap matches the thickness of a matchbook, bringing you to 15 degrees.
Once you find the angle, lock your wrist. Move your arm from your elbow and shoulder so the angle stays steady.
Glide Smoothly from Heel to Tip Using Light Pressure
The movement along a honing rod must be smooth, quiet, and controlled. You are not hacking through the steel or striking sparks. You are gently wiping the edge against the rod to nudge curled metal back into line.
Start with the heel of your knife, which is the wide back part of the blade next to the handle. Place the heel against the top of the vertical rod, just below the handle guard.
Follow these steps for a clean stroke:
- Position the blade at your chosen angle (15 or 20 degrees) near the top of the rod, with the tip pointing slightly upward.
- Pull the knife downward toward the board while drawing the blade backward toward your body. By the bottom of the rod, the blade tip should finish the stroke.
- Use light pressure. The weight of the knife itself provides most of the needed force. Think of the light touch used to slice a ripe tomato without bruising it. Pressing hard bends the delicate edge out of shape.
- Switch to the opposite side of the rod. Place the other face of the blade at the top, match the angle, and draw down and back from heel to tip.
- Alternate sides with every single stroke. This coaxes the microscopic edge straight into the middle.
Four to six gentle strokes per side are plenty for routine prep work. Taking dozens of passes will not make the knife sharper and increases the risk of slipping.
Avoid Mid-Air Swipes and Heavy Hands While Honing
Most blades dulled by a honing rod suffer from basic technique errors. Because movies show cooks swiping knives at high speed, home cooks often copy those habits without realizing the harm they cause.
Watch out for these common mistakes:
- Waving the rod in mid-air: Freehand honing feels quick, but unsupported wrists wobble. A shifting angle rounds off the apex of your blade, leaving it duller than before. Keep the tip anchored on your cutting board.
- Pressing too hard: Heavy pressure bends the thin edge sideways instead of standing it up straight. If the rod flexes or your knuckles turn white, ease off. Let the surface of the rod do the work.
- Scraping back and forth like a saw: Always stroke in one direction, from the top of the rod down toward the board. Sawing back and forth scratches the blade face and damages the cutting bevel.
- Skipping the knife tip: Many cooks stop short, honing only the middle of the blade. Make sure the entire edge, from heel to tip, slides across the rod in one continuous motion.
- Rushing the stroke: Speed does not help the edge; precision does. Take two full seconds for each stroke to keep your angle consistent from heel to point.
Use Plain Paper to Tell if Your Edge Recovered
After five or six alternating passes, check your progress before cutting food. Checking your blade tells you immediately whether the bent edge snapped back into line or whether the steel is truly worn flat.
Take a regular sheet of printer paper or junk mail. Hold the sheet upright with your free hand. Place the knife edge on the top of the paper and push gently downward and forward.
If the blade was simply out of alignment, the freshly honed knife will glide through the paper without snagging. It will make a crisp, clean hissing sound as it cuts. You will feel that same easy glide when you slice into onions or meat.
If the blade catches, tears the paper, or slides off without cutting, a honing rod cannot solve the problem. Tearing means the edge has flat spots, dents, or small chips.
At that point, steel has worn away, and the blade requires real sharpening rather than simple honing. You will need a water stone, an abrasive roller, or an electric sharpener with diamond or ceramic wheels to grind away old metal and shape a new edge. Storing your clean, honed blades on a secure rack, such as those in our guide to magnetic knife block and knife set combos, protects that freshly aligned edge from bumping against loose drawer clutter.
Choose the Right Rod or Sharpener for Your Kitchen
Finding the right tool depends on the condition of your kitchen knives and your cooking habits. If you already have knives that cut decently well, a simple 10-inch or 12-inch steel rod is all you need for weekly upkeep.
When looking at honing rods, check for three simple physical features. Look for a rod made from hardened carbon steel plated with nickel-chrome, which provides a smooth, durable surface that protects your blade from scratches. Make sure the handle features a wide, flared safety guard to keep your fingers shielded. A non-slip rubber tip on the end of the rod is also essential, as it grips the cutting board firmly and stops the rod from sliding.
Keep in mind the difference between rod materials. Smooth steel rods only realign metal and remove no material, making them safe for daily or weekly use. Ceramic rods and diamond-coated rods are slightly abrasive, shaving off tiny amounts of metal dust while they realign. A ceramic or diamond rod helps if your knife has mild dullness, but steel is gentler for regular maintenance.
If your knives fail the paper check completely and feel blunt to the touch, a steel rod cannot bring them back. For knives with rounded bevels, look for a multi-stage pull-through sharpener or an electric abrasive belt system. Multi-stage sharpeners use coarse grinding stages to reform the cutting bevel, followed by fine ceramic slots to polish away the burr. Once that new edge is established, your honing rod will keep it running smoothly for months between deep sharpenings.

- TAR Score9.4
TAR Score is a ranking system developed by TopAppliancesReviews.com. TAR score has no relationship or impact from any manufacturers or sales agent websites. Learn more
- BrandUtopia Kitchen
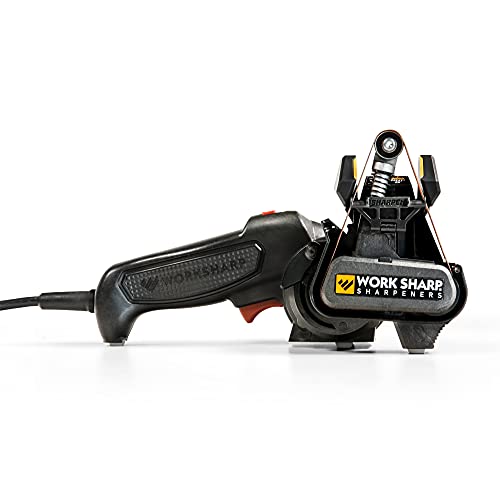
- TAR Score9.4
TAR Score is a ranking system developed by TopAppliancesReviews.com. TAR score has no relationship or impact from any manufacturers or sales agent websites. Learn more
- BrandWORK SHARP

- TAR Score9.2
TAR Score is a ranking system developed by TopAppliancesReviews.com. TAR score has no relationship or impact from any manufacturers or sales agent websites. Learn more
- Brandwgsajlo

- TAR Score9.2
TAR Score is a ranking system developed by TopAppliancesReviews.com. TAR score has no relationship or impact from any manufacturers or sales agent websites. Learn more
- BrandBrod & Taylor

- TAR Score9.0
TAR Score is a ranking system developed by TopAppliancesReviews.com. TAR score has no relationship or impact from any manufacturers or sales agent websites. Learn more
- BrandKITCHELLENCE
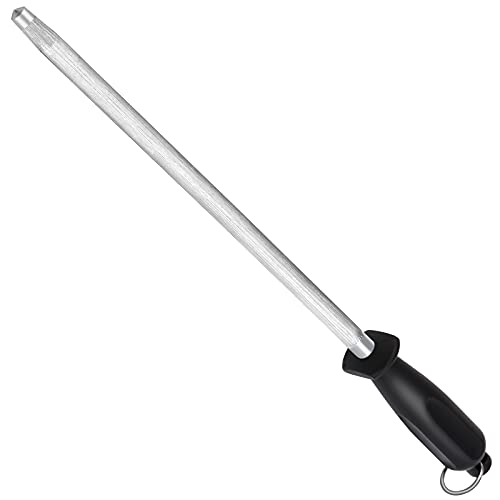
- TAR Score9.0
TAR Score is a ranking system developed by TopAppliancesReviews.com. TAR score has no relationship or impact from any manufacturers or sales agent websites. Learn more
- BrandAcoWELL

- TAR Score8.8
TAR Score is a ranking system developed by TopAppliancesReviews.com. TAR score has no relationship or impact from any manufacturers or sales agent websites. Learn more
- BrandLUFFEXX

- TAR Score8.8
TAR Score is a ranking system developed by TopAppliancesReviews.com. TAR score has no relationship or impact from any manufacturers or sales agent websites. Learn more
- BrandParkway Home

- TAR Score8.8
TAR Score is a ranking system developed by TopAppliancesReviews.com. TAR score has no relationship or impact from any manufacturers or sales agent websites. Learn more
- BrandCpckstands
Last update on 2026-10-18 / Affiliate links / Images, Product Titles, and Product Highlights from Amazon Product Advertising API


Top Rated Best Quality Range Hoods: 2026 Expert Picks

The 12 Best Small Solar Generators 2026

10 Best Quality Semi Automatic Washing Machine of 2026 For Leak-Free Laundry

11 Best Small Washer Machine of 2026 For Everyday Laundry

12 Best Vibration Pads For Washing Machine of 2026 To Stop Walking and Shaking

11 Best Selling Front Load Washing Machine of 2026 For Quiet Odor-Free Laundry

11 Best Washing Machine For King Size Bedding of 2026 To Prevent Cycle Errors

10 Best Small Front Loader Washing Machine of 2026 For Tight Closets






