
How to Use a Cutco Knife Sharpener Without Damaging the Blade

A ripe tomato squishes under the knife instead of slicing cleanly, leaving a dull blade resting on the cutting board. Getting that crisp edge back takes only a steady countertop and pulling the blade straight backward three to five times with light, even pressure. The tool reshapes the edge quickly as long as the steel glides smoothly from the heel near the handle all the way to the tip.
How well this works depends on the knife style and the amount of force behind each stroke. This handheld unit is built only for plain, straight edges, meaning any knife with recessed teeth will get damaged in the slots. Bearing down too hard or sawing back and forth will also gouge the metal rather than sharpen it. Learning the right setup and stroke will help protect the steel while restoring a clean cut.
Which Cutco Knives You Can Sharpen at Home (and Which to Avoid)
Before you take your sharpener out of the drawer, you need to check which knife you are holding. Cutco makes two completely different cutting edges across their cutlery lineup: straight-edge blades and their signature Double-D edge blades. The handheld Cutco knife sharpener is designed exclusively for straight-edge blades. Using this tool on the wrong blade is the fastest way to ruin an expensive piece of kitchen cutlery.
A straight edge features a continuous, smooth bevel (the angled cutting edge of the knife) running uninterrupted from the heel (the back end of the blade closest to the handle) all the way to the pointed tip. Common straight-edge Cutco knives include the chef knife, the santoku knife, the carving knife, the boning knife, and the straight-edge versions of their paring knives. These blades cut cleanly through food with a smooth slicing motion, similar to the blades you find in traditional German high-carbon steel premium knife sets. Their smooth bevels sit flat against the sharpening inserts inside the tool, allowing the metal to align evenly.
The Double-D edge is Cutco's term for recessed serrated teeth. Instead of sharp saw teeth that stick outward, these teeth sit inside small, crescent-shaped recesses along the blade. The points protect the sharp inner edges from dulling against hard cutting boards and ceramic dinner plates. Common Cutco knives with this edge include the trimmer, the spatula spreader, the bread knife, and the classic table knives. These knives never belong in a pull-through sharpener.
If you pull a Double-D blade through the sharpener, the hard sharpening inserts will catch on the protective points of the teeth. The tool will scrape, gouge, and grind down the points while completely missing the cutting edges recessed between them. Within seconds, the factory tooth pattern is shredded, leaving behind a jagged, damaged edge that tears meat and vegetables instead of cutting them. If you look down the length of your blade and see scallops, ridges, or teeth, put the sharpener away.
Step-by-Step Guide to Pulling Your Knife Through the Sharpener
Sharpening a straight-edge knife at home is quick and simple once you set up your work area properly. You do not need any special mechanical skills, but you do need steady hands and a stable surface. Rushing through the motion or holding the sharpener in midair creates uneven edges and increases the risk of slipping.
- Set up a clean, stable work surface. Place your sharpener flat on a sturdy, dry countertop or on top of a heavy cutting board. Never hold the sharpener up in the air with one hand while pulling the knife with the other. If your countertop is slick, set a damp dish towel underneath the sharpener base to keep it from sliding around while you work.
- Grip the sharpener handle firmly. Place your non-dominant hand on the handle of the sharpener, keeping your fingers safely behind the raised guard. Press straight down so the flat bottom of the sharpener stays completely level against the counter. Your grip should be firm enough that the unit cannot wobble, tip, or shift sideways.
- Position the heel of the blade into the slot. Take your clean, dry knife in your dominant hand. Insert the heel of the blade into the V-shaped sharpening slot. Make sure the knife sits completely vertical, at a clean 90-degree angle to the surface of the counter. If the knife tilts to the left or right, you will grind away the side of the blade rather than the cutting bevel.
- Draw the knife backward in one smooth stroke. Pull the blade straight back toward your body with light, continuous motion. As you reach the curved belly of the knife near the tip, raise your wrist and elbow slightly so the entire length of the curved edge maintains gentle contact with the sharpening stones. Complete the pull in one fluid motion until the tip clears the slot.
- Lift and reset at the heel. Once the tip slides out of the sharpening slot, lift the knife away from the sharpener. Never push the blade forward through the slot. Pushing the knife forward catches the thin steel against the carbide stones, creating deep notches and potentially causing the blade to jump out toward your fingers. Always return to the heel and pull backward again.
- Clean the blade thoroughly. As the sharpener works, it removes tiny microscopic metal shavings from the steel. Wipe the knife carefully from the handle to the tip using a damp sponge or paper towel. Cutco uses high-grade stainless steel (rust-resistant, easy-to-clean metal), but leaving loose metal dust on the blade can transfer metal particles directly into your food or leave dark marks on your drying towels.
Getting the Pressure and Stroke Count Right
The most common mistake people make with a handheld sharpener is pressing down with excessive force. Many home cooks assume that pushing harder will make a dull knife sharp faster, but the exact opposite happens. Heavy downward pressure gouges into the steel, strips away excessive metal, and creates flat spots along the cutting edge. Let the weight of the knife and the natural angle of the sharpener do the cutting for you.
When you draw the blade through the slot, apply only the gentle weight of your hand, similar to the light pressure you would use to slice through a ripe tomato or a block of cheddar cheese. The blade should slide smoothly across the stones with a soft, uniform scraping sound. If you hear a loud screech, feel the blade shudder and skip, or notice long metal shavings curling off the edge, you are pressing down far too hard. Back off your grip and let the knife glide smoothly.
Stroke count matters just as much as pressure. For regular kitchen maintenance, 3 to 5 gentle strokes are all you need to restore a crisp cutting edge. Running a knife through the slot 20 or 30 times will not make it sharper; it will simply wear away the metal and shorten the lifespan of your blade. After 3 to 5 pulls, inspect your work. You can check the edge by slicing through a sheet of scrap paper. If the knife catches the paper and glides cleanly through without tearing or snagging, the edge is ready. If it still snags, give it 2 more light passes.
Once your blade is sharp, proper storage is what keeps it that way. Tossing a freshly sharpened knife into a crowded utensil drawer allows the edge to bang against forks, spoons, and other steel tools, blunting the edge in days. Keeping your blades separated in their original wooden storage block or on magnetic knife blocks with stable bases protects the fine bevel from impact damage between meals.
- Sharpener resting flat on a clean, dry, stable surface.
- Blade aligned straight up and down at an exact 90-degree angle.
- Light downward pressure, letting the weight of the knife do the work.
- Single-direction pull from the heel all the way to the tip.
- Never push the blade forward through the sharpening slot.
- 3 to 5 passes maximum before checking the edge on scrap paper.
- Wipe the blade clean of all metal dust before slicing food.
What to Do With Serrated Teeth, Deep Chips, or Stubborn Dullness
A handheld manual sharpener is built for routine edge touch-ups on straight blades, but it cannot solve every edge issue. Recognizing when to stop using the sharpener is essential for protecting your knives from permanent damage. If your knife has severe wear, trying to fix it with a small manual sharpener will only grind away good steel without restoring proper performance.
If you give a straight-edge knife 5 or 6 gentle passes and it still slides helplessly over onion skins, the cutting bevel has likely rolled over or worn down completely flat. This happens when knives are used on glass cutting boards, marble countertops, or hard ceramic surfaces over several years. A simple handheld sharpener has fixed angles and cannot reshape a completely blunted bevel without taking off massive amounts of metal. Forcing the blade through over and over will only create an uneven, wavy profile along the cutting edge.
You should also inspect your knife closely for visible nicks, chips, or bent tips. If you run a chipped blade through the sharpening slot, the sharp carbide inserts will catch inside the chip. When the blade catches, the forward momentum can rip out an even larger chunk of steel, turning a tiny nick into a deep gouge that ruins the blade balance. A bent tip can also scrape unevenly against the sharpening inserts, scratching the polished sides of the blade.
When dealing with dull Double-D serrations, chipped edges, or deep blade damage, your best option is to take advantage of Cutco's factory service. Cutco offers a comprehensive service agreement for all their cutlery, known as the Forever Guarantee. Under this policy, you can send your knives directly back to their factory in Olean, New York. Factory technicians use industrial grinding and polishing equipment to re-cut Double-D teeth, reshape damaged bevels, remove chips, and buff the steel back to original factory condition.
To send your knives in for factory service, wrap each blade securely in thick cardboard or heavy paper towels, taping the wrapping tightly so no points or edges can poke through during transit. Pack the wrapped knives in a sturdy corrugated box with crumpled paper or bubble wrap. You can print out the service request form directly from the official Cutco website and include it inside the box. Cutco sharpens and repairs the knives for free; you only pay a nominal return shipping and handling fee. It is the safest, most reliable way to restore damaged or serrated blades to peak cutting performance.
FAQs
How often should I sharpen my straight-edge Cutco knives?
For most home kitchens, using the handheld sharpener every two to three months is plenty to maintain a crisp edge. You do not need to pull the knife through the sharpener before every cooking session, because every pass removes a small amount of steel. Sharpen the knife only when you notice it beginning to slide off smooth tomato skins or crush soft herbs instead of slicing cleanly.
Can I use a standard steel honing rod on my Cutco knives instead?
You can use a smooth or fine ceramic honing rod on straight-edge Cutco knives to realign the microscopic edge between sharpening sessions. A honing rod does not remove metal; it simply straightens out tiny bends along the edge. However, you must never use a honing rod on Cutco Double-D serrated knives, because the rod will bounce across the teeth and damage the serration pattern.
Why does my knife edge feel rough or scratchy after sharpening?
A rough feeling after sharpening usually means a microscopic burr (the microscopic wire edge or curved sliver of metal that forms on the opposite side during sharpening) is still clinging to the blade. It can also be caused by loose steel dust left behind in the slot. Wipe the blade firmly with a damp cloth from spine to edge, or draw the blade lightly through a piece of cork or scrap leather to snap off the burr and reveal the smooth cutting bevel underneath.
Related guides: how to sharpen a cutco knife.


Top Best Quiet Portable Generator Electric Start 2026 - (2026 Updated)

The 10 Best Portable Power Station For Tailgating 2026

10 Best Washing Machine For King Size Comforter of 2026 For Bulky Bedding

11 Best Semi Automatic Washing Machine Under 10000 of 2026 For Apartments and RVs

The Best Concrete Floor Buffer 2026 - Top Choices

Best Cooling Fan with HEPA Filter: Our 2026 Top Picks for Cleaner Air
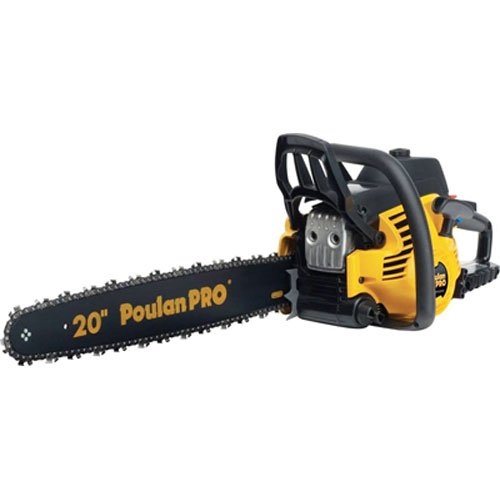
Best poulan chainsaw 2026 - Reviews & Buying Guides

Value Picks: 10 Vitamix 5300 Best Price of 2026






