How to Use a Cheese Knife for Clean Slices

Cutting cheese neatly means matching the shape of the blade to the texture of the cheese and pressing straight down instead of sawing back and forth. That basic motion changes quickly depending on how firm the block is. A soft wheel calls for a gentle push so the center does not collapse, while an aged wedge needs firm leverage to split along its natural grain.
The specific knife in your hand makes all the difference. Blades with cut-out holes stop gooey brie from sticking to the metal, wide rectangular cleavers power through blocks of cheddar, and short pointed blades pry crumbly parmesan into bite-sized chunks. Your serving layout also matters, especially between pre-slicing neat portions in the kitchen and letting guests carve directly from a shared board. Here is how to match every tool in your set to the right wedge and handle it safely.
Match Blade Shapes Directly to Cheese Firmness
Opening a boxed cheese knife set often leaves hosts guessing because every blade looks completely different. Matching the blade to the density of the block solves the problem instantly. Cheese varies from sticky and creamy to dry and rock-hard. When you use the wrong tool, soft cheeses collapse into a smear, and hard blocks cause blades to bind, slip, and risk cut fingers.
Every standard set includes four primary shapes tailored to specific cheese densities:
- The perforated knife: This blade features cut-out holes along the flat surface and usually ends in a dual-prong tip. It is designed specifically for soft and semi-soft varieties like brie, camembert, fresh mozzarella, and ripe fontina. The cut-outs stop sticky, moisture-rich curds from forming a vacuum seal against the steel.
- The flat mini-cleaver: Shaped like a small rectangular butcher cleaver, this blade handles semi-hard cheese, which means firm cheese like cheddar, gouda, monterey jack, or provolone. The wide blade allows you to apply balanced downward force with your hand or fingers directly above the spine.
- The spade knife: This tool has a stout, heart-shaped pointed blade with sharpened edges on both sides leading to a thick point. It is built strictly for hard, aged varieties such as parmesan, pecorino, aged manchego, and dry asiago. You do not slice with it; instead, you drive the point into the block to crack off natural bite-sized chunks.
- The rounded spreader: Featuring a blunt, paddle-like edge with no sharp point, this blade handles soft goat cheese logs, cream cheese, ricotta, and spreadable dips. It scoops easily and glides across delicate crackers without puncturing or snapping them.
Understanding these distinct roles prevents board accidents. A wide cleaver pushed into a soft brie compresses the outer rind, which is the outer cheese skin or crust, and squeezes the creamy center out across your platter. Conversely, pressing a thin, flexible spreader into an aged gouda bends the blade and forces your hand sideways. Pairing the tool to the cheese keeps slices neat and prevents dangerous hand slips.
Just like maintaining kitchen sets made of German high carbon steel knife sets, matching edge geometry to the task makes cutting effortless. Cheese density dictates how steel behaves under pressure. Soft cheese requires minimal surface area to prevent sticking, while dense cheese requires a rigid spine that will not bend under heavy downward force.
Slice Soft Cheeses Downward Without Any Sawing Motion
Soft cheeses present the biggest challenge for clean presentation. Varieties like ripe brie, camembert, and washed-rind cheeses contain high levels of moisture and butterfat. When you drag a blade back and forth across them, friction tears the rind and pulls the creamy center along with the steel. Follow these steps to produce clean, picture-perfect portions without squishing the wheel.
- Chill the block slightly before prep: Keep soft cheese in the refrigerator until about twenty minutes before cutting. Warm cheese sticks to metal much faster than cool cheese. Chilled fat stays firm enough to hold its shape under the blade while still warming to room temperature in time for your guests to eat.
- Wipe the blade with warm water: Dip your perforated knife, which is a blade with cut-out holes, into warm tap water and dry it quickly with a clean towel. A warm, slightly damp blade glides through dense butterfat without catching or dragging on the rind.
- Position the blade above the center: If you are working with a round wheel or a triangular wedge, position the knife tip at the center point of the wheel. Slice soft cheeses into long, slender wedges so that every serving gets an equal portion of the soft interior and the firmer outer rind.
- Push straight down in one motion: Bring the blade straight down through the cheese toward the cutting board using even, steady pressure. Do not saw back and forth. Sawing creates ripples and shreds the outer skin. If the cheese is particularly sticky, gently rock the heel of the blade down first, followed by the tip.
- Slide the blade out flat: Once the blade reaches the board, pull it straight back toward your body along the surface of the board rather than lifting it straight up. Lifting up creates suction that pulls the cheese wedge with it. Wipe the blade clean with a damp cloth after every two or three cuts to prevent build-up.
If you notice the paste clinging to the sides despite a downward push, check the temperature. Cheese that has sat in a warm room for over an hour becomes almost impossible to slice cleanly. Put the wedge back in the refrigerator for ten minutes to let the surface firm up, then finish portioning.
Rock Pointed Blades to Break Hard Blocks Safely
Aged cheeses like Parmigiano-Reggiano, pecorino, and vintage cheddar lose moisture as they mature. This creates a dense, brittle texture packed with crunchy protein crystals. Forcing a standard chef knife or a flat slicer through these blocks creates uneven cracks, causes brittle edges to shatter into useless dust, and can cause the blade to bind and kick sideways. Hard cheese should never be sliced thin; it should be pried apart along its natural curd lines.
- Secure your cutting surface: Place the block on a solid wood board that will not slide across the counter. If your board moves, place a damp cloth underneath it. A steady board prevents the cheese from rolling when you apply vertical force.
- Position the heart-shaped blade: Take your spade knife, which is the heart-shaped pointed blade, and place the tip directly into the top of the block, roughly half an inch from the outer edge. Angle the knife slightly so the blade points downward into the core of the block.
- Drive the point into the curd: Press downward firmly with your palm on top of the handle. Let the pointed tip penetrate about a quarter of an inch to half an inch into the cheese. Keep your free hand behind the cutting edge or flat against the far end of the block to stay well clear of the blade path.
- Rock the handle forward and back: Instead of pushing all the way through to the board, gently rock the handle from side to side. The thick shoulders of the heart-shaped blade act as a wedge, opening a small split in the cheese block.
- Follow the natural fracture: Move the blade tip down the newly formed fissure and repeat the rocking motion. The block will naturally crack open along its internal grain lines, yielding rough, rustic nuggets that showcase the crystalline texture of aged dairy.
Working with the natural grain rather than fighting it preserves the texture of expensive aged cheeses. Forcing a straight cut through parmesan ruins the crumbly bite that makes the cheese enjoyable. If you hit an unusually tough rind, score the outside skin first with the tip of the spade knife, then drive the wedge into that scored line.
Holes Prevent Sticking While Fork Tips Lift Slices
Two features on cheese knives confuse beginners more than any others: cut-out windows along the blade flat and two sharp prongs at the tip. Both features serve practical mechanical functions that eliminate the most common annoyances of charcuterie prep.
The cut-out holes in a perforated knife exist to eliminate surface tension. When you slice through high-fat food, air cannot enter between the blade flat and the food. This creates a vacuum, causing the slice to adhere firmly to the metal. You then have to peel the slice off with your fingers, leaving an unsightly thumbprint on the cheese. The cut-outs allow air to flow behind the slice constantly. Because there is very little metal touching the cheese, the vacuum never forms, and the slice drops away naturally onto the board.
The two-pronged fork tip solves the problem of food handling at social gatherings. After you press the blade down through a wedge of gouda or havarti, you tilt the knife sideways, slide the prongs under or into the fresh slice, and lift it directly onto a serving plate. Guests can serve themselves without touching shared food with their fingers, keeping the board clean and sanitary.
Some knife sets also include a flat chisel knife, which looks like a miniature putty scraper. This blade features a ground beveled edge along the bottom square edge. It is built to shave curls off medium-hard cheeses or push directly downward through small rounds of blue cheese or semi-firm sheep milk cheeses. It gives you precise control over slice thickness while keeping your knuckles elevated above the board surface.
Assign Separate Knives to Stop Flavors From Mixing
Setting up a cheese board involves more than scattering tools across a wooden platter. Placing a single knife on a board full of different cheeses ruins the flavor profile within minutes. Pungent blue cheeses, garlic-rubbed rinds, and mild cow milk wedges should never share the same blade.
Follow this checklist when arranging your knives for an event:
- Provide one knife per cheese profile: Set out at least three knives on any mixed board. Assign one for soft bloomy rinds, one for firm blocks, and one dedicated exclusively to strong blue or washed-rind cheeses.
- Isolate strong blues: Blue mold spreads immediately to mild cheeses on contact. If a guest uses the same blade on gorgonzola and then cuts a slice of mild havarti, the havarti will taste like blue mold. Keep the blue cheese knife strictly next to the blue wedge.
- Point handles outward: Place each knife with the handle facing toward the edge of the board and the cutting edge pointing inward toward the center. This lets guests pick up the tools easily without reaching across sharp blades or dragging sleeves through food.
- Score tough rinds beforehand: If you are serving an aged cheese with a hard, waxy outer crust, make preliminary score lines with a heavy kitchen knife before guests arrive. This guides guests on where to place the spade knife and prevents awkward struggles at the table.
- Keep a side tray for maintenance: Set a small ceramic dish or a folded cloth nearby. As knives accumulate cheese paste during the party, you can quickly wipe the steel clean without taking the knives back to the sink.
If you store your everyday prep blades in magnetic knife blocks with stable bases for a secure grip, you already know how magnetic storage keeps cutting edges protected from dulling against other tools. The same principle applies to your serving board: keeping tools organized and separated protects both the edges and the flavor of the food.
Choose Balanced Stainless Sets With Comfortable Solid Handles
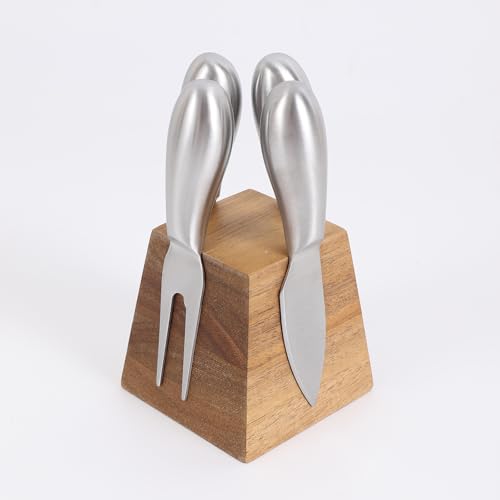
When choosing a cheese knife set, look for designs that offer balanced leverage and hygienic construction. A good set does not need dozens of pieces; a four-piece collection covering the spade, mini-cleaver, perforated blade, and spreader handles virtually every variety you will ever buy.
Focus on blade steel and handle security. Look for rust-resistant stainless steel blades that withstand food acids and moisture without pitting or discoloring. Because cheese cutting involves steady downward pressure rather than rapid slicing, handle ergonomics are critical. Solid wood handles like acacia or seamless stainless steel handles provide a comfortable, non-slip grip that will not twist in your palm when pressing into hard cheddars.
Check how the blade joins the handle. The blade should be firmly anchored without gaps where dairy fat and water can seep in and harbor bacteria. Seamless one-piece steel construction or securely riveted tangs provide the longest working life. Compact magnetic display blocks or stands that hold the knives handle-side-up are also helpful, keeping sharp edges off the table surface and ready for guests to grab comfortably.
Care for your cheese knives by washing them with warm water and mild dish soap immediately after use, then drying them with a soft towel. Avoid running them through an automated dishwasher, as high heat and harsh detergents can dry out natural wood handles and dull the fine cutting edges over time.

- TAR Score9.8
TAR Score is a ranking system developed by TopAppliancesReviews.com. TAR score has no relationship or impact from any manufacturers or sales agent websites. Learn more
- BrandYZS Housm

- TAR Score9.4
TAR Score is a ranking system developed by TopAppliancesReviews.com. TAR score has no relationship or impact from any manufacturers or sales agent websites. Learn more
- BrandTen Speed Press

KINMINGZHU 8pcs Stainless Steel Butter Knife, Cheese/Butter Spreaders, Breakfast Spreads
View on Amazon- TAR Score9.2
TAR Score is a ranking system developed by TopAppliancesReviews.com. TAR score has no relationship or impact from any manufacturers or sales agent websites. Learn more
- BrandKINMINGZHU
- TAR Score9.0
TAR Score is a ranking system developed by TopAppliancesReviews.com. TAR score has no relationship or impact from any manufacturers or sales agent websites. Learn more
- Brandolelo

- TAR Score9.0
TAR Score is a ranking system developed by TopAppliancesReviews.com. TAR score has no relationship or impact from any manufacturers or sales agent websites. Learn more
- Brandolelo

- TAR Score9.0
TAR Score is a ranking system developed by TopAppliancesReviews.com. TAR score has no relationship or impact from any manufacturers or sales agent websites. Learn more
- Brandexperiment

- TAR Score9.0
TAR Score is a ranking system developed by TopAppliancesReviews.com. TAR score has no relationship or impact from any manufacturers or sales agent websites. Learn more
- Brandolelo

- TAR Score7.6
TAR Score is a ranking system developed by TopAppliancesReviews.com. TAR score has no relationship or impact from any manufacturers or sales agent websites. Learn more
- BrandDr.HOWS
Last update on 2026-10-16 / Affiliate links / Images, Product Titles, and Product Highlights from Amazon Product Advertising API


Top Rated Best Quality Range Hoods: 2026 Expert Picks

The 12 Best Small Solar Generators 2026

10 Best Quality Semi Automatic Washing Machine of 2026 For Leak-Free Laundry

11 Best Small Washer Machine of 2026 For Everyday Laundry

12 Best Vibration Pads For Washing Machine of 2026 To Stop Walking and Shaking

11 Best Selling Front Load Washing Machine of 2026 For Quiet Odor-Free Laundry

11 Best Washing Machine For King Size Bedding of 2026 To Prevent Cycle Errors

10 Best Small Front Loader Washing Machine of 2026 For Tight Closets