
How To Test Washer Drain Pump Without Guesswork

How To Test Washer Drain Pump issues usually show up at the worst possible time. One minute the washer seems fine, then suddenly there's water sitting in the drum, a weird humming sound, or that annoying cycle that refuses to finish. Frustrating? Absolutely. Still, jumping straight into replacing parts can drain both patience and money faster than expected. A few careful checks often reveal whether the pump is clogged, struggling, or completely worn out.
Drain pump trouble doesn't always scream for attention right away. Some washers start acting sluggish before the real problem becomes obvious. Clothes stay wetter than normal, cycles drag on forever, or the machine gives off a faint burning smell that feels hard to ignore. Those little warning signs matter because a struggling pump tends to get worse over time instead of magically fixing itself. Catching the issue early can help avoid bigger repair headaches later.
Proper operation depends on more than just hearing the pump run. Plenty of pumps still make noise while failing to move water correctly. That's where people get tripped up. A blocked impeller, trapped lint, loose debris, or damaged wiring can mimic bigger mechanical failures. Taking a closer look at the drain hose, filter area, and electrical connections usually paints a much clearer picture before expensive decisions enter the conversation.
Some washing machines make the process easier than others, honestly. Front-load models often hide the pump behind lower access panels, while top-load units may require moving the cabinet or tilting the machine slightly. Either way, patience pays off. Rushing through the inspection can lead to stripped screws, cracked clips, or overlooked debris that's causing the entire mess in the first place.
Drainage performance also changes depending on how the washer is used day after day. Heavy blankets, pet hair, coins, sock lint, and detergent buildup create stress on the pump over time. So, even a washer that looked perfectly healthy months ago can slowly develop flow restrictions without much warning. That's why recurring draining issues usually point toward maintenance habits or hidden blockages instead of instant pump failure.
Electrical testing adds another layer to the diagnosis, especially if the washer stays silent during the drain cycle. Using a multimeter to check continuity helps narrow down whether the motor windings still function properly. No continuity often signals a failed pump motor, while proper readings may shift attention toward control boards or wiring problems instead. It sounds technical at first, yet the process becomes surprisingly manageable once the steps are broken down clearly.
How To Test Washer Drain Pump setups safely also means paying attention to water leaks and power connections before touching anything internal. Unplugging the washer, draining leftover water carefully, and keeping towels nearby can prevent an already annoying repair situation from becoming a full-blown mess. Small precautions matter more than people think, especially around electrical components and standing water.
Then again, not every noisy washer needs a brand-new drain pump. Sometimes the real culprit is embarrassingly simple, like a clogged coin trap or twisted hose hidden behind the machine. That's the tricky part. Symptoms overlap constantly, making a methodical inspection far more useful than random part swapping. A steady, practical approach usually saves time, money, and plenty of unnecessary frustration.

- TAR Score9.6
TAR Score is a ranking system developed by TopAppliancesReviews.com. TAR score has no relationship or impact from any manufacturers or sales agent websites. Learn more
- BrandCylrod

- TAR Score9.4
TAR Score is a ranking system developed by TopAppliancesReviews.com. TAR score has no relationship or impact from any manufacturers or sales agent websites. Learn more
- BrandSeentech

- TAR Score9.4
TAR Score is a ranking system developed by TopAppliancesReviews.com. TAR score has no relationship or impact from any manufacturers or sales agent websites. Learn more
- BrandTechecook
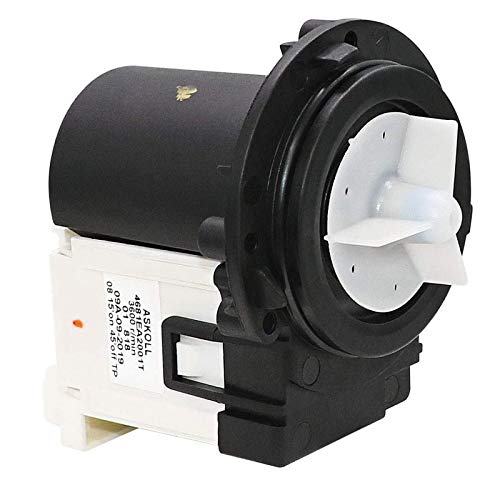
- TAR Score9.2
TAR Score is a ranking system developed by TopAppliancesReviews.com. TAR score has no relationship or impact from any manufacturers or sales agent websites. Learn more
- BrandBeaquicy

- TAR Score9.2
TAR Score is a ranking system developed by TopAppliancesReviews.com. TAR score has no relationship or impact from any manufacturers or sales agent websites. Learn more
- BrandAMI PARTS

- TAR Score9.2
TAR Score is a ranking system developed by TopAppliancesReviews.com. TAR score has no relationship or impact from any manufacturers or sales agent websites. Learn more
- BrandTOMOON

- TAR Score9.2
TAR Score is a ranking system developed by TopAppliancesReviews.com. TAR score has no relationship or impact from any manufacturers or sales agent websites. Learn more
- BrandBeaquicy

- TAR Score9.0
TAR Score is a ranking system developed by TopAppliancesReviews.com. TAR score has no relationship or impact from any manufacturers or sales agent websites. Learn more
- BrandZYTTOO
Last update on 2026-07-14 / Affiliate links / Images, Product Titles, and Product Highlights from Amazon Product Advertising API
How To Test Washer Drain Pump For Proper Operation
A washer full of standing water can make a normal laundry day feel like a plumbing emergency. The drum sits heavy, clothes come out soaked, and the machine may hum like it wants to help but can’t quite get there. That’s where how to test washer drain pump for proper operation becomes more than a repair phrase, because it helps separate a simple blockage from a failing pump motor. Guessing gets expensive fast, so a calm, step-by-step check usually saves money, time, and a whole lot of muttering in the laundry room.
Start With The Drain Symptoms
A drain pump rarely fails in a neat, obvious way. Sometimes the washer stops mid-cycle with water still inside, but other times the clues are sneakier. Clothes may feel heavier than normal, the spin cycle may take longer, or the machine may leave a small puddle after draining. Those symptoms point toward restricted water flow, but they don’t automatically prove the pump is dead.
Noise tells part of the story, yet it can also fool you. A pump that hums may still be getting power, but a blocked impeller can stop it from moving water. A grinding sound often hints at coins, hairpins, lint clumps, or broken plastic bits near the pump blades. Silence during the drain cycle can suggest electrical trouble, a failed pump motor, or a control issue further upstream.
Drain speed matters too. A healthy washer should push water out with a steady, confident flow, not a weak trickle that gives up halfway through. Slow draining often comes from a clogged hose, a dirty filter, or a pump chamber packed with debris. Before blaming the motor, check the easy flow points first because they’re the usual troublemakers.
Use the symptoms like breadcrumbs, not a final verdict. A washer that won’t drain could have a good pump trapped behind a clogged hose. A washer that drains sometimes but not always may have loose debris shifting around inside the pump housing. That’s why proper diagnosis beats random part swapping every single time.
Cut Power And Control The Water
Safety comes first because washers mix electricity, water, and tight metal spaces. Unplug the washer before opening any access panel or touching parts near the pump. Turning the machine off at the button isn’t enough because internal components can still carry risk. Pulling the plug gives you a cleaner, safer starting point.
Expect leftover water even if the washer looks mostly drained. Keep towels nearby, place a shallow tray near the filter area, and move slowly as you loosen any cap or hose. Water can rush out faster than expected, especially on front-load washers with a lower drain filter. A little patience keeps the floor from turning into a slip-and-slide.
Some washers have a small emergency drain hose beside the pump filter. Use it before removing the filter cap if your model has one. That tiny hose may look unimpressive, but it helps release trapped water in a more controlled way. This step protects the floor and makes the pump inspection much less chaotic.
Also, avoid yanking the washer away from the wall without checking the hoses. Drain hoses and water supply lines can kink, stretch, or pop loose if pulled too hard. Move the machine just enough to reach the panel or rear hose area. Slow movement protects the hose connections and keeps one repair from becoming two.
Check The Drain Hose First
The drain hose can create pump-like symptoms even when the pump is perfectly fine. A kink behind the washer can slow water flow so badly that the machine acts like it has a weak motor. Push the washer forward carefully and inspect the hose from end to end. Look for sharp bends, crushed areas, or spots where the hose sits too tightly against the wall.
Remove the hose from the standpipe or sink connection if the setup allows it. A wad of lint, softener residue, or small fabric fibers can collect near the end. Run water through the hose into a bucket to see whether it flows freely. A strong stream points away from the hose, while a weak flow suggests hidden blockage.
Hose height can also cause trouble. If the drain hose sits too low, the washer may siphon water at the wrong time. If it sits too high, the pump may struggle to push water out efficiently. Your washer manual gives the safest height range, and staying within that range helps protect drain performance.
A portable or compact laundry setup needs extra attention because drain routing can change from load to load. For small-space machines, compare setup limits and drainage layout before assuming the pump is faulty. To keep compact laundry setups easier to manage, explore giantex portable washer options that fit tighter rooms without awkward hose placement. A cleaner hose path often means fewer surprise drainage headaches.
Inspect The Pump Filter And Trap
The pump filter catches more drama than most people expect. Coins, buttons, hair ties, pet fur, and lint can pile up until water barely moves. Open the lower access door if your washer has one, then turn the filter cap slowly. That filter area is one of the most common places to find drain restrictions.
Pull out debris carefully and check the filter screen for slimy buildup. Detergent residue can mix with lint and create a sticky layer that blocks flow. Rinse the filter under warm water and wipe the housing with a cloth. A clean filter helps the pump move water without fighting unnecessary resistance.
Look inside the pump trap with a flashlight. Small objects can sit just beyond the filter where fingers don’t reach easily. Avoid forcing sharp tools into the housing because the impeller blades can crack or shift. Gentle removal protects the pump chamber while clearing the stuff that shouldn’t be there.
Routine washer cleaning lowers the odds of this mess coming back. Detergent film, lint, and odor-causing residue all add stress to the drain path over time. To reduce buildup in machines with deep tubs, use a practical maintenance routine with best cleaner top loading washing machine guidance that suits regular laundry habits. Cleaner internal surfaces give the drain system less sludge to push around.
Spin The Impeller By Hand
The impeller is the small blade assembly inside the pump that pushes water out. After the washer is unplugged and drained, reach the visible impeller area through the filter opening if your model allows access. It should move with a slight magnetic resistance, not flop around loosely. A jammed or cracked impeller points toward mechanical pump trouble.
Small objects love to hide around the impeller. A coin edge, bra wire, toothpick, or broken zipper pull can wedge itself in just enough to stop movement. That’s why a pump may hum without draining. The motor tries to spin, but the blocked impeller can’t move water through the system.
A healthy impeller usually turns in small steps rather than spinning freely like a toy fan. That slight stepping feeling is normal on many pump motors. What isn’t normal is scraping, grinding, wobbling, or total lockup. Those signs suggest internal damage or debris that needs removal before another drain cycle.
Don’t overlook blade condition. Bent or missing impeller blades can reduce flow even if the motor still runs. The washer may drain slowly, leave water behind, or trigger drain errors after heavy loads. A damaged impeller often means the pump assembly needs replacement because the blades usually aren’t serviced separately.
Run A Controlled Drain Test
Once the hose, filter, and impeller look clear, a controlled drain test gives the next clue. Reinstall the filter cap securely, reconnect any hose, and plug the washer back in. Add a small amount of water if the drum is empty, then choose a drain or spin setting. Watch for steady water flow from the drain hose.
Listen closely during the test. A smooth pump sound with strong water movement usually means the pump is doing its job. A loud hum with little flow suggests the impeller may still be blocked, worn, or slipping. A clicking or grinding sound deserves another shutdown and inspection before running more cycles.
Check the drain hose outlet while the washer pumps water out. Water should exit in a steady stream, not spit, pulse weakly, or stop suddenly. Weak output after cleaning the filter can point to a deeper clog in the hose or pump body. Strong output means the original issue may have been a clogged filter rather than a failed pump.
Air quality around the laundry area can matter more than people expect, especially in dusty utility rooms. Dust settles on vents, appliance surfaces, and damp areas where lint already collects. For homes with heavy dust or laundry-room debris, compare best air purifier dust removal choices to reduce the grime that keeps landing around machines. Less airborne dust won’t fix a bad pump, but it can make routine cleaning less of a losing battle.
Test Pump Continuity With A Multimeter
A multimeter helps confirm whether the pump motor’s electrical path is intact. Unplug the washer again before touching wiring or removing connectors. Access the pump terminals, pull the wire connector gently, and set the meter to continuity or resistance. This test checks the motor winding, not the entire washer control system.
A pump with continuity usually shows that electricity can pass through the motor winding. The exact resistance range varies by model, so the service manual is the best reference. No continuity, an open reading, or a reading far outside the expected range can suggest a failed pump motor. That’s a stronger clue than noise alone.
Still, continuity doesn’t prove the pump moves water properly. A pump can pass an electrical test and still struggle because of damaged blades or internal wear. That’s why the best diagnosis combines visual inspection, flow testing, and electrical testing. One check gives a hint, but all three tell the real story.
Take a photo before disconnecting wires if the layout feels confusing. Washer wiring areas can look cramped, and similar connectors may sit close together. A quick photo makes reassembly easier and prevents crossed connections. Small habits like that keep a simple pump test from turning into a head-scratcher.
Check For Power At The Pump
A pump can look clean and still refuse to run if it never receives power. That’s why voltage testing matters after the filter, hose, and impeller checks look normal. This step takes more care because the washer must be plugged in during part of the test. If live electrical testing feels sketchy, calling a qualified technician is the smarter move, not a defeat.
Start by finding the pump connector and checking for loose, burned, or corroded terminals. A weak connector can interrupt power just enough to make the washer act unpredictable. Look for dark marks, melted plastic, brittle wire insulation, or a plug that doesn’t seat firmly. Those details often explain why the pump works one day and quits the next.
During a drain cycle, the control board should send voltage to the drain pump. A meter reading at the pump connector can confirm whether power arrives during that command. If the pump receives proper voltage but stays silent, the pump motor is likely bad. If no voltage reaches the connector, the issue may sit in the wiring harness, lid switch, door lock, pressure sensor, or control board.
Don’t rush this step just because the washer seems simple. Modern machines rely on several safety checks before they allow draining or spinning. A faulty lid switch on a top-load washer, for example, can stop the drain routine even though the pump itself is fine. Testing power keeps the repair focused instead of turning the laundry room into a guessing booth.
Separate Pump Failure From Control Problems
A failed drain cycle doesn’t always point straight at the pump. Control boards, pressure switches, and door locks can all interrupt the same operation. That overlap creates a messy situation where one symptom has several possible causes. The best move is to follow the signal path instead of blaming the loudest part.
Door lock problems can stop a front-load washer before it enters a full spin or drain sequence. The machine may click, pause, or throw an error without ever sending power to the pump. A top-load washer may do something similar if the lid switch doesn’t confirm that the lid is safely closed. In both cases, the pump may be innocent.
Pressure sensors can also confuse the washer. If the machine thinks the tub is already empty, it may skip or shorten the drain command. If it thinks the tub is still too full, it may lock the cycle and refuse to move forward. Checking the pressure tube for clogs, kinks, or residue can reveal a small blockage causing big confusion.
A control board failure is possible, but it shouldn’t be the first guess. Boards cost more and usually need stronger proof before replacement makes sense. If the pump has continuity, spins freely, receives no voltage, and the door or lid checks out, then control-related diagnosis becomes more reasonable. Even then, careful testing beats throwing parts at the machine and hoping for the best.
Read Error Codes Without Overreacting
Error codes can help, but they aren’t always as direct as they look. A drain error usually means the washer failed to remove water within the expected time. That may involve the pump, but it may also involve a clogged hose, blocked filter, oversudsing, or a sensor problem. Treat the code as a starting clue, not a final diagnosis.
Many washers show codes like drain timeout, pump fault, or water level not changing. Those messages sound serious, and sometimes they are. Still, a handful of lint or a sock fragment can trigger the same warning. That’s why cleaning the drain path before replacing the pump often saves money.
Oversudsing can trick the washer into draining poorly too. Too much detergent creates foam that doesn’t move like water, so the machine struggles to sense and remove it properly. This problem shows up more often with high-efficiency washers and heavy detergent habits. Better detergent measuring and routine cleaning help protect pump performance.
Fabric dye projects can leave residue if the washer isn’t cleaned well afterward. Dye particles and hot-water cycles may loosen old buildup, which can drift toward the filter or pump chamber. After color-refresh laundry jobs, protect the drain system with smart cleanup habits and compare best fabric dye washing machine options before running dyed loads through a shared washer. Cleaner dye routines reduce surprise stains and lower the chance of residue gathering in the wrong place.
Know The Signs Of A Bad Pump
A truly bad pump usually leaves a pattern, not just one odd load. The washer may hum during every drain attempt, drain only a little, or stop with water still sitting in the tub. A pump that gets proper voltage but won’t run has a strong case against it. A pump that runs but barely moves water may have worn impeller blades or internal damage.
Burning smells deserve immediate attention. A stalled motor can overheat if it keeps trying to run against a jam or internal failure. Unplug the washer and inspect for debris before running another cycle. Heat, smell, and repeated drain failure together suggest serious pump stress.
Leaks around the pump body also matter. A cracked housing, loose seal, or damaged hose connection can let water drip near electrical parts. Even a slow leak can create rust, moldy smells, or floor damage over time. A leaking pump assembly usually needs replacement because seals and housings are often not worth patching.
Age plays a role, but it shouldn’t become the only reason for replacement. A newer pump can fail early if it swallows debris often, while an older pump can keep going if the drain path stays clean. The real question is whether the pump passes flow, mechanical, and electrical checks. If it fails more than one, replacement starts making practical sense.
Replace The Pump Only After Proof
Replacing the drain pump too early is a common mistake. The part may not be wildly expensive, but the time, mess, and frustration add up. Proof matters because blocked hoses and dirty filters can mimic pump failure almost perfectly. A careful test protects the budget and keeps the repair honest.
Match the replacement pump by model number, not just by looks. Washer pumps can share similar shapes while using different connectors, mounting tabs, or flow ratings. A poor match may leak, vibrate, or fail to communicate properly with the machine. The right part keeps fitment and drain strength where they should be.
Before removing the old pump, take photos of the wiring, hose clamps, and mounting position. Those pictures make reassembly easier, especially inside tight cabinets. Clamp placement matters because a hose that sits slightly crooked can leak during the first real load. Small details prevent repeat repairs.
After installation, run a short drain and rinse cycle while watching for leaks. Check the pump area, drain hose, and filter cap before pushing the washer fully back into place. A clean test cycle confirms the new pump moves water properly and seals stay dry. That final inspection catches installation issues before laundry piles up again.
Prevent Drain Pump Trouble Later
Prevention isn’t glamorous, but it keeps the washer from turning into a weekend project. Empty pockets before every load because coins, screws, and hairpins are brutal on pump impellers. Use mesh bags for tiny items like baby socks or delicate pieces that love to disappear. These small habits protect the drain pump from the junk it was never meant to chew through.
Clean the pump filter on a schedule that matches real laundry habits. Homes with pets, heavy towels, work clothes, or lots of fleece may need more frequent cleaning. Waiting until the washer stops draining usually means the filter has already been struggling for a while. A quick monthly check can prevent slow-drain surprises.
Use the right amount of detergent, even if the cap makes “a little extra” look harmless. Too much soap leaves residue that traps lint and coats drain parts over time. High-efficiency washers are especially picky because they use less water to rinse everything away. Less buildup means the pump doesn’t have to fight through sticky sludge.
Laundry rooms near kitchens can collect grease-heavy air, especially in small homes or apartments with poor ventilation. Greasy dust settles on appliances and mixes with lint, making surfaces harder to keep clean. To improve airflow near cooking areas, compare best range hoods indian cooking solutions that handle stronger odors and heavier cooking residue. Cleaner surrounding air won’t repair a pump, but it can reduce grime that settles around laundry equipment.
Decide Between Repair And Service
Some drain pump tests are simple enough for a careful homeowner. Cleaning a filter, checking a hose, and listening during a drain cycle are practical first steps. Multimeter testing is manageable too if basic electrical safety feels familiar. Live voltage checks, though, deserve respect because water and electricity don’t leave much room for sloppy work.
A technician makes sense when the washer shows mixed signals. Maybe the pump has continuity but no voltage, or maybe the machine throws several codes at once. Control boards, pressure systems, and wiring faults can get tricky fast. Paying for skilled diagnosis may cost less than buying parts that don’t solve the problem.
Repair value depends on the washer’s age, condition, and history. A newer machine with a confirmed bad pump is usually worth repairing. An older washer with bearing noise, leaks, rust, and repeated electronic faults may not be as sensible. The practical choice comes down to total repair cost, not just the price of the pump.
Keep notes after each test because patterns help. Write down whether the pump hummed, whether water flowed, whether the hose was clear, and what the meter showed. Those details make the next step easier, whether that means replacing the pump or explaining the issue to a technician. Clear notes turn a frustrating washer problem into a repair path that actually makes sense.


10 Best Quality Semi Automatic Washing Machine of 2026 For Leak-Free Laundry

11 Best Small Washer Machine of 2026 For Everyday Laundry

12 Best Vibration Pads For Washing Machine of 2026 To Stop Walking and Shaking

11 Best Selling Front Load Washing Machine of 2026 For Quiet Odor-Free Laundry

11 Best Washing Machine For King Size Bedding of 2026 To Prevent Cycle Errors

10 Best Small Front Loader Washing Machine of 2026 For Tight Closets

12 Best Side Load Washing Machine of 2026 For Low Vibration

11 Best Single Tub Washing Machine of 2026 For Apartments Without Hookups






