
How to Sharpen Serrated Knives With a Knife Sharpener

Most people assume a dull bread knife is ready for the trash because the wavy teeth seem impossible to sharpen at home. That assumption is false. You can restore the edge cleanly using a cone-shaped sharpening rod or a sharpener with a dedicated serrated slot. Pulling wavy teeth through a standard kitchen notch will grind them flat and ruin the blade, but working each individual curve brings back the bite.
The exact steps depend on your blade and the tool you have on hand. Most serrated knives have a slanted cutting edge on one side and a completely flat back, so working both sides will spoil the cut. Wide scallops also need a thicker part of a rod than narrow, pointy teeth. Matching your tool to the grooves keeps every slice clean and smooth.
Standard V-notch sharpeners flatten and destroy serrated teeth
Bread knives and serrated steak knives do not cut like smooth chef knives. A smooth knife has a straight edge that slices by pressing straight down through food. A serrated knife works like a small hand saw, using pointed teeth to puncture hard bread crusts or slick tomato skins and curved dips to slice through soft interiors. When a serrated knife feels dull, it usually means the curved dips have lost their edge, or the teeth have bent slightly out of line.
Most standard pull-through sharpeners in home kitchens use two small ceramic or carbide blades that cross in a V shape. These slots are built exclusively for straight blades. When you pull a wavy edge through a V-notch, the crossing stones only touch the highest pointed tips of the teeth. The stones grind those points down flat, completely missing the gullet (the curved dip between each pointed tooth) where the actual slicing happens.
Within two or three pulls, a standard V-notch turns sharp pointed teeth into blunted, squared nubs. Once those tips are ground flat, the blade loses its ability to bite into crusty surfaces. Instead of piercing cleanly, the knife skids across food. Slipping blades are a primary cause of severe kitchen cuts, because you have to press down much harder to force a dull saw through food.
Blade grind also matters here. Most serrated kitchen knives feature a single bevel (a slanted cutting edge ground onto only one side of the tooth) while the back side remains completely flat. Standard pull-through sharpeners shave metal from both sides at identical angles. Running a single-bevel serrated knife through a two-sided slot destroys the factory shape, leaving a mangled edge that tears bread into ragged crumbs.
Cone-shaped sharpening sticks work better than pull-through slots
You have two main tools for sharpening serrations at home: a tapered rod and a handheld sharpener with a dedicated serrated slot. A tapered rod (a cone-shaped sharpening stick that gets narrower toward the tip) is by far the most effective tool. Because the stick changes in thickness from base to tip, you can slide it into almost any tooth shape until the diameter matches the curve of the steel.
Tapered rods are typically made from steel coated in fine diamond grit or smooth ceramic. Diamond grit cuts quickly, making it ideal for restoring teeth that have gone years without maintenance. Ceramic rods remove less metal and leave a polished, clean finish for routine upkeep. Both styles give you total manual control over the angle, pressure, and exact area of contact on each tooth.
Handheld sharpeners with dedicated serrated slots offer a faster alternative when you need a quick edge before dinner. These tools use specially shaped carbide cutters or rounded ceramic wheels designed to reach into scalloped spaces better than straight V-slots. They are convenient, but they cannot adapt to custom scallop sizes. They also remove more raw metal than a gentle rod, which can shorten the working life of your cutlery over time.
If you own a quality bread knife from a set like a German high-carbon steel premium knife block set, taking a few minutes with a tapered rod is always the better choice. German kitchen knives use durable stainless steel (rust-resistant, easy-to-clean metal) that responds well to manual rod honing. The rod cleans each tooth without thinning the surrounding blade steel.
Sharpen each curved tooth individually using a tapered rod
Sharpening with a cone-shaped stick takes patience, but the process is straightforward once you find your rhythm. Set your cutting board on a flat counter and place a damp towel underneath so the board does not shift. Work in a brightly lit room so you can clearly see the reflections along the edge of each tooth.
- Find the beveled side: Hold the knife handle in your hand and look closely down the blade under good light. One side of the knife will show a distinct slanted face along each tooth curve, while the opposite side will be smooth and flat. You will do nearly all your sharpening on this beveled side.
- Size the rod to the dip: Take your tapered rod and insert the narrow tip into the gullet (the curved dip between teeth) closest to the handle. Slide the rod deeper into the dip until the width of the rod matches the width of the scallop. If the rod is too thin, it wobbles; if it is too thick, it rests only on the outer points.
- Match the cutting angle: Tilt the rod until it lies flush against the slanted bevel. On most kitchen knives, this angle sits between 15 and 20 degrees. You can feel when the flat of the stone rests evenly across the slanted steel.
- Stroke outward through the curve: Push the rod gently forward, moving from the bottom of the dip out toward the sharp point of the tooth. Always stroke away from the blade body and away from your hands. Give the rod a slight rolling twist with your fingers as you push forward so the abrasive grit sweeps across the whole curve.
- Count four to six strokes per tooth: Use light, consistent pressure. Let the diamond or ceramic grit shave the metal. Heavy pressure gouges the steel and strips the diamond coating off your tool. Count your strokes so every tooth receives the same amount of care.
- Work along the entire blade: Move to the next tooth and repeat the exact same motion. Work systematically from the handle end all the way down to the knife tip.
Take your time on each dip. Rushing through the teeth can cause the rod to slip off the edge and scratch the polished face of the blade. Keeping a steady pace ensures an even, razor-sharp edge across the entire cutting length.
Wipe away the rough metal ridge on the back
When you sharpen the beveled side of each tooth, the rod pushes tiny particles of steel over the edge to the opposite side. This process forms a burr (the microscopic wire edge or curved sliver of metal that forms on the opposite side during sharpening). If you leave this wire edge attached, the knife will snag, tear bread crusts, and quickly roll back into dullness.
To confirm the wire edge is there, hold the knife still and gently slide the pad of your thumb from the knife spine downward across the flat back face. Never slide your thumb lengthwise along the cutting edge. You should feel a fine, scratchy ridge of metal catching your skin along the back of the teeth.
Remove this rough wire ridge by following these simple checks:
- Lay the rod completely flat: Place your tapered rod or a flat fine-grit stone flush against the un-beveled back side of the blade. The tool must rest completely flat against the steel with zero tilt. Tilting the rod creates a bevel on the flat side, which ruins the cutting balance of the knife.
- Make one light sweep: Glide the rod across the back of the blade from the handle toward the tip using feather-light pressure. You only want to snap off the microscopic wire edge, not grind away blade steel.
- Check for smoothness: Feel the back face again with your thumb moving from spine to edge. The scratchy lip should be gone, leaving the back face glassy and smooth.
- Wash and dry immediately: Hand-wash the knife with warm soapy water to clear away fine steel grit. Dry the blade completely with a towel right away to keep moisture from causing rust spots.
Use dedicated serrated sharpener slots only with light pressure
When you do not have ten minutes to work through individual teeth with a rod, a handheld sharpener with a dedicated serrated slot offers a quick way to restore cutting bite. These slots feature specifically positioned ceramic pins or specialized tungsten carbide blades shaped to contact the curves without flattening the tips. They work well for quick kitchen touch-ups, provided you use the correct technique.
- Secure the sharpener: Place the sharpener on an uncluttered, level countertop. If your sharpener has a rubber base or a suction lock, press it down firmly to ensure it cannot slide or wobble while you pull the knife.
- Identify the correct slot: Check the labels on your sharpener housing. Only insert the knife into the slot marked specifically for serrated blades. Never use the straight coarse or fine slots, which will grind the teeth flat.
- Seat the heel of the blade: Place the serrated edge into the slot near the handle, keeping the blade standing straight up at a 90-degree angle to the counter. Do not tilt the blade sideways unless the sharpener manual explicitly instructs you to lean it toward the beveled face.
- Pull straight back with light pressure: Draw the knife smoothly toward your body from the heel to the tip. Use very light downward pressure, letting the weight of the knife do most of the work. Never push the blade forward inside the slot, as pushing back and forth chips the delicate teeth.
- Limit your passes: Make three to five gentle pulls through the slot. Stop and inspect the teeth. Over-sharpening in a pull-through slot removes metal rapidly and distorts the shape of the scallops.
- Test the edge on soft food: Try slicing a ripe tomato or a crusty bread roll. A properly sharpened serrated edge should bite into the skin or crust without requiring any downward force.
If the blade still drags or tears after five passes, stop using the pull-through slot. Continuing to drag a stubborn blade through carbide cutters will strip away excess metal without fixing deeply blunted teeth. Switch to a tapered rod to address the individual curves properly.
Common sharpening mistakes can ruin your blade beyond repair
Sharpening serrated blades is easy once practiced, but a few common errors can permanently damage the steel. Because serrated edges have complex geometry, grinding away metal in the wrong spot cannot be undone. Knowing what to avoid preserves both your knives and your kitchen safety.
- Avoid sharpening the flat back side: Only sharpen inside the beveled dips. Grinding into the flat side rounds off the teeth and ruins the cutting line. The back side only needs a flat, gentle wipe to clear the wire burr.
- Never use heavy grinding force: Pressing down hard on a tapered rod can gouge uneven notches into the scallops. Heavy pressure also strips the fine diamond grit off your sharpening rod, ruining the tool.
- Do not sharpen micro-serrations: Inexpensive steak knives often have micro-serrations (tiny, needle-like teeth packed tightly together). A tapered rod cannot fit into these tiny grooves. Trying to sharpen micro-serrations will only destroy them, so these blades are meant to be replaced when dull.
- Store blades safely after sharpening: Never toss sharpened serrated knives loose into a utensil drawer where metal edges bang together. Store them in a slotted wooden block or on a magnetic strip like those found with high-carbon Japanese chef knife sets to protect the teeth from chipping.
- Hand-wash blades only: High heat and abrasive detergents in automatic dishwashers warp knife handles and dull fine cutting teeth. Always hand-wash your knives and dry them immediately instead of soaking them in sinks.
Sometimes a knife cannot be restored at home. If several teeth have snapped off from hitting frozen food or bone, a tapered rod will not fix the missing metal. Deep chips in the steel or teeth that have been ground completely flat by old V-notch sharpeners require professional regrinding. In many cases, replacing an inexpensive stamped bread knife is more practical and cost-effective than paying a professional grinding service.
Choose sharpeners that match the curve of your blade
When shopping for a sharpener to maintain your serrated knives, look for a tool that matches the specific scallops on your cutlery. Tapered diamond rods remain the most versatile choice for home kitchens because the gradual cone shape fits everything from narrow tomato knife scallops to wide bread knife curves. Look for a rod with a fine to medium diamond grit, which cuts steel cleanly without leaving deep gouges.
If you prefer a compact pull-through sharpener for speed and convenience, look closely at the housing before purchasing. Make sure the unit features a dedicated, independently labeled slot for serrated blades rather than relying on standard straight V-notches. Check that the sharpener includes a stable, non-slip base or a solid suction mount so the tool stays planted on your counter while you pull the blade.
Check the safety features on handheld models as well. A wide finger guard or an enclosed handle helps keep your hands safely separated from the exposed teeth during the stroke. Choosing a sharpener that supports both straight and serrated edges gives you a single, dependable tool for all your kitchen cutlery, keeping your knives cutting cleanly for years to come.

- TAR Score9.4
TAR Score is a ranking system developed by TopAppliancesReviews.com. TAR score has no relationship or impact from any manufacturers or sales agent websites. Learn more
- BrandACCUSHARP

- TAR Score9.4
TAR Score is a ranking system developed by TopAppliancesReviews.com. TAR score has no relationship or impact from any manufacturers or sales agent websites. Learn more
- BrandACCUSHARP

- TAR Score9.4
TAR Score is a ranking system developed by TopAppliancesReviews.com. TAR score has no relationship or impact from any manufacturers or sales agent websites. Learn more
- BrandACCUSHARP

- TAR Score9.2
TAR Score is a ranking system developed by TopAppliancesReviews.com. TAR score has no relationship or impact from any manufacturers or sales agent websites. Learn more
- BrandACCUSHARP
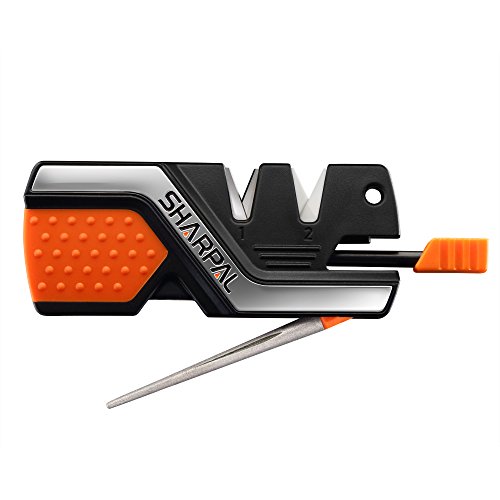
- TAR Score9.2
TAR Score is a ranking system developed by TopAppliancesReviews.com. TAR score has no relationship or impact from any manufacturers or sales agent websites. Learn more
- BrandSHARPAL

- TAR Score8.8
TAR Score is a ranking system developed by TopAppliancesReviews.com. TAR score has no relationship or impact from any manufacturers or sales agent websites. Learn more
- BrandSHARPAL

- TAR Score8.8
TAR Score is a ranking system developed by TopAppliancesReviews.com. TAR score has no relationship or impact from any manufacturers or sales agent websites. Learn more
- BrandSiyurongg

- TAR Score8.8
TAR Score is a ranking system developed by TopAppliancesReviews.com. TAR score has no relationship or impact from any manufacturers or sales agent websites. Learn more
- Brandlongzon

- TAR Score8.6
TAR Score is a ranking system developed by TopAppliancesReviews.com. TAR score has no relationship or impact from any manufacturers or sales agent websites. Learn more
- BrandSharp Pebble
Last update on 2026-10-02 / Affiliate links / Images, Product Titles, and Product Highlights from Amazon Product Advertising API


Top Rated Best Quality Range Hoods: 2026 Expert Picks

The 12 Best Small Solar Generators 2026

10 Best Quality Semi Automatic Washing Machine of 2026 For Leak-Free Laundry

11 Best Small Washer Machine of 2026 For Everyday Laundry

12 Best Vibration Pads For Washing Machine of 2026 To Stop Walking and Shaking

11 Best Selling Front Load Washing Machine of 2026 For Quiet Odor-Free Laundry

11 Best Washing Machine For King Size Bedding of 2026 To Prevent Cycle Errors

10 Best Small Front Loader Washing Machine of 2026 For Tight Closets






