
How to Sharpen Scissors With a Knife Sharpener Rod

A sharpening rod can quickly restore scissors. Success comes down to working only the angled outer edge while leaving the inside surface completely untouched. Unlike kitchen knives, scissors cut by sliding two flat metal faces tightly against each other. Scraping that smooth inside face rounds off the shearing corner, leaving a gap that bends paper instead of slicing it.
What happens next depends on your tool and the blade angle. A rod coated in ceramic or diamond grit removes dull metal, while a smooth steel stick only realigns folded edges. You also need to match the blade's steep factory slope instead of using a shallow knife angle. Sometimes, tightening the center screw solves the trouble before any sharpening begins. Here is the right way to stroke each blade so your scissors cut cleanly again.
Scissors Have Only One Angled Edge Per Blade
A kitchen knife and a pair of scissors slice things apart in completely different ways. A standard kitchen knife has a blade that tapers down from both sides to form a centered point. When you slice an onion, that two-sided wedge pushes food outward to both sides as it cuts. Kitchen shears and crafting scissors do not work that way at all. They use a shearing action where two hard steel edges slide directly past one another, clipping material between them like a miniature paper trimmer.
Because of this shearing action, each scissor blade has only one bevel (angled cutting edge) along its outer rim. The other side is the flat face (smooth inside surface of the blade). When the scissors open and close, those two flat inside surfaces glide against each other with almost zero clearance. That flush fit is what makes scissors cut cleanly instead of grabbing material.
The cutting action happens right at the sharp ninety-degree corner where that flat face meets the outer angled bevel. When scissors start to feel dull, that corner has worn down, rounded off, or folded over slightly from regular use. The most common mistake people make is grabbing a sharpening tool and rubbing both sides of the blade like they are working on a chef knife. Doing that rounds off the flat face and ruins the tool in seconds.
If you grind metal off the flat inside face, you create an open gap between the blades. When you try to cut wrapping paper, cardboard, or raw poultry, the material will simply slide into that gap and fold in half instead of parting. The primary rule of scissor maintenance is absolute: only sharpen the outer angled bevel, and never grind the flat inside surface.
Match Your Sharpening Rod Material To The Dullness
Before you run a sharpening stick across your blades, check what kind of tool you actually have in your hands. People often pull a long steel rod out of a kitchen block and assume it works like sandpaper. That is not always true, and picking the wrong rod will leave your blades just as dull as when you started. In many homes, kitchen shears sit right alongside chef tools in a German high-carbon steel premium knife block set, where the included rod is designed for edge alignment rather than grinding.
To choose the right tool for the job, check your rod against these common materials:
- Smooth or grooved steel honing rod: This is a traditional steel smoothing stick. It is typically forged from carbon steel and plated with nickel-chrome to resist rust. A smooth or fine-grooved steel rod does not shave away metal. It simply pushes rolled steel back into alignment. If your shears are only slightly tired from cutting paper, a steel rod can realign the edge, but it will not fix nicks or deep bluntness.
- Ceramic sharpening rod: Ceramic rods are made from hardened, kiln-fired minerals that are much harder than household blade steel. A ceramic rod gently shaves off tiny amounts of metal while smoothing the edge. It works well for light touch-ups when your scissors need a refreshed bite.
- Diamond-coated sharpening rod: This style features a steel core coated in industrial monocrystalline diamond particles, often around a fine 600 grit. Diamond is harder than any household blade steel. It quickly grinds away worn metal and establishes a crisp new cutting corner. If your scissors chew cloth, crush herbs, or have visible flat spots on the edge, a diamond rod is the only type with enough abrasive bite to restore them.
If your scissors are completely rounded or nicked, rubbing them against a smooth steel rod will only polish the dull curve. Verify that your rod has visible abrasive grit, such as ceramic or diamond, before attempting to reshape worn cutting edges.
Sharpen Only The Outer Bevel In Smooth Sweeps
Sharpening scissors on a handheld rod takes steady hands and patience. Because the rod is round, the contact area between the rod and the flat bevel is very small. Take your time with each stroke so you do not wobble and round off the cutting edge.
- Clean and inspect the blades: Wash the scissors with warm water and dish soap to remove built-up tape residue, kitchen grease, or dirt. Dry the blades thoroughly. If your kitchen shears come apart at the hinge, separate them into two individual blades. If they do not separate, open them as wide as possible so the blades stay clear of each other while you work.
- Mark the bevel with ink: Take a black permanent marker and color the entire outer angled bevel from the pivot (center screw holding the blades together) to the tip. This simple trick lets you inspect your progress. As you stroke the rod across the edge, the rod will scrape away the black ink. If the ink disappears evenly across the whole bevel width, your angle is correct. If ink remains near the cutting line, your angle is too shallow.
- Anchor the sharpening rod: Place the tip of your rod downward onto a wooden cutting board or a folded damp kitchen towel on a flat counter. Holding the rod vertically with its tip pressed into a stable surface prevents slipping and protects your fingers. Many cooks prefer keeping their everyday tools organized on a magnetic knife block and knife set combo to keep counters clear and safe during edge maintenance.
- Match the steep factory angle: Scissor bevels are much steeper than kitchen knives. While a kitchen knife sits at a gentle 15 to 20-degree angle, a scissor bevel is usually ground at a steep 60 to 75-degree angle. Place the outer bevel against the rod so the flat slope of the metal rests flush against the steel or diamond surface.
- Stroke from base to tip: Hold the scissor blade firmly and draw the angled bevel across the rod in a smooth, sweeping motion. Start near the pivot and slide the blade down the rod toward the tip. Use moderate, steady pressure. Do not scrub back and forth. Let the abrasive material do the cutting without bearing down with excessive force.
- Count your passes: Make five to eight smooth passes across the first blade. Inspect the bevel to verify that the marker ink was removed evenly. Once the first blade looks clean and feels uniformly shaped, repeat the exact same number of strokes on the outer bevel of the second blade.
During the entire process, make sure the round surface of the rod never slips over the cutting corner onto the flat inside face. Keep the rod firmly planted against the outer slope from start to finish.
Close The Blades To Snap Off The Burr
Once you finish sharpening the outer bevel with an abrasive rod, run your finger carefully across the back of the blade. Feel from the flat inside face outward toward the edge, moving across the metal rather than along it. You will feel a tiny rough metal lip along the inside corner. This is called a burr (the microscopic wire edge that forms on the opposite side during sharpening).
When sharpening a standard kitchen knife, you would sweep the opposite side across a fine stone or leather strap to polish this wire edge away. With scissors, you must never rub a sharpening rod across that flat face to clear the burr. Even a light touch with a round rod will scuff the flat surface, bevel the inner corner, and create a gap where the blades bypass each other.
Instead, let the scissor blades clean themselves. The shearing design of the tool provides a built-in deburring system. Reassemble the shears if you took them apart, or simply close them slowly. As the two flat faces slide across one another, the hard opposing steel blade shears the thin wire lip clean off the edge.
To finish clearing loose metal particles, grab a sheet of standard printer paper or lightweight scrap cardboard. Make three to five slow cuts from the hinge all the way through the tips. The paper wipes away microscopic wire fragments without scratching the polished flat faces. Finish by wiping both blades clean with a dry microfiber cloth so stray metal shavings do not end up on your cutting board or fabric table.
Tighten The Center Pivot If Blades Push Apart
If you have sharpened the bevel, cleared the burr, and the scissors still fold paper or chew fabric, the problem is rarely the edge. Most failed cuts happen because the blades are physically separating during the stroke.
Check the center tension before you grind off any more steel. The pivot holds the two halves tightly together so the edges stay in firm contact as they slide past one another. Over years of cutting tough packaging or cardboard, this center joint naturally loosens. Even razor-sharp blades cannot cut if there is enough space between them for material to slip through.
Inspect the pivot tension using a quick gravity check:
- Hold the scissors horizontally by one handle.
- Lift the upper handle straight up until the blades open to a ninety-degree angle.
- Let go of the upper handle and observe how it falls.
- If the handle drops completely shut on its own with a clatter, the pivot is far too loose.
- If the handle drops down about halfway and stops under gentle friction, the tension is correct.
If the pivot has an adjustable screw, grab a matching screwdriver. Turn the screw clockwise in very small increments, about one-eighth of a turn at a time. After each tiny turn, open and close the scissors to check the resistance. The action should feel smooth and firm without binding or grinding.
If your scissors have a solid brass or steel rivet instead of a screw, you cannot adjust them with a screwdriver. Place the back of the rivet flat against a hard metal surface, such as an anvil or the flat side of a bench vise. Set a flat metal punch on the center of the rivet and tap it gently with a small hammer. Check the handle friction after each light tap. Be cautious: if you hit the rivet too hard, the blades will lock together completely, requiring gentle prying to loosen them again.
Finally, check the straightness of the blades. Quality scissor blades are not completely flat like rulers. They are built with a subtle inward curve or bow toward each other. This bow ensures that the cutting edges press firmly together at the exact point where they cross. If someone used your scissors to pry open a paint can or twist a wire, one blade may have bent outward. Look down the length of the closed blades from the handle to the tip. If light shines between the edges near the middle, the blades are bent outward. While heavy kitchen shears can sometimes be eased back into shape in a padded vise, thin craft scissors that are severely warped should be replaced.
Choose The Right Sharpening Tool When Basic Rods Fall Short
A standard smooth kitchen rod can keep healthy shears running smoothly, but it cannot repair deep chips or heavily rounded edges. When your household scissors refuse to cut cleanly after a quick touch-up, upgrading your sharpening equipment solves the problem much faster than scrubbing away on a smooth steel bar.
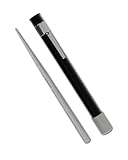
If you prefer using sharpening rods, look for compact, diamond-coated rods rather than smooth steel sticks. A fine monocrystalline diamond surface removes hard stainless steel with minimal hand pressure. Retractable pocket rods with a flat or half-round profile make keeping a consistent angle much easier than working on a thick, fully round kitchen steel. Look for tools featuring fine grit ratings around 600 grit, which provide enough abrasive power to grind out minor nicks without leaving coarse, jagged scratches on the cutting edge.
Dedicated handheld scissor sharpeners offer an even simpler route for general household use. These compact tools feature preset ceramic or tungsten carbide sharpening inserts built into guided slots. Instead of forcing you to balance a steep 60 to 75-degree angle by eye, the tool sets the alignment automatically. You simply insert the open scissor blades into the guided slot and pull the tool through with light, even strokes. Many of these tools include built-in safety guards, cut-resistant grips, and non-slip rubber bases that keep the tool steady on the table.
Keep in mind that DIY rod sharpening is meant for general utility shears, kitchen scissors, and basic craft tools. If you own expensive Japanese fabric shears, curved embroidery snips, or professional hair-cutting scissors, do not attempt to sharpen them on a handheld rod. Professional styling and tailoring shears often feature delicate convex edges and micro-beveled faces ground to exact machine tolerances. Using a manual rod on high-end salon tools will alter their balance and ruin their edge geometry. For those specialty blades, always send them to a qualified professional sharpening service equipped with flat water hones and factory angle jigs.

- TAR Score9.4
TAR Score is a ranking system developed by TopAppliancesReviews.com. TAR score has no relationship or impact from any manufacturers or sales agent websites. Learn more
- BrandUtopia Kitchen

- TAR Score9.4
TAR Score is a ranking system developed by TopAppliancesReviews.com. TAR score has no relationship or impact from any manufacturers or sales agent websites. Learn more
- BrandACCUSHARP

AccuSharp Professional Dual Rod Knife Sharpener, Retractable Diamond-Coated Steel Rod,
View on Amazon- TAR Score9.2
TAR Score is a ranking system developed by TopAppliancesReviews.com. TAR score has no relationship or impact from any manufacturers or sales agent websites. Learn more
- BrandACCUSHARP
- TAR Score9.2
TAR Score is a ranking system developed by TopAppliancesReviews.com. TAR score has no relationship or impact from any manufacturers or sales agent websites. Learn more
- BrandWamery

- TAR Score9.2
TAR Score is a ranking system developed by TopAppliancesReviews.com. TAR score has no relationship or impact from any manufacturers or sales agent websites. Learn more
- BrandSHARPAL

- TAR Score9.0
TAR Score is a ranking system developed by TopAppliancesReviews.com. TAR score has no relationship or impact from any manufacturers or sales agent websites. Learn more
- BrandSmith's

- TAR Score8.8
TAR Score is a ranking system developed by TopAppliancesReviews.com. TAR score has no relationship or impact from any manufacturers or sales agent websites. Learn more
- BrandSiyurongg

- TAR Score8.8
TAR Score is a ranking system developed by TopAppliancesReviews.com. TAR score has no relationship or impact from any manufacturers or sales agent websites. Learn more
- BrandLUFFEXX

- TAR Score8.8
TAR Score is a ranking system developed by TopAppliancesReviews.com. TAR score has no relationship or impact from any manufacturers or sales agent websites. Learn more
- Brandlongzon

- TAR Score8.8
TAR Score is a ranking system developed by TopAppliancesReviews.com. TAR score has no relationship or impact from any manufacturers or sales agent websites. Learn more
- BrandSHARPAL
Last update on 2026-10-03 / Affiliate links / Images, Product Titles, and Product Highlights from Amazon Product Advertising API


Top Rated Best Quality Range Hoods: 2026 Expert Picks

The 12 Best Small Solar Generators 2026

10 Best Quality Semi Automatic Washing Machine of 2026 For Leak-Free Laundry

11 Best Small Washer Machine of 2026 For Everyday Laundry

12 Best Vibration Pads For Washing Machine of 2026 To Stop Walking and Shaking

11 Best Selling Front Load Washing Machine of 2026 For Quiet Odor-Free Laundry

11 Best Washing Machine For King Size Bedding of 2026 To Prevent Cycle Errors

10 Best Small Front Loader Washing Machine of 2026 For Tight Closets






