
How to Sharpen Pencils With a Knife Without Breaking the Lead

Most people assume sharpening a pencil with a knife takes heavy whittling strokes, but forcing the cut almost always fractures the brittle core. The clean, safe way is to rest the blade nearly flat against the wood and push the back of the knife with your thumb to shave paper-thin slivers. This controlled movement keeps the steel from biting too deep, protecting your fingers from slips while keeping the exposed lead intact.
How you trim depends on your pencil and your blade. Soft drawing charcoal snaps under pressure that standard writing graphite easily tolerates, while a dull knife crushes cedar fibers instead of slicing them cleanly. The point you need matters as well, from a flat carpenter chisel to a long taper for detailed sketch work. Getting your grip right solves the problem before you make that first cut.
The Short Version
- Grip the pencil firmly in your non-dominant hand and rest the knife blade nearly flat against the wood, pointing away from your body.
- Place the thumb of your pencil-holding hand directly onto the spine (the flat back edge of the blade) to power each small cut forward with controlled leverage.
- Shave thin, shallow ribbons of wood in short strokes, rotating the pencil slightly after every pass until roughly half an inch of bare core (pencil lead) is visible.
- Turn the blade ninety degrees so the cutting edge stands upright against the bare graphite, then gently scrape outward toward the tip until you form your desired point.
The Right Knife Setup
Sharpening a pencil by hand requires precision rather than brute force. A standard rotary sharpener forces a pencil into a fixed cone, but a knife lets you customize the wood taper and the graphite length for writing, shading, or marking lumber. To get clean results without splitting the casing, your cutting tool needs to meet a few basic requirements.
- A razor-sharp cutting edge: A dull edge crushes wood fibers instead of slicing them. When a blade struggles to cut cedar, you naturally push harder, which instantly fractures the brittle graphite inside. A blade with a keen edge, much like German high-carbon steel blades, glides through wood grain without catching or tearing.
- A flat or gently curved blade profile: Straight utility blades, craft scalpels, and small pocket knives work best. Avoid large serrated edges or heavily recurved blades, which gouge uneven hollows into the wood collar.
- A secure locking mechanism: If you use an EDC (an everyday carry pocket knife), ensure it features a sturdy liner lock (the spring bar inside the handle that snaps behind the open blade to stop it from closing on your fingers) or a lockback. Never sharpen pencils with a loose friction folder or a slipjoint that could accidentally snap shut across your fingers under thumb pressure.
- A smooth, comfortable blade spine: Your thumb will press directly against the spine (the flat back edge of the blade) to guide every cut. A spine with sharp machine burrs or aggressive jimping will quickly blister your thumb during repeated sharpening.
- A thin blade thickness: Thick hunting knives or heavy camp blades act like wedges, splitting the wood ahead of the cutting edge. Thin blade profiles shave paper-thin curls with minimal drag, similar to how high-carbon Japanese chef knives slice cleanly through dense textures without wedging.
The Thumb-Push Grip
The single most common mistake beginners make is whittling a pencil using whole-arm force. Swinging your hand from the wrist, elbow, or shoulder turns the blade into an uncontrolled wedge. If the edge catches on a hard wood grain ring and suddenly breaks free, it can slice straight into your holding hand. Pushing with your arm also creates uneven downward pressure that snaps fragile lead instantly.
The safest, most accurate technique is the thumb-push grip. This method uses the mechanical advantage of your thumb to produce short, controlled micro-cuts. Your arms stay still, and the blade cannot travel more than half an inch even if it slips.
- Grip the pencil: Hold the pencil in your non-dominant hand. Grip it like a small wand, roughly two to three inches back from the unsharpened tip. Rest your forearm or wrist against the edge of a desk or workbench for added stability. Point the pencil tip forward and slightly outward, away from your torso.
- Position the blade: Hold the knife handle in your dominant hand. Lay the bevel (the angled cutting edge) against the pencil wood about three-quarters of an inch behind the tip. Keep the sharp edge angled forward toward the point, never back toward your body.
- Anchor your guide thumb: Place the thumb of your non-dominant hand (the hand holding the pencil) squarely onto the spine of the blade, right above the cutting zone. Your dominant hand merely holds the knife handle steady; it does not push the knife forward.
- Flex the thumb forward: Push the blade through the wood by flexing your anchor thumb forward. The cut should be no longer than a quarter-inch to a half-inch. As soon as your thumb finishes its short forward pivot, the cut stops naturally.
- Reset and reposition: Pull the blade back slightly, rotate the pencil a few degrees with your holding fingers, and repeat the motion. Because the cutting force comes entirely from your thumb flexing against the blade spine, you have complete control over the depth and speed of every stroke.
Shaving the Wood Collar
Before you shape the writing point, you must clear away the surrounding wood casing to expose the core (pencil lead). The sloped wood surrounding the tip is called the shoulder. Your goal in this stage is to create a gradual, smooth shoulder while leaving a solid cylinder of bare graphite completely untouched.
- Establish your starting shoulder: Place the blade about three-quarters of an inch to an inch back from the tip. If you are preparing a pencil for fine writing, a three-quarter-inch shoulder works well. If you are an artist who wants an extended graphite core for broad side-shading, start an inch to an inch and a half back.
- Set a shallow cutting angle: Tilt the knife so the blade bevel rests almost flat against the wood, roughly ten to fifteen degrees. If you angle the blade too steep, the edge will dig deep into the wood and collide with the graphite, snapping it off flush inside the casing.
- Shave thin, uniform ribbons: Press the blade forward with your guide thumb. Shave off a sliver of wood so thin you can almost see light through it. You should hear a soft slicing whisper rather than a loud wood snap. The shaving should curl away smoothly like tissue paper.
- Rotate the pencil continuously: After each stroke, turn the pencil roughly one-eighth of a turn. Shave another thin ribbon from the new facet. By rotating steadily, you keep the taper round and symmetrical rather than carving flat, lopsided grooves into one side of the shaft.
- Expose the bare core: Work your way down the shoulder layer by layer until the wood collar recedes and leaves roughly three-eighths to one-half inch of bare graphite cylinder exposed. Stop cutting wood the moment the blade reaches the graphite surface. Do not try to sharpen the point while carving the wood. Separate wood removal from graphite shaping to prevent accidental breakage.
Scraping the Point to Shape
Graphite and charcoal are formed from compressed powder bound with clay or wax. Unlike wood, pencil lead has no structural grain. It cannot withstand the lateral shearing force of a knife blade slicing directly through it. If you try to carve the graphite like a stick of wood, the tip will snap off every time.
Instead of slicing, use a gentle scraping technique. Scraping removes microscopic amounts of graphite dust with zero bending stress on the core.
Hold the pencil securely in your hand. Position the knife blade at a ninety-degree angle (perpendicular) against the exposed graphite cylinder. Do not use the sharp edge to bite into the lead; simply rest the edge upright on the surface. Starting right at the wood shoulder, stroke the blade lightly down the length of the graphite toward the tip. Use feather-light pressure, letting the edge scrape away fine graphite powder.
Rotate the pencil between your fingers as you scrape. You can shape the core into three distinct profiles depending on the work you plan to do:
- The conical writing point: Scrape evenly around the entire circumference while tapering inward toward the end. This creates a needle-sharp point ideal for precise handwriting, bookkeeping, or detailed drafting.
- The artist drafting taper: Leave the graphite core long (up to an inch exposed). Scrape only the final millimeter of the tip into a sharp cone, leaving the rest of the cylinder smooth. This lets an artist shade broad tonal areas with the side of the lead while keeping a crisp point available for outline work.
- The carpenter chisel point: Instead of rotating the pencil, scrape two opposite sides flat until the lead resembles a flat screwdriver blade. A chisel edge glides cleanly against a steel ruler without rolling or snapping, making it the preferred point for marking lumber and drywall.
Pencil Sharpening Mistakes to Avoid
Snapping pencil lead while sharpening is almost always caused by tool handling errors rather than defective pencils. Watching out for these common missteps will keep your pencils long and your points sharp.
- Whipping the knife through the cut: Never push the blade with your shoulder, biceps, or wrist. Pushing hard down the length of the pencil causes the knife to accelerate violently off the end, tearing off the fragile graphite tip in the process. Keep all cutting motion locked into the small flex of your thumb.
- Using a blunt or damaged blade: A dull blade wedges into the wood grain instead of severing the fibers. As the wedge jams, pressure builds until the wood suddenly splits, shearing the graphite underneath. If your knife raises rough, jagged ridges instead of smooth curls, sharpen or replace the blade immediately.
- Carving at a steep angle: Digging the blade in at a thirty-degree angle creates a blunt shoulder that catches on rulers and obscures your sightline while drawing. More importantly, steep cuts plunge straight into the side of the graphite core, notching it like a felled tree until it snaps off at the base.
- Ignoring internal core fractures: If a pencil was previously dropped onto a hard concrete floor, the graphite inside may already be shattered into a dozen pieces. If a core slides out of the wood collar completely or snaps off repeatedly at the exact same depth despite feather-light shaving, the interior is broken. Strip back another inch of wood using gentle passes until you reach solid, unbroken lead.
- Carving toward fingers without a guide stop: Never hold the pencil with your fingers wrapped around the tip where the blade finishes its stroke. Always hold the pencil well behind the wood shoulder, keeping all fingers of both hands behind the sharp cutting edge at all times.
Choosing the Right Knife for Sharpening
While almost any sharp edge can point a pencil in an emergency, having a knife matched to detailed craft shaving makes the process faster and far less frustrating. When selecting a knife for desk, studio, or jobsite sharpening, evaluate the blade geometry and safety features carefully.
Look for knives with thin blade stock. Utility knives with disposable blades, compact folding craft knives, and small pocket knives slice wood cleanly because the steel creates minimal resistance as it passes through the grain. Heavy pocket knives with thick, tactical blade spines tend to split soft cedar rather than slicing paper-thin ribbons.
Consider the steel characteristics as well. Stainless steel (rust-resistant, easy-to-clean metal) requires very little maintenance and works well in damp workshop conditions. On the other hand, high-carbon or tool steel (harder metal that stays sharp longer) takes a razor-sharp, polished edge that glides through stubborn wood collars with almost zero thumb effort. If you choose carbon steel, wipe the blade dry after sharpening graphite to keep fine dust and moisture from causing dark surface spots.
Finally, inspect the lock and handle profile. For folding knives, verify that the locking mechanism engages completely without blade play. A solid lock ensures the blade will not wobble or fold backward when you press your thumb firmly against the spine. Pick a handle that fills your palm comfortably without sharp pocket clips digging into your grip while you work.

- TAR Score10.0
TAR Score is a ranking system developed by TopAppliancesReviews.com. TAR score has no relationship or impact from any manufacturers or sales agent websites. Learn more
- BrandIPPINKA

- TAR Score9.8
TAR Score is a ranking system developed by TopAppliancesReviews.com. TAR score has no relationship or impact from any manufacturers or sales agent websites. Learn more
- BrandGeneric

- TAR Score9.6
TAR Score is a ranking system developed by TopAppliancesReviews.com. TAR score has no relationship or impact from any manufacturers or sales agent websites. Learn more
- BrandIPPINKA

- TAR Score9.2
TAR Score is a ranking system developed by TopAppliancesReviews.com. TAR score has no relationship or impact from any manufacturers or sales agent websites. Learn more
- BrandBostitch

- TAR Score9.2
TAR Score is a ranking system developed by TopAppliancesReviews.com. TAR score has no relationship or impact from any manufacturers or sales agent websites. Learn more
- Brande.l.f.

- TAR Score9.0
TAR Score is a ranking system developed by TopAppliancesReviews.com. TAR score has no relationship or impact from any manufacturers or sales agent websites. Learn more
- BrandMelville House

- TAR Score9.0
TAR Score is a ranking system developed by TopAppliancesReviews.com. TAR score has no relationship or impact from any manufacturers or sales agent websites. Learn more
- BrandN/A

- TAR Score9.0
TAR Score is a ranking system developed by TopAppliancesReviews.com. TAR score has no relationship or impact from any manufacturers or sales agent websites. Learn more
- BrandX-Acto
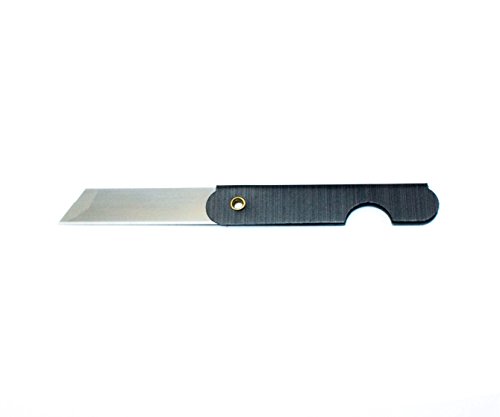
- TAR Score7.2
TAR Score is a ranking system developed by TopAppliancesReviews.com. TAR score has no relationship or impact from any manufacturers or sales agent websites. Learn more
- BrandHAND
Last update on 2026-10-03 / Affiliate links / Images, Product Titles, and Product Highlights from Amazon Product Advertising API
FAQs
Why does my pencil lead keep breaking while I carve the wood?
The lead usually breaks because the blade is angled too steeply into the wood, causing the steel to strike the side of the graphite core with heavy lateral force. Core breakage also happens when a dull blade crushes the wood instead of slicing it cleanly. Keep your blade nearly flat against the wood collar, shave only thin paper-like curls, and push exclusively with your thumb to eliminate jarring vibrations.
Can I sharpen colored pencils and charcoal pencils with a knife?
Yes, and a knife is often much better than a mechanical sharpener for these softer mediums. Colored pencil cores contain soft wax or oil binders, while charcoal cores are exceptionally brittle and easily pulverized by rotary blades. Use a fresh, razor-sharp utility blade, shave tiny slivers from the wood collar without touching the core, and gently scrape the colored core or charcoal to a point.
What angle should I hold the knife when shaving the wood?
Keep the cutting edge tilted at a shallow angle between ten and fifteen degrees against the pencil casing. The flat bevel of the blade should rest almost parallel to the wood shaft so you shave away whisper-thin curls. If you tilt the knife past twenty degrees, the blade will dig deep into the wood and collide with the brittle graphite inside.
How do I sharpen a flat carpenter pencil with a knife?
Hold the carpenter pencil flat in your hand and use your thumb-push grip to shave the broad wood faces first, exposing about half an inch of the flat rectangular graphite core. Next, shave the narrow sides of the pencil collar to form an even shoulder. Finish by resting your blade upright at a ninety-degree angle and scraping both flat sides of the exposed lead until you achieve a durable, chisel-shaped marking edge.


Top Rated Best Quality Range Hoods: 2026 Expert Picks

The 12 Best Small Solar Generators 2026

10 Best Quality Semi Automatic Washing Machine of 2026 For Leak-Free Laundry

11 Best Small Washer Machine of 2026 For Everyday Laundry

12 Best Vibration Pads For Washing Machine of 2026 To Stop Walking and Shaking

11 Best Selling Front Load Washing Machine of 2026 For Quiet Odor-Free Laundry

11 Best Washing Machine For King Size Bedding of 2026 To Prevent Cycle Errors

10 Best Small Front Loader Washing Machine of 2026 For Tight Closets






