
How to Sharpen a Knife on a Diamond Stone

Place the diamond plate on a damp towel or rubber mat so it cannot slide across the counter. Keeping the base steady lets you glide the blade with light pressure at a fixed angle, allowing the abrasive to cut cleanly without gouging the steel. Sweep the edge smoothly from heel to tip until a faint wire ridge forms on the opposite side, then flip the knife over and repeat.
The exact approach depends on your blade style and how dull it has become. Thick pocket knives and Western kitchen blades favor a broader twenty-degree angle on coarse grit, while thin Japanese cutlery needs a sharper fifteen-degree tilt. A few drops of tap water will also keep fine metal dust from packing the stone. Getting the posture right from the start protects your edge and makes every pass count.
Setting Up Your Diamond Stone and Choosing the Right Fluid
Diamond sharpening stones work differently from traditional waterstones or oilstones. Instead of a solid block of clay or quarried rock that wears down with use, a diamond plate consists of industrial monocrystalline diamond particles electroplated onto a solid steel base. Because the diamond crystals sit on a rigid steel plate, the stone stays dead flat and never develops a hollow dip in the center. This flatness gives you a reliable reference surface, but diamonds also cut metal much faster than conventional abrasives. Setting up your workspace correctly ensures you control that aggressive cutting action rather than letting it control you.
A common point of confusion is whether to use water, oil, or no fluid at all. You can use a diamond plate completely dry if you are out in the woods or working away from a sink. But dry sharpening creates fine metal dust known as swarf (the microscopic particles of steel ground off the blade). Without a liquid to carry that dust away, the metal particles settle into the tiny gaps between the diamond crystals. Over time, that packed dust cushions the blade and prevents the stone from cutting effectively.
Never use petroleum honing oil or heavy mineral oils on a diamond stone. Thick oil creates a gummy sludge that traps metal dust around the diamond points and is difficult to clean out of the plate. Plain tap water is the best lubricant for everyday kitchen sharpening. Adding a single drop of liquid dish soap to a small spray bottle of water helps break surface tension, allowing the water to spread into an even sheet across the plate. This thin film of soapy water keeps the steel cool and floats the fine metal dust away from the diamond abrasive while you work.
Before placing your knife on the stone, make sure the sharpening plate cannot slide around on your counter. Diamond abrasive needs steady, uniform contact, and a shifting stone can cause your hand to slip or alter your angle mid-pass. Set your stone inside a rubber dock or place it on top of a silicone baking mat or a folded damp paper towel. Work at a comfortable counter height where you can look directly down at the stone with your shoulders relaxed and your elbows free to move.
Finding Your Angle and Mastering the Sharpening Stroke
Every knife edge relies on a bevel (the angled cutting edge ground along the bottom of the blade). The secret to a razor edge is not using extreme pressure or fancy hand movements. It comes down to matching that factory bevel angle and holding it steady on every single stroke. If your angle rocks back and forth while you push the blade across the plate, you round off the cutting edge instead of sharpening it.
Different knives require different edge angles depending on their steel thickness and intended kitchen prep tasks. Delicate slicers such as high-carbon Japanese chef knife sets are designed with a steep 15-degree slicing edge per side to glide cleanly through raw fish and vegetables. In contrast, heavier utility blades and rugged German high-carbon steel premium knife block sets usually feature a wider 20-degree utility edge per side to handle dense root vegetables, bones, and firm cutting boards without chipping.
Before you begin grinding, verify your angle using this quick physical check:
- Color the entire cutting bevel on both sides of your blade with a dark permanent marker.
- Lay the blade flat against the diamond plate, then raise the spine (the thick top back edge) until the colored bevel sits flush on the stone.
- Slide the blade forward half an inch with light pressure, then lift it to inspect the ink.
- Check the marker line: if ink is wiped away only at the top of the bevel, your angle is too low; if ink is scraped off only at the cutting apex, your angle is too steep; if ink is removed evenly across the full width, your angle is locked.
Once you confirm your angle, follow these numbered steps to execute clean, repeatable sharpening strokes across the coarse grit side of your plate:
- Position the heel of the blade (the rear section closest to the handle) flat against your chosen angle near the far end of the stone.
- Push the blade forward into the diamond surface in an edge-leading stroke, as though you are slicing a thin sliver off the top of the plate.
- Draw the blade diagonally across the stone toward yourself as you push, sweeping smoothly from the heel, across the curved belly, and through the tip.
- Apply featherlight downward pressure, using no more force than the weight of your hand resting on the knife. Monocrystalline diamonds cut aggressively on their own, and pushing down hard will strip the diamond crystals off the plate.
- Perform eight to ten smooth passes on this first side before stopping to check your progress.
Feeling for the Burr and Finishing the Cutting Edge
Sharpening is not a matter of counting down clock minutes. You only switch sides when you feel a burr (the microscopic wire edge or curved sliver of metal that forms on the opposite side during sharpening). When diamond grit grinds steel away from the first side of the blade, the metal becomes thinner and thinner until the very edge curls over toward the unsharpened side. Feeling that ridge proves you have worked the steel all the way down to the apex.
Checking for the wire edge requires a gentle touch and strict safety habits. Lay the blade flat on the counter or hold it securely away from your body. Rest the pad of your thumb on the face of the blade, then sweep your thumb upward and off the edge toward the ceiling. Never run your finger along the length of the edge, because even a partially sharpened knife will slice open skin. If your thumb catches on a slight rough lip or raised metal curl, the burr is formed. If the edge feels smooth in some sections, return the knife to the stone and make a few more light passes along those specific spots until the wire edge extends unbroken from heel to tip.
Once the wire edge is continuous across the entire blade, flip the knife over and repeat the exact same number of strokes on the second side. Because the apex is already established, grinding the second side will fold that wire edge back across the blade. Once you feel the burr along the first side again, both bevels have met in a sharp, centered point. Now you are ready to refine the steel and remove the rough scratch marks.
Follow these steps to hone and polish your new cutting edge:
- Turn your plate over to the fine grit side (typically 1000 grit or higher) and apply a fresh mist of soapy water.
- Perform four to six light slicing passes on the first side, then match those passes on the second side to smooth out the coarse scratch pattern.
- Switch to alternating single passes: make one stroke on the left side, then one stroke on the right side, using almost zero downward pressure so only the weight of the knife touches the plate. This back-and-forth action snaps off the delicate wire edge cleanly.
- Wipe the blade dry with a soft cloth and inspect the cutting edge under a bright overhead light. A sharp edge shows no bright glints reflecting off flat spots.
- Wash your diamond plate under warm running tap water, scrub away metal dust with a soft nylon brush, and towel-dry the plate thoroughly to prevent surface rust on the steel base.
What to Look for in a Beginner-Friendly Diamond Stone Setup
Choosing the right diamond sharpening plate makes developing consistent hand habits much easier. If you are shopping for your first setup, look for a double-sided sharpening plate that combines two complementary grit stages on one tool. A coarse side in the 300 to 400 grit range quickly resets dull, rounded kitchen edges or removes tiny nicks. A fine side rated around 1000 to 1200 grit refines the bevel and produces a crisp, toothy edge that bites cleanly into tomato skins and crusty bread.
Size also plays an important role in how steady your strokes feel. Compact pocket sharpeners work well for camp tools, but standard eight-inch kitchen knives require an eight-inch by three-inch plate. That larger surface area gives you plenty of runway to sweep from the heel of a chef knife all the way through the curved tip in a single continuous movement without running off the edge of the stone.
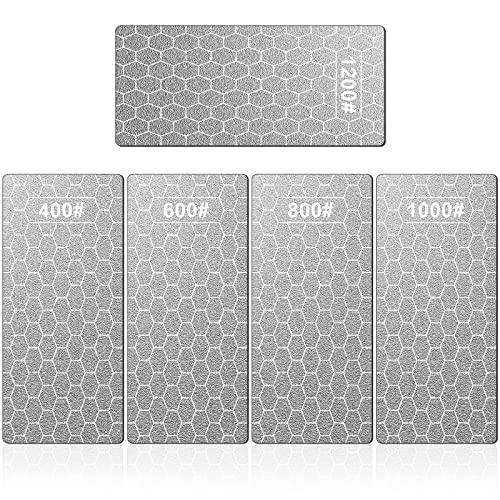
Look for plates that come equipped with a molded rubber base or a heavy non-skid dock. A stable base eliminates distracting stone movement so you can focus entirely on maintaining your angle and using light downward pressure. Some diamond stones also feature patterned surface indentations, such as honeycomb cutouts, which provide channels where metal dust can settle away from the diamond abrasive during longer sharpening sessions.

- TAR Score9.6
TAR Score is a ranking system developed by TopAppliancesReviews.com. TAR score has no relationship or impact from any manufacturers or sales agent websites. Learn more
- BrandSHARPAL

- TAR Score9.4
TAR Score is a ranking system developed by TopAppliancesReviews.com. TAR score has no relationship or impact from any manufacturers or sales agent websites. Learn more
- BrandLifeholic

- TAR Score9.4
TAR Score is a ranking system developed by TopAppliancesReviews.com. TAR score has no relationship or impact from any manufacturers or sales agent websites. Learn more
- BrandPOWERTEC

- TAR Score9.2
TAR Score is a ranking system developed by TopAppliancesReviews.com. TAR score has no relationship or impact from any manufacturers or sales agent websites. Learn more
- BrandSHARPAL

- TAR Score9.2
TAR Score is a ranking system developed by TopAppliancesReviews.com. TAR score has no relationship or impact from any manufacturers or sales agent websites. Learn more
- Brandceilyweli

- TAR Score9.0
TAR Score is a ranking system developed by TopAppliancesReviews.com. TAR score has no relationship or impact from any manufacturers or sales agent websites. Learn more
- BrandS SATC
- TAR Score8.8
TAR Score is a ranking system developed by TopAppliancesReviews.com. TAR score has no relationship or impact from any manufacturers or sales agent websites. Learn more
- BrandKITANIS
- TAR Score8.8
TAR Score is a ranking system developed by TopAppliancesReviews.com. TAR score has no relationship or impact from any manufacturers or sales agent websites. Learn more
- BrandXILEWHZF

- TAR Score8.8
TAR Score is a ranking system developed by TopAppliancesReviews.com. TAR score has no relationship or impact from any manufacturers or sales agent websites. Learn more
- BrandYRVHCK

- TAR Score8.4
TAR Score is a ranking system developed by TopAppliancesReviews.com. TAR score has no relationship or impact from any manufacturers or sales agent websites. Learn more
- BrandOkxiri
Last update on 2026-10-02 / Affiliate links / Images, Product Titles, and Product Highlights from Amazon Product Advertising API
FAQs
Can I use regular honing oil on my diamond stone?
You should avoid using heavy petroleum honing oil on diamond sharpening stones. Oil creates a thick, sticky paste with fine metal grinding dust that packs tightly into the micro-gaps around the diamond crystals. Plain water with a single drop of liquid dish soap is cheaper, flushes away metal swarf cleanly, and washes off the plate in seconds under a kitchen faucet.
Why does my knife still feel dull after using a diamond stone?
A knife usually remains dull for two simple reasons: using an unsteady angle or failing to form a complete burr before switching sides. If you wobble your wrist, you create a blunt, rounded edge instead of a crisp V-shape bevel. Make sure you work the coarse side until you feel a distinct wire edge along the entire opposite side of the blade before you begin refining the edge on fine grit.
How do I clean stubborn metal buildup from a diamond sharpening plate?
Metal dust ground off your blades can occasionally lodge between the diamond particles and make the plate look gray and discolored. To clean it, wet the stone with warm water, apply a dash of mild kitchen cleaning powder or dish soap, and scrub the surface firmly with a stiff nylon brush or an old toothbrush. Rinse thoroughly under running water and dry the plate completely with a clean towel before putting it away.


Top Rated Best Quality Range Hoods: 2026 Expert Picks

The 12 Best Small Solar Generators 2026

10 Best Quality Semi Automatic Washing Machine of 2026 For Leak-Free Laundry

11 Best Small Washer Machine of 2026 For Everyday Laundry

12 Best Vibration Pads For Washing Machine of 2026 To Stop Walking and Shaking

11 Best Selling Front Load Washing Machine of 2026 For Quiet Odor-Free Laundry

11 Best Washing Machine For King Size Bedding of 2026 To Prevent Cycle Errors

10 Best Small Front Loader Washing Machine of 2026 For Tight Closets






