
How to Sharpen a Knife at Home Without a Sharpener?

Grab a heavy ceramic coffee mug and flip it upside down on your counter. The rough, unfinished ring on the bottom acts like a sharpening stone because hardened ceramic is tougher than knife steel. To fix an edge that slips on onion skins or squishes tomatoes, slide the blade across that unglazed ring at roughly a twenty-degree angle. A dozen steady, sweeping passes on each side shave away dull metal and restore a clean cutting edge right away.
How well this works depends on three things. The mug rim must feel gritty to the touch, as glossy porcelain will simply slip without shaving off steel. The blade also needs to be intact, since household tricks rescue blunt edges but cannot fix deep chips or bent tips. Finally, your hands need to hold that slight angle steady so you do not round off the blade. Here is how to set up your counter safely and restore your edge step by step.
Turn Over a Ceramic Mug to Find an Emergency Sharpening Stone
A dull blade makes prep work frustrating and dangerous. When a knife loses its bite, the bevel (the angled cutting edge that parts food) has either rolled over or worn down into a rounded profile. Instead of catching vegetables, a rounded edge slides off smooth skins like tomatoes or onions, forcing you to press down harder. That extra force causes dangerous slips.
You do not need an expensive stone right now. The bottom of almost every ceramic coffee mug or soup bowl features an unglazed circular ring. Pottery makers coat mugs in glaze for a glossy finish, but they wipe the bottom foot clean so the piece does not fuse to the kiln shelf during firing.
That unglazed ceramic foot is harder than cutlery steel. The roughness of the surface, known as the grit, creates an abrasive texture similar to a medium-grade sharpening stone. Sliding steel across this rough rim shaves away microscopic particles of metal to create a clean, thin bevel.
This process is true sharpening, not just honing (straightening a bent edge without grinding off metal). It works reliably on everyday stainless steel (rust-resistant, easy-to-clean metal) and premium German high-carbon steel premium knife block sets that use sturdy utility edges.
Follow These Six Steps to Sharpen Your Blade on a Mug Rim
Sharpening a knife on dishware requires steady hands, correct angles, and basic precautions. Set up your workspace on a flat, dry countertop and take your time.
- Select a heavy, flat ceramic mug. Pick a sturdy coffee mug with a wide base and an unglazed ring. Avoid delicate porcelain, travel mugs, or dishware with fully glazed bottoms, as smooth glaze slips without grinding metal.
- Anchor the mug on a damp kitchen towel. Flip the mug upside down onto a damp dishcloth or silicone mat. Never set it on a bare counter, because an unstable base can slip mid-stroke and send the blade toward your fingers.
- Set your sharpening angle. Rest the blade flat against the unglazed rim at 90 degrees. Tilt it halfway to 45 degrees, then halfway again to roughly 22 degrees. Lower it a touch more to lock in a sturdy 20-degree utility edge. Delicate Japanese blades use a steeper 15-degree slicing edge per side, so hold those slightly flatter.
- Draw the blade from heel to tip with light pressure. Place the heel of the knife against the ceramic ring. Pull the blade smoothly toward yourself in a gentle sweeping arc, ending at the tip. Use moderate, even pressure, similar to slicing a block of cheddar cheese. Make 6 to 8 smooth passes on one side.
- Feel for the burr along the edge. A burr is the microscopic wire edge or curved sliver of metal that forms on the opposite side during sharpening. Pull the pad of your thumb gently upward from the spine toward the back edge, never along the sharp edge. When you feel a faint rough ridge catching on your skin, turn the knife over and match the strokes on the other side.
- Finish with light alternating passes and wash the blade. Make two or three light alternating passes per side to knock away the wire burr. Dark gray streaks on the mug confirm that ceramic removed metal. Wash the knife with warm soapy water and dry it immediately to remove loose metal filings.
Use Leather, Cardboard, or Smooth River Stones When You Lack Ceramic
If your mugs have completely glazed bases or you are away from home, several other household objects can help restore a working edge.
A plain leather belt is the best household tool for stropping. Stropping does not grind away bulk metal; instead, it realigns microscopic bends and polishes the cutting bevel. Lay a thick leather belt flat with the rough suede side facing up. Hold the blade at your sharpening angle, but reverse your motion: pull the blade away from the edge with the spine leading and the cutting edge trailing behind. Dragging the blade backward keeps the steel from digging into the leather. Twenty backward sweeps per side will smooth out rough burrs and noticeably improve cutting performance.
Clean corrugated cardboard from a shipping box works as an effective emergency strop as well. Cardboard fibers contain natural silicates, which are microscopic mineral particles that act like an ultra-fine polishing abrasive. Lay a flat piece of cardboard on your counter and stroke the blade backward across the surface just like a leather belt. This method works especially well on knives from high-carbon Japanese chef knife sets, because hard steel responds rapidly to fine surface stropping.
Smooth river stones offer an outdoor solution when you need to remove actual steel. Find an oval, water-smoothed rock that feels silky and dense. Wet the stone with water to float away loose grit and metal dust. Sweep your blade across the stone at your 20-degree angle with light pressure. A dense, smooth pebble acts like a natural whetstone and restores a functional utility edge on a dull camp knife.
Skip Common Kitchen Hacks That Scratch Blades and Cause Slips
The internet offers plenty of creative sharpening advice, but several viral shortcuts cause permanent blade damage or create severe cut hazards. Avoid these four methods entirely:
- Cutting through aluminum foil: Slicing foil does not sharpen kitchen steel. Soft aluminum cannot abrade harder blade metal. Slicing through foil layers rolls the bevel and leaves the cutting edge blunter than when you started.
- Scraping the blade across glass bottles: Dragging a blade across a wine bottle neck is dangerous. Smooth glass lacks the abrasive grit to grind metal. Rounded glass causes the knife to slip unpredictably toward your fingers, and hard glass chips brittle blade tips.
- Rubbing two kitchen knives together: Drawing two chef knives against each other looks impressive in movies, but it damages your cutlery. Kitchen blades have similar steel hardness. Dragging them together nicks the metal and dulls both cutting edges at the same time.
- Grinding on concrete steps or bricks: Concrete steps and bricks contain large, uneven chunks of gravel. Dragging a kitchen knife across rough masonry gouges deep chips into the edge that require heavy professional grinding to fix.
Check Your Finished Edge Safely Before You Return to Chopping
Never check blade sharpness by running your bare fingers across the cutting edge. A tiny slip can cause a deep cut. Use safe verification methods that confirm actual slicing ability instead.
The printer paper check is the quickest way to confirm your progress. Hold an ordinary sheet of scrap paper vertically by one corner. Place the knife edge against the top sheet border and push gently downward and forward. A sharp edge slices cleanly through the paper with a quiet, smooth hiss. If the blade catches, crumples the sheet, or tears the paper, your edge still has flat spots or a bent burr that needs a few more passes on your mug.
The ripe tomato check provides the best real-world confirmation for food prep. Set a ripe tomato on your cutting board. Rest the middle of the blade on the skin without pushing down. Pull the knife backward smoothly, letting only the natural weight of the blade do the work. A sharp edge bites instantly through the skin and glides into the flesh. If the blade slides over the surface or squishes the tomato, the edge lacks the bite needed for effortless cutting.
You can also perform a quick visual inspection under a bright kitchen light. Point the blade upward with the spine facing you, and look directly down the cutting edge under a strong bulb. A sharp edge is microscopic and cannot reflect light. If you see bright spots, shiny white lines, or glinting dots along the edge, you are looking at flat steel that still needs work.
Pick Up a Dedicated Sharpener to Save Time on Routine Maintenance
Using a coffee mug or a strip of cardboard is a practical emergency fix when a dull knife stops your dinner prep, but improvised tools are not ideal for long-term care. Makeshift ceramic rings can wear unevenly, leave gray metal marks on your favorite dishware, and require steady hand control to hold a consistent angle.
Investing in a dedicated kitchen sharpener makes routine blade care fast, repeatable, and safe. When choosing a manual sharpener for regular use, look for compact tools with an ergonomic handle and a non-slip rubber base or suction foot that grips your counter securely. A stable base prevents wobbling and keeps your fingers safely out of the cutting path while you pull the knife through.
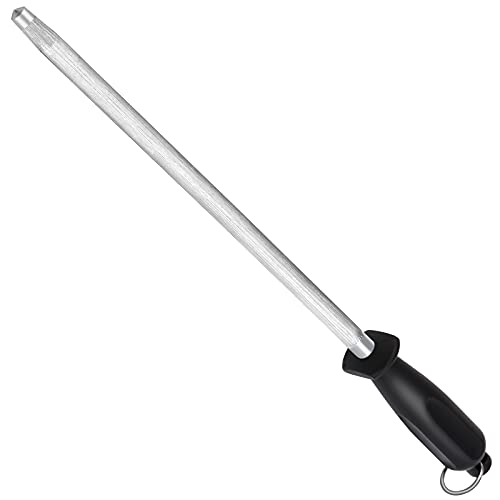
A versatile kitchen sharpener should offer a multi-stage slot system. Look for models that pair coarse tungsten carbide blades with fine ceramic finishing rods. The coarse slot repairs dull edges and restores the bevel in a few strokes, while the fine ceramic slot polishes away burrs and refines the sharp edge. If you cook with a variety of blades, pick a sharpener with an adjustable angle dial to match both Western utility edges and steeper Asian slicing profiles, or keep a 12-inch carbon steel honing rod on hand for quick daily edge realignment.

- TAR Score9.4
TAR Score is a ranking system developed by TopAppliancesReviews.com. TAR score has no relationship or impact from any manufacturers or sales agent websites. Learn more
- BrandACCUSHARP
- TAR Score9.0
TAR Score is a ranking system developed by TopAppliancesReviews.com. TAR score has no relationship or impact from any manufacturers or sales agent websites. Learn more
- BrandAcoWELL

- TAR Score9.0
TAR Score is a ranking system developed by TopAppliancesReviews.com. TAR score has no relationship or impact from any manufacturers or sales agent websites. Learn more
- BrandKITCHELLENCE
- TAR Score8.8
TAR Score is a ranking system developed by TopAppliancesReviews.com. TAR score has no relationship or impact from any manufacturers or sales agent websites. Learn more
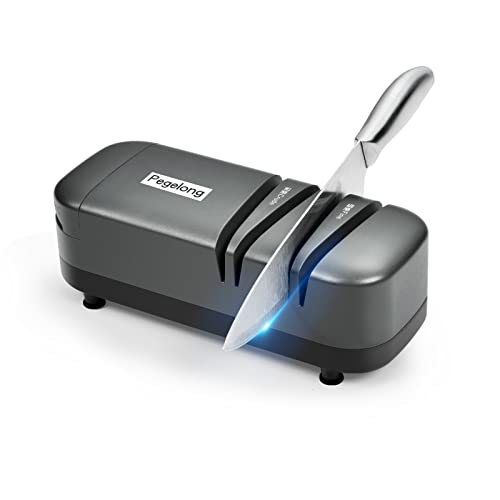
- BrandPegelong

- TAR Score8.8
TAR Score is a ranking system developed by TopAppliancesReviews.com. TAR score has no relationship or impact from any manufacturers or sales agent websites. Learn more
- BrandMyHome 101

- TAR Score8.8
TAR Score is a ranking system developed by TopAppliancesReviews.com. TAR score has no relationship or impact from any manufacturers or sales agent websites. Learn more
- BrandFANERFUN

- TAR Score8.6
TAR Score is a ranking system developed by TopAppliancesReviews.com. TAR score has no relationship or impact from any manufacturers or sales agent websites. Learn more
- Brandlongzon

- TAR Score8.6
TAR Score is a ranking system developed by TopAppliancesReviews.com. TAR score has no relationship or impact from any manufacturers or sales agent websites. Learn more
- BrandSHARPAL
Last update on 2026-10-02 / Affiliate links / Images, Product Titles, and Product Highlights from Amazon Product Advertising API
FAQs
Can sharpening a knife on a coffee mug ruin the mug?
Sharpening will not crack or ruin a sturdy ceramic mug, but it will leave dark gray streaks on the unglazed bottom ring. These gray lines are tiny bits of steel ground off the knife and trapped in the rough ceramic pores. You can easily remove these marks by scrubbing the rim with a damp sponge and baking soda.
How many strokes does it take to sharpen a knife on a mug?
Most moderately dull kitchen knives need between 6 and 10 sweeping strokes per side on the unglazed ceramic ring to raise a burr and restore a working edge. Avoid making dozens of aggressive passes, which can shave off too much blade steel and scratch your knife faces.
Can I sharpen a serrated bread knife with a coffee mug?
No, a flat ceramic mug base cannot reach inside the curved scallops of a serrated knife. Pulling a serrated blade across a flat surface will only grind down the pointed teeth and ruin the cutting pattern. Serrated blades require a slender, tapered sharpening rod matched to each individual scallop.
Why does my knife feel duller after sharpening it on ceramic?
The knife usually feels duller because you held it at too steep an angle or wobbled your hand during the stroke. A steep angle blunts the edge, while an inconsistent wrist motion rounds off the cutting bevel instead of forming a sharp V-shape. Keep your wrist locked at a steady 20 degrees with light, smooth pressure.


Top Rated Best Quality Range Hoods: 2026 Expert Picks

The 12 Best Small Solar Generators 2026

10 Best Quality Semi Automatic Washing Machine of 2026 For Leak-Free Laundry

11 Best Small Washer Machine of 2026 For Everyday Laundry

12 Best Vibration Pads For Washing Machine of 2026 To Stop Walking and Shaking

11 Best Selling Front Load Washing Machine of 2026 For Quiet Odor-Free Laundry

11 Best Washing Machine For King Size Bedding of 2026 To Prevent Cycle Errors

10 Best Small Front Loader Washing Machine of 2026 For Tight Closets






