
How to Sharpen a Kitchen Knife with a Whetstone

Holding a steady angle restores dull knives. Wet your sharpening stone, lock your wrist at a consistent tilt, and slide the steel across the surface until a tiny rough metal lip forms along the edge. Smoothing away that small ridge on a finer stone leaves the blade keen and ready to glide through food without slipping.
A few details change the exact routine for your kitchen. Thicker Western blades balance best at a twenty-degree tilt, while thinner Japanese knives slice best at fifteen degrees. Severely dull edges need a coarse stone first, and traditional water stones require a ten-minute soak instead of a simple splash. Here is how to set up your counter and guide every stroke safely from heel to tip.
The Short Version
- Soak and secure: Submerge your whetstone (sharpening stone) in water for 10 to 15 minutes until air bubbles stop rising, then place it on a damp towel or rubber holder.
- Lock the angle: Tilt the blade to 15 degrees per side for thin Japanese blades or 20 degrees for Western knives, keeping your wrist rigid.
- Raise a burr: Sweep the blade across the medium grit (stone coarseness number) side from heel to tip until a burr (a tiny rough metal lip) forms along the opposite edge.
- Flip and polish: Repeat on the second side, then switch to a fine grit stone or a strop (leather polishing strip) to wipe away that lip.
Preparing Your Sharpening Stone and Workstation
Before placing steel against stone, your workstation needs solid preparation. A whetstone that slips across the counter is dangerous and makes holding a steady angle impossible.
- Check your stone type: Traditional water stones need a 10 to 15-minute soak in cool tap water. Watch the stone submerged in a baking dish; when air bubbles stop rising, the stone is fully saturated. Splash-and-go synthetic stones only need a mist of surface water before you start.
- Anchor your base: Fit your stone into its rubber holder, then set it inside a wooden base or directly on the counter. If you lack a base, fold a damp kitchen towel flat beneath the stone to prevent slipping.
- Position your body: Work on a counter where your elbows bend at 90 degrees. Standing upright lets you guide strokes using your torso and shoulders rather than loose wrist joints.
- Keep water nearby: Place a small bowl of water beside your station. Stones dry out as you work, so splash a spoonful of water whenever friction increases.
The cloudy liquid that builds on the stone is called slurry. This mix of water and shed abrasive grit speeds up metal removal. Leave that slurry on the stone while you work.
Finding the Right Angle Without Guesswork
Sharpening a knife means grinding two flat bevels (angled cutting edges) until they meet at a clean apex. The angle you pick balances cutting ease against edge durability.
Standard Western kitchen knives, such as German high-carbon steel knives, perform best with a sturdy 20-degree utility edge per side. This angle supports chopping dense squashes and accidental strikes against chicken bones without chipping. Thin Asian blades, like high-carbon Japanese chef knives, use a steep 15-degree slicing edge per side for delicate vegetables and boneless meats.
You can find these angles with simple visual tricks. Stand the knife straight up on its spine to form a 90-degree angle with the stone. Tilt the knife halfway toward the surface to find 45 degrees. Cut that angle in half again for roughly 22 degrees, then lower it slightly for 20 degrees. For a 15-degree angle, rest the blade flat and lift the spine just enough to slip two standard pennies underneath.
Angle consistency matters far more than hitting an exact degree. Holding 17 degrees steadily produces a razor-sharp edge. The main danger is wobbling your wrist mid-stroke, which rounds the bevel and dulls the blade.
The Sharpening Motion: Heel-to-Tip Passes on Medium Grit
Begin sharpening on the medium grit side of your stone, typically around 1000 grit. This stage reshapes dull metal without removing unnecessary blade steel.
- Grip the handle: Hold the handle firmly with your dominant hand. Rest your thumb against the blade flat and place your index finger along the spine to stabilize your wrist.
- Set your guide fingers: Place the fingertips of your free hand flat on the blade face, just above the cutting edge near the heel (the back end of the blade). These fingers control downward pressure.
- Start at the heel: Place the heel at the far end of the stone at your target angle.
- Push across the stone: Push the blade forward and across the surface in a smooth diagonal motion. Slide from heel to tip as you push away from your body, using the pressure of a firm doorbell push. Ease off pressure as you pull the knife back to reset.
- Lift for the curved tip: As the stroke reaches the curved belly near the tip, raise your elbow slightly. This tilt keeps the curved steel in full contact with the abrasive block.
- Work in sets: Make 10 to 15 controlled strokes across the entire edge, keeping your pace slow and your wrist completely stationary.
How to Feel for the Burr and Check Your Progress
Never guess whether you have sharpened enough. As abrasive grit grinds metal away from one side, excess steel folds over the opposite edge. This folded steel is the burr (a microscopic wire edge or tiny rough metal lip). Feeling this lip confirms that you ground down to the apex.
To check for the lip safely, keep your fingers clear of slicing motions. Never drag your finger along the sharp edge. Instead, place the soft pad of your thumb flat against the side of the blade facing upward. Gently slide your thumb straight outward, moving perpendicular from the spine off the edge into empty air.
A formed burr feels like a rough, scratchy snag catching against your skin, like an unfiled fingernail. Check the blade from heel to tip. If the middle feels rough but the tip feels smooth, make several extra passes focused on the curved tip until the lip runs the full length.
Once you feel a uniform rough lip along the entire blade, flip the knife over. Sharpen the second side at the exact same angle until that rough lip folds back toward your first side.
Polishing the Edge and Removing the Metal Lip
Once both bevels meet, the rough wire lip makes the cutting edge weak. Polishing cleans off that lip and refines the steel for smooth kitchen slicing.
- Switch to fine grit: Turn the stone over to the fine grit side, usually 3000 to 6000 grit. Rinse the stone with fresh water to clear away coarse slurry.
- Lighten your touch: Place the blade on the fine surface at your established angle. Cut your downward pressure in half so the stone polishes rather than bending the wire lip back and forth.
- Alternate your strokes: Make one sweeping pass from heel to tip on side one, flip the blade, and make one pass on side two. Complete 6 to 10 alternating single passes to weaken and break off the tiny wire lip.
- Strop the blade: If you have a leather strop, set it flat. Pull the blade spine-first with light trailing strokes, doing 5 passes per side. This step strips away leftover metal debris.
- Clean and dry: Wash the knife thoroughly with warm soapy water, wiping from spine to edge, and dry it immediately with a towel. Rinse your stone and allow it to air-dry completely before storing.
Common Sharpening Mistakes to Avoid
Sharpening by hand takes practice. Watching out for these common errors keeps your edges crisp and straight:
- Wobbling your wrist: Rolling your wrist while stroking rounds off the cutting bevel. Lock your wrist solid and drive the motion using your elbow and shoulder.
- Sharpening on dry stone: Dry stones clog with steel dust, scratch blade faces, and generate heat. Splash clean water across the stone whenever the surface feels dry.
- Applying excessive force: Pressing down with heavy body weight gouges the stone and creates uneven low spots on the blade. Let stone grit remove steel naturally under moderate pressure.
- Switching sides too quickly: Flipping the knife before feeling a complete rough lip leaves dull spots along the blade. Confirm the lip extends from heel to tip before turning the knife over.
- Flattening the curved tip: Failing to raise your elbow through the curve leaves the front portion of your chef knife dull. Lift slightly as you reach the tip to maintain contact.
What to Look for in a Home Sharpening Kit
Choosing the right sharpening setup makes learning stone sharpening much easier for home cooks. A reliable kit provides firm stability, two grit levels, and basic alignment support.
Look for a dual-sided water stone combining a medium grit (around 1000) and a fine grit (around 6000). The medium side restores dull cutting bevels, while the fine side cleans away the rough lip and polishes the steel for clean vegetable slicing.
A non-slip base is essential for safe kitchen sharpening. Pick a kit featuring a snug silicone holder seated inside a solid bamboo or heavy wooden base to stop all movement on wet countertops.
Beginners also benefit from a clip-on angle guide and a leather strop. The guide slides onto the knife spine to hold your blade at a steady angle until muscle memory takes over. A leather strop gives you an easy way to buff off final microscopic wire edges after stone work.

- TAR Score9.4
TAR Score is a ranking system developed by TopAppliancesReviews.com. TAR score has no relationship or impact from any manufacturers or sales agent websites. Learn more
- BrandLeking

- TAR Score9.2
TAR Score is a ranking system developed by TopAppliancesReviews.com. TAR score has no relationship or impact from any manufacturers or sales agent websites. Learn more
- BrandIntelitopia

- TAR Score9.2
TAR Score is a ranking system developed by TopAppliancesReviews.com. TAR score has no relationship or impact from any manufacturers or sales agent websites. Learn more
- BrandHiramWare

- TAR Score9.2
TAR Score is a ranking system developed by TopAppliancesReviews.com. TAR score has no relationship or impact from any manufacturers or sales agent websites. Learn more
- BrandSharp Pebble

- TAR Score9.2
TAR Score is a ranking system developed by TopAppliancesReviews.com. TAR score has no relationship or impact from any manufacturers or sales agent websites. Learn more
- BrandKEENBEST

- TAR Score9.0
TAR Score is a ranking system developed by TopAppliancesReviews.com. TAR score has no relationship or impact from any manufacturers or sales agent websites. Learn more
- BrandHMPLL

- TAR Score9.0
TAR Score is a ranking system developed by TopAppliancesReviews.com. TAR score has no relationship or impact from any manufacturers or sales agent websites. Learn more
- BrandWhetstone Cutlery
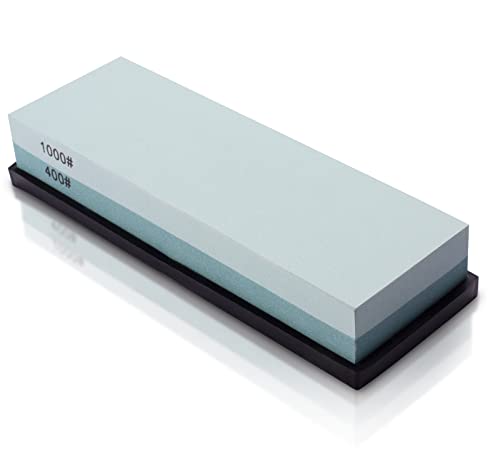
- TAR Score9.0
TAR Score is a ranking system developed by TopAppliancesReviews.com. TAR score has no relationship or impact from any manufacturers or sales agent websites. Learn more
- BrandMIDO Professional Abrasive
Last update on 2026-10-02 / Affiliate links / Images, Product Titles, and Product Highlights from Amazon Product Advertising API
FAQs
Do I need to soak my whetstone before every sharpening session?
It depends on your stone material. Traditional water stones need a 10 to 15-minute soak in cool tap water until air bubbles stop rising. Splash-and-go synthetic stones do not absorb water, requiring only a quick surface mist before use.
How do I know when my kitchen knife is actually sharp?
Hold a sheet of standard copy paper upright and slice downward through the page. A sharp knife glides through paper with zero tearing, catching, or rough edges. You can also test the edge against a ripe tomato; sharp steel cuts the skin on contact without crushing the flesh.
Can I ruin my kitchen knife if my angle wobbles while sharpening?
Wobbling will not permanently ruin your knife, but it rounds the edge and leaves the blade dull. If your angle slips, slow your pace, re-establish your original angle, and make deliberate passes on your medium stone to reset the flat bevel.
How often should I sharpen my kitchen knife on a whetstone?
Most home cooks only need whetstone sharpening every two to four months based on regular meal prep. Using a honing rod between stone sessions keeps the apex aligned, extending the time between full stone sharpenings.


Top Rated Best Quality Range Hoods: 2026 Expert Picks

The 12 Best Small Solar Generators 2026

10 Best Quality Semi Automatic Washing Machine of 2026 For Leak-Free Laundry

11 Best Small Washer Machine of 2026 For Everyday Laundry

12 Best Vibration Pads For Washing Machine of 2026 To Stop Walking and Shaking

11 Best Selling Front Load Washing Machine of 2026 For Quiet Odor-Free Laundry

11 Best Washing Machine For King Size Bedding of 2026 To Prevent Cycle Errors

10 Best Small Front Loader Washing Machine of 2026 For Tight Closets






