
How to Sharpen Electric Knife Blades Safely at Home

Electric knife blades get their bite back when you separate the pair and sharpen each tooth along its slanted edge using a small round rod. That fix only works if the flat inner sides stay untouched, because grinding those faces ruins how the twin blades slide together. Standard kitchen pull-through slots will wreck the teeth, but working groove by groove rescues dull edges without warping the metal.
Success depends mainly on the shape of the teeth and the tools in your drawer. Blades with wide scallops are straightforward to file with a tapered diamond rod, but tiny micro-teeth are usually too tight to reshape by hand. If the steel has deep notches or factory replacements cost very little, buying a fresh set might be the faster choice. Otherwise, a few patient minutes at the table will have your blades gliding cleanly through roasts again.
Why Electric Knife Blades Differ from Regular Kitchen Knives
Electric carving knives do not cut like standard kitchen knives. A typical kitchen knife features a single piece of steel with a straight cutting edge that slides through food with smooth downward hand pressure. Electric knives use two separate blades mounted flush against each other. An electric motor inside the handle drives the blades so they slide back and forth in opposite directions at high speed. This back-and-forth action, called reciprocating motion, acts like a pair of high-speed motorized scissors to shear through turkey, ham, crusty bread, or fish fillets without crushing delicate textures.
For this slicing action to work, both blades must touch each other with no gap between them. Knife makers achieve this by grinding two distinct sides on each blade. The inside face is completely flat and smooth. The outside face contains the saw teeth (serrations). Each tooth has a slanted edge (a bevel) cut only into that outer surface.
Running an electric knife blade through a common pull-through kitchen sharpener ruins this delicate balance. Standard pull-through sharpeners have V-shaped slots designed to grind both sides of a straight blade at the same time. If you pull an electric blade through one of those slots, the abrasive wheels grind a slanted edge into the flat inner side. Once that inner face loses its flat profile, a gap opens between the twin blades. Meat fibers, bird skin, and juices get pulled into that gap instead of being cut cleanly. The blades catch against each other, shred your food, and put heavy drag on the motor until the knife stalls out completely.
How to Safely Disassemble and Clean the Blades Before Sharpening
Before you touch any sharpening equipment, disconnect the knife from its power source. Unplug the electrical cord from the wall outlet or take out the rechargeable battery pack. Electric knives have sensitive thumb triggers directly on the handle grip. Leaving the tool powered while working on the blade release latch creates an unnecessary risk of severe cuts.
Press the blade release buttons on the motor body and pull the blade assembly straight out. Always hold the blades by their blunt spine or the molded plastic finger guards near the base, never by the cutting edge. Once the blades are free from the motorized handle, inspect the connection near the tips or midsection. Most models join the two blades with a small metal rivet on one blade that fits into a keyhole slot on the other. Slide the rivet toward the larger opening of the slot to unlock and separate the two halves.
If sticky meat juices or grease make the two blades stick together, soak them briefly in warm water instead of prying them apart with tools. Bending the thin metal will ruin how they seat together. Wash both blades thoroughly with dish soap and warm water, then dry them completely with a clean towel. Sharpening dirty blades pushes dried grease and food debris into the grit of your sharpening tools and creates sticky metal sludge inside the saw teeth.
Step-by-Step Process to Sharpen Electric Knife Blades at Home
Follow this sequence to restore the cutting edge on each saw tooth while keeping the flat mating sides in factory condition.
-
Select a round or tapered sharpening rod that fits inside the tooth dips.
Reason: Choosing a rod diameter that matches the curved dip between the teeth, called the gullet, sharpens the cutting curve without flattening the pointed tips.
-
Lay the first blade flat side down on a clean wooden board or folded towel.
Reason: Supporting the flat inner face against a steady surface keeps the blade from flexing under hand pressure and protects the mating side from accidental scratches.
-
Align the sharpening rod against the slanted edge inside the first tooth dip.
Reason: Matching the original factory angle, which typically rests between 20 and 25 degrees, restores sharpness without thinning or weakening the steel edge.
-
Stroke the rod through the tooth dip away from the blade body with light pressure.
Reason: Pushing outward rolls the sharpened edge forward and keeps your abrasive tool from slipping onto the flat back face.
-
Repeat the stroke four to five times on that tooth, then move to the next dip.
Reason: Keeping the stroke count identical across all teeth ensures the metal removal stays balanced along the entire length of the blade.
-
Feel the flat inner side with a light fingertip sweep to detect the rough metal wire.
Reason: Feeling this raised sliver of steel, known as a burr, confirms that your abrasive strokes have ground all the way through to the cutting edge.
-
Lay the flat inner face completely flush against a fine stone or leather strop.
Reason: Keeping the blade entirely flat removes the rough metal wire cleanly without creating an unwanted bevel on the mating face.
-
Repeat the exact same sharpening sequence on the second twin blade.
Reason: Sharpening both blades with identical strokes ensures they cut evenly and prevents friction that strains the motor.
Common Mistakes That Ruin Reciprocating Blades
Sharpening electric knife blades requires precision because the two metal pieces must interact smoothly. Avoid these common errors that can permanently ruin your blade set.
Never grind the flat mating face of either blade. Many people think they should sharpen both sides of a knife blade, just as they would with an ordinary carving knife. On an electric knife, grinding that flat face rounds the shearing corner. The blades will push meat fibers between them rather than slicing them off. The flat side must only ever touch an abrasive stone while lying totally flat, and only to wipe away the rough metal wire created by sharpening the front side.
Never use high-speed power tools like rotary tools or bench grinders on electric knife blades. High-speed grinding generates intense friction heat in just a few seconds. Unlike heavier knives found in German high carbon steel knife block sets that use thicker stock, electric blades are stamped from thin stainless steel. Excessive friction heat ruins the temper of the metal (the factory heat treatment that gives steel its hardness). Once overheated, the steel softens permanently and will never hold a sharp edge again.
Avoid dragging electric blades across flat whetstones. Smooth kitchen knives like those in high-carbon Japanese chef knife sets benefit from long, sweeping passes across a flat whetstone because their edges are continuous and straight. Electric blades have curved dips. Running them flat across a stone only grinds down the points of the teeth, turning them into blunt nubs while leaving the dull valleys untouched.
When to Sharpen vs. When to Replace Electric Knife Blades
Sharpening takes time, and not every dull electric blade can or should be sharpened at home. Knowing when to replace your blades saves time and protects your knife motor from burning out.
Examine the size and shape of the saw teeth. If your blades feature distinct scallops with visible dips, you can sharpen them easily with a tapered rod. But if your knife uses micro-serrations (tiny saw teeth packed closely together like the edge of a hacksaw blade), sharpening them by hand is nearly impossible. Standard sharpening rods cannot fit into those microscopic dips. Rubbing an abrasive tool over micro-serrations simply files the teeth off, ruining the blade entirely. When micro-serrated blades go dull, buying a replacement pair is the only practical solution.
Inspect the blades for physical distortion and mechanical wear. Check the locking tabs on the tang (the metal end that clips into the handle) and the interlocking rivet that holds the blades together. If the rivet has worked loose or the keyhole slot has worn wide, the twin blades will vibrate and gap apart while running. If either blade has bent from cutting through dense bones or semi-frozen meat, it will rub against the other with heavy resistance. That friction causes the motor to overheat and can permanently damage the drive gears inside the handle.
Replacement blades for most brand-name electric knives are readily available and simple to snap in. If your blades are bent, have loose locking pins, or feature micro-teeth, picking up a new pair restores clean slicing right away.
Choosing the Right Tools for Serrated Blade Maintenance
Keeping your electric knife in top condition requires sharpening tools designed specifically for scalloped edges rather than flat kitchen cutlery.
A tapered diamond or ceramic sharpening rod is the most practical manual tool for electric blades. Look for a rod that tapers down to a narrow tip so it can slide cleanly into small dips, while widening toward the base to accommodate larger scallops. Diamond abrasives cut through stainless steel quickly with minimal hand pressure, while ceramic rods provide a smooth finish that cleanly removes the rough metal wire from the back face.
If you prefer a powered system, choose a sharpener that uses flexible abrasive belts instead of hard grinding wheels. Flexible belts curve naturally into the scalloped dips of saw teeth, allowing you to sharpen the entire contour without flattening the tips. Verify that the unit includes an open belt section or a dedicated guide that lets you sharpen one side of a serrated edge at a time.
When shopping for replacement blades, verify that the locking notches on the tang match your specific motor base. Even blades of the same overall length often have different drive tabs that will not lock into another brand's handle.
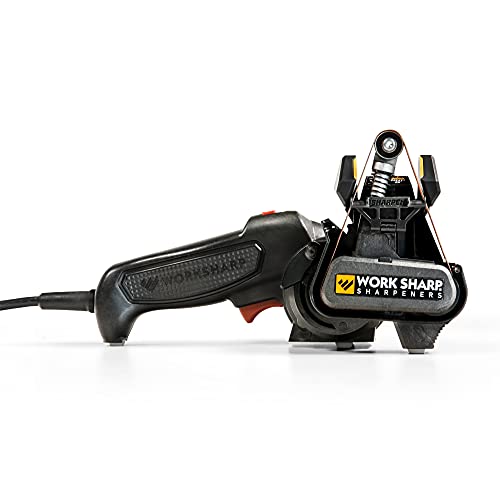
- TAR Score9.4
TAR Score is a ranking system developed by TopAppliancesReviews.com. TAR score has no relationship or impact from any manufacturers or sales agent websites. Learn more
- BrandWORK SHARP

Chef’sChoice 15XV EdgeSelect Professional Electric Knife Sharpener with 100-Percent Diamond
View on Amazon- TAR Score9.2
TAR Score is a ranking system developed by TopAppliancesReviews.com. TAR score has no relationship or impact from any manufacturers or sales agent websites. Learn more
- BrandChef's Choice

- TAR Score9.2
TAR Score is a ranking system developed by TopAppliancesReviews.com. TAR score has no relationship or impact from any manufacturers or sales agent websites. Learn more
- BrandKIBSTOY
- TAR Score9.0
TAR Score is a ranking system developed by TopAppliancesReviews.com. TAR score has no relationship or impact from any manufacturers or sales agent websites. Learn more
- BrandPresto
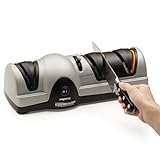
- TAR Score9.0
TAR Score is a ranking system developed by TopAppliancesReviews.com. TAR score has no relationship or impact from any manufacturers or sales agent websites. Learn more
- BrandPresto

- TAR Score9.0
TAR Score is a ranking system developed by TopAppliancesReviews.com. TAR score has no relationship or impact from any manufacturers or sales agent websites. Learn more
- BrandDawnstar

- TAR Score8.8
TAR Score is a ranking system developed by TopAppliancesReviews.com. TAR score has no relationship or impact from any manufacturers or sales agent websites. Learn more
- BrandNarcissus

- TAR Score8.8
TAR Score is a ranking system developed by TopAppliancesReviews.com. TAR score has no relationship or impact from any manufacturers or sales agent websites. Learn more
- BrandHomaider
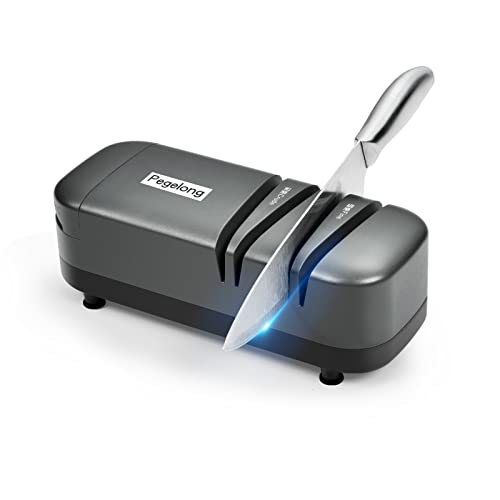
- TAR Score8.8
TAR Score is a ranking system developed by TopAppliancesReviews.com. TAR score has no relationship or impact from any manufacturers or sales agent websites. Learn more
- BrandPegelong
Last update on 2026-10-01 / Affiliate links / Images, Product Titles, and Product Highlights from Amazon Product Advertising API
FAQs
Can you sharpen electric knife blades with an ordinary pull-through sharpener?
No, standard pull-through sharpeners have V-shaped slots that grind both sides of a blade at the same time. Electric knife blades must stay completely flat on the inside so the twin blades slide flush against each other. Grinding the flat inside face creates a gap that causes the blades to jam, tear food, and strain the motor.
Do you ever sharpen the flat side of an electric knife blade?
You should never grind or sharpen the flat side of an electric blade. The only time the flat side touches an abrasive is when you lay it completely flat against a fine ceramic stone or leather strop to wipe away the rough metal wire created from sharpening the saw teeth. Tilting the blade on that side will ruin how the two blades slide together.
What is the easiest way to tell if electric blades are too dull to use?
A sharp electric knife should slice through turkey breast, crusty sourdough, or ham using only the weight of the motor handle. If you find yourself pressing down firmly with your hand to make a cut, or if the blades tear ragged shreds instead of clean slices, the saw teeth have lost their edge.
Can you sharpen electric knife blades with micro-serrations?
Micro-serrations are too tiny to sharpen with standard round rods or hand files. Attempting to sharpen them usually grinds the small teeth flat and ruins the blade. If an electric knife with micro-serrated teeth becomes dull, replacing the blades with a new factory pair is the most reliable option.


Top Rated Best Quality Range Hoods: 2026 Expert Picks

The 12 Best Small Solar Generators 2026

10 Best Quality Semi Automatic Washing Machine of 2026 For Leak-Free Laundry

11 Best Small Washer Machine of 2026 For Everyday Laundry

12 Best Vibration Pads For Washing Machine of 2026 To Stop Walking and Shaking

11 Best Selling Front Load Washing Machine of 2026 For Quiet Odor-Free Laundry

11 Best Washing Machine For King Size Bedding of 2026 To Prevent Cycle Errors

10 Best Small Front Loader Washing Machine of 2026 For Tight Closets






