
How to Sharpen Electric Fillet Knife Blades at Home

Most people assume dull electric fillet blades are disposable because saw-tooth edges seem impossible to touch up at home. That is not true, but standard kitchen sharpeners will destroy them. You can restore the edge by separating the blades and using a round sharpening rod on each tooth from the beveled side. A quick pass across a flat stone wipes away the leftover metal burr so the pair can slice cleanly again.
The job depends on your blade style and overall wear. Blades with wide scallops take a file easily, but tiny micro-teeth are often too small to sharpen by hand. The flat inner sides must also stay completely flat, because grinding that surface creates gaps that jam the motor. When teeth are bent or deeply chipped, replacement blades remain the smarter choice. Here is the proper way to sharpen each tooth without wrecking the sliding action.
How Electric Fillet Knife Blades Work and Why They Dull
Electric fillet knives cut fish very differently from conventional kitchen knives. Instead of a single edge pushed by hand pressure, an electric fillet knife uses two separate blades paired together. A small motorized arm inside the handle pushes these blades back and forth against each other in a reciprocating motion (a rapid, back-and-forth sliding movement). As the two blades slide in opposite directions, their saw-tooth grooves (often called serrations or scallops) act like dozens of miniature scissor pairs slicing through meat, ribs, and tough skin.
Because these blades work as a pair, their physical shape is unusual. Each blade has an outer beveled side (the angled cutting slope that shapes the sharp points and grooves) and an inner mating surface (the flat inside face where the two blades touch). The flat inner sides must press against each other with zero gap. When the flat faces slide cleanly against one another, fish skin cannot slip between them, and the motor glides through crappie, walleye, or catfish effortlessly.
Over time, slicing through abrasive fish scales, cutting close to rib cages, and hitting tough backbone dulls the points of the scallops. When the points round off, the knife stops slicing and starts dragging. Pushing harder on a dull blade creates heat and forces the two blades to bow apart slightly. Once they bow, fish skin and slimy flesh jam between the flat mating faces. That stalls the motor and shreds your fresh catch into ragged pieces. Sharpening these blades requires restoring the curved cutting grooves while keeping the inner sliding faces dead flat.
Essential Tools for Sharpening Electric Fillet Blades
Sharpening serrated reciprocating blades requires tools that can get inside individual scalloped teeth without altering the flat inner side. Before starting, gather the right equipment:
- Round tapered diamond rod: A narrow diamond-coated file that gradually thins toward the tip. The taper allows you to match the exact diameter of small, medium, or wide scallops along the blade.
- Fine ceramic slip stone or flat sharpening stone: A flat ceramic bench stone or whetstone used strictly to wipe away the raised burr on the flat backside.
- Permanent marker: A standard dark felt-tip marker used to coat the beveled edge so you can track where the diamond rod removes steel.
- Isopropyl alcohol and a microfiber cloth: Cleaning supplies to wipe off dried fish slime, dried oil, and metal filings.
- Cut-resistant gloves and safety glasses: Hand and eye protection to keep you safe from sharp reciprocating teeth and fine metal dust.
Step-by-Step Guide to Sharpening Electric Fillet Blades
Follow these specific steps to reshape the teeth and restore smooth slicing action to your electric fillet blades.
- Separate the twin blades from the handle and each other. Press the blade release buttons on your motorized handle to eject the assembly, then separate the locking pin or sliding rivet holding the two blades together. Reason: You cannot reach the individual saw-tooth grooves safely or file at the correct angle while both blades remain pinned together.
- Clean away dried fish scales, slime, and factory oil. Wipe both blades thoroughly using rubbing alcohol and a clean rag, paying close attention to the teeth and the flat inner faces. Reason: Dried grease and fish residue clog fine diamond abrasives, causing the rod to slide slickly over the metal instead of grinding a sharp edge.
- Color the beveled edge of each scallop with a permanent marker. Take a dark felt-tip marker and paint the sloped, angled face of every tooth along the cutting edge. Reason: The ink acts as a visual guide; when you stroke the file, disappearing ink reveals whether your filing angle matches the factory slope.
- Match the diameter and angle of your tapered diamond rod to the tooth scallop. Slide your tapered rod into the curved groove from the beveled side until the rod diameter matches the curve of the scallop, then tilt the rod to match the original factory bevel (the angled cutting slope). Reason: Filing at an angle that is too steep will blunt the tooth, while filing too flat will miss the cutting edge entirely.
- Stroke the rod outward through each scallop groove. Using light, steady forward pressure, push the rod through the scallop toward the outer cutting edge in three to five smooth passes. Reason: Filing strictly in one direction pushes displaced steel toward the flat back, preventing the thin point of the tooth from curling backward.
- Feel for a raised metal burr along the flat back face. Gently run your bare fingertip across the flat, un-beveled side of the blade from the spine downward toward the teeth to check for rough resistance. Reason: Feeling a burr (the microscopic wire edge or curved sliver of metal that forms on the opposite side during sharpening) confirms you removed metal all the way to the edge.
- Lay the inner mating surface flat on a fine stone to remove the burr. Place the blade completely flat on your fine ceramic or diamond bench stone, keeping the entire inner face flush, and push it lightly forward twice. Reason: Wiping away the burr without tilting the blade removes the wire edge while keeping the sliding face perfectly flat so the paired blades do not bind.
- Repeat the process on the second blade and verify smooth manual clearance. Sharpen all teeth on the second blade, reconnect the locking pin, and slide the two blades back and forth by hand. Reason: Manual verification confirms the two blades glide silently against each other before you lock them into an electric motor.
The Critical Mistake That Ruins Electric Fillet Blades
The single biggest mistake people make with electric fillet blades is trying to sharpen both sides of the blade. Most traditional kitchen knives, such as those found in German high-carbon steel premium knife block sets, feature symmetric edges ground evenly on both sides. Electric fillet blades, however, use a single-bevel chisel grind. One side carries the angled teeth, while the other side is precision-ground at the factory to be dead flat.
This single-bevel profile resembles the traditional single-sided grinds found on some high-carbon Japanese chef knife sets, but electric reciprocating blades have an even tighter tolerance because the flat sides must slide directly against each other. If you run a file, stone, or abrasive across the flat inside face at an angle, you bevel that flat edge. Creating even a tiny bevel on the inner face opens a gap between the two blades. When you turn on the motor and slice into a fish, that gap functions like loose scissors cutting limp paper. Skin and meat pull into the space between the blades instead of cutting cleanly. The motor bogs down, the blades bind, and your fish fillets get mangled.
Another common error is using standard V-notch pull-through sharpeners. These gadgets use tungsten carbide or ceramic wheels set in a V shape made strictly for straight-edged blades. Dragging a scalloped electric fillet blade through a V-notch sharpener ruins the profile instantly. The hard carbide teeth catch on the scallops, shearing off the sharp tips and gouging out the steel. Never use a pull-through sharpener on electric blades.
Sharpening by Hand Versus Buying Replacement Blades
Sharpening electric fillet blades by hand takes patience and careful focus. A standard eight-inch or ten-inch blade can have twenty to forty individual scallops. Because an electric knife uses two blades, you must sharpen between forty and eighty separate curved teeth by hand. For most anglers, working through every tooth on both blades takes thirty to forty-five minutes of steady bench work.
You must also inspect the tooth style before you begin. Blades with wide scallops are relatively easy to refresh with a tapered diamond rod. But some blades feature micro-serrations (tiny, needle-like saw teeth packed closely together). Micro-serrations are too narrow for standard diamond rods. Trying to hand-file micro-serrations usually flattens the teeth and destroys the blade profile.
If your blades have bent tips, deep notches from striking heavy fish bones, or micro-serrations, sharpening by hand is rarely practical. Replacement blades made from high-carbon stainless steel (rust-resistant metal that stays sharp through heavy use) are readily available and snap directly into your existing motorized handle. If your time at the cleaning table is limited, keeping a fresh backup set in your tackle bag saves you from spending an entire evening filing teeth.
What to Look for in Replacement Blades and Powered Sharpeners
When your current blades are worn past saving or hand filing takes too much time, you have two practical solutions: buying replacement blades or using a powered belt sharpener designed for serrations.
When choosing replacement blades, confirm the connection tang shape. The rear metal tab that snaps into the motor housing varies across brands, and blades are rarely universal. Verify the length and flexibility to match your style of fish cleaning. An eight-inch flexible blade bends easily around delicate rib cages on panfish, trout, and walleye. A ten-inch stiff blade provides the rigid backbone needed to power through the tough scales and thick spines of striped bass, salmon, or large catfish. Look for high-carbon stainless steel that has been heat-treated and surface polished, which reduces friction while resisting corrosion from lake water and salt.
If you prefer to maintain your blades mechanically rather than filing individual teeth by hand, consider a powered sharpener with flexible abrasive belts. Unlike rigid grinding wheels or fixed pull-through slots, flexible abrasive belts conform to the curved shape of serrated teeth. When paired with a wide-angle serration guide, a powered belt sharpener can polish the beveled scallops of an electric fillet blade in just a couple of minutes, keeping your blades keen season after season without tedious hand filing.
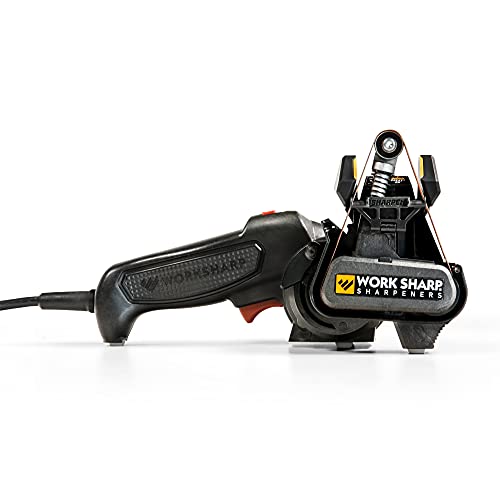
- TAR Score9.4
TAR Score is a ranking system developed by TopAppliancesReviews.com. TAR score has no relationship or impact from any manufacturers or sales agent websites. Learn more
- BrandWORK SHARP

- TAR Score9.2
TAR Score is a ranking system developed by TopAppliancesReviews.com. TAR score has no relationship or impact from any manufacturers or sales agent websites. Learn more
- BrandWORKPRO

- TAR Score9.0
TAR Score is a ranking system developed by TopAppliancesReviews.com. TAR score has no relationship or impact from any manufacturers or sales agent websites. Learn more
- BrandOld Timer

- TAR Score8.8
TAR Score is a ranking system developed by TopAppliancesReviews.com. TAR score has no relationship or impact from any manufacturers or sales agent websites. Learn more
- BrandNarcissus
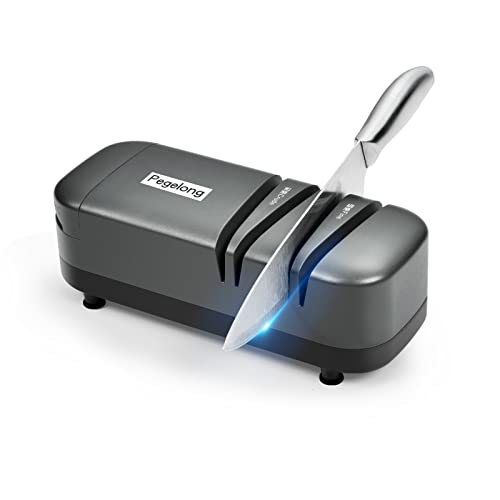
- TAR Score8.8
TAR Score is a ranking system developed by TopAppliancesReviews.com. TAR score has no relationship or impact from any manufacturers or sales agent websites. Learn more
- BrandPegelong

- TAR Score8.8
TAR Score is a ranking system developed by TopAppliancesReviews.com. TAR score has no relationship or impact from any manufacturers or sales agent websites. Learn more
- Branddskiley

- TAR Score8.4
TAR Score is a ranking system developed by TopAppliancesReviews.com. TAR score has no relationship or impact from any manufacturers or sales agent websites. Learn more
- BrandFLISSA

- TAR Score8.4
TAR Score is a ranking system developed by TopAppliancesReviews.com. TAR score has no relationship or impact from any manufacturers or sales agent websites. Learn more
- BrandFLISSA

- TAR Score8.4
TAR Score is a ranking system developed by TopAppliancesReviews.com. TAR score has no relationship or impact from any manufacturers or sales agent websites. Learn more
- BrandWORKPRO

- TAR Score8.4
TAR Score is a ranking system developed by TopAppliancesReviews.com. TAR score has no relationship or impact from any manufacturers or sales agent websites. Learn more
- BrandWORKPRO
Last update on 2026-10-02 / Affiliate links / Images, Product Titles, and Product Highlights from Amazon Product Advertising API
FAQs
Can you sharpen electric fillet knife blades on an electric rotary wheel sharpener?
No, standard electric rotary sharpeners with fixed slots should never be used on electric fillet blades. Fixed spinning wheels cannot enter the curved hollows of individual saw teeth and will grind off the cutting tips. They also grind both sides of the blade, which destroys the flat inner face required for smooth reciprocating operation.
How do you know when electric fillet blades are worn past saving?
Blades should be replaced when teeth have visible chips, when the tips are bent out of alignment, or when hand sharpening has ground the scallops so shallow that they no longer grip fish skin. If you lay the two inner faces together and can see light passing between them, the blades are warped and will constantly bind during use.
Why do my electric fillet blades bind or drag after sharpening?
Blades usually bind after sharpening because a rough wire burr was left on the flat inner mating face, or because the inner face was accidentally beveled. If the inner side is not completely flat, the blades catch on each other instead of sliding freely, which causes the motor to heat up and stall.
Do electric fillet knife blades need oil after sharpening?
Yes, applying a drop of food-grade mineral oil to the flat inner mating surface and the connecting pin keeps the blades sliding smoothly. Food-grade mineral oil reduces friction, prevents motor strain, and protects the steel from corrosion during storage without contaminating your fish fillets.


Top Rated Best Quality Range Hoods: 2026 Expert Picks

The 12 Best Small Solar Generators 2026

10 Best Quality Semi Automatic Washing Machine of 2026 For Leak-Free Laundry

11 Best Small Washer Machine of 2026 For Everyday Laundry

12 Best Vibration Pads For Washing Machine of 2026 To Stop Walking and Shaking

11 Best Selling Front Load Washing Machine of 2026 For Quiet Odor-Free Laundry

11 Best Washing Machine For King Size Bedding of 2026 To Prevent Cycle Errors

10 Best Small Front Loader Washing Machine of 2026 For Tight Closets






