
How to Sharpen a Zwilling J.A. Henckels Knife at Home

Sharpening a dull German kitchen knife means removing a tiny amount of steel along the edge, usually at a fifteen-degree angle on each side. The right method depends on how blunt the blade has become and which sharpening tool sits on the counter. A handheld manual sharpener restores that angle in just a few gentle strokes, while a whetstone (a flat sharpening block) takes more practice but creates a smoother, longer-lasting bevel.
Finding the right fix also depends on whether the metal is truly dull or just bent out of line. Daily honing (straightening the curled edge with a steel rod) keeps a knife working smoothly between true sharpenings, while older blades might feature a wider twenty-degree angle rather than the modern slim profile. Here is how to match that factory slope, protect the blade from scratches, and restore clean slicing power without ruining the steel.
Honing Straightens the Edge While Sharpening Removes Metal
Many home cooks pull the steel rod from their knife block, slide their blade across it, and wonder why the knife still squashes ripe tomatoes. That steel rod is a honing rod, not a sharpener. Knowing the difference between honing and sharpening is the first step in restoring your German cutlery.
Honing means straightening a bent edge. When you chop on a cutting board, the thin cutting edge does not instantly wear away. Instead, the microscopic teeth of the metal fold over to the side. The knife feels dull because the cutting point is bent. Honing pushes those microscopic teeth back into a straight line without taking off noticeable metal.
Sharpening means grinding away dull steel along the cutting edge angle (bevel) to create a brand new apex. Over months of use, the edge rounds off flat. Once the edge is rounded, honing cannot fix it because there is no sharp point left to straighten. Sharpening uses abrasive stones or ceramic wheels to grind away worn steel and reveal fresh metal.
If your knife worked well yesterday but slips today, a few strokes on a honing rod will restore it. If your knife has felt dull for months, it is blunt. It needs actual sharpening to cut a fresh edge into the blade.
Match the Factory Angle to Protect Your Blade
Zwilling J.A. Henckels knives are made from rust-resistant, easy-to-clean stainless steel. Modern German knives from Zwilling are ground at the factory to a cutting edge angle (bevel) of 15 degrees per side, creating a combined 30-degree edge. Older traditional lines or heavy utility knives were ground at 20 degrees per side, creating a 40-degree edge.
Holding that factory angle matters. If you hold the blade too flat against an abrasive surface, like 10 degrees, you will scratch the polished sides of the blade without touching the dull edge. If you hold it too steep, like 25 degrees, you create a blunt wedge that splits vegetables instead of slicing them clean.
Follow this checklist to find and keep the right angle:
- Identify your knife line: Modern Zwilling lines use a 15-degree edge per side, while older traditional lines use 20 degrees. Caring for German high carbon steel knife sets requires matching these factory bevels so the steel keeps its balance of durability and slicing ease.
- Find the angle by eye: Standing the blade straight up creates a 90-degree angle to your counter. Halving that brings you to 45 degrees. Halving that again brings you to roughly 22 degrees. Lower the spine just below that point to find 15 degrees.
- Use matchbooks as guides: Place two standard paper matchbooks flat on the counter and rest the spine of the knife on top. That height sets an accurate 15-degree angle for a chef knife.
- Keep your wrist locked: Lock your wrist firm as you guide the blade. Wobbling your hand rounds off the cutting edge angle, leaving the blade dull.
Use Pull-Through Sharpeners for Fast and Simple Edges
Manual pull-through sharpeners are the easiest option for home cooks. You do not need to guess the angle because the internal ceramic or carbide wheels sit fixed inside guide slots. Most units feature two stages: a coarse grit stage to reshape the edge, and a fine ceramic stage to polish the metal.
Follow these steps to sharpen your knife with a handheld pull-through tool:
- Anchor the sharpener firmly: Place the sharpener flat on an even counter. Grip the handle firmly with your non-dominant hand, keeping your fingers tucked safely behind the guard.
- Seat the heel in the coarse slot: Place the heel of the blade (the rear part of the edge closest to the handle) straight down into the coarse slot. Keep the blade upright without tilting.
- Pull backward with smooth pressure: Draw the knife backward toward your body in one continuous motion from heel to tip. Follow the curve of the tip as you pull through. Use light pressure, about the force needed to slice a ripe peach.
- Never saw back and forth: Pull the blade in one direction only. Never push forward into the slot or saw back and forth, which can gouge notches into the blade steel.
- Repeat three to five times: For a knife losing its bite, three to four pulls through the coarse slot are enough. For a blunt knife, pull it through five to six times to clear away worn steel.
- Polish in the fine slot: Move the knife to the fine ceramic slot. Pull the blade from heel to tip three to four times using light pressure to smooth out the edge.
- Wash and dry: Wipe the blade with a damp towel to remove steel dust, then wash and dry the knife before preparing food.
Use a Whetstone for Full Control and Durability
A whetstone (a flat sharpening block) takes patience, but it gives you total control over the blade. It removes less steel than pull-through sharpeners, extending the life of your cutlery. Most home cooks use double-sided water stones with a medium grit (around 1,000 grit coarseness) on one side and a fine grit (around 3,000 grit) on the other.
Follow these steps to sharpen your knife on a whetstone:
- Soak and prepare the stone: Submerge your water stone in cool water for ten minutes until air bubbles stop rising. Place the stone on a damp towel with the medium grit side up. Keep a cup of water nearby to keep the stone wet.
- Set your 15-degree angle: Lay the knife across the stone with the cutting edge pointing away from you. Lift the spine until the blade sits at roughly 15 degrees, about the height of two stacked quarters off the stone.
- Glide the blade forward in sections: Place your free fingertips on the blade face near the cutting edge. Push the blade forward across the stone in a smooth diagonal arc, applying steady pressure forward. Ease off pressure as you draw back. Work from heel to tip, doing ten to twelve strokes per section.
- Check for the burr: Grinding creates a burr, which is the microscopic wire edge or curved sliver of metal that forms on the opposite side during sharpening. Gently slide your thumb pad upward from the spine toward the edge on the flat side. Never slide your finger along the sharp length. When you feel a rough ridge running from heel to tip, you have ground enough metal.
- Sharpen the opposite side: Flip the knife over to work on the other side. Match the 15-degree angle and repeat the same strokes in sections until the burr flips to the other side.
- Polish on the fine stone: Flip the whetstone to the fine grit side. Make five or six light sweeping strokes from heel to tip on each side to remove the burr and polish the bevel.
- Clean the blade: Wash the knife with warm soapy water to remove all metal sludge, then dry it immediately with a towel.
Check the Edge Safely Using Paper or Produce
Never run your bare finger directly across a freshly sharpened edge to see if it is sharp. Doing so can cause cuts or give a misleading impression. Instead, rely on safe kitchen checks.
Use this checklist to confirm your edge is kitchen-ready:
- The printer paper slice: Hold a sheet of printer paper vertically by one corner. Place the heel of the knife against the top edge and slice downward. A sharp knife will glide through smoothly with a clean hiss. If the blade snags or tears, the edge still has dull spots or a leftover rough burr.
- The ripe tomato slice: Rest the belly of the blade on top of a soft tomato without pushing down. Gently draw the knife backward toward you. A sharp edge cuts through the slick skin under its own weight without squishing the flesh.
- The thumbnail catch: Rest the cutting edge gently on top of your thumbnail at a shallow angle without pushing down. Try to slide the knife sideways. If it slides freely, the edge is still blunt. If it catches your nail securely, the edge has good bite.
- The overhead light reflection: Look directly down at the cutting edge under a bright light. A dull edge has flat spots that will reflect tiny pinpricks of light back at you. A properly sharpened edge is microscopic and appears as a dark line that reflects no light.
Regular Honing Extends the Time Between Full Sharpenings
Every time you sharpen a knife, you remove permanent blade steel. Frequent grinding wears down your knife prematurely. Consistent everyday care keeps the blade aligned so you only need to sharpen once or twice a year.
Follow these maintenance habits to keep your knives performing at their best:
- Hone regularly: Use your honing steel every few cooking sessions. Hold the rod vertically with the tip resting on a cutting board, set your knife at 15 degrees, and take four to five light sweeping strokes per side. This straightens the microscopic edge before it bends flat.
- Choose the right cutting board: Cut only on wood or soft food-grade plastic boards. Hard surfaces like glass, granite, marble, and stainless steel act like anvils, flattening a sharp 15-degree edge in seconds.
- Wash exclusively by hand: Never put fine German knives in the dishwasher. High heat, harsh detergents, and rattling against other dishes dull the edge and cause pitting on stainless steel. Wash with warm water and soap, then dry immediately with a clean towel.
- Store edges safely: Never let bare knives rattle around in a loose drawer. Store them in a countertop block, inside edge guards, or on a wall rack. For safe storage that keeps edges separated, consider magnetic knife block sets to hold blades securely without dulling friction.
Choose Sharpening Tools That Match Your Skill Level
Keeping your German knives in peak condition requires the right tools for your cooking routine. For most home kitchens, pairing an everyday honing rod with a reliable sharpening tool gives you everything needed to maintain blade performance. A steel or ceramic honing rod takes care of daily edge alignment, while a dedicated sharpener steps in when the edge finally rounds off.
What to look for before choosing sharpening equipment:
- Correct factory angle alignment: German blades perform best when ground to 15 degrees per side. Ensure any sharpener or guide you buy supports this angle. Sharpeners set at wider angles will create a thicker bevel that struggles with precision slicing.
- Two-stage abrasive options: Avoid basic sharpeners that only feature coarse grinding wheels. Look for multi-stage systems with a coarse or medium grit stage to reshape worn edges and a fine ceramic stage to polish the steel and remove rough burrs.
- Stable non-slip bases: Sharpening requires stability. Choose sharpeners with wide, rubberized non-slip feet and sturdy handles with protective guards so the unit stays firmly anchored on your counter during every pull.
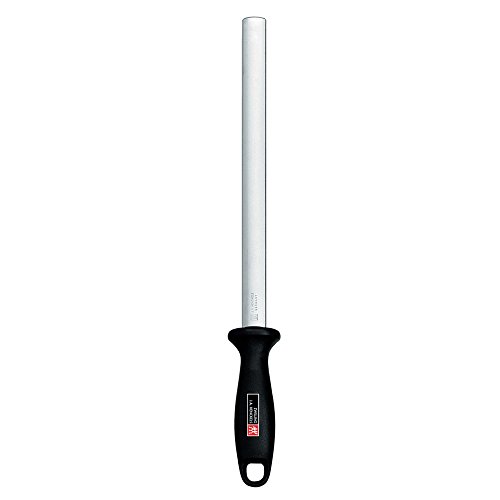
- Honing rod length: When buying a honing rod, make sure the steel length matches your largest chef knife. A nine-inch to twelve-inch rod provides plenty of surface to sweep the entire blade from heel to tip in a single smooth motion.

- TAR Score9.6
TAR Score is a ranking system developed by TopAppliancesReviews.com. TAR score has no relationship or impact from any manufacturers or sales agent websites. Learn more
- BrandRobert Rose

- TAR Score9.4
TAR Score is a ranking system developed by TopAppliancesReviews.com. TAR score has no relationship or impact from any manufacturers or sales agent websites. Learn more
- BrandZWILLING
- TAR Score9.4
TAR Score is a ranking system developed by TopAppliancesReviews.com. TAR score has no relationship or impact from any manufacturers or sales agent websites. Learn more
- BrandZWILLING

- TAR Score9.4
TAR Score is a ranking system developed by TopAppliancesReviews.com. TAR score has no relationship or impact from any manufacturers or sales agent websites. Learn more
- BrandZWILLING

- TAR Score9.2
TAR Score is a ranking system developed by TopAppliancesReviews.com. TAR score has no relationship or impact from any manufacturers or sales agent websites. Learn more
- BrandHENCKELS

- TAR Score9.2
TAR Score is a ranking system developed by TopAppliancesReviews.com. TAR score has no relationship or impact from any manufacturers or sales agent websites. Learn more
- BrandZWILLING

- TAR Score9.0
TAR Score is a ranking system developed by TopAppliancesReviews.com. TAR score has no relationship or impact from any manufacturers or sales agent websites. Learn more
- BrandHENCKELS

- TAR Score8.6
TAR Score is a ranking system developed by TopAppliancesReviews.com. TAR score has no relationship or impact from any manufacturers or sales agent websites. Learn more
- BrandZWILLING

- TAR Score8.6
TAR Score is a ranking system developed by TopAppliancesReviews.com. TAR score has no relationship or impact from any manufacturers or sales agent websites. Learn more
- BrandZWILLING
Last update on 2026-10-02 / Affiliate links / Images, Product Titles, and Product Highlights from Amazon Product Advertising API


Top Rated Best Quality Range Hoods: 2026 Expert Picks

The 12 Best Small Solar Generators 2026

10 Best Quality Semi Automatic Washing Machine of 2026 For Leak-Free Laundry

11 Best Small Washer Machine of 2026 For Everyday Laundry

12 Best Vibration Pads For Washing Machine of 2026 To Stop Walking and Shaking

11 Best Selling Front Load Washing Machine of 2026 For Quiet Odor-Free Laundry

11 Best Washing Machine For King Size Bedding of 2026 To Prevent Cycle Errors

10 Best Small Front Loader Washing Machine of 2026 For Tight Closets






