How to Sharpen a Serrated Bread Knife Without Damaging the Teeth

Sharpen each curved groove one by one. Running a bread knife through a standard kitchen sharpener shaves the teeth flat and ruins the edge. The right method is to work a tapered sharpening rod, which is a slender, cone-shaped stick, along the angled slope of every tooth. Polishing each hollow scallop separately restores that crisp bite while keeping the pointed tips intact.
A few details change the job for your specific blade. The rod must fit the width of your knife's scallops so it reaches the bottom curve without scraping the sides. Most bread knives have an angled edge on only one face, though a few rare models are cut on both sides. Deep chips or snapped teeth might also mean the blade is beyond saving. Here is how to safely restore every groove at home.
The Short Version
- Work groove by groove: Sharpen each gullet (the curved groove between teeth) individually using a tapered rod (a cone-shaped sharpening stick made of ceramic or diamond).
- Match the factory bevel: Most bread knives use a chisel grind (a blade sharpened on one side only), so place your sharpening rod flush against the angled cutting slope on that side.
- Clear the wire burr: Sharpening pushes a burr (a microscopic wire edge or curved sliver of metal) over to the flat side, which you remove with a couple of flat, light wipes.
- Skip standard kitchen sharpeners: Never drag a serrated blade through a pull-through sharpener or across a flat stone, because those tools grind off the pointed teeth and ruin the knife.
Why Standard Sharpeners Ruin Serrated Bread Knives
A standard chef knife features a straight, continuous edge that meets a cutting board evenly. When you run a straight edge through a V-notch pull-through sharpener or sweep it across a whetstone, the abrasive surface contacts the entire cutting edge. That process works well for smooth blades, but it causes severe damage to serrations.
A serrated bread knife acts like a miniature handsaw. The blade pattern alternates between raised points and sunken valleys called gullets. The sharp points pierce hard bread crusts, tough bagel skins, and ripe tomato skins. The curved gullets then glide through the soft, tender crumb inside without squishing the loaf. Each gullet has its own curved cutting bevel (an angled cutting slope) ground directly into the steel.
When you pull a serrated blade through a slotted sharpener or rub it flat on a whetstone, the abrasive surfaces only hit the very tips of the teeth. The stones cannot reach inside the recessed curves where the real slicing takes place. In just a few strokes, the sharpener shaves off the pointed teeth, turning them into blunt, rounded nubs. Meanwhile, the dull cutting valleys remain untouched. The blade will no longer bite into a crusty sourdough boule, leaving you with a crushed loaf and a ruined edge that cannot be restored without professional grinding.
Tools That Actually Fit Into Curved Serrations
Restoring a serrated edge requires an abrasive tool that fits inside the curved hollows between the teeth. You do not need expensive machines, but you do need the right shape.
- Ceramic tapered rod: This is a cone-shaped sharpening stick that gradually narrows from a thick base down to a fine point. Because bread knives have scallops of different widths, the cone shape allows you to slide the rod in until the diameter matches the exact curve of your knife. Ceramic provides a fine grit that polishes and sharpens without removing excess metal.
- Diamond-coated sharpening rod: This tool works like a ceramic rod, but it features a layer of fine industrial diamond particles over a steel core. Diamond cuts much faster than ceramic. It works well on neglected, extremely dull bread knives. Because diamond removes metal rapidly, you must use a light touch to avoid altering the tooth shape.
- Wooden dowel wrapped in fine sandpaper: If you do not own a specialized rod, you can make an inexpensive tool at home. Find a wooden craft dowel that matches the curve of your knife gullets. Wrap a sheet of 600-grit to 1,000-grit wet-or-dry sandpaper tightly around the dowel. It fits smoothly into each groove and costs very little.
Avoid standard butcher steels, coarse bench stones, and electric belt sharpeners. A typical kitchen honing steel is far too thick to enter narrow tooth curves and will simply batter the tips. Electric wheels remove steel too aggressively and can overheat the blade, permanently softening the metal.
Step-by-Step: Sharpening Groove by Groove
Sharpening a serrated knife requires patience rather than muscle. Work slowly and follow these steps to restore each scallop cleanly.
- Identify the beveled side: Look down the length of your bread knife under bright kitchen lighting. Most bread knives feature a chisel grind, meaning the metal slopes down toward the edge on one side while the opposite side remains completely flat. You will do all your primary sharpening on the angled, beveled side.
- Set up a steady work position: Lay the knife spine flat on a wooden cutting board with the teeth facing away from you, or rest the blade firmly against the edge of a sturdy table. Keep your non-dominant hand firmly on the handle. Always ensure the sharp edge points safely away from your body and fingers.
- Match the rod diameter to the gullet: Slide your tapered rod into the first scallop near the heel (the base of the blade closest to the handle). Move the rod forward or back until its thickness matches the width of the curved groove. The rod should touch the full contour of the curve, not just the points.
- Align with the factory bevel angle: Tilt the rod until it rests flush against the angled cutting slope inside the scallop. Most serrated knives use a bevel angle between 12 and 18 degrees. If you hold the rod too upright, you will dull the edge; if you lay it too flat, you will scratch the blade face.
- Stroke away from the blade: Push the rod through the scallop in a smooth, gentle motion moving away from your body and across the cutting edge. Apply light, consistent pressure, about the same weight you would use to write with a pencil. Give the rod a slight rolling twist with your fingers as you push to keep wear even across the abrasive. Repeat this stroke 4 to 6 times per scallop.
- Advance along the blade: Lift the rod completely clear of the blade, place it into the next scallop, check the diameter, align the angle, and repeat the strokes. Work your way methodically down the entire blade until you reach the tip.
How to Deburr the Flat Backside of the Blade
As you stroke the beveled curves with your sharpening rod, the friction pushes metal across the edge. This action creates a burr, which is a tiny rough metal lip that rolls over onto the flat side of the blade. You cannot always see the burr with the naked eye, but you can feel it, and leaving it in place will cause the knife to snag and drag through soft bread.
Removing this wire edge takes less than a minute, but you must be careful not to introduce a secondary bevel on the flat side.
- Locate the burr: Turn the knife over so the flat side faces upward. Gently slide a clean cotton towel or the soft pad of your finger across the flat side, moving strictly from the spine out toward the teeth. Never run your finger along the sharp edge. If the cloth catches or you feel a fine, scratchy ridge along the back of the teeth, the burr has formed properly.
- Position your abrasive completely flat: Place your ceramic rod, fine whetstone, or sandpaper dowel flat against the back side of the blade. The abrasive must lay flush against the steel surface. Do not lift the back of the rod even a fraction of an inch, as tilting it will round off the flat back and ruin the cutting geometry.
- Wipe the burr away: Apply feather-light pressure and sweep the abrasive across the flat backside from the heel to the tip of the knife. Two or three gentle passes are plenty. The goal here is not to grind away blade steel, but simply to break off the delicate folded wire edge.
- Clean and check the edge: Wipe the blade thoroughly with a damp cloth to remove any fine metal dust, then dry it immediately to prevent spotting. Check the edge by slicing through a sheet of standard printer paper or a soft, ripe tomato. The teeth should grab the surface instantly and slice cleanly without snagging or tearing.
Common Serrated Sharpening Mistakes to Avoid
Sharpening a wavy blade is straightforward once you find your rhythm, but a few common errors can compromise the edge or shorten the working life of the knife.
- Applying heavy downward pressure: Steel sharpens through steady abrasive friction, not brute force. Pressing hard against the gullet can gouge uneven hollows into the steel, wear flat spots into your ceramic rod, or bend the delicate tooth points out of alignment.
- Sharpening both sides of a chisel grind: If your bread knife has scallops ground on the right side and a flat face on the left, sharpening the left side will ruin the factory geometry. Only sharpen the beveled scallops. Use the flat side strictly for flat, gentle deburring sweeps.
- Using a rod that is too wide: If your sharpening stick is thicker than the scallop curve, it will rest on top of the tooth tips without touching the inner hollow. This rounds off the points and leaves the cutting edge dull. Always use a narrow or tapered tool that drops completely into the bottom of the curve.
- Storing the blade unprotected: After spending time restoring each scallop, do not toss the bread knife into a crowded utensil drawer. Bumping against metal spatulas, forks, and other knives will quickly chip the tooth points. Storing your cutlery on wall racks or dedicated slots in magnetic knife blocks and storage setups keeps the edges shielded and ready for clean slicing.
Repair Versus Replacement: When to Call It Quits
Because the inner gullets of a serrated knife rarely make direct contact with a cutting board, a bread knife retains its sharpness far longer than a smooth-edged chef knife. Even an artisan baker may only need to sharpen a bread knife every two to three years. But kitchen blades do not last forever, and there comes a point where reshaping the teeth is no longer practical.
If your knife simply feels sluggish, tears soft sandwich loaves, or requires extra downward pressure on sourdough crusts, it is an ideal candidate for sharpening. A twenty-minute session with a tapered rod will bring back its original slicing bite.
On the other hand, replacement makes more sense if the blade has severe structural damage. If several teeth are chipped, broken off at the root, or bent sideways from prying frozen food or hitting hard bones, grinding the entire edge down to uniform height requires removing excessive amounts of steel. Similarly, thin stamped blades can warp along their spine over time. A warped bread knife will wander through bread at an angle, producing crooked, uneven slices regardless of how sharp the scallops are.
Cost is another practical factor. Inexpensive stamped bread knives often cost less than a good diamond tapered sharpening rod. If you own an entry-level knife with worn-down scallops, investing in sharpening gear may not be worth the expense unless you plan to maintain other serrated blades in your kitchen.
What to Look for in a Low-Maintenance Replacement Bread Knife
When replacing a heavily worn bread knife, selecting the right blade shape and construction makes future maintenance much easier. A thoughtfully designed bread knife glides through tough crusts with minimal arm effort and sharpens quickly when the time comes.
Look for a blade length between 8 and 10 inches. Shorter bread knives force you to saw back and forth repeatedly, which creates excessive crumbs and shreds tender baked goods. A longer blade allows you to draw the knife through wide artisan boules and delicate layered cakes in single, smooth cutting strokes.
Pay attention to the spacing and depth of the serrations. Knives with wide, gently curved scallops are vastly easier to sharpen at home than blades with dozens of needle-sharp, closely packed teeth. A wider scallop gives your tapered rod plenty of room to seat securely against the factory bevel.
Steel choice and handle balance also play major roles in edge retention. Quality stainless steel or high-carbon steel holds a sharp edge through hundreds of crusty loaves while remaining easy to sharpen with ceramic abrasives. Look for a full tang (meaning one solid piece of blade steel extends all the way through the handle), which provides lasting structural rigidity and prevents the blade from loosening over time. If you already maintain traditional German high-carbon steel knife sets, you will appreciate how durable, balanced cutlery handles dense crusts without flexing sideways. Look for an ergonomic, textured handle that offers a secure grip even when your hands are dusted with flour or damp from kitchen prep.

- TAR Score9.6
TAR Score is a ranking system developed by TopAppliancesReviews.com. TAR score has no relationship or impact from any manufacturers or sales agent websites. Learn more
- BrandOrblue

- TAR Score9.6
TAR Score is a ranking system developed by TopAppliancesReviews.com. TAR score has no relationship or impact from any manufacturers or sales agent websites. Learn more
- BrandMercer Culinary

- TAR Score9.6
TAR Score is a ranking system developed by TopAppliancesReviews.com. TAR score has no relationship or impact from any manufacturers or sales agent websites. Learn more
- BrandODERFUN

- TAR Score9.4
TAR Score is a ranking system developed by TopAppliancesReviews.com. TAR score has no relationship or impact from any manufacturers or sales agent websites. Learn more
- BrandCoquusAid

- TAR Score9.4
TAR Score is a ranking system developed by TopAppliancesReviews.com. TAR score has no relationship or impact from any manufacturers or sales agent websites. Learn more
- BrandPiklohas
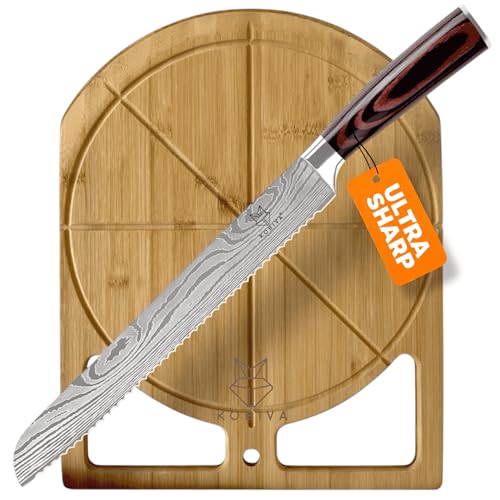
- TAR Score9.4
TAR Score is a ranking system developed by TopAppliancesReviews.com. TAR score has no relationship or impact from any manufacturers or sales agent websites. Learn more
- BrandKobiva

- TAR Score9.2
TAR Score is a ranking system developed by TopAppliancesReviews.com. TAR score has no relationship or impact from any manufacturers or sales agent websites. Learn more
- BrandKEEMAKE

- TAR Score9.0
TAR Score is a ranking system developed by TopAppliancesReviews.com. TAR score has no relationship or impact from any manufacturers or sales agent websites. Learn more
- BrandHampton Forge

- TAR Score8.8
TAR Score is a ranking system developed by TopAppliancesReviews.com. TAR score has no relationship or impact from any manufacturers or sales agent websites. Learn more
- BrandMezzo
Last update on 2026-10-02 / Affiliate links / Images, Product Titles, and Product Highlights from Amazon Product Advertising API
FAQs
Can I use my standard kitchen sharpener on a bread knife?
No, standard slot sharpeners and pull-through gadgets are built exclusively for straight blades. Running a serrated knife through these slots grinds down the pointed teeth, flattens the profile, and never reaches the inner curved cutting edges. Always use a round or tapered sharpening rod to work each scallop individually.
How often do you need to sharpen a serrated bread knife?
Most home cooks only need to sharpen a bread knife every two to three years. Because the recessed gullets do not strike the cutting board directly, serrated edges hold their sharpness significantly longer than smooth chef knives. You only need to sharpen the blade when you notice it crushing soft bread or slipping on tough crusts.
Do I have to sharpen both sides of the serrated blade?
No, almost all serrated bread knives feature a chisel grind, which means only one side of the blade is beveled. You should only use your sharpening rod inside the curved scallops on that angled side. The flat backside only needs a few light, flat sweeps to knock off the microscopic wire burr created during sharpening.
How do I check if my bread knife is sharp enough without cutting bread?
You can check the edge by gently slicing through a sheet of standard printer paper or shaving the skin of a ripe tomato. A sharp serrated blade will bite instantly and glide through the paper or tomato skin under its own weight without snagging, tearing, or requiring downward force.

Top Rated Best Quality Range Hoods: 2026 Expert Picks
The 12 Best Small Solar Generators 2026

10 Best Quality Semi Automatic Washing Machine of 2026 For Leak-Free Laundry

11 Best Small Washer Machine of 2026 For Everyday Laundry

12 Best Vibration Pads For Washing Machine of 2026 To Stop Walking and Shaking

11 Best Selling Front Load Washing Machine of 2026 For Quiet Odor-Free Laundry

11 Best Washing Machine For King Size Bedding of 2026 To Prevent Cycle Errors

10 Best Small Front Loader Washing Machine of 2026 For Tight Closets