
How to Sharpen a Knife Safely at Home

Check how the blade behaves on a ripe tomato or folded paper. Slipping instead of biting means the steel has rounded over and needs fresh metal exposed. Restoring that edge requires grinding away a tiny layer of dull metal at a steady 15- to 20-degree angle. Sweeping the steel smoothly across an abrasive surface creates a fresh, crisp cutting line that slices without pressure.
The right method depends on the blade style and its current condition. Thinner Japanese knives need a slim 15-degree bevel (the angled cutting slope), while thicker Western chef knives hold up better at 20 degrees. A blade with minor dullness takes just a few passes on a fine whetstone (a flat sharpening block) or a guided tool, while chipped edges demand heavier reshaping. Here is how to hold the proper angle and restore a true, keen edge step by step.
Honing Versus Sharpening: Knowing When to Grind Metal
Most people notice a dull knife when it slips sideways off an onion peel or smashes a soft tomato instead of gliding through it. When a blade refuses to cut, your natural reaction is to press down harder. That extra downward force is dangerous. A dull blade can easily slide off slick food toward your fingers. Before you pull out abrasive tools, you need to understand what has actually happened to your blade edge.
Under a magnifying glass, a knife edge looks like a row of tiny, microscopic teeth. Daily kitchen work bends those tiny teeth out of line. The metal is not missing; it is simply knocked crooked. In that situation, you need honing, not sharpening. Honing is the act of straightening a bent edge without grinding steel away. Running your blade across a magnetized carbon steel rod pushes those tiny teeth back into center alignment. It restores cutting bite in ten seconds without removing any metal.
Sharpening is completely different. When regular honing stops bringing back that smooth cut, the microscopic teeth have worn down flat, chipped, or rounded over. Honing cannot fix metal that is no longer there. Sharpening grinds away a minute layer of blade steel to create a fresh cutting edge. You hone your kitchen knives weekly, but you only need to sharpen them a few times a year. Grinding away metal every time a knife feels slightly sluggish will wear your favorite blade down to a toothpick within a few years.
If you own rust-resistant stainless steel knives, they can handle frequent light honing before needing stone work. Harder high-carbon steel blades hold an edge longer, but when they do dull, they need patient work on an abrasive stone to bring that crisp bevel back to life.
Finding the Right Sharpening Angle for Your Knife
The secret to a sharp knife is maintaining a steady bevel from the heel of the blade to the tip. The bevel is simply the angled slope that leads down to the sharp cutting edge. If you grind too flat against the stone, you scratch the decorative face of the blade. If you tilt the knife too high, you blunt the edge and turn it into a blunt wedge. You must match the angle your knife had when it left the factory.
Most kitchen knives fall into two broad styles: Western knives and Japanese knives. Sturdy German-style kitchen blades, like those found in Wüsthof Ikon knife block sets, feature a durable 20-degree angle on each side. That wider 20-degree utility edge gives the steel extra support behind the cut. It allows the blade to chop through dense butternut squash, sweet potatoes, and herb bundles without chipping.
Delicate Japanese kitchen knives, such as those in Shun Premier knife sets, are ground to a steep 15-degree slicing edge per side. The steel in these blades is harder and thinner. A 15-degree bevel creates an edge that falls through proteins and vegetables with almost zero resistance. Pocket knives and hunting tools built for outdoor work often sit around 20 to 22 degrees per side to withstand rough cutting tasks.
Visualizing a 15-degree or 20-degree angle without expensive measuring gadgets is simple. Picture a right angle between your knife and the sharpening surface, which is 90 degrees. Tilt the blade halfway down toward the surface to reach 45 degrees. Cut that space in half again, and you are sitting at roughly 22.5 degrees. Lower the spine just a hair more, and you have reached 20 degrees. For a 15-degree edge, rest the blade on the surface and slide two standard pennies under the spine. That small gap gives you the exact height to hold while sharpening.
Step-by-Step Sharpening With a Whetstone or Pull-Through Tool
You can sharpen a dull knife at home using two dependable tools: a flat whetstone or a multi-stage manual pull-through sharpener. Whetstones give you complete control and produce the longest-lasting edges. Pull-through sharpeners are quick and convenient when you want to restore an edge in less than two minutes.
Method 1: Sharpening on a Whetstone
- Prepare your sharpening station: Soak your whetstone in cool water for ten to fifteen minutes if it is a traditional water stone. When air bubbles stop rising from the stone, it is ready. Place the stone on a non-slip rubber base or a damp kitchen towel on a flat, sturdy countertop so it never shifts during use. Keep a small cup of water nearby to keep the surface wet.
- Set your grip and angle: Hold the knife handle firmly in your dominant hand with your index finger resting along the spine for stability. Place the fingertips of your other hand flat against the side of the blade near the cutting edge. Tilt the blade to your target angle, using the two-penny gap height as your guide.
- Sweep across the coarse grit: Grit refers to the roughness rating of the sharpening stone. Start on the coarser side, typically 400 to 1000 grit. Push the blade smoothly forward across the stone in an arc, sweeping from the heel near the handle all the way out to the pointed tip. Apply light to moderate pressure on the forward stroke, like wiping dried batter off a table, and release pressure as you pull back. Repeat this sweep ten to fifteen times.
- Feel for the burr: The burr is a tiny curled ridge of metal that forms on the opposite side of the blade once you grind enough steel away. To check for it safely, wipe the blade dry and slide your thumb gently upward from the cutting edge toward the spine. Never run your finger along the sharp length of the edge. If you feel a rough, catching wire ridge running from heel to tip, you have successfully ground that side.
- Work the opposite side: Flip the knife over and match the same angle and stroke count on the second side until you form a burr in the other direction. Keep your wrist locked so the angle stays consistent on every stroke.
- Polish on the fine stone: Flip your stone over to the fine polishing side, usually 3000 to 8000 grit. Repeat the sweeping motion with very light pressure for five to eight passes per side. This step polishes away the microscopic scratch marks and snaps off the curled burr, leaving behind a clean, razor-sharp edge.
Method 2: Using a Multi-Stage Pull-Through Sharpener
- Secure the sharpener: Set the unit on a clean, dry, flat surface. Grip the handle firmly with your non-dominant hand. Wearing a cut-resistant glove on the holding hand provides great protection while working close to the blade slots.
- Pull through the coarse slot: Insert the heel of your knife straight down into the first stage, which typically uses coarse diamond or tungsten carbide rods. Keeping the blade perfectly upright, pull the knife straight back toward your body with light, smooth pressure. Never saw the blade back and forth, and never push forward. Let the weight of the knife do the work. Repeat this pull three to five times for a dull blade.
- Refine and polish in the ceramic slot: Move the blade to the fine ceramic slot. Pull the knife through smoothly three to four times. The ceramic rods straighten any misaligned metal, hone away remaining rough edges, and smooth out the bevel.
- Clean the blade thoroughly: Wash the knife with warm water and dish soap immediately to remove loose metal filings. Dry the blade with a clean towel before using it to prepare food.
How to Check the Edge and Avoid Common Sharpening Mistakes
Once you finish sharpening, you need to verify that the cutting edge is truly sharp before you put the knife back into daily service. Never run your bare finger pad along the blade edge to check your work. A micro-burr or fresh edge can give you a nasty cut before you even realize you are bleeding. Instead, use everyday kitchen items to confirm your progress safely.
Use this simple checklist to verify your edge:
- The paper slice check: Hold a standard sheet of printer paper loosely by the top corner. Place the heel of the knife against the top edge of the paper and push gently forward and down. A sharp edge slices cleanly through the sheet without catching, tearing, or ripping the paper.
- The ripe tomato check: Rest the blade on top of a soft tomato or bell pepper. Draw the knife backward using only the physical weight of the knife, without pressing down with your wrist. A properly sharpened blade cuts through the slick skin immediately on contact.
- The thumbnail bite check: Rest the cutting edge very gently across your thumbnail at a shallow 45-degree angle without applying pressure. If the blade slides across your nail like an ice skate, it is still dull. If the edge grabs slightly and resists sliding, your bevel is crisp and complete.
If your knife fails these checks, you likely ran into one of three common sharpening mistakes. The most frequent error is changing your wrist angle during the stroke. If your wrist wobbles as you sweep across a whetstone, you end up rocking the knife. That rocking action rounds over the cutting apex instead of keeping it pointed, leaving the blade just as dull as when you started. Focus on locking your wrist and moving from your elbow and shoulder.
Another common mistake is pushing down with too much muscle. Heavy force does not speed up sharpening. Instead, heavy pressure gouges your whetstone, flexes thin steel, and scratches the decorative flat sides of your blade. Use gentle, steady strokes. Let the abrasive grit do the cutting work.
Lastly, people often stop sharpening too early because they forget to verify the burr. If you switch to the fine grit before creating a distinct burr across the entire blade on the coarse stone, you have not actually apexed the edge. The knife may feel slightly better, but it will lose its bite after slicing a single crusty loaf of bread.
What to Look for in Knife Sharpening Gear
Choosing the right sharpening tools depends on how much time you want to spend and the types of knives in your kitchen. If you enjoy the hands-on process and want the cleanest possible edge on Japanese or German cutlery, a double-sided whetstone is the best foundation. Look for a combination water stone that pairs a coarse grit for resetting worn edges with a fine finishing grit for everyday polishing. A solid bamboo holder fitted with a non-slip rubber base is essential to keep the stone stable while you work.
If you prefer speed and simplicity, a manual multi-stage sharpener is a dependable choice. Look for models with preset angled slots lined with diamond abrasives and ceramic polishing wheels. These guides hold the blade at a uniform angle automatically, taking the guesswork out of the process. Handheld sharpeners that include a non-slip counter grip and a cut-resistant glove make kitchen maintenance fast and safe for any home cook.
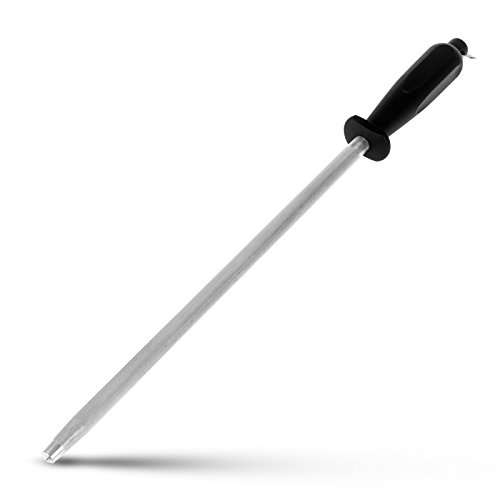
For daily care between sharpening sessions, keep a magnetized carbon steel honing rod in your knife block. A 12-inch or 13-inch rod plated with nickel-chrome provides plenty of runway to straighten chef knives of any length. Magnetized steel also pulls away loose metal dust as you swipe, keeping your kitchen prep area clean.

- TAR Score9.2
TAR Score is a ranking system developed by TopAppliancesReviews.com. TAR score has no relationship or impact from any manufacturers or sales agent websites. Learn more
- BrandN/A

- TAR Score9.2
TAR Score is a ranking system developed by TopAppliancesReviews.com. TAR score has no relationship or impact from any manufacturers or sales agent websites. Learn more
- BrandIntelitopia
- TAR Score9.2
TAR Score is a ranking system developed by TopAppliancesReviews.com. TAR score has no relationship or impact from any manufacturers or sales agent websites. Learn more
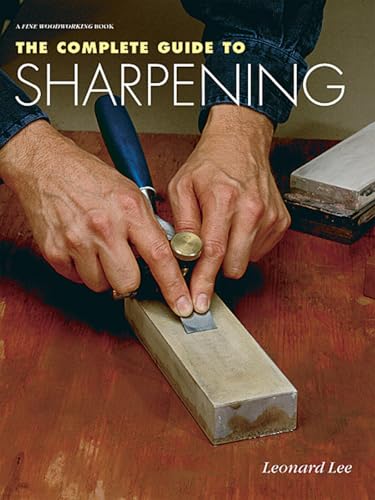
- BrandTaunton Press

- TAR Score9.0
TAR Score is a ranking system developed by TopAppliancesReviews.com. TAR score has no relationship or impact from any manufacturers or sales agent websites. Learn more
- BrandKITCHELLENCE

- TAR Score9.0
TAR Score is a ranking system developed by TopAppliancesReviews.com. TAR score has no relationship or impact from any manufacturers or sales agent websites. Learn more
- BrandN/A

- TAR Score9.0
TAR Score is a ranking system developed by TopAppliancesReviews.com. TAR score has no relationship or impact from any manufacturers or sales agent websites. Learn more
- Brandryerum

- TAR Score9.0
TAR Score is a ranking system developed by TopAppliancesReviews.com. TAR score has no relationship or impact from any manufacturers or sales agent websites. Learn more
- BrandFANERFUN
- TAR Score9.0
TAR Score is a ranking system developed by TopAppliancesReviews.com. TAR score has no relationship or impact from any manufacturers or sales agent websites. Learn more
- BrandALLWIN-HOUSEWARE W

- TAR Score8.8
TAR Score is a ranking system developed by TopAppliancesReviews.com. TAR score has no relationship or impact from any manufacturers or sales agent websites. Learn more
- BrandAIERLIAN

- TAR Score8.8
TAR Score is a ranking system developed by TopAppliancesReviews.com. TAR score has no relationship or impact from any manufacturers or sales agent websites. Learn more
- Brandlongzon
Last update on 2026-09-29 / Affiliate links / Images, Product Titles, and Product Highlights from Amazon Product Advertising API
FAQs
How often should I sharpen my kitchen knives?
Most home cooks only need to sharpen their knives on a stone or pull-through sharpener every three to six months. If you prepare meals daily on hard wooden or plastic cutting boards, you might refresh the edge every two to three months. In between those sharpening sessions, run your blade along a honing rod once a week to keep the edge straight without grinding away steel.
Can you ruin a knife by sharpening it at home?
You can scratch the sides of the blade or temporarily round over the cutting edge if you use inconsistent angles or excessive pressure. However, these cosmetic scratches and rounded edges can almost always be corrected by re-establishing the proper bevel on a medium-grit stone. The only true permanent damage comes from using high-speed motorized grinders that overheat the steel and destroy its temper, which does not happen with manual whetstones or slot sharpeners.
Do serrated bread knives require a different sharpening method?
Yes, standard whetstones and slot sharpeners will grind down the pointed teeth of a serrated knife and ruin the blade profile. Serrated knives have individual curved gullets between each tooth that must be sharpened one by one. You need a narrow, tapered ceramic or diamond sharpening rod, matching the rod diameter to each individual scallop and sweeping away from the edge.


Top Rated Best Quality Range Hoods: 2026 Expert Picks

The 12 Best Small Solar Generators 2026

10 Best Quality Semi Automatic Washing Machine of 2026 For Leak-Free Laundry

11 Best Small Washer Machine of 2026 For Everyday Laundry

12 Best Vibration Pads For Washing Machine of 2026 To Stop Walking and Shaking

11 Best Selling Front Load Washing Machine of 2026 For Quiet Odor-Free Laundry

11 Best Washing Machine For King Size Bedding of 2026 To Prevent Cycle Errors

10 Best Small Front Loader Washing Machine of 2026 For Tight Closets






