
How to Sharpen a Knife With a Wet Stone at Home

Glide the blade at one steady angle. Soak the stone in water, set it on a damp towel so it cannot slide, and sweep the blade across the rough grit. Once a rough wire lip forms along the opposite side, flip the knife over and repeat the motion before finishing on the smooth side. Locking your wrist prevents wobbling, which protects the steel from scratches and creates a crisp cutting edge.
A few details shape the exact routine. Thinner Japanese knives need a shallow fifteen-degree tilt, while sturdy Western blades sit better at twenty degrees. Chipped edges require a coarse surface to grind away damage, while slightly dull knives only need medium grit followed by a fine polish. Some water stones need twenty minutes of soaking, while splash stones work right away with surface moisture. Here is how to set up your station and guide every pass with control.
Prepping Your Stone and Workstation Before You Begin
A whetstone (a sharpening water stone) needs water to wash away metal filings and prevent the blade from overheating. Dry steel against dry stone creates friction heat and clogs the stone pores with metal dust. Setting up a stable station takes only a couple of minutes and keeps the stone from sliding while you work.
Use this quick setup checklist before your knife touches the abrasive surface:
- Submerge the stone in cool water: Soak the block for 10 to 15 minutes. When air bubbles stop rising, the stone is fully saturated. Splash-and-go stones only need surface moisture, but regular water stones dry out mid-stroke if not soaked first.
- Anchor a non-slip base: Place a damp kitchen towel or a fitted rubber base on a flat counter. Put the stone on top and push it firmly with your palm to verify it does not slide.
- Position the stone: Point the stone straight away from your body, or tilt it slightly if that keeps your wrist straight and relaxed.
- Keep water nearby: Set a small bowl of clean water next to your board to sprinkle on the stone when it looks dry.
- Keep a dry towel handy: Wipe your hands and the knife handle so slick fingers never slip toward the sharp edge.
Finding and Holding the Right Sharpening Angle
Sharpness comes down to keeping your angle steady from the first pass to the last. Dull knives happen when the bevel (the sloped cutting edge that tapers down to the sharp point) wears flat or rolls over. If your wrist wobbles during a pass, you round the edge over instead of sharpening it.
Different blades require different sharpening angles:
- Delicate Japanese kitchen knives: These thin blades take a steep 15-degree slicing edge per side. If you use delicate Japanese kitchen knives, this narrow angle glides effortlessly through raw fish and vegetables.
- Sturdy Western kitchen knives: Heavier blades and sturdy Western kitchen knives use a 20-degree utility edge per side. This broader slope handles dense root vegetables and cuts near bone without chipping.
To find this angle, lay the blade flat on the stone with the sharp edge facing away from you. Tilt the spine upward while resting the edge on the grit (the stone roughness rating). When you can just fit your thumb pad between the knife spine and the stone, you are at roughly 15 to 20 degrees. Lock your wrists firm and move your arms from the shoulders so this gap stays identical on every stroke.
How to Make the Sharpening Pass Step by Step
Follow these steps to reshape your cutting bevel cleanly without scratching the blade faces.
- Place the coarse grit side facing up. Reason: A lower grit number, like 400 or 1000, removes dull metal quickly to set a fresh bevel without endless rubbing.
- Rest the heel across the stone at your target angle. Reason: Starting at the heel ensures you sharpen the full edge evenly without missing the rear corner.
- Place two fingertips of your free hand flat on the blade face. Reason: Finger pressure near the edge keeps the bevel flat on the stone so your angle does not wobble.
- Glide the blade across the stone from heel to tip in a smooth sweeping arc. Reason: Sweeping the curve across the stone sharpens the straight section and the rounded belly evenly.
- Press down with moderate pressure as you pull, then release on the push back. Reason: Cutting into the stone removes steel cleanly, while pressing on the return push can gouge the stone surface.
- Splash a few drops of water whenever the stone surface looks dry. Reason: Moisture carries away ground steel and keeps stone pores open so the abrasive grains keep cutting.
- Repeat this smooth gliding stroke ten to fifteen times on side one. Reason: A steady stroke count grinds an even amount of steel along the entire edge.
Checking for the Burr to Know When to Flip
Never flip the blade based on time or guess work. Flip only after raising a burr (the microscopic wire edge or curved sliver of metal that forms on the opposite side during sharpening). When the stone removes enough metal on side one, the edge folds over away from the stone, signaling that you reached the true edge apex.
To check for this wire edge safely, pause your strokes and wipe the blade clean. Rest your thumb flat on the unsharpened side of the blade. Slide your thumb pad upward from the thick spine toward the cutting edge. Never slide your finger along the blade lengthwise, which can cut you.
If the edge feels slick, you need more passes on side one. If the edge catches your thumb pad like a tiny wire lip or rough sandpaper, your burr is formed. Once you feel this rough lip from heel to tip, flip the blade and sharpen side two with the exact same angle and stroke count.
Refining the Edge on Fine Grit and Cleaning Up
After forming a burr on both sides, turn your stone over to the fine grit side (usually 3000 to 8000 grit). This side smooths out coarse grind scratches and removes the fragile wire edge.
As you work, a dark, muddy paste forms on the stone. This is slurry (the muddy water paste that builds up on the stone from water and loose abrasive particles). Do not wash this slurry off. The fine particles suspended in the paste act like a liquid polishing compound that buffs your cutting bevel to a mirror finish.
Use light pressure on the fine stone. Make five passes on each side, then switch to single alternating strokes. Alternating single passes flexes the tiny wire edge back and forth until it breaks off cleanly, leaving a crisp edge.
Clean and store your gear properly after sharpening:
- Wash and dry the knife right away: Rinse the blade under warm tap water and dry it immediately with a towel. Rust-resistant stainless steel forgives minor dampness, but high-carbon or tool steel will develop rust spots within minutes if left wet. Never clean fine kitchen knives in a dishwasher.
- Rinse and air-dry the stone: Flush the stone with clean tap water to remove steel shavings. Never use dish soap, which clogs stone pores. Stand the stone on edge on a drying rack for 24 hours before boxing it up. Storing a damp water stone in an enclosed drawer breeds mold and can crack the block.
What to Look for in a Beginner Sharpening Stone
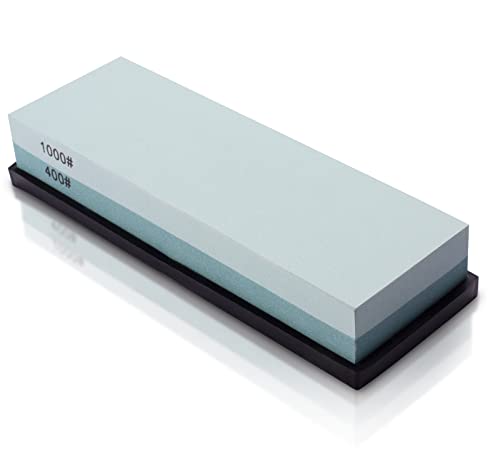
Getting clean results is much simpler when you have the right basic stone kit. A dual-grit water stone (a two-sided sharpening block combining two roughness levels) provides everything you need to sharpen and polish without cluttering your workspace.
Look for a combination block with medium grit around 1000 on one side for general sharpening, paired with a fine 3000 to 6000 grit on the reverse side for polishing. If you have neglected knives with noticeable edge chips, pick a kit that also includes a coarse 400 grit block to reshape the steel first.
Base stability keeps you safe and helps maintain a fixed angle. Make sure the stone includes a snug silicone rubber base to hold it steady. Kits that seat this rubber boot inside a solid wood or bamboo stand with non-slip rubber feet give you the best stability on wet countertops. If keeping your wrists stiff feels awkward at first, look for a set that includes a clip-on plastic angle guide. Snapping this small guide over the blade spine holds your knife at a consistent height while you build muscle memory.

- TAR Score9.2
TAR Score is a ranking system developed by TopAppliancesReviews.com. TAR score has no relationship or impact from any manufacturers or sales agent websites. Learn more
- BrandIntelitopia

- TAR Score9.2
TAR Score is a ranking system developed by TopAppliancesReviews.com. TAR score has no relationship or impact from any manufacturers or sales agent websites. Learn more
- BrandKEENBEST

- TAR Score9.2
TAR Score is a ranking system developed by TopAppliancesReviews.com. TAR score has no relationship or impact from any manufacturers or sales agent websites. Learn more
- BrandSharp Pebble

- TAR Score9.2
TAR Score is a ranking system developed by TopAppliancesReviews.com. TAR score has no relationship or impact from any manufacturers or sales agent websites. Learn more
- BrandKEENBEST

- TAR Score9.2
TAR Score is a ranking system developed by TopAppliancesReviews.com. TAR score has no relationship or impact from any manufacturers or sales agent websites. Learn more
- BrandSD.TIANPENG

- TAR Score9.2
TAR Score is a ranking system developed by TopAppliancesReviews.com. TAR score has no relationship or impact from any manufacturers or sales agent websites. Learn more
- BrandHiramWare

- TAR Score9.2
TAR Score is a ranking system developed by TopAppliancesReviews.com. TAR score has no relationship or impact from any manufacturers or sales agent websites. Learn more
- Brandryerum

- TAR Score9.0
TAR Score is a ranking system developed by TopAppliancesReviews.com. TAR score has no relationship or impact from any manufacturers or sales agent websites. Learn more
- BrandHMPLL
- TAR Score9.0
TAR Score is a ranking system developed by TopAppliancesReviews.com. TAR score has no relationship or impact from any manufacturers or sales agent websites. Learn more
- BrandMIDO Professional Abrasive

- TAR Score9.0
TAR Score is a ranking system developed by TopAppliancesReviews.com. TAR score has no relationship or impact from any manufacturers or sales agent websites. Learn more
- BrandWhetstone Cutlery
Last update on 2026-10-02 / Affiliate links / Images, Product Titles, and Product Highlights from Amazon Product Advertising API
FAQs
How long do I need to soak a wet stone before sharpening?
Standard water stones need to soak in a pan of water for 10 to 15 minutes. When bubbles stop rising to the surface, the stone is fully saturated and ready to use. Splash-and-go stones do not need soaking, requiring only a sprinkle of water on top right before you begin.
Should I wipe away the muddy water that forms on top of the stone?
Leave the muddy water paste on the stone while sharpening. That paste is a mix of water and abrasive stone grit that actually polishes the cutting bevel and refines the edge. If the stone feels dry or sticky, simply splash a few drops of water over the paste.
How do I test if my knife is sharp without risking a cut?
Hold a loose sheet of printer paper vertically by one corner and draw the blade downward through the top edge. A truly sharp knife glides cleanly through the paper with light pressure and no tearing. You can also place the blade against a ripe tomato skin; it should slice through immediately without squishing the fruit.
How often should kitchen knives be sharpened on a wet stone?
Most home cooks only need to sharpen everyday kitchen knives on a wet stone every three to six months. In between sharpening sessions, realign the edge using a smooth honing steel once a week. When the knife starts sliding off smooth onion skins or tearing fresh herbs, it is time for the stone again.


Top Rated Best Quality Range Hoods: 2026 Expert Picks

The 12 Best Small Solar Generators 2026

10 Best Quality Semi Automatic Washing Machine of 2026 For Leak-Free Laundry

11 Best Small Washer Machine of 2026 For Everyday Laundry

12 Best Vibration Pads For Washing Machine of 2026 To Stop Walking and Shaking

11 Best Selling Front Load Washing Machine of 2026 For Quiet Odor-Free Laundry

11 Best Washing Machine For King Size Bedding of 2026 To Prevent Cycle Errors

10 Best Small Front Loader Washing Machine of 2026 For Tight Closets






