
How to Sharpen a Knife With a Sharpening Stone

A dull kitchen knife slides right off the slick skin of a ripe tomato instead of slicing cleanly through. Restoring that edge means you must hold a steady angle against the stone and sweep the steel until a fine wire burr forms along the opposite side. Once you feel that tiny ridge of raised metal, you repeat the stroke on the other side and polish it smooth.
A few details shift based on the gear on the counter. Traditional water stones need a quick soak in water before use, while diamond plates work with just a splash. Thin kitchen blades sit at a narrow fifteen-degree tilt, but thicker pocket knives need a wider stance. Deeply nicked edges also call for a coarse grit first, whereas routine touch-ups start on fine grit. Getting your hands comfortable with these basic motions makes the whole process simple and safe.
Soak Your Water Stone And Lock Down Your Work Surface
Before your blade ever touches abrasive grit (the stone roughness rating where a lower number means coarser and scratchier), you must prepare your stone and your work area. Sharpening requires steady, controlled hand motions. If your stone slides around on the countertop while you work, you will lose your cutting angle and risk slicing into your fingers.
Start by identifying what kind of stone you have. Traditional water stones, also called whetstones (stones lubricated with water rather than petroleum oil), need to absorb liquid before use. Submerge your water stone in a bowl or baking dish filled with clean room-temperature tap water. Watch the surface closely. Tiny air bubbles will immediately start rising to the top. Leave the stone underwater for ten to fifteen minutes until the stream of bubbles stops completely. If you use a diamond plate or an oil-based Arkansas stone instead, do not soak it. Diamond plates only need a light mist of water or window cleaner to float away metal filings, while oil stones require a few drops of mineral honing oil.
Once your stone is ready, build a slip-free work station on a flat, waist-height kitchen counter or sturdy table. Follow this quick setup checklist to keep everything safe and steady:
- Place a damp towel underneath: Fold a clean kitchen dishcloth or paper towel flat beneath your stone holder to absorb vibration and stop skidding.
- Seat the stone in its holder: Fit the stone firmly into its silicone sleeve, rubber foot, or wooden cradle so it cannot wiggle from side to side.
- Orient the stone lengthwise: Point the narrow ends of the stone toward you and away from you, which gives you a long runway for each sweeping stroke.
- Keep water within reach: Set a small bowl of clean water or a spray bottle right beside your station so you can splash the stone as it dries.
- Wear comfortable, stable shoes: Stand with your feet shoulder-width apart so your core stays planted and your arms can move smoothly.
Never skip the water or oil lubricant. Sharpening steel against a bone-dry stone produces heat that can ruin the heat treatment of delicate blades. The water also floats away spent abrasive grit and microscopic metal swarf (the fine black metal paste that rubs off the blade during sharpening), keeping the pores of the stone open and cutting freely.
Match Your Blade Bevel To A Steady Matchbook Angle
Holding a consistent tilt is the single hardest part of stone sharpening for beginners. When you look closely at the cutting edge of any kitchen or pocket knife, you will see the bevel (the narrow, slanted cutting slope of the blade that tapers down to the sharp apex). Your goal is to lay that existing bevel flat against the surface of the stone and maintain that exact slope on every single stroke.
Different knives require different sharpening angles depending on how they were built. Delicate Japanese kitchen knives, such as those found in high-carbon Japanese chef knife sets, typically use a steep 15-degree slicing edge per side. That thin angle slips through raw fish and crisp vegetables with almost zero resistance, but it is fragile. Heavier Western kitchen knives, including durable German high-carbon steel premium knife block sets, use a wider 20-degree utility angle per side. Everyday carry pocket knives and outdoor hunting tools also use a 20-degree or 22-degree angle because that thicker wedge resists chipping when cutting cardboard, rope, or small branches.
To find 20 degrees without a plastic protractor, visualize a common matchbook. Rest the spine (the thick top back edge of the blade) on the stone, then lift the spine just high enough to slip a standard paper matchbook or two stacked quarters underneath. That gap creates roughly a 20-degree tilt. For a 15-degree Japanese angle, reduce that gap so only a single quarter fits beneath the blade spine.
If you feel unsure whether you are hitting the factory bevel correctly, use the black marker trick:
- Take a standard permanent black marker and color along the entire cutting edge on both sides of the knife.
- Place the knife on your stone at your estimated angle and take two light strokes across the grit.
- Turn the blade over and inspect where the black ink rubbed away.
- If the ink rubbed off only at the very tippy-edge of the apex, your angle is too high and steep. Lower the spine slightly.
- If the ink rubbed off only near the top of the bevel shoulder, your angle is too low and flat. Raise the spine a fraction of an inch.
- When the stone removes the black ink cleanly across the entire width of the bevel, your angle matches the factory edge perfectly.
Once you locate that sweet spot, lock your wrist muscles. Do not flick your wrists back and forth as you sharpen. Your elbows and shoulders should provide the smooth pushing and pulling power, while your wrists stay as rigid as a solid clamp.
Sweep The Edge Across The Stone With Even Finger Pressure
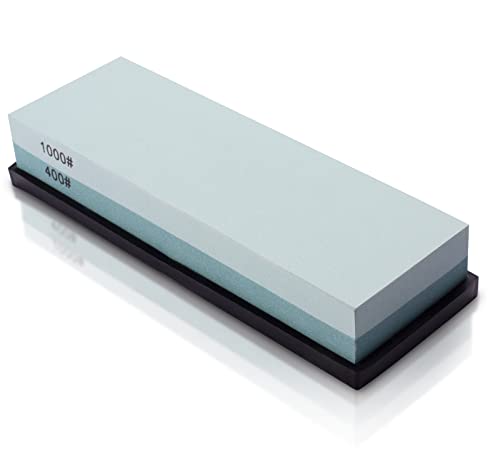
Now that your stone is soaked and your angle is set, you can begin removing metal. Always start on the coarse grit side of your stone. If you are using a dual-grit block, this is the side labeled with the smaller number, such as 400 or 1000 grit. The coarse side removes dull metal quickly to shape a fresh, straight edge.
Hold the knife handle securely in your dominant hand, wrapping your fingers firmly around the grip with your thumb resting against the flat face of the blade for extra stability. Place the blade across the far end of the stone at your chosen 15 or 20-degree angle, pointing the sharp edge away from you. Place two or three fingertips from your non-dominant hand flat on the side of the blade, resting just above the cutting bevel to guide contact.
Follow these steps to complete a clean sharpening pass:
- Start at the blade heel: Place the heel (the wide end of the cutting edge closest to the handle) near the top corner of the stone at your locked angle.
- Sweep diagonally toward yourself: Pull the blade smoothly across the stone in a diagonal, sweeping motion toward your body. Maintain steady downward contact, using roughly four to five pounds of finger pressure, which feels like pressing down firmly on a bathroom scale.
- Lift your elbow slightly near the tip: As the sweep reaches the curved belly and tip of the knife, raise your elbow slightly. Lifting your elbow keeps the curving sweep of the blade flat against the stone so the tip gets sharpened rather than skipped.
- Finish the stroke at the stone edge: End the sweep with the tip resting near the bottom corner of the stone. Lift the blade clean off the surface, reset your hands at the top of the stone, and repeat.
- Work in small sections for longer blades: If you are sharpening an eight-inch or ten-inch chef knife, sweep in overlapping sections. Work the heel section for five to eight strokes, shift your fingertips to the middle belly for five to eight strokes, then finish with five to eight strokes on the curved tip.
Listen to the sound the steel makes against the wet stone. A steady, scratchy hissing noise means you are maintaining contact along the bevel. If the sound suddenly shifts to a sharp clattering or hollow scraping noise, your blade is rocking off its angle. Stop, check your marker line, lock your wrists again, and resume with slow, deliberate strokes.
Feel For The Burr Along The Opposite Side Before You Flip
The single biggest mistake beginners make is counting twenty strokes on side A, flipping the knife over, counting twenty strokes on side B, and assuming the knife is sharp. Stroke counts do not sharpen knives; apexing the steel sharpens knives. You must never flip the blade over until you feel a distinct burr (the thin wire ridge of metal or curved microscopic sliver that forms along the edge).
As the abrasive stone grinds away steel along the bottom bevel, the thin cutting edge eventually folds over away from the stone. That rolled over metal lip is your burr. It is proof that you have ground away all the old, dull, rounded steel and formed a crisp new apex. If you stop grinding before that burr forms, the blade apex remains rounded and blunt in the middle, and your knife will struggle to cut warm butter.
To safely check for a burr, follow this method:
- Wipe the wet slurry off the blade with a clean kitchen rag so you can inspect the bare metal.
- Place the pad of your thumb flat against the side of the blade that was facing away from the stone.
- Gently slide your thumb pad from the spine downward, moving off the edge into empty air. Never slide your thumb lengthwise along the sharp edge, which will cut your skin.
- Feel for a rough, snagging metal catch. A burr feels like a tiny wire lip, sandpaper grit, or a raised hangnail running along the steel.
- Check the full length of the knife, from the heel, across the belly, out to the very tip.
If you feel a distinct wire ridge catching your skin all the way from heel to tip, you have successfully ground the first side. If you feel the burr near the heel but the tip still feels perfectly smooth, do not flip the knife yet. Apply a few more careful passes focused directly on the tip section until the wire ridge extends from end to end. Once the burr is continuous, turn the knife over and repeat the entire sharpening sequence on the opposite side until the burr flips over in the opposite direction.
Switch To Your Fine Grit And Strop Away Loose Steel
Once you have raised a burr on both sides using your coarse grit, your knife is technically sharp, but the cutting edge is still rough and jagged. If you look at it under a microscope, a coarse stone leaves deep saw-tooth scratches. To turn that raw edge into a razor-sharp slicing tool, you need to refine the scratch pattern and remove the fragile wire burr.
Flip your stone over to the fine polishing grit side, which is typically 1000 to 6000 grit. Rinse off your knife and splash fresh water across the fine surface. Because the coarse stone already established the correct bevel, the fine stone does not need to grind away massive amounts of metal. Its job is simply to smooth the scratch marks and coax the thin burr off the edge.
Follow these numbered finishing steps to polish the steel clean:
- Lighten your finger pressure: Place the knife back on the fine stone at the exact same angle you used before, but cut your downward hand pressure in half. Heavy pressure on fine grit will gouge the stone and warp the microscopic apex.
- Make alternating light strokes: Instead of doing long sets on one side, make alternating passes. Do one smooth heel-to-tip stroke on the left side, flip the knife, and do one smooth stroke on the right side. Perform about ten to fifteen light pairs of strokes.
- Clean away microscopic metal fuzz: Wipe the blade thoroughly dry with a cloth. If you own a leather strop (a flat piece of leather mounted on wood used to wipe away leftover metal fuzz), finish the blade there. Lay the bevel on the leather and pull the blade backward, trailing the spine away from the edge with very light pressure for ten passes per side. A piece of clean corrugated cardboard works well if you do not own leather.
- Verify the finished edge: Hold a loose sheet of standard printer paper by its top corner. Place the heel of your knife against the top edge of the paper and push gently downward without sawing back and forth. A sharp knife will glide straight through the paper silently without catching or tearing. You can also test it on a ripe tomato; the blade should part the smooth skin under its own weight without squishing the flesh.
When you finish, store your knives safely in a wooden sheath, edge guard, or magnetic rack like those found in magnetic knife block sets to protect the polished apex from banging against drawer silverware.
Avoid These Common Mistakes That Scratch Steel And Dull Edges
Sharpening by hand is a physical skill that improves with practice, but small careless habits can easily ruin your blade finish or dull your edge. Keep this checklist of common beginner mistakes in mind every time you stand at your stone:
- Wobbling your wrist mid-stroke: Raising your hand up and down like a see-saw rounds off the cutting edge. A rounded apex cannot bite into food. Keep your wrist locked stiff and let your shoulder guide the movement.
- Pushing down with crushing force: Grinding too hard does not sharpen faster. It flexes the thin metal edge, scratches the polished face of the blade, and hollows out the middle of your stone. Let the stone grit do the slicing work.
- Allowing the stone to dry out: As water evaporates, black metal slurry thickens into dry paste. This clogged paste scratches the sides of your knife and slows down steel removal. Add a quick splash of water whenever the stone looks dull or tacky.
- Neglecting to flatten the stone: Over months of use, stones wear down faster in the center than at the ends, forming an uneven dip known as dishing. Sharpening on a dished stone makes holding an accurate angle impossible. Rub your stone against a dedicated diamond flattening plate or coarse wet-dry sandpaper laid over flat glass once every few sharpening sessions to keep the stone level.
- Tossing sharp blades in the dishwasher: Extreme wash cycle heat, harsh detergent salts, and vibrating metal racks will chip a hand-sharpened edge instantly. Always hand-wash and dry your knives with a cotton towel the moment you finish using them.
Choose A Stable Dual-Grit Setup That Keeps Your Hands Steady
If you are gathering tools to start sharpening at home, choosing the right basic gear eliminates most beginner frustration. You do not need an entire shelf of expensive single-grit stones to get hair-shaving results. A well-designed combination stone setup solves the two biggest hurdles new sharpeners face: slipping surfaces and inconsistent angles.
Look for a dual-grit block that pairs a medium-coarse shaping side with a fine finishing side. A combination featuring roughly 400 to 1000 grit on one face and 3000 to 6000 grit on the reverse gives you everything needed to repair minor chips, set a new bevel, and polish the edge to a mirror shine. Silicon carbide and aluminum oxide water stones provide great feedback under your fingers, while diamond plates offer extreme longevity and stay permanently flat without needing water baths.
Pay close attention to the base included with the kit. Stones that sit loose on a table invite slips and cuts. Look for sets that include a snug-fitting silicone stone jacket seated inside a solid bamboo, acacia, or rubberized workstation. Sturdy rubber feet grip damp granite or laminate counters tightly. If you feel nervous about keeping your hands at 15 or 20 degrees, pick up a kit that includes a small clip-on plastic angle guide. Snapping the guide onto the spine of your knife gives you a built-in training wheel that rests against the stone, teaching your hands muscle memory until you feel ready to sharpen freehand.

- TAR Score9.4
TAR Score is a ranking system developed by TopAppliancesReviews.com. TAR score has no relationship or impact from any manufacturers or sales agent websites. Learn more
- BrandSHARPAL

- TAR Score9.2
TAR Score is a ranking system developed by TopAppliancesReviews.com. TAR score has no relationship or impact from any manufacturers or sales agent websites. Learn more
- BrandIntelitopia

- TAR Score9.2
TAR Score is a ranking system developed by TopAppliancesReviews.com. TAR score has no relationship or impact from any manufacturers or sales agent websites. Learn more
- BrandKEENBEST

- TAR Score9.2
TAR Score is a ranking system developed by TopAppliancesReviews.com. TAR score has no relationship or impact from any manufacturers or sales agent websites. Learn more
- BrandSharp Pebble

- TAR Score9.0
TAR Score is a ranking system developed by TopAppliancesReviews.com. TAR score has no relationship or impact from any manufacturers or sales agent websites. Learn more
- BrandHMPLL
- TAR Score9.0
TAR Score is a ranking system developed by TopAppliancesReviews.com. TAR score has no relationship or impact from any manufacturers or sales agent websites. Learn more
- BrandMIDO Professional Abrasive

- TAR Score9.0
TAR Score is a ranking system developed by TopAppliancesReviews.com. TAR score has no relationship or impact from any manufacturers or sales agent websites. Learn more
- BrandBABOSTOW

- TAR Score9.0
TAR Score is a ranking system developed by TopAppliancesReviews.com. TAR score has no relationship or impact from any manufacturers or sales agent websites. Learn more
- BrandYeopAsda
Last update on 2026-10-01 / Affiliate links / Images, Product Titles, and Product Highlights from Amazon Product Advertising API
FAQs
Do I need to soak my sharpening stone in water or oil?
It depends entirely on the material your stone is made from. Traditional synthetic and natural whetstones made from aluminum oxide or silicon carbide require soaking in clean water for ten to fifteen minutes until bubbles stop rising. Oil stones, such as natural Arkansas stones, should only be lubricated with mineral honing oil. Diamond sharpening plates should never be soaked; they work best dry or with a light mist of water to wash away metal dust.
How do I know which side of the stone to use first?
Always start on the coarse grit side, which is the face with the lower grit number like 325, 400, or 1000. This coarse side grinds away blunt steel quickly to establish a clean, flat bevel and raise a metal burr. You only switch to the fine grit side (3000 to 8000 grit) after both sides of the blade have formed a full burr and require polishing.
Why is my knife still dull after working on the stone?
The most common reason is failing to raise a burr on the coarse stone before flipping the knife over or moving to the fine grit. If you do not grind all the way down to the very apex of the edge, the blade remains round and dull in the center. Another frequent cause is wobbling your wrist during strokes, which rounds the bevel shoulder rather than sharpening the cutting tip.
Should I wipe away the gray mud that forms on top of the whetstone?
No, leave that gray mud on the stone while you work. That liquid mixture is called slurry, and it consists of water mixed with loosened abrasive particles and tiny metal bits. The slurry helps polish the bevel and cushions the blade as you draw it across the grit. Only rinse the stone completely clean when you finish your sharpening session.
Can I sharpen a pocket knife and a kitchen knife on the same stone?
Yes, any standard flat sharpening stone can sharpen kitchen knives, hunting knives, and everyday carry pocket blades equally well. The only difference is the angle you hold with your hands. Kitchen knives are typically ground at a steep 15 to 20-degree angle for delicate slicing, while pocket knives work best at a thicker 20 to 22-degree angle to handle tough utility tasks without chipping.


Top Rated Best Quality Range Hoods: 2026 Expert Picks

The 12 Best Small Solar Generators 2026

10 Best Quality Semi Automatic Washing Machine of 2026 For Leak-Free Laundry

11 Best Small Washer Machine of 2026 For Everyday Laundry

12 Best Vibration Pads For Washing Machine of 2026 To Stop Walking and Shaking

11 Best Selling Front Load Washing Machine of 2026 For Quiet Odor-Free Laundry

11 Best Washing Machine For King Size Bedding of 2026 To Prevent Cycle Errors

10 Best Small Front Loader Washing Machine of 2026 For Tight Closets






