
How to Sharpen a Knife With Sandpaper

Ordinary workshop sandpaper can restore a dull blade to a razor-sharp edge just as cleanly as expensive sharpening stones. Success comes down to pulling the blade backward with light pressure, which keeps the steel from slicing straight into the paper sheet.
Your results rely on the surface underneath and the roughness ratings you select. Taping the paper onto a completely flat base like float glass or a smooth ceramic tile keeps the bevel (the slanted cutting edge) straight rather than rounded. Stepping progressively from a coarse grit to an ultra-fine polishing sheet removes scratches and finishes the metal. Here is how to set up your surface and work through each stage safely.
A Hard Flat Base And Wet Sandpaper Work Best
You do not need an expensive workshop setup to turn a dull blade into a razor-sharp tool. Everyday sandpaper can grind hard blade steel just like a stone, as long as you choose the right abrasive sheets and back them with a firm foundation. The secret lies in selecting automotive sheets rather than regular carpentry paper.
Standard brown sandpaper made for woodworking uses soft paper backing and loose aluminum oxide grains that crumble when rubbed against hard cutlery steel. Instead, look for black wet-or-dry sandpaper made with silicon carbide. Silicon carbide is an extremely hard synthetic mineral that fractures into sharp cutting edges as you work. The waterproof backing also holds together when wet, which keeps the sheet from tearing apart mid-stroke.
Grit refers to the roughness number of the sandpaper. Lower numbers indicate coarse, rough grains that cut away damaged metal quickly, while higher numbers indicate microscopic grains that polish the edge smooth. To take a knife from blunt to razor-sharp, gather three or four progressive grit sheets:
- Coarse grit (320 or 400): Reshapes a dull edge, fixes tiny nicks, and establishes the initial cutting bevel.
- Medium grit (800 to 1000): Removes coarse scratch marks and refines the blade apex into a crisp cutting line.
- Fine grit (1500 to 2000): Polishes the edge to a mirror shine and removes microscopic metal burrs for effortless push-cutting.
Along with your sandpaper sheets, gather a few basic household supplies before you begin sharpening:
- A thick piece of float glass, a polished granite offcut, or a smooth ceramic floor tile to serve as your hard base.
- Blue painter's tape or a small spray bottle of tap water to hold the sheets down.
- A damp dish towel or a rubber shelf liner to keep your base from sliding across the counter.
- A black permanent marker to color the blade edge so you can track where metal is being removed.
- A soft cotton cloth or paper towel to wipe metal dust from the blade between grits.
A Solid Base Keeps Your Blade Bevel Straight
The surface underneath your sandpaper directly controls the final shape of your cutting edge. The bevel is the slanted flat surface that forms the cutting edge on either side of the blade. If your backing surface dips or flexes, your bevel will change shape while you sharpen.
A hard, rigid backing such as a pane of float glass, a polished marble pastry board, or a glazed ceramic tile keeps the bevel flat and crisp. This flat V-bevel is the factory shape found on almost all kitchen knives and pocket knives. When the steel glides over a hard surface, the abrasive cuts evenly along the entire flat plane of the bevel, creating a keen apex that slices smoothly through food and cardboard.
Using a soft backing like a foam mousepad, cardboard, or soft rubber creates a convex edge. As you press the knife down, the soft foam compresses, wrapping the sandpaper slightly up around the edge apex. While a rounded convex edge provides extra durability for heavy outdoor chopping blades and axes, it creates wedging resistance when slicing through dense vegetables or meat. For general kitchen slicing and utility carry, stick to hard glass or smooth tile.
Once you choose your flat base, you must secure the sandpaper so it cannot bunch up, slide, or wrinkle. Lay your glass or tile on top of a damp hand towel or rubber drawer liner so the base stays planted on your work table. Next, secure the sandpaper sheet using one of two simple methods:
- The tape method: Place the dry sandpaper sheet on the tile, pull it drum-tight, and secure the top and bottom borders with strips of blue painter's tape.
- The water-tension method: Mist a few droplets of water directly onto clean glass, lay the wet-or-dry sheet on top, and squeegee out air bubbles with your thumb. Surface tension will hold the sheet flat against the glass without any tape.
Pulling The Blade Edge Backward Protects The Paper
The single most important rule of sandpaper sharpening is using edge-trailing strokes. An edge-trailing stroke means pulling the knife backward with the sharp side facing away from the direction of travel. The spine of the knife moves first, and the sharp edge follows behind it.
When sharpening on a traditional whetstone, you can push the blade forward into the stone as if shaving a thin slice off the top. If you try that forward motion on sandpaper, the sharp edge will dig straight into the paper sheet, slicing it to ribbons and blunting the blade apex instantly. Pulling the blade backward eliminates gouging and keeps your paper intact through hundreds of strokes.
- Color the bevel: Run a black permanent marker along the cutting bevel on both sides of the knife. This ink provides an instant visual guide. If your sandpaper scrubs away ink only at the shoulder, your angle is too low. If it scrubs away ink only at the very tip of the edge, your angle is too high.
- Set your blade angle: Rest the blade flat on the sandpaper, then raise the spine until the bevel rests flush against the grit. Kitchen cutlery typically uses a steep 15-degree slicing edge per side, which is common on delicate Japanese knives. Pocket knives, hunting blades, and thick German blades use a sturdier 20-degree utility edge per side. Sturdy blades from German high-carbon steel knife sets perform best when sharpened at this 20-degree angle. A simple visual trick is matching the thickness of two stacked pennies under the blade spine.
- Position the blade: Place the heel of the knife near the far end of the sandpaper sheet, keeping your wrist locked at your chosen angle.
- Pull the blade backward: Draw the knife toward you in a smooth, steady stroke. As you pull the blade backward, sweep the knife sideways so the abrasive contacts the entire cutting edge from the heel all the way out to the pointed tip.
- Maintain light, even pressure: Press down only with the weight of two or three fingertips spread across the blade flat. Heavy downward force tears the paper fibers and strips the abrasive grains away from the backing sheet.
- Count your strokes: Pull 10 to 15 smooth strokes down the sheet, maintaining the exact same angle on every pass. Then flip the blade over and repeat the exact same number of strokes on the opposite side.
Feel For The Burr Before Switching To Finer Grits
You cannot produce a truly sharp edge simply by guessing how many strokes to pull. You must confirm that metal has been ground away all the way to the very apex of the blade. You verify this by checking for a burr. A burr is the microscopic wire edge or curved sliver of metal that forms on the opposite side during sharpening when the two bevel planes meet.
Detecting this wire edge tells you that the coarse paper has done its job. Never drag your bare finger along the sharp length of the edge to check for sharpness. Instead, rest your thumb pad flat against the side of the blade and slide it gently upward, moving from the spine past the edge. If the bevel is fully sharpened, you will feel a distinct, scratchy ridge or wire lip catching your skin along the entire length of the blade.
- Form the initial burr: Work on your coarse 320 or 400-grit sheet using edge-trailing strokes. Keep working the first side until you feel a continuous burr along the entire opposite edge from heel to tip.
- Flip the burr: Turn the knife over and stroke the second side on the coarse sheet until the wire edge flips over to the first side. Both bevel faces are now flat and meet at a crisp center line.
- Switch to medium grit: Replace the coarse sheet with an 800 or 1000-grit wet-or-dry sheet. Add a splash of water mixed with a single drop of liquid dish soap to the paper surface. The soapy water floats away dark metal shavings, keeps the grit clean, and lubricates the blade glide.
- Refine the scratch pattern: Pull 10 alternating strokes per side on the 1000-grit sheet, reducing your downward pressure. The finer grit replaces the rough 400-grit grinding trenches with a smooth, bright satin finish.
- Polish on fine grit: Move to your 1500 or 2000-grit sheet, wet with soapy water. Use very light feather-touch strokes. Knives with high-carbon steel, like those found in high-carbon Japanese chef knife sets, take an exceptional mirror polish on 2000-grit paper, resulting in silky push-cuts through meat and vegetables.
- Remove the wire edge: To remove the final microscopic burr, make three very light edge-trailing strokes per side on your finest wet paper. Afterward, lay a strip of clean corrugated cardboard or an old leather belt flat on your glass base and pull the edge backward five times per side. This stropping step wipes away the last fragile wire strands.
- Verify your edge: Hold a loose sheet of standard printer paper by one corner with your fingers. Rest the knife heel against the top edge of the paper and slice downward with gentle forward pressure. A properly sharpened knife will slice cleanly through the paper from heel to tip without snagging, ripping, or chattering.
Avoid Heavy Pressure And Inconsistent Blade Angles
Sandpaper sharpening is forgiving, but a few simple handling mistakes can quickly ruin a blade bevel or shred your abrasive sheets. Knowing what to avoid will save your knuckles and protect your knives.
Pushing the cutting edge forward into the paper is the most common error. Remember that sandpaper does not possess the structural density of a solid bench stone. Any forward edge-leading stroke drives the steel apex under the abrasive coating, cutting the paper loose from the base. Always pull backward with the spine leading.
Pressing down with excessive body weight is another frequent mistake. Heavy downward pressure compresses the paper backing and causes the sheet to curl upward around the sharp apex. This curls the bevel into an unintentional, blunt curve and strips the cutting crystals right off the paper. Let the hardness of the silicon carbide do the cutting; your hands only need to guide the path and maintain the angle.
Wobbling your wrist while pulling the stroke rounds the cutting edge. Beginners often raise their wrist as they pull toward the tip, which increases the angle and blunts the point. Keep your wrist locked solid. Move your entire arm from the elbow and shoulder to keep the angle steady across the entire length of the pull.
Jumping directly to fine sandpaper on a blunt knife wastes hours of effort. Fine 2000-grit paper removes microscopic amounts of steel; it polishes an existing apex but lacks the cutting power to reshape a dull bevel. Always start on coarse 320 or 400 grit until you raise a burr, then progress sequentially through the grits.
Failing to clean the blade between grit changes drags coarse abrasive particles onto your fine polishing sheets. Always wipe the blade and your hands with a clean cloth before stepping up to a finer sheet so rogue 400-grit grains do not scratch your polished 2000-grit bevel.
Dedicated Sharpening Stones Offer Better Longevity Over Time
Sandpaper is an affordable, accessible method for restoring a dull blade when you do not own dedicated sharpening stones. However, sandpaper sheets wear out after a few sharpening sessions, tear easily if your angle slips, and require regular replacement. If you maintain multiple kitchen knives, pocket tools, or outdoor blades, switching to reusable sharpening gear provides a more permanent, cost-effective solution.
Dual-sided water stones, commonly known as whetstones, use solid blocks of bonded abrasives that last for years of regular use. A stone with a coarse 1000-grit side for sharpening paired with a fine 6000-grit side for polishing covers all standard kitchen maintenance. Because whetstones are solid blocks, they allow both forward pushing strokes and backward pulling strokes, which speeds up metal removal significantly compared to sandpaper.
When selecting a dedicated sharpening stone setup, verify that it includes a stable base. Look for units equipped with a heavy bamboo stand and a non-slip silicone or rubber holder that locks the stone securely onto wet kitchen counters. A stable base eliminates wobbling, which makes maintaining a consistent bevel angle much easier.
If you struggle to hold a steady 15 or 20-degree angle by hand, check for sharpening sets that include a clip-on angle guide. These plastic guides snap directly onto the spine of your blade, resting against the stone to maintain the correct sharpening pitch automatically with every stroke. For outdoor pocket knives or garden tools, compact double-sided diamond plates provide fast metal removal and never require soaking or flattening.

- TAR Score9.4
TAR Score is a ranking system developed by TopAppliancesReviews.com. TAR score has no relationship or impact from any manufacturers or sales agent websites. Learn more
- BrandLeking

- TAR Score9.4
TAR Score is a ranking system developed by TopAppliancesReviews.com. TAR score has no relationship or impact from any manufacturers or sales agent websites. Learn more
- BrandBABOSTOW

- TAR Score9.2
TAR Score is a ranking system developed by TopAppliancesReviews.com. TAR score has no relationship or impact from any manufacturers or sales agent websites. Learn more
- BrandKEENBEST

- TAR Score9.2
TAR Score is a ranking system developed by TopAppliancesReviews.com. TAR score has no relationship or impact from any manufacturers or sales agent websites. Learn more
- BrandSharp Pebble
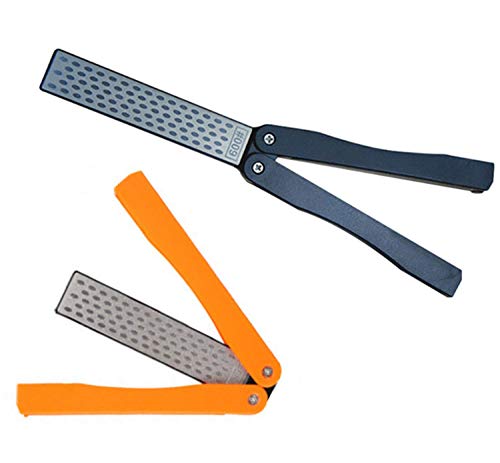
- TAR Score8.8
TAR Score is a ranking system developed by TopAppliancesReviews.com. TAR score has no relationship or impact from any manufacturers or sales agent websites. Learn more
- BrandXILEWHZF

- TAR Score8.6
TAR Score is a ranking system developed by TopAppliancesReviews.com. TAR score has no relationship or impact from any manufacturers or sales agent websites. Learn more
- BrandHonoson

- TAR Score8.6
TAR Score is a ranking system developed by TopAppliancesReviews.com. TAR score has no relationship or impact from any manufacturers or sales agent websites. Learn more
- Brandlongzon

- TAR Score8.6
TAR Score is a ranking system developed by TopAppliancesReviews.com. TAR score has no relationship or impact from any manufacturers or sales agent websites. Learn more
- BrandSE
Last update on 2026-10-02 / Affiliate links / Images, Product Titles, and Product Highlights from Amazon Product Advertising API


Top Rated Best Quality Range Hoods: 2026 Expert Picks

The 12 Best Small Solar Generators 2026

10 Best Quality Semi Automatic Washing Machine of 2026 For Leak-Free Laundry

11 Best Small Washer Machine of 2026 For Everyday Laundry

12 Best Vibration Pads For Washing Machine of 2026 To Stop Walking and Shaking

11 Best Selling Front Load Washing Machine of 2026 For Quiet Odor-Free Laundry

11 Best Washing Machine For King Size Bedding of 2026 To Prevent Cycle Errors

10 Best Small Front Loader Washing Machine of 2026 For Tight Closets






