
How to Sharpen a Knife with Household Items

The fastest way to put a working edge back on steel is using the unglazed ceramic ring on the bottom of a coffee mug. That trick works wonders for everyday dullness, but deep chips or bent tips need dedicated workshop tools instead. The rough, exposed clay acts like an emergency whetstone, gently shaving away tiny bits of metal to recreate a clean cutting bevel (the angled slope of the edge).
How well this works depends on your blade shape and what you have in the drawer. Smooth chef knives and pocket blades respond in minutes, but serrated bread knives with grooved teeth require specific tapered files. A strip of fine sandpaper or a plain leather belt can also help realign steel if you lack ceramic. Here is how to set the right angle, move the blade safely, and get your knife cutting cleanly again.
The Quick Solution at a Glance
- Use an unglazed ceramic mug: Turn an ordinary coffee mug upside down. The rough, unpainted ring on the bottom works just like a fine ceramic sharpening stone.
- Hold a consistent angle: Keep your blade tilted at about 15 to 20 degrees against the ceramic ring, sweeping from the heel of the blade to the tip.
- Hone with plain leather: Rub the blade along a flat leather belt to straighten microscopic bends without stripping away steel.
- Skip the viral tricks: Never cut through aluminum foil, run your knife over glass rims, or rub it against rough concrete. These shortcuts break or round off your cutting edge.
The Ceramic Mug Method: Step-by-Step Emergency Sharpening
The underside of almost every ceramic coffee mug or heavy soup bowl has a exposed ring of raw clay. Manufacturers leave this bottom rim unglazed so the cup does not stick to kiln shelves during firing. That coarse, exposed ceramic is harder than kitchen knife steel. Because of that natural hardness, it acts as an abrasive surface that can shave away tiny particles of metal and realign your cutting edge.
Before you begin, remember that sharpening actually removes metal, while you hone to straighten a bent edge without removing metal. This mug trick sharpens your blade by creating a fresh bevel, which is the angled slope of the cutting edge. Follow these direct steps to sharpen your knife safely on your kitchen counter.
-
Anchor the mug on a damp towel.
Place a damp kitchen towel or silicone trivet flat on a solid counter. Set the coffee mug upside down on the towel. Press down to verify the cup does not slide, wobble, or tip over. Never try to hold the mug in one hand while swinging a blade with the other hand. A slipping mug is the fastest way to suffer a nasty cut.
-
Match the angle of the blade bevel.
Rest the heel of the knife (the wide part of the blade closest to the handle) flat against the unglazed ring. Tilt the knife spine upward to match the existing bevel. For delicate kitchen blades, such as those found in high-carbon Japanese chef knife sets, aim for a steep 15-degree slicing edge per side. For sturdier everyday utility knives or German high-carbon steel premium knife sets, lean closer to a 20-degree utility edge. A simple visual guide: 90 degrees is straight up and down, 45 degrees is halfway to the counter, and 20 degrees is slightly less than half of that.
-
Draw the blade from heel to tip.
Pull the knife backward toward your body while sliding the blade across the ring. Move steadily from the heel all the way out to the pointed tip. Apply light, gentle pressure. You do not need to push hard; the hardness of the ceramic will do the cutting work. Pushing too hard will scratch the face of the blade or chip the steel.
-
Alternate sides with equal strokes.
Sharpening creates a burr, which is the microscopic wire edge or tiny rough curl of bent metal that forms on the opposite side of the blade. To keep the cutting edge centered, switch sides with every stroke. Perform six to eight gentle sweeps on the first side, then flip the knife over and make six to eight matching sweeps on the reverse side. Finish with two or three very light alternating passes on each side to remove the loose wire edge.
-
Wipe and rinse the blade thoroughly.
Look closely at the ceramic ring when you finish. You will notice dark gray streaks. That is microscopic steel dust shaved from your knife. Wipe the blade with a damp paper towel and wash it with soap and warm water before cutting any food. You do not want metal shavings ending up in your dinner.
Other Household Items That Actually Work
If you do not have a ceramic mug with an exposed ring, a few other common household items can help you reshape or smooth out an edge. Each item has a different level of coarseness, also known as grit, which refers to the roughness of the surface.
Fine-Grit Sandpaper
Wet-or-dry sandpaper from a home workshop makes an effective makeshift whetstone. Look for sandpaper labeled between 600 grit and 1500 grit. Place a sheet on a flat surface, such as a glass cutting board, smooth countertop, or mousepad. Tape down the edges so the paper cannot slide.
Place your blade flat against the sandpaper, raise the spine to your 15-degree or 20-degree angle, and pull the knife backward away from the cutting edge. Moving backward prevents the sharp steel from slicing through the paper. Make eight to ten trailing passes per side. Using a slightly soft backing like a rubber mousepad creates a subtle rounded bevel that holds up well during heavy kitchen prep.
A Plain Leather Belt
A thick, unstitched leather work belt does not remove steel, but it is great for stropping. Stropping polishes the cutting edge and straightens out microscopic curls after you use a ceramic mug or fine sandpaper. Turn the belt upside down so the rough, suede-like backside faces upward. Pull the belt tight against your counter or wrap one end around a sturdy cabinet knob.
Lay your blade almost flat against the leather. Drag the knife down the length of the belt with the spine leading and the cutting edge trailing behind. Never push the edge into the leather, or you will slice straight through your belt. Give each side twenty trailing strokes. This quick step buffs away any remaining burr and leaves a clean, razor-smooth finish.
Smooth River Stones
If you are outdoors or cooking at a campsite, a smooth river rock works in a pinch. Natural stones smoothed by flowing river water often contain fine quartz crystals that act like traditional sharpening stones. Look for an oval stone with an unbroken, flat surface that feels silky rather than gritty.
Splash water over the rock to wash away loose sand and dirt. Keep the stone wet while working, as the water carries away loose steel particles and prevents the rock pores from clogging. Glide your blade slowly across the flat face of the stone, matching your bevel angle. Keep your strokes slow and deliberate to avoid hitting bumpy spots on the natural stone.
Household Hacks to Avoid
The internet is full of viral kitchen advice, but several widely shared knife sharpening tricks do far more harm than good. Using improper hard surfaces ruins the edge geometry of your knife, strips off too much metal, or creates jagged micro-chips that ruin the blade.
Cutting Aluminum Foil
You may see videos claiming that folding up aluminum foil and slicing through it sharpens kitchen knives or scissors. This does not work. Slicing through metal foil does not grind a new bevel, nor does it straighten a bent edge. In reality, aluminum foil acts as a mild abrasive that rubs against the very tip of your cutting edge, quickly rounding it over. Cutting foil turns a mildly dull blade into a completely flat, useless blade.
Rubbing on Glass Bottles or Jars
Some people suggest running a knife edge across the smooth neck of a wine bottle or the rim of a glass jar. Glass is extremely hard, brittle, and slick. It lacks the microscopic abrasive grain needed to sharpen metal cleanly. When steel meets glass without abrasive grit, the blade slips easily, which creates an immediate cut hazard for your fingers. In addition, hard kitchen steels can chip instantly against rigid glass rims.
Grinding on Concrete Steps or Bricks
Scraping a dull kitchen knife against an outdoor brick or a concrete porch step will shred your steel. Concrete contains large chunks of aggregate, gravel, and coarse sand. These uneven particles rip deep, ragged gouges into the blade. While the knife might feel grabby afterward, that rough bite is just a jagged, saw-like edge that will tear food instead of slicing it cleanly. Fixing the damage from concrete requires grinding away significant steel on dedicated workshop stones.
How to Check Your New Edge
Never run your bare finger down the length of a blade to see if it feels sharp. That habit invites painful accidents. Instead, verify your new edge using simple, safe checks that clearly show whether the blade can handle everyday cutting tasks.
The Printer Paper Slice: Hold an ordinary sheet of printer paper loosely by its top corner with one hand. Place the belly of your knife against the top edge of the paper and push gently forward and down. A dull blade will crush or tear the sheet. A knife with a properly restored edge will glide through the paper smoothly without snagging or ripping.
The Ripe Tomato Glide: Set a ripe tomato or a smooth bell pepper on your cutting board. Rest the edge of your knife on top of the tomato skin. Without pressing down, simply draw the blade backward toward you. If the knife bites into the waxy skin under its own weight, your edge is in excellent shape. If the blade rolls off the slick skin or squashes the fruit, your bevel angle was likely uneven, and the knife needs another light pass on the ceramic mug.
The Thumbnail Catch Check: To confirm that you removed the burr along the entire edge, rest the cutting edge lightly on your thumbnail at an angle. Do not press down. Gently let the knife try to slide sideways. A sharp edge catches on the surface of your nail immediately. A dull or bent edge will skate across your nail without gripping.
When to Switch to a Dedicated Sharpener
Makeshift kitchen items are great emergency tools when dinner prep is halfway finished, but they are not permanent solutions. Ceramic mugs have small, round contact points that make it difficult to hold a perfectly consistent angle across an entire eight-inch chef knife. Over months of use, relying solely on DIY methods can cause wavy edges or uneven low spots along the belly of your blade.
When you have time to step back from the cutting board, upgrading to a dedicated sharpening tool is the best way to protect your knives. For most home kitchens, an inexpensive manual pull-through sharpener or a dual-grit synthetic whetstone provides reliable, repeatable results. Look for tools that feature non-slip rubber bases to keep the unit firmly planted on your counter, comfortable handles that protect your hands, and multi-stage slots made with tungsten carbide plates and fine ceramic rods. A sturdy manual sharpener lets you reset damaged blades in seconds and keep your knives slicing cleanly without risking damage to the steel.

- TAR Score9.4
TAR Score is a ranking system developed by TopAppliancesReviews.com. TAR score has no relationship or impact from any manufacturers or sales agent websites. Learn more
- BrandACCUSHARP

- TAR Score9.2
TAR Score is a ranking system developed by TopAppliancesReviews.com. TAR score has no relationship or impact from any manufacturers or sales agent websites. Learn more
- BrandIntelitopia

- TAR Score9.0
TAR Score is a ranking system developed by TopAppliancesReviews.com. TAR score has no relationship or impact from any manufacturers or sales agent websites. Learn more
- BrandKITCHELLENCE
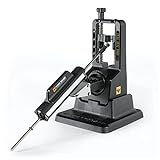
- TAR Score9.0
TAR Score is a ranking system developed by TopAppliancesReviews.com. TAR score has no relationship or impact from any manufacturers or sales agent websites. Learn more
- BrandWORK SHARP

- TAR Score8.8
TAR Score is a ranking system developed by TopAppliancesReviews.com. TAR score has no relationship or impact from any manufacturers or sales agent websites. Learn more
- Brandlongzon

- TAR Score8.8
TAR Score is a ranking system developed by TopAppliancesReviews.com. TAR score has no relationship or impact from any manufacturers or sales agent websites. Learn more
- BrandLUFFEXX
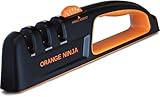
- TAR Score8.8
TAR Score is a ranking system developed by TopAppliancesReviews.com. TAR score has no relationship or impact from any manufacturers or sales agent websites. Learn more
- BrandSharp Pebble

- TAR Score8.6
TAR Score is a ranking system developed by TopAppliancesReviews.com. TAR score has no relationship or impact from any manufacturers or sales agent websites. Learn more
- BrandHOTEC
Last update on 2026-10-01 / Affiliate links / Images, Product Titles, and Product Highlights from Amazon Product Advertising API
FAQs
Can you sharpen a serrated bread knife on a coffee mug?
No, you should not run a serrated knife across a flat ceramic mug bottom. Serrated knives feature individual curved teeth that require a slender, round sharpening rod to fit inside each scallop. Rubbing a serrated edge over a flat mug rim will grind down the pointed tips while leaving the cutting valleys dull, permanently ruining the blade profile.
How many strokes does it take to sharpen a knife on a mug?
Most mildly dull kitchen blades need between six and ten steady passes per side to form a working edge. If your knife has not been sharpened in years or feels completely blunt, it may take fifteen to twenty passes per side. Always use gentle pressure and switch sides evenly so you do not push the edge out of alignment.
Will sharpening a knife on a ceramic mug scratch the blade?
The mug will only scratch the blade if your angle slips and the flat face of the steel drags across the rough ceramic. As long as you maintain a steady 15 to 20-degree tilt, only the very tip of the bevel touches the ring. Work slowly and keep your wrist locked to keep the sides of your knife scratch-free.
How often can you use household items before needing real tools?
Household items like ceramic mugs and leather belts work well for occasional tune-ups during food prep. However, using them every week can slowly create uneven wear along the blade. It is best to treat DIY sharpening as a temporary rescue method and use a dedicated manual sharpener or whetstone every few months for balanced maintenance.


Top Rated Best Quality Range Hoods: 2026 Expert Picks

The 12 Best Small Solar Generators 2026

10 Best Quality Semi Automatic Washing Machine of 2026 For Leak-Free Laundry

11 Best Small Washer Machine of 2026 For Everyday Laundry

12 Best Vibration Pads For Washing Machine of 2026 To Stop Walking and Shaking

11 Best Selling Front Load Washing Machine of 2026 For Quiet Odor-Free Laundry

11 Best Washing Machine For King Size Bedding of 2026 To Prevent Cycle Errors

10 Best Small Front Loader Washing Machine of 2026 For Tight Closets






