
How to Sharpen a Knife with a Whetstone or Sharpener

Check the tool sitting on the counter before sliding any blade across it. A whetstone or a pull-through gadget actually shaves away dull steel to create a crisp cutting edge, whereas a long metal rod merely straightens bent metal without sharpening it. To restore a dull blade, sweep the edge across a stone at a steady angle or pull it gently through preset abrasive slots.
The exact motion comes down to your blade and its condition. Thin Japanese kitchen knives perform best at a shallow fifteen-degree slant, while sturdier Western chef knives need a twenty-degree angle to keep from chipping. A blade that slides right off tomato skins needs metal ground away on a rough surface, but a knife that just feels slightly sluggish might only need a quick touch-up along a steel rod. Here is how to handle each tool safely so the edge cuts cleanly again.
Tool Check: Grinding Away Dull Metal Versus Straightening a Bent Edge
Every dull knife suffers from one of two problems. Either the microscopic teeth along the blade have bent out of line, or the cutting edge has worn down into a rounded, blunt wedge. Knowing which problem you have determines whether you need to realign the metal or grind away old steel to create a fresh bevel (the angled cutting edge that does the slicing).
A honing rod, often called a sharpening steel, does not actually sharpen a blunt knife. Honing means straightening a bent edge without removing metal. When you chop vegetables or slice meat, the ultra-thin apex of the blade folds slightly to the left or right. A honing rod pushes that folded metal back into a straight line. If your knife feels slightly sluggish after a week of normal kitchen prep, a few passes on a steel rod will bring back that crisp bite. But if the edge is truly blunt or chipped, rubbing it against a smooth steel rod will change nothing because there is no sharp point left to straighten.
To fix a truly dull knife, you must remove metal using an abrasive surface. That is where whetstones and manual pull-through sharpeners come in. Both tools grind away damaged steel on both sides of the blade until two flat bevels meet at a razor-thin point. Whetstones give you complete control over the shape and angle of the edge, while pull-through sharpeners use fixed internal abrasive wheels to set the angle for you.
Knife style also changes how you approach the metal. Most Western chef knives, such as those found in German high-carbon steel knife block sets, feature a sturdy 20-degree utility edge per side. That wider angle resists chipping against hard cutting boards and squash rinds. In contrast, many Asian blades, including those in high-carbon Japanese chef knife sets, use a steeper 15-degree slicing edge per side. Thin blades slice effortlessly through delicate proteins, but they require a steady, shallow sharpening angle so you do not thicken the edge by mistake.
Step-by-Step Sharpening with a Whetstone or Pull-Through Tool
Sharpening at home does not require professional workshop machinery. Whether you choose a classic whetstone or a multi-slot manual sharpener, the goal is identical: maintain a consistent angle, remove just enough steel to form a clean apex, and smooth away rough scratches. Follow the specific steps below for the tool currently sitting on your counter.
Method 1: Sharpening with a Dual-Grit Whetstone
- Prepare your stone and workspace. If you use a traditional water stone, submerge it in a bowl of room-temperature water for 10 to 15 minutes until bubbles stop rising to the surface. Splash-and-go stones only need a quick splash of water across the top. Place the stone on your counter with the rough, low-grit surface facing up. Grit refers to the roughness of the sharpening surface; lower numbers like 400 or 1000 grind away metal quickly, while higher numbers like 3000 or 8000 polish the edge. Set the stone into a non-slip rubber base or lay it flat on a damp kitchen towel so it cannot slide while you work.
- Set your blade angle. Place the heel of the knife flat against the stone. Tilt the spine of the knife up until the angled cutting edge sits completely flush against the abrasive surface. For a standard 20-degree kitchen knife, this gap is roughly the thickness of two quarters stacked together under the spine. For a thin 15-degree blade, imagine the height of a single quarter. Lock your wrist so this angle remains steady from start to finish.
- Sweep from heel to tip. Place your dominant hand firmly on the knife handle, and rest the pads of two or three fingers from your other hand on the flat side of the blade near the cutting edge. Apply light downward pressure, about the weight of a large orange. Push the blade forward and across the stone in a smooth diagonal arc, sweeping from the heel all the way out to the pointed tip. Keep the blade wet by splashing a few drops of water on the surface whenever it starts to feel sticky.
- Check for a burr. A burr is the thin wire edge or curved sliver of metal that forms on the opposite side of the blade during sharpening. You cannot see it easily, but you can feel it. Stop after 8 to 10 sweeps. Lay your thumb flat against the opposite side of the blade and gently slide your thumb pad upward away from the cutting edge toward the spine. If you feel a rough, catch-like ridge along the entire length from heel to tip, you have successfully ground through the old dull steel. If the edge still feels smooth, make 5 more sweeps until that raised wire edge appears.
- Sharpen the opposite side. Switch the knife in your hands or adjust your grip so the unsharpened side faces the stone. Hold the exact same angle and repeat the sweeping strokes. Grind until you push that wire burr back to the original side.
- Polish on fine grit. Flip your whetstone over to the smooth, fine-grit side. Repeat the sweeping motion using much lighter pressure, alternating sides with each stroke for about 10 passes. This step removes the microscopic wire edge and buffs the cutting bevel into a mirror finish.
Method 2: Sharpening with a Multi-Slot Pull-Through Sharpener
- Anchor the tool on a flat surface. Set the pull-through unit flat on a clean, dry cutting board or countertop. Hold the handle firmly with your non-dominant hand. If you worry about slips, put on a cut-resistant glove on the hand holding the tool base. Make sure the unit does not wobble or slide when you pull backward.
- Insert the heel into the coarse slot. Multi-slot sharpeners usually have two or three slots labeled coarse, medium, or fine. Start in the coarse slot, which holds hard tungsten carbide or diamond rods meant to reshape blunt metal. Drop the heel of the blade straight down into the V-shaped groove until it touches the internal abrasives. Keep the knife completely upright at 90 degrees to the counter. Tilting the blade to the side will cut an uneven bevel.
- Pull straight back with gentle pressure. Pull the knife straight toward your body in one continuous, fluid motion, letting the shape of the blade guide the contact from heel to tip. Use moderate, steady downward pressure. Do not push down with your full body weight, do not push the blade forward, and never saw back and forth. Repeat this pull 3 to 5 times.
- Progress through the finishing slots. Move the knife to the medium or ceramic finishing slot. These fine ceramic wheels smooth out the coarse grind marks and align the microscopic edge. Pull the blade through this slot 4 to 6 times using very light pressure. Wipe the blade clean with a damp towel to remove any loose metal dust before using it on food.
Everyday Beginner Mistakes and Safe Ways to Check Your Edge
Most sharpening problems happen because of small hand movements that feel natural but quietly undo your progress. When a knife stays dull after twenty minutes of work, the cause is almost always an unsteady wrist, uneven pressure, or skipping the final burr removal.
Here are the common mistakes that round off cutting edges instead of making them sharp:
- Wobbling the wrist angle: If your hand dips up and down as you sweep across a stone, you grind down the sharp apex you just made, turning the cutting edge into a rounded butter knife.
- Pushing down too hard: Excessive force gouges soft whetstones, flexes thin steel, and creates an uneven wave along the blade line. Let the grit do the cutting.
- Dragging the knife tip off the stone: Pulling the tip completely off the edge of the whetstone with downward pressure rounds the delicate point. Stop your stroke right as the tip reaches the far edge of the stone.
- Sawing back and forth in a pull-through sharpener: Pushing a knife forward in a manual slot catches the blade against the abrasive wheels, creating deep notches and gouges along the edge. Always pull in one single direction.
- Ignoring the burr: If you stop sharpening before a wire edge forms along the entire blade, you have not reached the actual cutting apex. The knife will remain just as dull as when you started.
Once you finish sharpening, never run your finger or thumb along the sharp edge to see if it worked. That is an easy way to cause a deep cut. Instead, verify your edge using safe, reliable kitchen items.
Hold a standard sheet of printer paper vertically by its top corner with one hand. Place the knife heel against the top edge of the paper and slice gently downward and outward. A properly sharpened knife will glide cleanly through the sheet with zero resistance, creating a smooth ribbon of paper without catching, ripping, or tearing.
You can also check sharpness on a ripe tomato or a yellow onion. Rest the blade on the smooth, waxy skin of the vegetable. Without pressing down, pull the knife backward toward you. A keen edge will bite through the skin instantly under the knife's own weight. If the blade slides across the surface without cutting, the edge is still rounded and needs more work on the coarse abrasive.
Finally, inspect the blade under direct light. Point the cutting edge straight up toward a bright kitchen ceiling lamp and look directly down at the line of the blade. A sharp edge is microscopic and cannot reflect light, so it appears as a dark, invisible line. A dull edge has flat spots that bounce light back at you, looking like shiny silver threads along the blade.
Choosing the Right Sharpening Equipment for Your Kitchen
Selecting the right sharpening gear depends on how much time you want to spend maintaining your cutlery and what kind of steel you own. There is no single setup that fits every household, but matching your tool to your cooking habits ensures your knives stay functional for years.
If you enjoy the craft of cooking and own premium knives, a two-sided water stone is the gold standard. Look for a combination block with a coarse grit (around 1000) on one side to repair dull edges, and a fine grit (around 3000 to 6000) on the reverse side to polish the steel. Check that the stone includes a secure, non-slip base, such as a heavy rubber shoe or a grooved bamboo block with silicone feet. A stable base keeps the abrasive from wandering across a wet kitchen counter while your hands are busy controlling the blade.
If you want quick, reliable maintenance without learning manual angle control, a manual multi-stage pull-through sharpener is practical and efficient. When selecting a pull-through unit, look for models that provide independent stages: a coarse slot fitted with diamond or tungsten abrasives to reset the cutting angle, and a fine ceramic slot to deburr and hone. Make sure the unit has a broad, ergonomic grip handle and slip-resistant rubber pads across the bottom surface to protect your hands while pulling blades through.
For daily upkeep between sharpening sessions, keep a 10 to 12-inch carbon steel or ceramic honing rod in your knife block. A magnetized rod helps capture tiny steel filings so they do not settle on your cutting board. Using a honing rod for 30 seconds before heavy meal prep straightens the microscopic teeth on your blade, meaning you will only need to break out your whetstone or pull-through sharpener a few times a year.
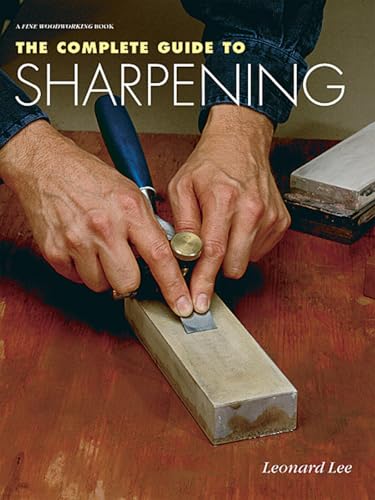
- TAR Score9.2
TAR Score is a ranking system developed by TopAppliancesReviews.com. TAR score has no relationship or impact from any manufacturers or sales agent websites. Learn more
- BrandTaunton Press

- TAR Score9.2
TAR Score is a ranking system developed by TopAppliancesReviews.com. TAR score has no relationship or impact from any manufacturers or sales agent websites. Learn more
- BrandIntelitopia

- TAR Score9.0
TAR Score is a ranking system developed by TopAppliancesReviews.com. TAR score has no relationship or impact from any manufacturers or sales agent websites. Learn more
- BrandIndependently Published

- TAR Score9.0
TAR Score is a ranking system developed by TopAppliancesReviews.com. TAR score has no relationship or impact from any manufacturers or sales agent websites. Learn more
- BrandN/A

- TAR Score9.0
TAR Score is a ranking system developed by TopAppliancesReviews.com. TAR score has no relationship or impact from any manufacturers or sales agent websites. Learn more
- BrandKITCHELLENCE
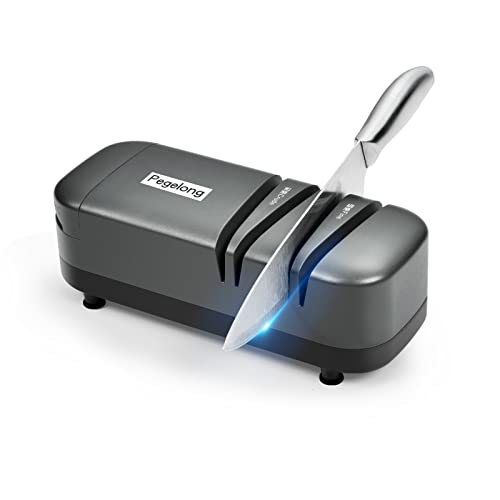
- TAR Score8.8
TAR Score is a ranking system developed by TopAppliancesReviews.com. TAR score has no relationship or impact from any manufacturers or sales agent websites. Learn more
- BrandPegelong

- TAR Score8.8
TAR Score is a ranking system developed by TopAppliancesReviews.com. TAR score has no relationship or impact from any manufacturers or sales agent websites. Learn more
- BrandFANERFUN

- TAR Score8.6
TAR Score is a ranking system developed by TopAppliancesReviews.com. TAR score has no relationship or impact from any manufacturers or sales agent websites. Learn more
- Brandlongzon

- TAR Score7.0
TAR Score is a ranking system developed by TopAppliancesReviews.com. TAR score has no relationship or impact from any manufacturers or sales agent websites. Learn more
- BrandMajosta
Last update on 2026-10-01 / Affiliate links / Images, Product Titles, and Product Highlights from Amazon Product Advertising API
FAQs
How often should you sharpen a kitchen knife?
Most home cooks only need to sharpen their primary chef knife once or twice a year using a whetstone or pull-through tool. Sharpening grinds away actual metal, so doing it too often wears down your blade unnecessarily. In between sharpenings, use a smooth honing rod every few cooking sessions to keep the existing edge aligned and straight.
Why is my knife still dull after using a pull-through sharpener?
A pull-through sharpener leaves a knife dull if the internal abrasive angle does not match the original bevel of your blade, or if you pushed down too hard and tore the metal. If your knife had severe flat spots or chips, a few quick pulls through a preset slot might not have removed enough metal to create a brand-new cutting apex. You may need more passes in the coarse slot, or the blade may need a flat whetstone to reset the bevel.
Can you sharpen a serrated bread knife with a whetstone?
You cannot sharpen the scalloped, grooved side of a serrated knife flat against a standard whetstone because the stone cannot reach inside the recessed curves. Doing so will simply grind off the pointed teeth. Serrated edges require a tapered ceramic or diamond sharpening rod that fits inside each individual groove, though you can use a fine flat whetstone on the flat backside of the blade to remove burrs.


Top Rated Best Quality Range Hoods: 2026 Expert Picks

The 12 Best Small Solar Generators 2026

10 Best Quality Semi Automatic Washing Machine of 2026 For Leak-Free Laundry

11 Best Small Washer Machine of 2026 For Everyday Laundry

12 Best Vibration Pads For Washing Machine of 2026 To Stop Walking and Shaking

11 Best Selling Front Load Washing Machine of 2026 For Quiet Odor-Free Laundry

11 Best Washing Machine For King Size Bedding of 2026 To Prevent Cycle Errors

10 Best Small Front Loader Washing Machine of 2026 For Tight Closets






