
How to Sharpen a Knife With a Whetstone

Lock the stone onto a damp cloth and glide the blade at a steady 15 to 20 degree angle from heel to tip. Maintaining that firm angle until a tiny rough ridge forms along the back is what sharpens the metal instead of rounding the edge. Simply flip the knife to repeat the process, then polish away the scratch marks on a finer grit.
A few details shape your technique. Thinner Japanese kitchen knives cut best at a low 15-degree tilt, while thicker Western knives and outdoor blades need roughly 20 degrees. Soaking rules also differ: water stones need ten minutes submerged in water, but diamond plates and oil stones only take a quick splash of fluid. Severely dull edges call for a coarse grit stone, while routine tune-ups start on a medium surface. Learning the right motions keeps your hands safe and restores a clean, crisp edge.
How Do You Set Up Your Stone And Workspace?
A whetstone (a sharpening stone used to grind and reset a cutting edge) needs a flat, stable surface and proper moisture. If your stone wobbles, the blade angle shifts with every pass, leaving an uneven edge. Setting up a firm station before you touch a blade keeps your movements controlled and safe.
First, check whether your stone requires water or oil. Traditional water stones need a bath before use. Submerge the stone in a bowl of clean tap water for 10 to 15 minutes. Once tiny air bubbles stop rising, the stone is fully saturated and ready to use. If you use a diamond plate or an oil stone, skip the soaking. Diamond plates work with a light splash of water, while natural oil stones require a few drops of mineral oil to float away metal dust.
Next, secure your work area. Place the stone with its coarse grit facing up, pointing straight ahead or sitting sideways depending on what feels natural for your arms. If the stone lacks a non-slip rubber base, set it on a damp cloth or silicone mat. Lean your hand weight against the stone to verify that it will not slide. Keep a small bowl of water nearby to sprinkle moisture onto the stone whenever the top turns dry.
What Angle Should You Hold The Knife At?
The bevel (the slanted side that forms the sharp edge) must meet the stone at an exact tilt. Lifting the spine too high blunts the edge apex immediately. Laying the blade too flat scratches the blade face without sharpening the cutting edge.
Select your angle based on knife design:
- Delicate Japanese kitchen knives: Hold a steep 15-degree slicing edge per side. These thinner blades slice cleanly through vegetables and boneless meats. Home cooks using high-carbon Japanese chef knives rely on this narrow bevel for effortless slicing prep.
- Western cutlery and outdoor blades: Hold a sturdy 20-degree utility edge for pocket and hunting knives or German kitchen knives. Thicker German high-carbon steel knives need this wider angle to withstand heavy chopping against cutting boards without chipping.
Use these visual tricks to find your angle without guessing:
- The stacked coin trick: Lay the blade flat on the stone, then lift the spine to slide two pennies underneath. For an eight-inch chef knife, that two-coin gap sets an angle close to 15 degrees. Adding a third penny lifts the spine to roughly 20 degrees.
- The matchbook trick: Slide the folded edge of a cardboard matchbook under the blade spine to set a quick 15 to 18-degree angle.
- The thumb knuckle rest: Place your thumb flat on the stone and rest the knife spine against your first knuckle to give your hands a steady reference.
How Do You Make The Sharpening Stroke?
Sharpening grinds away microscopic layers of steel along the bevel. Smooth, controlled strokes keep the angle steady and protect your hands from slips.
- Lock your wrist and place your fingers. Grip the handle firmly with your dominant hand, resting your index finger along the spine for support. Place the fingertips of your free hand flat on the blade face, about a half-inch above the sharp edge, to provide even downward pressure.
- Position the heel on the stone. Start at the top of the stone farthest from your body. Rest the heel (the back section of the edge nearest the handle) flat against the stone at your chosen angle.
- Sweep down and across. Draw the blade toward your body in a smooth arc. Apply light, steady pressure, roughly the force used to press a ripe peach without bruising it. As you pull, sweep the knife sideways so the curved belly and tip pass across the stone before the stroke finishes.
- Move from your elbows and shoulders. Keep your wrist stiff. If your wrist bends, the knife rocks upward, rounding off the cutting edge instead of grinding a flat bevel.
- Keep the stone wet. The stone creates a muddy paste called slurry (a mix of water and stone particles). Leave this mud in place because it helps polish the bevel. Add a splash of water only when the surface turns sticky.
- Count your passes. Complete 10 to 15 matching strokes along the blade, keeping the same speed and angle on each pass.
How Do You Know When To Flip The Blade?
Sharpening is not about counting random strokes; it is about raising a burr. A burr is the microscopic wire edge or curved sliver of metal that forms on the opposite side during sharpening. It tells you that the stone has ground all the way through the dull metal.
As you grind the bevel on the first side, the stone wears away dull steel until the edge apex becomes razor-thin. Once that thin edge loses its structural backing, it curls upward over the unsharpened side. That curled ridge is your physical sign that you ground all the way to the very bottom of the edge. Flipping the blade before raising a burr leaves dull flat spots behind.
Check for the burr using this safe touch method:
Never run your finger along the length of the blade, which can cause severe cuts. Instead, set the knife flat. Place your thumb pad on the blade face of the unsharpened side, about an inch away from the edge. Gently push your thumb straight outward, sliding off the cutting edge.
If the edge feels slippery, the burr has not formed yet, so continue grinding for another five passes. When the burr forms, your thumb will feel a rough catch or wire lip, similar to the feel of fine sandpaper. Confirm that this rough lip runs from the heel all the way to the tip. Once the burr spans the entire blade, flip the knife over and sharpen the second side with identical strokes until the burr folds back over.
How Do You Polish And Finish The Edge?
A coarse grit (a stone with a low roughness rating, such as 400 or 1000) creates a burr but leaves a scratchy edge. Finishing on a higher grit smooths out scratch marks and removes the remaining wire burr so food glides past cleanly.
- Move to a finer stone. If you started on a coarse 400 grit stone to fix dullness, transition to a medium 1000 grit stone. If you already worked on 1000 grit, switch to a 3000 to 6000 grit stone to polish the metal.
- Lighten your touch. Cut your downward hand pressure in half on the finishing stone. Heavy pressure gouges softer fine stones and bends the edge out of alignment.
- Alternate single passes. After five gentle strokes per side, switch to alternating single strokes. Make one stroke on the right side, flip the blade, and make one stroke on the left side. This alternating action straightens the burr and breaks it off cleanly.
- Clear the lingering wire. Pull the cutting edge lightly through a scrap of soft wood, a wine cork, or cardboard. This gentle pass snaps off microscopic metal shavings without dulling the fresh edge.
- Rinse and dry the blade. Wash away all stone slurry with warm water and dry the knife immediately. If your blade is made from high-carbon steel (a hard metal that holds an edge well but rusts easily), wipe a thin coat of food-safe mineral oil over the metal before storing it.
How Can You Check If The Blade Is Sharp?
Checking a freshly sharpened blade does not require touching the sharp edge with your fingers. Touching the blade directly is unsafe and does not show you how the edge performs under slicing pressure.
Use these practical checks to confirm your edge is ready for kitchen prep:
- The paper slice check: Hold a sheet of standard copy paper upright with one hand. Place the knife heel against the top edge of the paper and push gently forward and down without sawing. A sharp edge glides through the paper with a clean hiss. If the blade snags or rips the sheet, an unground flat spot or hanging burr remains at that point.
- The tomato skin check: Set the knife blade onto the smooth skin of a ripe tomato. Pull the knife backward across the fruit using only the weight of the blade, without pushing downward. A sharp edge slices immediately into the slick skin, while a dull edge skids across the surface or squashes the flesh.
- The light reflection check: Hold the knife under a bright light with the cutting edge pointing straight up. A dull, rounded edge reflects light and shines like a thin silver thread. A razor-sharp apex is microscopic and cannot reflect light, appearing as a dark, invisible line.
- The thumbnail catch check: Rest the cutting edge lightly across your thumbnail at a 45-degree angle with zero downward force. If the blade slides away easily, the edge is rounded. If the blade bites into the nail surface without slipping, the edge is properly set.
What Equipment Helps Beginners Sharpen More Consistently?
Maintaining an identical angle across every stroke takes time to learn. Choosing the right sharpening setup gives beginners the physical support needed to build good habits quickly.
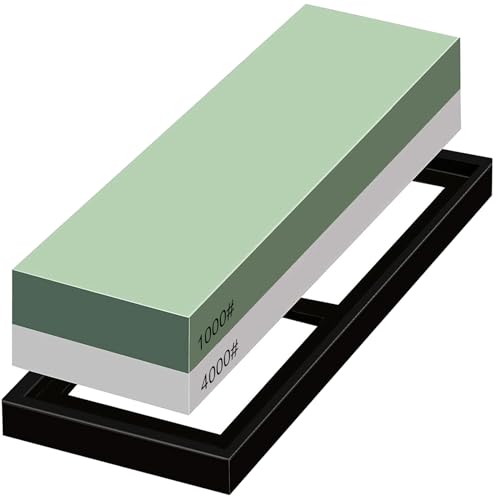
A dual-sided whetstone is the most practical starting point. These blocks combine two different grits on one stone, such as a 1000-grit medium side for reshaping dull bevels and a 4000 or 6000-grit fine side for honing. Look for a stone that comes with a non-slip silicone holder or a heavy wooden base fitted with rubber feet. A stable base prevents the stone from sliding across wet countertops, protecting your hands while you focus on blade tilt.
A clip-on sharpening angle guide can also speed up your learning curve. These plastic guides clamp onto the spine of your kitchen knife and rest against the stone, keeping the blade locked at a precise 15 to 20-degree tilt. Using a guide during your first few sharpening sessions trains your hands to recognize the proper height before you sharpen freehand.

- TAR Score10.0
TAR Score is a ranking system developed by TopAppliancesReviews.com. TAR score has no relationship or impact from any manufacturers or sales agent websites. Learn more
- BrandPafeooui

Professional Knife Sharpener Kit-7 Whetstones Precision Angle Adjustable Sharpening Metal
View on Amazon- TAR Score9.6
TAR Score is a ranking system developed by TopAppliancesReviews.com. TAR score has no relationship or impact from any manufacturers or sales agent websites. Learn more
- BrandSHARP ROCK

- TAR Score9.2
TAR Score is a ranking system developed by TopAppliancesReviews.com. TAR score has no relationship or impact from any manufacturers or sales agent websites. Learn more
- BrandLifeholic

- TAR Score9.2
TAR Score is a ranking system developed by TopAppliancesReviews.com. TAR score has no relationship or impact from any manufacturers or sales agent websites. Learn more
- BrandDan's Whetstone Company Inc.

- TAR Score9.2
TAR Score is a ranking system developed by TopAppliancesReviews.com. TAR score has no relationship or impact from any manufacturers or sales agent websites. Learn more
- BrandCutluxe

- TAR Score9.2
TAR Score is a ranking system developed by TopAppliancesReviews.com. TAR score has no relationship or impact from any manufacturers or sales agent websites. Learn more
- Branduxcell

- TAR Score8.8
TAR Score is a ranking system developed by TopAppliancesReviews.com. TAR score has no relationship or impact from any manufacturers or sales agent websites. Learn more
- BrandGozantine
- TAR Score8.8
TAR Score is a ranking system developed by TopAppliancesReviews.com. TAR score has no relationship or impact from any manufacturers or sales agent websites. Learn more
- BrandCUNQN

- TAR Score8.8
TAR Score is a ranking system developed by TopAppliancesReviews.com. TAR score has no relationship or impact from any manufacturers or sales agent websites. Learn more
- BrandAli Industries

- TAR Score7.4
TAR Score is a ranking system developed by TopAppliancesReviews.com. TAR score has no relationship or impact from any manufacturers or sales agent websites. Learn more
- Branduxcell
Last update on 2026-10-03 / Affiliate links / Images, Product Titles, and Product Highlights from Amazon Product Advertising API
FAQs
Do you need oil or water for your whetstone?
That depends entirely on the stone material. Synthetic water stones require soaking or splashing with plain tap water, while natural oil stones require a light mineral oil to float away ground steel. Never put oil on a water stone, because oil permanently clogs the porous surface and ruins its grinding ability.
How often should you sharpen kitchen knives with stones?
Most home cooks only need to sharpen their knives on a whetstone every three to six months. Daily kitchen prep dulls a blade slowly if you cut on wooden boards and store knives properly. Between stone sessions, using a smooth honing steel straightens rolled edges and restores clean cutting performance without removing metal.
Why does your knife feel duller after sharpening?
A blade usually feels duller after sharpening because the user wobbled their wrist and changed the blade angle on every pass. Varying angles round off the cutting apex instead of creating two flat, meeting bevels. Leaving a clinging wire burr along the edge will also make a newly sharpened blade snag and drag through food.
Can you ruin a knife on a whetstone?
It is very hard to ruin a knife permanently on a manual stone. While you might scratch the blade face or temporarily round the edge with an inconsistent angle, manual stones remove steel very slowly. You can easily polish out cosmetic marks and regrind a proper bevel once you reset your angle.


Top Rated Best Quality Range Hoods: 2026 Expert Picks

The 12 Best Small Solar Generators 2026

10 Best Quality Semi Automatic Washing Machine of 2026 For Leak-Free Laundry

11 Best Small Washer Machine of 2026 For Everyday Laundry

12 Best Vibration Pads For Washing Machine of 2026 To Stop Walking and Shaking

11 Best Selling Front Load Washing Machine of 2026 For Quiet Odor-Free Laundry

11 Best Washing Machine For King Size Bedding of 2026 To Prevent Cycle Errors

10 Best Small Front Loader Washing Machine of 2026 For Tight Closets






