
How to Sharpen a Knife With a Wet Stone to a Razor Edge

Most people assume sharpening a knife on a stone requires years of trade practice or master craftsman hands. In truth, bringing steel back to life simply takes holding one steady tilt across the wet surface until you feel a tiny rough ridge form along the back edge. Once that little lip appears, you just flip the blade, repeat the smooth passes, and polish the edge clean.
A few details will change your routine. Thin Japanese kitchen knives slice best at a shallow fifteen-degree angle, while pocket knives and heavier Western blades need a wider twenty-degree slope. A blade with visible nicks also demands a coarse grit to grind away damaged metal, whereas a slightly tired edge starts right on a medium stone. Traditional soaking blocks also need ten minutes under water, while ceramic stones only take a splash. Here is how to prepare your block, steady your wrists, and restore a crisp cutting edge safely.
Soak your water stone and build a stable workstation
A water sharpening block, also called a water stone, requires moisture to lubricate the surface and float away tiny metal shavings. If you have a traditional water stone, submerge it completely in a bowl or baking dish filled with tap water. Leave it submerged for 10 to 15 minutes. Watch the water as air bubbles stream out of the porous block. When the bubbles stop rising, the stone has absorbed all the liquid it can hold and is ready for work. Splash-and-go stones or diamond plates do not need a long bath, so verify your stone type before soaking.
Next, secure your workspace. A slipping stone is dangerous and ruins your angle. Set up on a flat, sturdy counter at elbow height so you can look straight down at your blade.
Use this quick setup checklist before your knife touches the abrasive:
- Place a damp dish towel or a silicone stone holder on your counter to prevent slipping.
- Set the wet stone into its rubber sleeve or non-slip base with the medium grit facing upward.
- Keep a spray bottle or cup of clean water nearby to wet the surface when it dries.
- Position a clean hand towel nearby to wipe the blade clean between grit stages.
Match your sharpening angle using simple household coins
Sharpening a knife means creating a clean bevel, which is the angled slope that leads to the sharp edge. The secret to a sharp edge is picking one angle and holding it steady from the first stroke to the last.
Western kitchen knives, everyday carry pocket knives, and hunting knives normally use a sturdy 20-degree utility edge per side. This wider angle supports tough chopping through dense vegetables without chipping. Kitchen blades found in German high-carbon steel premium knife block sets often use this durable 20-degree bevel. In contrast, thin slicing knives like those in high-carbon Japanese chef knife sets typically take a steeper 15-degree edge per side. Japanese blades use harder high-carbon steel that holds a razor-thin point for delicate slicing, though they demand careful handling rather than heavy twisting.
You do not need a special tool to find these angles on your counter. To set a 20-degree angle, place your blade flat on the stone, then lift the spine (the thick top edge of the knife) until you can slide three standard pennies stacked together underneath it. For a 15-degree angle, lower the spine until it clears a stack of two pennies, or roughly the thickness of a cardboard matchbook.
Memorize how that gap looks against your thumb. Rest your thumb against the knife spine and let the side of your thumb lightly brush the stone. Your thumb acts as a physical guide, helping your hand keep that exact distance across every stroke.
Glide the blade with light pressure and steady wrists
Once your angle is set, glide the blade smoothly across the stone without tilting your wrist. Think of your arms as a rigid track and let the motion come from your shoulders and core. Heavy downward force gouges the stone and blunts the edge. You only need light pressure, roughly two to three pounds of force, which feels like resting two large oranges on the blade.
Follow these steps to complete a steady sharpening pass on the medium grit side:
- Grip the handle firmly with your dominant hand. Place your index finger along the spine for control and wrap your other fingers around the handle.
- Place the tips of two fingers of your non-dominant hand flat against the blade face, just above the bevel. These fingers apply gentle downward pressure against the wet stone.
- Start at the heel of the blade, which is the back end closest to the handle. Lay the blade across the far end of the stone at your chosen 15 or 20 degree angle, edge facing toward you.
- Pull the knife smoothly toward your body across the stone. As you pull, sweep the blade sideways so the stone touches every section from heel to tip in one continuous motion.
- Lift your elbow slightly as you reach the curved tip. Lifting your forearm keeps the curved belly flat against the stone instead of rounding the point.
- Complete 8 to 10 smooth strokes across this first side. Splash on more water if the stone feels dry.
Check for a rough wire edge to confirm progress
Never guess whether you have sharpened enough. Steel tells you when it is ready through a physical sign called a burr. A burr is the tiny rough ridge of rolled metal on the opposite edge from the one you are grinding. As your stone shaves away dull steel on the first side, it pushes a microscopic wire edge of excess metal over the crest until it hangs off the reverse side. If you do not create a burr, you have not ground down far enough to form a fresh apex.
Finding this wire ridge requires a safe touch. Never slide your finger along the blade edge, as even a dull knife can cut skin during a sideways slide.
Instead, rest your thumb pad flat against the unsharpened face of the blade. Gently push your thumb upward and outward, moving off the edge into empty air. If the steel has apexed, you will feel a faint, scratchy catch, similar to the rough edge of torn paper or dry sandpaper. You can also lightly drag the top of your fingernail upward across the edge; a burr will catch the nail surface with a distinct snag.
Check the entire length of the blade from heel to tip. If the heel has a burr but the tip feels smooth, sharpen the tip section for a few more passes. Once you feel that continuous burr from end to end, flip the knife over and repeat the exact same number of strokes on the other side until the burr flips back.
Smooth away the wire edge on fine grit and leather
Now that both sides meet at a sharp point, your knife has a fresh edge, but it is covered in loose, jagged metal fuzz. Leaving that rough ridge in place makes the edge snag when slicing soft food, and the edge dulls quickly as the bent metal snaps off. Polishing refines the bevel and removes the burr completely.
Wipe your knife with a clean towel. Flip your water sharpening block over to the fine polishing grit side, usually marked 3000 to 6000. Grit is the surface roughness number: lower numbers grind fast, while higher numbers polish the metal to a clean, bright finish.
Follow these steps to clean and polish your sharp edge:
- Wet the fine grit surface with a splash of clean water. Place the knife down at your matching angle.
- Make 4 to 5 light, sweeping strokes on the first side using trailing passes. A trailing pass means pulling the blade away from the sharp edge with the spine leading, preventing the edge from biting into the softer fine stone.
- Flip the blade and repeat 4 to 5 trailing passes on the reverse side using the same feather-light pressure.
- Alternate single strokes side to side. Stroke the first side once, flip, stroke the second side once, and repeat four or five times. This back-and-forth movement snaps off the microscopic wire edge without creating a new one.
- Finish on a leather strop, which is a leather strip used to wipe away leftover metal fuzz. Lay the blade flat against the leather, tilt it up to your bevel angle, and drag the knife backward with the spine leading. Five to ten gentle strokes per side align the microscopic teeth of the steel for a razor finish.
Avoid common mistakes that dull or scratch the blade
Sharpening on a wet stone is a physical skill that relies on muscle memory. Most failed sharpening sessions come from a few simple mistakes that are easy to correct once you know what to watch for.
Keep this checklist in mind to keep your blades straight and scratch-free:
- Never rinse away the muddy paste on the stone. As you sharpen, loose stone particles blend with water to create slurry. Slurry is the muddy paste of water and loose stone dust that sharpens the knife. This gray paste acts as a liquid abrasive that speeds up sharpening and smooths the bevel. Add a few drops of water when it thickens, but leave the slurry on the stone.
- Lock your wrists to prevent angle wobble. Tilting your hand up and down changes the angle with every pass. This rounds off the cutting bevel, blunts the edge, and scratches the face of the blade. Keep your wrist stiff and move from your shoulders.
- Let the abrasive grit do the work instead of pushing down hard. Heavy hand pressure flexes thin blades, gouges the soft stone, and rolls the fine edge over before it can form.
- Check your stone for dips and hollows. Over time, sharpening in the center wears a swayback hollow into the stone block. A hollow stone cannot sharpen a straight blade evenly. If a straight ruler across the dry stone shows light underneath, rub the block against a flattening stone to make it level again.
- Never soak ceramic or diamond plates. Traditional water stones need a 10 to 15 minute soak, but ceramic stones soften if left underwater, and diamond plates only need a light splash to clear steel shavings.
Choose a dual-grit stone set with a solid base
Sharpening by hand is much easier when your gear eliminates wobble and guesswork. A dual-grit water stone setup provides everything needed to maintain kitchen cutlery and utility blades cleanly.
When choosing a sharpening kit, check for these practical design features:
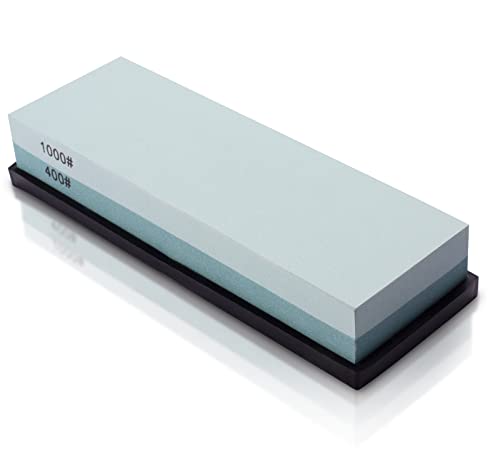
Look for a combination block that pairs medium grit with fine finishing grit. A 1000-grit side works for routine maintenance, while a 6000-grit side polishes the steel to a keen finish. If you regularly repair chipped knives, look for a kit that also includes a coarse 400-grit stone to reshape damaged steel.
Make base stability your top priority. Choose a stone with a snug silicone holder fitted inside a heavy bamboo or wooden platform with rubber feet. The rubber base prevents slipping across a wet counter while you guide the blade. Beginners also benefit from a clip-on angle guide to maintain a steady bevel. Bundled leather strops and flattening stones also help you deburr cleanly and keep your stone surface flat for years of reliable use.

- TAR Score9.4
TAR Score is a ranking system developed by TopAppliancesReviews.com. TAR score has no relationship or impact from any manufacturers or sales agent websites. Learn more
- BrandLeking

- TAR Score9.2
TAR Score is a ranking system developed by TopAppliancesReviews.com. TAR score has no relationship or impact from any manufacturers or sales agent websites. Learn more
- BrandIntelitopia

- TAR Score9.2
TAR Score is a ranking system developed by TopAppliancesReviews.com. TAR score has no relationship or impact from any manufacturers or sales agent websites. Learn more
- Brandryerum

- TAR Score9.2
TAR Score is a ranking system developed by TopAppliancesReviews.com. TAR score has no relationship or impact from any manufacturers or sales agent websites. Learn more
- BrandKEENBEST

- TAR Score9.2
TAR Score is a ranking system developed by TopAppliancesReviews.com. TAR score has no relationship or impact from any manufacturers or sales agent websites. Learn more
- BrandSharp Pebble

- TAR Score9.2
TAR Score is a ranking system developed by TopAppliancesReviews.com. TAR score has no relationship or impact from any manufacturers or sales agent websites. Learn more
- BrandKEENBEST

- TAR Score9.0
TAR Score is a ranking system developed by TopAppliancesReviews.com. TAR score has no relationship or impact from any manufacturers or sales agent websites. Learn more
- BrandHMPLL
- TAR Score9.0
TAR Score is a ranking system developed by TopAppliancesReviews.com. TAR score has no relationship or impact from any manufacturers or sales agent websites. Learn more
- BrandMIDO Professional Abrasive

- TAR Score9.0
TAR Score is a ranking system developed by TopAppliancesReviews.com. TAR score has no relationship or impact from any manufacturers or sales agent websites. Learn more
- BrandWhetstone Cutlery
Last update on 2026-10-03 / Affiliate links / Images, Product Titles, and Product Highlights from Amazon Product Advertising API


Top Rated Best Quality Range Hoods: 2026 Expert Picks

The 12 Best Small Solar Generators 2026

10 Best Quality Semi Automatic Washing Machine of 2026 For Leak-Free Laundry

11 Best Small Washer Machine of 2026 For Everyday Laundry

12 Best Vibration Pads For Washing Machine of 2026 To Stop Walking and Shaking

11 Best Selling Front Load Washing Machine of 2026 For Quiet Odor-Free Laundry

11 Best Washing Machine For King Size Bedding of 2026 To Prevent Cycle Errors

10 Best Small Front Loader Washing Machine of 2026 For Tight Closets






