How to Sharpen a Knife With a Stone Without Ruining the Edge

Sharpening a knife with a stone means gliding the edge at a steady tilt across the wet surface until a tiny rough ridge of metal forms, then smoothing that ridge away on a finer side. The exact angle you hold changes with the type of blade in your hand, shifting between fifteen degrees for thin Japanese knives and twenty degrees for sturdy Western cutlery. Keeping your wrists locked during each pass is what prevents the steel from rounding over.
Your stone also dictates your prep work. Water stones require a thorough soak in water beforehand, while diamond plates or oil stones just need a quick splash of fluid to float away metal shavings. How dull the knife has become matters too, since a nicked edge requires a coarse grit while a tired kitchen slicer can start right on medium grit. The simple steps below walk you through the whole motion so you can sharpen with confidence.
Soak Your Water Stone and Lock Your Workstation Down
A whetstone is simply a water sharpening stone that uses liquid to float away ground steel particles so the surface pores never clog. If you have a ceramic or synthetic water stone, submerge it completely in a bowl of cool tap water. Watch the air bubbles escape from the stone; once they stop after about ten minutes, the stone is fully saturated. Diamond plates and oil stones do not need soaking. Diamond plates just need a light mist of water, while oil stones take a few drops of mineral honing oil.
Setting up a solid workstation prevents dangerous slips and ruined bevels. A stone that wobbles on your counter makes it impossible to hold a steady angle. Work on a flat kitchen counter at waist height. Most stones come with a snug silicone rubber base that wraps around the bottom edge. Set that rubber base into a wooden bamboo holder, or place it directly on your countertop.
Without a rubber holder, place a damp kitchen towel flat underneath the stone and press with your palm to confirm it will not shift. Place the coarse grit facing up. Grit measures the stone roughness level, where a low number like 400 or 1000 cuts away dull metal quickly. Keep a small cup of water nearby to splash on the surface whenever it starts to look dry.
Find Your Angle Using Two Quarters Under the Spine
Holding one steady angle across every stroke is the secret to a sharp knife. Hand wobble is almost always the problem when beginners struggle. If your wrist tilts up or down during a stroke, you round over the bevel (the slanted edge slope that tapers down to the cutting edge). That rounding removes excess steel, thickens the metal behind the apex, and leaves the knife duller than before.
The right angle depends on your knife style. Thin blades made from high-carbon steel (harder metal that stays sharp longer but requires dry wiping and light oiling to prevent rust spots) cut best with a steep 15-degree slicing edge per side. Knives like those in high-carbon Japanese chef knife sets rely on that slim 15-degree profile for delicate vegetable prep. Sturdier Western knives made from stainless steel (rust-resistant, easy-to-clean metal), or an everyday carry pocket knife (an EDC folding knife used for daily utility tasks), need a wider 20-degree utility edge per side to handle heavy chopping without chipping.
You can find your angle quickly with pocket change. Lay your stone flat and place your knife blade flat on its side across the surface. Slide two standard quarters under the spine (the thick top edge of the blade). Rest the spine on the coins while keeping the cutting edge on the stone. That height creates roughly 15 to 18 degrees. Add a third quarter for a 20-degree utility angle.
Lock your wrists firm like a cast once you see that height. Do not flex your wrists or flick your fingers during a stroke. Instead, lock your arms and move your upper body from your shoulders and elbows so the blade stays locked at that exact angle across the stone.
Work the Coarse Grit Until You Feel a Burr
Always start on the coarse grit side of the stone if your blade is dull. Coarse grit, typically rated from 400 to 1000, quickly grinds away worn metal to establish a fresh cutting edge. Grip the handle firmly in your dominant hand with your index finger along the spine. Place the fingertips of your other hand flat against the blade face near the cutting edge to guide downward pressure.
Follow these steps to sharpen the first side:
- Set the heel of the blade across the far end of the stone at your chosen angle, facing the edge toward you.
- Draw the knife smoothly toward your body in an arc, sliding from the heel through the middle belly while applying light, steady downward pressure.
- Move your guide fingertips along the blade to stay directly over the contact point touching the stone.
- When you reach the curved tip, lift your handle slightly so the curved belly stays flush against the stone.
- Lighten your downward pressure as you slide the blade back to the far end so you do not gouge the surface.
As you repeat these passes, a dark gray paste called slurry forms on the stone. Do not rinse this paste away. This blend of water, abrasive grit, and steel shavings acts like liquid sandpaper to speed up sharpening. Add a few drops of water if the stone dries out.
After fifteen strokes per section, check for a burr. A burr is the microscopic wire edge or curved sliver of metal that forms on the opposite side during sharpening. Wipe the blade dry, lay your thumb pad flat against the unsharpened side, and gently brush downward from spine to edge. Never slide along the edge. When you feel a rough, scratchy lip catching along the entire length from heel to tip, you are ready to flip.
Match the Other Side and Polish on Fine Grit
Flip the knife over once you feel that rough burr running along the opposite edge. Sharpening only one side creates an uneven bevel that pulls sideways during slicing, so working both sides equally keeps the edge centered.
Rest the second side against the stone at the exact same angle. Because the cutting edge now faces away from your body, push the knife smoothly away from you across the stone from heel to tip. Match the number of strokes you used on the first side until you feel the wire burr fold back over to the original side. Take four or five alternating, feather-light strokes on each side to center the edge.
Rinse the slurry off the blade and flip your stone to the fine grit side (usually 3000 to 8000 grit) to polish away coarse grind marks and refine the cutting apex.
Follow these steps to polish the blade:
- Splash clean water across the fine grit stone until a light sheen covers the surface.
- Place your knife down at the same angle, keeping your wrists locked.
- Make sweeping, edge-trailing passes across the stone, pulling the blade with almost zero downward pressure so only the weight of the knife presses down.
- Perform eight to ten gentle passes on each side, sweeping from heel to tip to smooth out the microscopic scratches.
- Rinse the blade with warm water and dry it with a soft towel.
If you have a leather strop, make five backward sweeps per side. Stropping wipes away any remaining microscopic wire bits, leaving an edge that glides effortlessly through food.
Check the Finished Edge With Paper Instead of Fingers
Never test knife sharpness by pressing your bare thumb against the cutting edge. A truly sharp knife will slice through skin without resistance, causing a deep cut before you feel pain. Using a plain sheet of printer paper is a safe, reliable way to check your edge quality from heel to tip.
Hold a sheet of printer paper loosely by the top corner so it hangs vertically. Place the heel of the knife against the top edge at a 45-degree angle, then push forward and down in one smooth stroke without sawing.
Use this checklist to read your results:
- Clean, effortless cut: The blade bites instantly and glides straight to the bottom with a quiet whispering sound. Your bevels meet in a clean, sharp edge with no burr left behind.
- Ragged or loud cut: The blade cuts through the sheet but leaves fuzzy, torn edges with a loud ripping sound. A microscopic wire burr is still folded over along the edge, so give the knife a few more light passes on your fine grit stone.
- Sliding or crushing: The blade slides across the paper or crinkles the sheet without cutting in. The edge is still dull, meaning you need to return to the coarse stone to reset your bevel.
- Catching in one spot: The knife slices smoothly for two inches and then catches near the tip. That specific section has a dull spot that needs two or three more light passes on the stone.
You can also check kitchen knives, such as those in German high-carbon steel knife block sets, on a ripe tomato. A sharp knife slices through glossy skin under its own weight without bruising the flesh. Hand-wash and dry your knife immediately, and store it safely in a block or sheath rather than loose in a drawer.
Pick a Dual-Grit Stone With a Solid Rubber Base
You do not need specialized workshop tools or electric grinding machines to keep your knives sharp at home. A single dual-grit water stone provides everything needed to maintain kitchen cutlery and pocket blades. A combination stone bonds two grit levels into one reversible block, giving you two tools in one compact unit.
Look for a combination stone that pairs a coarse grit of 400 or 1000 with a fine finishing grit of 3000, 6000, or 8000. The coarse side quickly removes metal to fix dull or rolled edges, while the fine side polishes the steel for clean slicing. Even if you sharpen knives with partial tang handles (where the blade metal narrows or stops inside the handle), a medium 1000 grit side provides plenty of bite for everyday cutting chores without grinding away too much steel.
Workstation stability is the most critical feature to look for in a sharpening stone set. Always choose a stone that includes a snug silicone rubber base to wrap around the bottom of the block. A sturdy bamboo holder with non-skid rubber feet lifts the stone off the countertop, keeping it rock-solid while giving your knuckles plenty of clearance during strokes.
If you are worried about keeping your hands steady, look for a kit that includes a clip-on angle guide. These small plastic or ceramic guides slide onto the spine of your knife and rest on the stone to hold a steady 15 or 20-degree tilt. They act like training wheels while your arms develop muscle memory. Once your blades are razor sharp, storing them on magnetic knife blocks with stable bases will protect your fresh edges from getting dinged inside crowded kitchen drawers.

- TAR Score9.2
TAR Score is a ranking system developed by TopAppliancesReviews.com. TAR score has no relationship or impact from any manufacturers or sales agent websites. Learn more
- BrandIntelitopia

- TAR Score9.2
TAR Score is a ranking system developed by TopAppliancesReviews.com. TAR score has no relationship or impact from any manufacturers or sales agent websites. Learn more
- BrandKEENBEST

- TAR Score9.2
TAR Score is a ranking system developed by TopAppliancesReviews.com. TAR score has no relationship or impact from any manufacturers or sales agent websites. Learn more
- BrandSharp Pebble
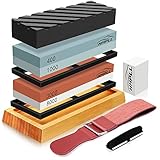
- TAR Score9.0
TAR Score is a ranking system developed by TopAppliancesReviews.com. TAR score has no relationship or impact from any manufacturers or sales agent websites. Learn more
- BrandHMPLL

- TAR Score9.0
TAR Score is a ranking system developed by TopAppliancesReviews.com. TAR score has no relationship or impact from any manufacturers or sales agent websites. Learn more
- BrandSUWAJUME
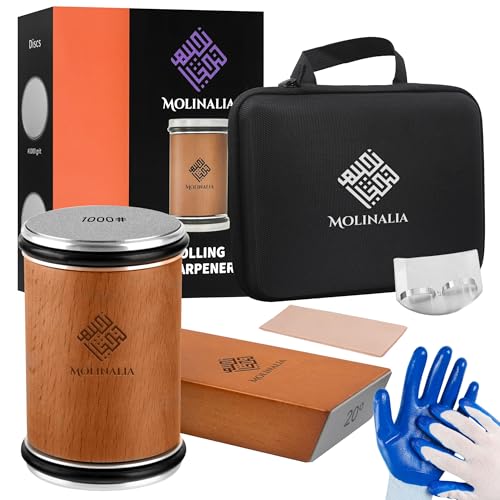
- TAR Score8.8
TAR Score is a ranking system developed by TopAppliancesReviews.com. TAR score has no relationship or impact from any manufacturers or sales agent websites. Learn more
- BrandMOLINALIA

- TAR Score8.8
TAR Score is a ranking system developed by TopAppliancesReviews.com. TAR score has no relationship or impact from any manufacturers or sales agent websites. Learn more
- BrandSaker

- TAR Score8.8
TAR Score is a ranking system developed by TopAppliancesReviews.com. TAR score has no relationship or impact from any manufacturers or sales agent websites. Learn more
- BrandParkway Home

- TAR Score8.0
TAR Score is a ranking system developed by TopAppliancesReviews.com. TAR score has no relationship or impact from any manufacturers or sales agent websites. Learn more
- BrandSHARPAL
Last update on 2026-10-01 / Affiliate links / Images, Product Titles, and Product Highlights from Amazon Product Advertising API


Top Rated Best Quality Range Hoods: 2026 Expert Picks
The 12 Best Small Solar Generators 2026

10 Best Quality Semi Automatic Washing Machine of 2026 For Leak-Free Laundry

11 Best Small Washer Machine of 2026 For Everyday Laundry

12 Best Vibration Pads For Washing Machine of 2026 To Stop Walking and Shaking

11 Best Selling Front Load Washing Machine of 2026 For Quiet Odor-Free Laundry

11 Best Washing Machine For King Size Bedding of 2026 To Prevent Cycle Errors

10 Best Small Front Loader Washing Machine of 2026 For Tight Closets