How to Sharpen a Knife With a Stone for Beginners

A ripe tomato squishes flat on the cutting board instead of slicing clean, spraying juice across the counter as the dull blade slides off the skin. Fixing it requires keeping a steady fifteen-to-twenty-degree angle against a wet stone until you feel a tiny rough ridge of metal along the opposite side. Flipping the blade to match that stroke and finishing on a fine grit creates a crisp cutting edge without scratching your knife face.
A couple of factors change your exact approach. Thick Western knives need a slightly wider angle than thin Japanese blades. Waterstones call for plain tap water, while oil stones need light oil to keep loose steel dust from packing into the stone. Severely dull blades also start on a coarse grit, while mild touch-ups start on a medium surface. Here is how to position your hands and sharpen with confidence from your very first stroke.
Setting Up Your Stone and Work Area
Before your knife touches any abrasive surface, you need a safe and stable station. Sharpening uses firm downward pressure, so if your stone slides across the counter while you work, your angle will slip and you can easily scratch the blade or cut your fingers. Setting up takes only a few minutes, but it makes the difference between an even edge and a damaged blade.
Most beginners use a whetstone (a sharpening stone used with water or oil). The vast majority of modern household stones are waterstones. Some waterstones are splash-and-go models that only need a splash of tap water right before you begin. Most traditional waterstones, however, need a full soak. Submerge your stone in a bowl of room-temperature water for about 10 to 15 minutes. Watch the surface closely. You will see steady streams of tiny air bubbles rising to the top. Once the bubbles stop floating up, the stone is fully saturated and ready to use.
Follow these steps to prepare your station properly:
- Soak or splash your stone: Place your waterstone in a basin of clean water until it stops bubbling, or splash the surface thoroughly if you have a splash-and-go stone. Never use cooking oil on a waterstone, because oil permanently clogs the pores.
- Anchor your base: Set a damp dish towel, a silicone mat, or a non-slip rubber stone holder on a flat, sturdy kitchen counter. Place your stone on top of the base and nudge it with your hand to confirm it will not slide.
- Orient the coarse grit facing up: Position the stone so the rougher side faces upward. Sharpening stones use grit (a number that measures the coarseness of the stone surface). A lower grit number, like 400 or 1000, feels rough and removes metal quickly to reshape a dull edge.
- Place water within reach: Keep a small bowl of clean water or a spray bottle right beside your board. As you stroke the blade across the surface, water evaporates or washes away, so you will need to add a few drops whenever the stone feels sticky or dry.
Working at the right counter height also keeps you steady. Stand comfortably with your shoulders relaxed and your feet shoulder-width apart. When your station is solid and your stone is slick with water, you can focus entirely on keeping your hands steady.
Finding and Locking Your Cutting Angle
Holding a consistent angle is the single most important skill in sharpening. Every knife edge has a bevel (the slanted slope of polished steel that tapers down to form the sharp cutting line). When you hold the knife at that exact slope against the stone, you grind away dull metal evenly. If your wrist wobbles up and down while you stroke, you round off the cutting edge and leave the knife duller than when you started.
Different knives require different edge slopes. Delicate kitchen blades like high-carbon Japanese chef knives typically use a steep 15-degree slicing edge per side. This narrow slope cuts through vegetables effortlessly, but it needs careful handling. Sturdier everyday blades like German high-carbon steel kitchen knives, hunting tools, and pocket knives usually take a 20-degree utility edge per side. That wider bevel supports the cutting line and resists chipping when chopping through dense squash or hard root vegetables.
You can find this angle without any complex measuring tools. Lay the knife flat on the stone with the cutting edge pointing away from you. Lift the spine (the thick top back of the blade) slowly off the stone. For a 20-degree angle, you need a gap under the spine roughly equal to the thickness of two stacked quarters or a standard matchbook. For a 15-degree angle, the gap should match the thickness of a single quarter or two pennies. Once you see that small wedge of space beneath the spine, freeze your wrist in that exact position.
To lock the angle, do not rely on your wrist muscles alone. Stiffen your wrist, lock your elbow at your side, and move the knife by shifting your upper body and shoulders. Think of your arm and the knife as one solid piece of machinery. If you want an easy visual check, take a black permanent marker and color the entire cutting edge bevel on both sides. Take two light strokes across the stone. Look at the edge under good light. If the stone wiped away the black ink evenly from the shoulder down to the cutting line, your angle is spot-on. If ink remains on the very tip of the edge, you are holding the spine too low. If ink remains near the top of the bevel, you are holding the spine too high.
Sharpening the Blade, Flipping Sides, and Polishing the Edge
Once your stone is wet and your angle is set, you can begin removing dull metal. Sharpening works by grinding away steel on one side until you create a burr (the microscopic wire edge or curved sliver of metal that forms on the opposite side during sharpening). Feeling this tiny ridge tells you that you ground all the way to the apex of the edge. Until you raise that ridge along the entire blade, the knife is not sharp.
Take your time and follow these numbered steps to work through both sides of the blade:
- Position your hands: Grip the knife handle firmly with your dominant hand, placing your index finger along the spine for stability. Place two or three fingertips of your other hand flat on the face of the blade, just behind the cutting edge. Keep your fingers well clear of the sharp line itself.
- Stroke the first section: Start at the heel of the blade (the rear section closest to the handle). Apply about three to five pounds of downward pressure with your fingertips, roughly the weight of pressing down on a bathroom scale to see the needle move just a bit. Push the blade forward across the stone in a smooth diagonal sweep, maintaining your locked angle.
- Work section by section toward the tip: Most chef knives are longer than the stone is wide. Divide the blade into three imaginary zones: the heel, the middle belly, and the tip. Make 10 to 15 smooth, controlled forward strokes on the heel, slide your guide fingers to the middle belly for 10 to 15 strokes, and finish on the curved tip. Lift the knife handle slightly when you reach the curve of the tip to keep the bevel flat against the stone surface.
- Feel for the burr: Wipe the blade dry with a clean cloth. Turn the knife over so the unsharpened side faces up. Gently slide your dry thumb pad from the spine downward off the edge. Do not run your thumb along the length of the blade, which can slice your skin. If you did enough strokes, you will feel a faint, rough wire catch your skin like fine sandpaper or a coarse stubble. Check that this rough ridge runs from the heel all the way to the tip.
- Flip and repeat on the second side: Switch the knife in your hands or adjust your grip so the second bevel faces the stone at the exact same angle. Repeat the exact same number of strokes on each section. Check the opposite side with your thumb pad until the rough ridge flips back over.
- Polish the bevel on fine grit: Flip your stone over to the finer side (often 3000 to 6000 grit) or switch to a fine polishing block. Make lighter, full-length sweeping strokes from heel to tip along the stone, alternating sides after every single stroke. These gentle passes grind away the rough wire burr and smooth out the coarse scratch pattern, leaving a clean, mirror-like cutting edge.
After polishing, wash the blade with warm water and dish soap, dry it immediately with a towel, and check your work. Never run your finger along the sharp edge to see if it worked. Instead, use this short verification checklist to confirm your edge is sharp and safe:
- Paper slicing check: Hold a standard sheet of scrap printer paper loosely in one hand. Place the knife heel on the top edge of the paper and slice downward with light pressure. A sharp edge glides through the paper cleanly without catching or tearing.
- Light reflection check: Hold the knife directly under a bright kitchen light with the sharp edge pointing up at the ceiling. Look straight down along the cutting line. A dull spot shines back at you like a bright silver mirror, while a truly sharp edge absorbs the light and looks completely black.
- Tomato skin check: Place the blade on the slick skin of a ripe tomato or bell pepper. Draw the knife backward without pushing down. A sharp edge cuts through the tough skin under its own weight without bruising the soft flesh underneath.
- Slurry inspection: Check your stone during your session to ensure a muddy, grey paste forms on top. This slurry is a mixture of water and worn stone particles that helps refine the steel; rinse it off only when your sharpening session is completely finished.
What to Look for in a Beginner Sharpening Setup
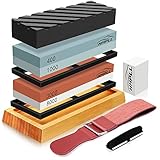
Starting with the right gear keeps the sharpening process simple and eliminates most early frustrations. When shopping for your first setup, look for a dual-grit combination waterstone. A combination stone bonds two different grit levels into one single block, giving you an aggressive coarse side for repairing dull edges and a smooth, fine side for polishing without buying multiple loose stones.
Look for a stone that includes a sturdy non-slip base. High-friction silicone rubber sleeves and heavy bamboo blocks with rubberized feet stop the stone from shifting on slick kitchen counters while you apply downward pressure. Stone size matters as well; choose a stone that measures at least seven to eight inches long and over two inches wide. That generous surface area gives you plenty of room to sweep an eight-inch chef knife across the grit in a single fluid stroke.
Many starter sets also include helpful extras like a clip-on angle guide and a flattening stone. An angle guide snaps directly onto the spine of your knife, keeping the blade elevated at a fixed bevel angle while you glide it across the stone. This accessory takes the guesswork out of holding your hands steady while your muscles learn the movement. Finally, a coarse flattening stone (also called a conditioning stone) is essential for long-term care. Sharpening stones naturally wear down faster in the middle than at the edges. Rubbing a flattening stone across the surface every few sessions keeps the stone completely flat, ensuring your knives always receive a straight, true edge.
- TAR Score9.2
TAR Score is a ranking system developed by TopAppliancesReviews.com. TAR score has no relationship or impact from any manufacturers or sales agent websites. Learn more
- BrandTaunton Press

- TAR Score9.2
TAR Score is a ranking system developed by TopAppliancesReviews.com. TAR score has no relationship or impact from any manufacturers or sales agent websites. Learn more
- BrandFox Chapel Publishing

- TAR Score9.2
TAR Score is a ranking system developed by TopAppliancesReviews.com. TAR score has no relationship or impact from any manufacturers or sales agent websites. Learn more
- BrandN/A

- TAR Score9.0
TAR Score is a ranking system developed by TopAppliancesReviews.com. TAR score has no relationship or impact from any manufacturers or sales agent websites. Learn more
- BrandIndependently Published
- TAR Score9.0
TAR Score is a ranking system developed by TopAppliancesReviews.com. TAR score has no relationship or impact from any manufacturers or sales agent websites. Learn more
- BrandHMPLL
- TAR Score8.8
TAR Score is a ranking system developed by TopAppliancesReviews.com. TAR score has no relationship or impact from any manufacturers or sales agent websites. Learn more
- BrandN/A

- TAR Score8.8
TAR Score is a ranking system developed by TopAppliancesReviews.com. TAR score has no relationship or impact from any manufacturers or sales agent websites. Learn more
- BrandSharpening Lives, LLC

- TAR Score8.8
TAR Score is a ranking system developed by TopAppliancesReviews.com. TAR score has no relationship or impact from any manufacturers or sales agent websites. Learn more
- BrandN/A

- TAR Score8.4
TAR Score is a ranking system developed by TopAppliancesReviews.com. TAR score has no relationship or impact from any manufacturers or sales agent websites. Learn more
- BrandBrand: Schiffer Publishing

- TAR Score7.6
TAR Score is a ranking system developed by TopAppliancesReviews.com. TAR score has no relationship or impact from any manufacturers or sales agent websites. Learn more
- BrandAudible
Last update on 2026-10-02 / Affiliate links / Images, Product Titles, and Product Highlights from Amazon Product Advertising API
FAQs
What do the different grit numbers on a sharpening stone mean?
The grit number indicates how coarse or fine the abrasive particles on the stone are. Low numbers under 800 are coarse and remove steel quickly to repair chips or reshape very dull blades. Medium numbers between 1000 and 2000 are everyday working grits that sharpen standard kitchen edges, while fine grits of 3000 and higher polish the steel to a razor-smooth finish.
Can you use cooking oil or dish soap on a waterstone?
You should never use cooking oils on a waterstone because the oil penetrates deep into the pores and turns rancid. Oil also clogs the microscopic abrasive grains permanently, ruining the stone's ability to sharpen steel. Stick to clean tap water, which floats away loose metal shavings easily and washes out of the stone without leaving any residue.
How often should you sharpen a knife on a stone?
Most home cooks only need to sharpen their primary kitchen knives on a stone every three to six months. How often you sharpen depends on how frequently you prep meals and whether you use forgiving wooden cutting boards or harsh glass surfaces. Between stone sessions, you can keep the edge straight and true by using a smooth ceramic rod or leather strop every week or two.


Top Rated Best Quality Range Hoods: 2026 Expert Picks
The 12 Best Small Solar Generators 2026

10 Best Quality Semi Automatic Washing Machine of 2026 For Leak-Free Laundry

11 Best Small Washer Machine of 2026 For Everyday Laundry

12 Best Vibration Pads For Washing Machine of 2026 To Stop Walking and Shaking

11 Best Selling Front Load Washing Machine of 2026 For Quiet Odor-Free Laundry

11 Best Washing Machine For King Size Bedding of 2026 To Prevent Cycle Errors

10 Best Small Front Loader Washing Machine of 2026 For Tight Closets