
How to Sharpen a Knife With a Sharpening Stone

Keep a steady angle across the stone. Lubricate the surface, tilt the blade around twenty degrees, and smoothly sweep the edge from heel to tip until a faint rough ridge forms on the other side. That tiny raised lip, called a burr, proves the steel has met at the very edge and is ready to flip.
A few details change the routine. Water stones need a ten-minute soak, while oil stones take a few drops of mineral oil to carry away metal dust. Everyday kitchen knives sharpen best around twenty degrees, but thinner Japanese blades need a narrower fifteen-degree slant. Blunt knives also require a rough, coarse grit first to shape the steel before moving to a smooth polishing side. Holding that angle steady keeps you in full control as you work through the steps below.
Stone Preparation: Setting Up Your Base and Lubricant
Sharpening begins before your blade touches grit. Grit refers to the coarseness rating of the stone surface, like sandpaper ratings. Using the wrong moisture or letting the stone slide on the counter can ruin an edge or cause a slip.
First, verify your stone material. Water stones, common for kitchen cutlery, absorb water to form an abrasive slurry. Submerge a water stone in room-temperature water for ten to fifteen minutes until air bubbles stop rising. Splash extra water on top while working if the surface begins to look dry.
Oil stones, such as natural Arkansas or synthetic India stones, use light mineral oil instead of water. Never soak an oil stone in water. Apply a few drops of mineral oil across the surface to float away tiny metal shavings. Diamond stones, featuring industrial diamond dust bonded to steel plates, can run dry or with a splash of water to keep fine steel dust from floating into the air.
Once lubricated, anchor the stone securely. A sliding stone ruins your sharpening angle and risks finger cuts. Place the stone into a silicone holder or a wooden base with rubber feet. If your stone has no base, lay a damp kitchen towel directly underneath it. Push sideways against the stone with your palm to verify it cannot slip before you start.
Finding and Holding the Right Sharpening Angle
The most common reason blades stay dull after sharpening is an inconsistent hand angle. Knives cut because two angled surfaces meet at a single sharp point. This angled surface is the bevel (the angled surface that slopes down to make the sharp edge). If you wobble your wrist, you round off the bevel instead of making it crisp.
Most kitchen knives fall into two angle categories. Thicker everyday cutlery, such as blades found in German high-carbon steel premium knife block sets, usually takes a sturdy 20-degree utility edge per side. This angle supports heavy chopping without chipping. Thin blades, like those in high-carbon Japanese chef knife sets, perform best with a steep 15-degree slicing edge per side for delicate cutting.
Use common household items as physical guides. Stack two standard quarters flat on the stone, then rest the knife spine (the thick top edge) on the coins with the edge touching the stone. That creates roughly 20 degrees. For 15 degrees, rest the spine on a single quarter or a folded cardboard matchbook. Memorize that gap, lock your wrist, and move your arm from your shoulder and elbow.
The Sharpening Stroke: Step-by-Step Blade Work
Once your stone is wet and your angle is set, use calm, steady motions. Rushing causes hands to wobble and round the cutting edge. Follow this stroke sequence to reshape dull metal evenly:
- Position the stone lengthwise facing you squarely. This gives your arms a long, straight path to sweep without twisting your body.
- Grip the handle firmly and pinch the spine with your thumb and forefinger. Pinching the spine locks your hand position and prevents the blade from rolling.
- Rest two fingertips from your other hand on the blade face near the edge. This guide hand applies light downward pressure directly where steel meets stone.
- Angle the blade diagonally across the stone at roughly 45 degrees. A diagonal position keeps more of the curved blade belly in contact with the flat stone.
- Sweep the blade forward from heel to tip in one smooth arc. Pushing into the stone cuts metal away cleanly instead of dragging loose grit over the edge.
- Lift your elbow and handle slightly as the curved belly and tip touch the stone. Raising your grip slightly maintains an identical bevel angle along the upward curve near the tip.
- Release downward pressure as you pull the knife back to start. Dragging down hard on the return stroke can roll the fresh edge backward.
- Repeat this forward sweep for ten to fifteen passes on the first side. Counting passes keeps metal removal equal so you do not thin out one spot.
The Burr Check: Knowing Exactly When to Flip the Knife
Never guess when it is time to turn the knife over. You must verify that the stone has ground away old steel all the way to the edge. You confirm this by feeling for a burr (the tiny rough ridge of metal bent over the edge). As the stone removes steel on one side, a paper-thin foil of metal rolls over toward the opposite side.
If you do not create a burr, your knife will stay dull. Check for the burr using these safe steps:
- Wipe the blade clean: Clear away slurry with a damp rag so loose grit does not feel like raised metal.
- Keep fingers clear of the cutting line: Rest your thumb pad flat on the unsharpened side of the blade, well above the bevel.
- Slide your thumb outward: Slide your thumb straight down and off the edge into empty air. Never slide along the edge, as that can slice your skin.
- Feel for rough catching: If the metal has reached the center apex, you will feel a scratchy, wire-like lip catching against your skin.
- Inspect uneven zones: If you feel a burr near the heel but the tip feels smooth, make five more focused sweeps on the tip until the burr is continuous.
Once you confirm an unbroken burr along the entire blade, flip the knife. Sharpen the second side with the same angle and stroke count until that burr bends back toward the initial side.
Polishing and Deburring for a Clean Finish
Setting the edge bevel on a medium-grit stone creates a working edge, but that fragile burr is still attached. If you cut food now, that bent wire snaps off and leaves a ragged edge. The final stage removes the burr and polishes the steel into a keen apex.
Flip your dual-sided stone to the fine polishing grit, typically 3000 to 6000 grit. Rinse the stone with fresh water so coarse particles do not scratch the smooth surface. High-grit stones feel silky and remove microscopic amounts of steel, burnishing away rough scratches left by coarser stones.
Perform light, alternating strokes on the polishing surface. Sweep the first side from heel to tip with only the natural weight of the blade, then immediately flip the knife and sweep the opposite side. Do five alternating passes, then four, then three, gradually lightening your touch. This alternating motion snaps off the bent wire edge cleanly.
Finish the blade on a strop (a leather strip that wipes away the last microscopic metal burrs). Lay the leather flat on your table. Unlike stone sharpening where you push the edge forward, stropping uses an edge-trailing motion. Lay the bevel against the leather at your sharpening angle, then pull the knife backward toward the spine. Drag each side across the leather five to ten times to leave the bevel mirror-bright.
The Paper Slice Check: Verifying Sharpness Safely
Never run your fingers directly across a knife edge to check sharpness. A microscopic wire edge can feel sharp even if the bevel underneath is blunt. Verify sharpness by checking how the blade cuts paper fibers instead.
Take a plain sheet of standard printer paper or a page from a magazine. Hold the paper upright by one top corner so the sheet hangs freely.
Rest the heel of the knife against the top edge of the paper at a downward 45-degree angle. Without sawing or hacking, draw the blade smoothly downward and forward across the paper using light, steady arm pressure.
Watch how the blade cuts through the sheet:
- A truly sharp knife: Slices through hanging paper cleanly with a quiet whispering hiss, leaving crisp cut lines with no frayed fibers or tears.
- A dull edge: Crinkles, crushes, or folds the top of the paper instead of biting into the edge.
- A burr or flat spot: Slices cleanly for two inches, catches or rips suddenly near the belly, and then continues cutting toward the tip.
If the blade snags at a specific spot, check that area under a bright light. Look straight down at the cutting edge. If you see tiny white glints reflecting light, the edge is still flat or has a rolled burr. Return to the fine stone for three gentle passes on that spot, strop again, and repeat the paper cut check.
Choosing the Right Sharpening Stone Setup
Getting reliable results at home is much easier when your sharpening equipment eliminates common beginner mistakes like slipping stones and fluctuating angles. A practical home setup centers around a dual-grit combination water stone. Having two grit ratings on a single stone allows you to reset a dull bevel on the coarse side, then flip the block over to hone and polish on the fine side without storing multiple stones.
When looking at sharpening stone sets, check for a sturdy mounting system. A soft silicone stone sleeve combined with a solid wooden bench base keeps the stone stationary on slick countertops. Stone stability protects your hands and makes maintaining a steady angle much simpler.
Look for sets that include auxiliary tools that simplify edge care. A clip-on angle guide snaps directly onto the spine of kitchen blades, physically keeping your knife at a consistent 15 to 20-degree bevel until your hands develop muscle memory. A small, coarse flattening stone is another helpful addition, as water stones slowly hollow out in the center after repeated use. Lastly, verify whether the kit includes a leather strop to remove lingering wire burrs, which ensures your finished blades slice cleanly right off the bench.

- TAR Score9.4
TAR Score is a ranking system developed by TopAppliancesReviews.com. TAR score has no relationship or impact from any manufacturers or sales agent websites. Learn more
- BrandLeking

- TAR Score9.2
TAR Score is a ranking system developed by TopAppliancesReviews.com. TAR score has no relationship or impact from any manufacturers or sales agent websites. Learn more
- BrandIntelitopia
- TAR Score9.2
TAR Score is a ranking system developed by TopAppliancesReviews.com. TAR score has no relationship or impact from any manufacturers or sales agent websites. Learn more
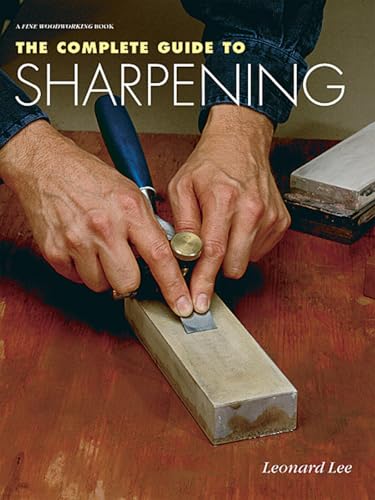
- BrandTaunton Press

- TAR Score9.2
TAR Score is a ranking system developed by TopAppliancesReviews.com. TAR score has no relationship or impact from any manufacturers or sales agent websites. Learn more
- BrandKEENBEST

- TAR Score9.2
TAR Score is a ranking system developed by TopAppliancesReviews.com. TAR score has no relationship or impact from any manufacturers or sales agent websites. Learn more
- BrandSharp Pebble

- TAR Score9.0
TAR Score is a ranking system developed by TopAppliancesReviews.com. TAR score has no relationship or impact from any manufacturers or sales agent websites. Learn more
- BrandHMPLL

- TAR Score7.6
TAR Score is a ranking system developed by TopAppliancesReviews.com. TAR score has no relationship or impact from any manufacturers or sales agent websites. Learn more
- BrandAudible

- TAR Score7.0
TAR Score is a ranking system developed by TopAppliancesReviews.com. TAR score has no relationship or impact from any manufacturers or sales agent websites. Learn more
- BrandMajosta
Last update on 2026-10-02 / Affiliate links / Images, Product Titles, and Product Highlights from Amazon Product Advertising API
FAQs
Does my sharpening stone need water or oil?
Water stones require water, while natural or synthetic oil stones require mineral oil. Check the manufacturer label on your stone before applying any liquid. Never put oil on a dedicated water stone, as oil fills the pores permanently and stops water from penetrating the material.
How do I keep the exact same angle on every stroke?
Lock your wrist and keep your guide fingers firmly pressed against the blade face. Rather than pivoting your hand, move your entire upper body from the shoulder and elbow while keeping the gap between the knife spine and stone constant. Beginners can also clip a plastic angle guide onto the blade spine to maintain the correct tilt physically.
How many strokes do I need on each side of the blade?
There is no fixed stroke count because metal hardness and dullness vary. Work in sets of ten to fifteen passes, then stop and feel the opposite side for a rough burr. Once you feel that continuous burr from heel to tip, flip the knife and match the same number of passes on the other side.
How often should I sharpen my kitchen knives on a stone?
Most home cooks only need to sharpen on a stone two to three times a year for routinely used chef knives. Between stone sessions, maintain your edge with a honing steel or leather strop to realign metal without grinding away steel. When your knife begins sliding off tomato skins or crushing soft herbs, it is time for the stone again.


Top Rated Best Quality Range Hoods: 2026 Expert Picks

The 12 Best Small Solar Generators 2026

10 Best Quality Semi Automatic Washing Machine of 2026 For Leak-Free Laundry

11 Best Small Washer Machine of 2026 For Everyday Laundry

12 Best Vibration Pads For Washing Machine of 2026 To Stop Walking and Shaking

11 Best Selling Front Load Washing Machine of 2026 For Quiet Odor-Free Laundry

11 Best Washing Machine For King Size Bedding of 2026 To Prevent Cycle Errors

10 Best Small Front Loader Washing Machine of 2026 For Tight Closets






