
How to Sharpen a Knife with Another Knife Safely

Turn the second knife upside down so the blunt, thick spine faces up. Sliding a dull blade along that flat surface at a slight angle will realign a rolled edge right away. Never rub sharp edge against sharp edge. Scraping cutting edges together chips the steel instantly and ruins both tools, but using the smooth back of a blade acts like a honing rod when dinner cannot wait.
Success depends on the steel you have on hand. The guide knife needs a smooth, square back that is at least as hard as the dull blade. This quick fix also only straightens bent metal, so it cannot repair deep notches or reshape a blade that has worn completely round. With the right grip and angle, finishing meal prep safely takes just a minute.
Why the Blunt Spine Works and Edge-on-Edge Scraping Fails
Rubbing two knife edges together is a movie trick that ruins good cutlery. When actors clash two cutting edges in a kitchen scene, they produce a dramatic scraping noise. In real life, that action instantly crushes the delicate apex of both blades. Instead of fixing a dull edge, blade-to-blade friction causes microscopic chips, folds the apex flat, and leaves you with two damaged tools instead of one.
To fix a blade in an emergency, you do not use the cutting edge of the second tool. You use the spine, which is the thick, blunt back of the blade opposite the sharp side. Most everyday kitchen knives lose their cutting power not because the steel has vanished, but because the very tip of the edge has curled sideways under cutting pressure. Straightening this bent edge is called honing, which means realigning a rolled edge without shaving off metal. A standard sharpening session, by comparison, grinds away steel to create a fresh bevel, which is the slanted side that forms the sharp edge.
A smooth, unsharpened knife spine acts just like a steel honing rod. Steel has enough density and surface friction to nudge that curled metal back into a straight line. When you draw the dull bevel across a flat spine, you press the microscopic teeth back into center alignment. Within a dozen light passes, a knife that struggled to cut an onion skin can slice cleanly again. You have not removed metal or thinned the blade, but you have restored the straight cutting line.
This technique depends entirely on two mechanical factors: spine shape and metal hardness. The guide knife must feature a flat, square 90-degree spine rather than a rounded or polished back. If the spine has crowned or rounded corners, the dull blade simply rolls across the curved surface without catching enough friction to realign the steel. The steel of the guide knife also needs to be as hard or harder than the knife you want to fix. Many Western kitchen knives, such as those found in sturdy German high-carbon steel knife block sets, feature square, durable backs that make outstanding improvised honing tools. If your guide knife is made of softer steel, your dull knife will bite directly into the spine and gouge permanent scratches into the metal.
You also need to identify the steel of the blade you are working on. Standard stainless steel, which is rust-resistant, easy-to-clean metal, is relatively forgiving and bends back into shape easily under light contact. Harder alloys, like those used in delicate high-carbon Japanese chef knife sets, are much more brittle. Using an improvised knife spine on extra-hard Japanese steel can snap tiny chips out of the edge if you apply even slightly uneven pressure. Keep this method for tough kitchen blades, camp knives, and standard pocket cutlery.
Step-by-Step Honing Technique: Grip, Angle, and Stroke
Handling two bare blades at the same time carries a real risk of slipping. You should never hold both knives freehand in midair like scissors. A sudden jerk or a greasy handle can cause one blade to jump your hand, leading to deep cuts. The safest setup uses your cutting board or camp table as a solid anchor point, keeping the guide blade completely stationary while your dominant hand controls the blade you want to realign.
- Anchor the guide knife on a flat surface. Place a thick cutting board or a folded towel on your counter to prevent slipping. Take the guide knife by the handle, turn it upside down so the blunt spine faces directly upward, and press the tip or flat side firmly into the cutting board. Keep the cutting edge facing away from your knuckles. If the knife has a full tang, meaning one solid piece of blade steel extending all the way through the handle, it will feel very rigid against the board. Knives with a partial tang, where the blade metal narrows or stops inside the handle, need a gentler grip so you do not stress the handle joint.
- Set the bevel angle against the spine. Place the heel of the dull blade against the flat spine of the anchored knife, near the handle. For standard utility, pocket, and chef knives, aim for a sturdy 20-degree utility edge. To find 20 degrees easily, hold the blade perpendicular to the spine at 90 degrees, tilt it halfway down to 45 degrees, and then tilt it down by half once more. The slanted bevel should rest flat against the corner of the spine without lifting the spine off the table.
- Draw the blade backward with light pressure. Pull the dull knife toward you in a smooth, sweeping motion, sliding from the heel all the way to the tip. Do not push the sharp edge into the spine as if trying to whittle wood. Instead, sweep the edge along the steel as if you are trying to wipe off a thin film of grease. The weight of the blade itself provides nearly all the force you need. Pressing down hard will roll the metal over the other way or dent the blade edge.
- Alternate sides with balanced strokes. Pick up the dull blade, turn it over, and place the opposite side against the spine at the identical 20-degree angle. Pull the blade from heel to tip with the same feather-light touch. Repeat this process for 4 to 6 strokes per side, alternating after every single stroke. Alternating sides keeps the apex centered rather than pushing a burr, which is a tiny bent lip of metal along the edge, permanently over to one side.
- Wipe both blades clean. Even though spine honing does not shave off large amounts of steel, microscopic metal dust and loose burr fragments can cling to both tools. Wipe down both blades thoroughly with a damp towel before using either knife on food.
Once you finish those passes, check whether the edge has straightened out before you start prepping food. Never run your bare finger directly down the length of the edge to check sharpness. Use this quick checklist to confirm the edge is ready for work:
- Look at the edge under overhead light: Hold the blade edge-up directly under a kitchen light. A dull, rolled edge reflects bright specks of light where the steel is bent flat. A properly realigned edge looks like a faint, dark line with zero bright reflections.
- Perform the thumbnail scratch check: Rest the edge very gently on your thumbnail at a shallow angle with zero downward pressure. If the blade slips sideways without catching, the edge is still rounded. If it bites lightly into the nail surface without sliding, the micro-teeth are aligned.
- Slice a sheet of scrap paper: Hold a piece of notebook or printer paper by the corner and slice downward from heel to tip. If the blade cuts through smoothly without catching or tearing the paper fibers, your emergency honing worked.
Limits of the Trick and Household Emergency Backups
Using a knife spine is an emergency field fix, not a permanent sharpening method. It works only when your blade is dull due to edge rollover. Over months of regular cooking or field dressing, cutting boards and tough ingredients slowly grind away the steel apex until it becomes completely rounded like a bowling pin. When the edge is round, or when hard bones have knocked small chips out of the steel, there is no bent apex left to straighten. Rubbing a chipped or blunt blade against a knife spine does nothing because no metal is being removed to form a new edge.
If you perform six clean strokes per side on a flat spine and the knife still crushes a tomato instead of slicing it, stop immediately. Continuing to scrape the steel will simply burnish and work-harden the blunt metal, making it harder to sharpen correctly later. At this stage, you need an abrasive surface that actually grinds away damaged steel to set a fresh cutting bevel.
When you are stuck in a vacation rental, a deer camp, or a kitchen without real sharpening equipment, several common household items provide the abrasive friction needed to grind metal in a pinch:
The unglazed ceramic ring on the bottom of a coffee mug or dinner plate is the best improvised sharpener available. Flip an ordinary ceramic mug upside down on a damp dish towel. The rough, unpainted circular ring on the base is made of vitrified ceramic, which is significantly harder than cutlery steel. Hold your blade at a steady 20-degree angle and draw the edge across that rough ring from heel to tip, using light pressure. The white ceramic will turn dark gray as it shaves off tiny ribbons of steel, grinding a genuine new edge. Clean the edge with two light spine strokes afterward to straighten any leftover burr.
The top edge of an automobile side window also works remarkably well when camping or hunting. Roll down your car window halfway to expose the smooth, rounded glass top. The frosted upper edge of safety glass contains microscopic abrasive texture. Drawing your blade along that glass edge at a consistent angle will gently polish and align a working edge on field dressing and boning knives without harming the window.
Unpolished river stones and smooth slate found near streams offer another outdoor backup. Look for a dense, completely flat stone that feels silky rather than gritty. Splash water across the surface to float away loose grit, then stroke the blade across the stone following the factory angle. While these tricks save a dinner prep or a field dressing task, they lack the angle control and fine abrasive grits needed to keep fine cutlery in top condition.
Choosing a Dedicated Sharpener for Lasting Knife Care
Improvising with knife backs and coffee mugs solves an immediate problem, but relying on them long term will eventually round your bevels and ruin blade profiles. Keeping your knives genuinely sharp requires two separate maintenance tools: a daily or weekly alignment tool, and a periodic metal-removing abrasive sharpener.
For weekly upkeep, a standalone honing rod is far safer and more effective than scraping two kitchen knives together. Traditional carbon steel honing rods feature fine longitudinal ridges that realign bent edges with minimal friction, while smooth ceramic rods provide gentle polishing during the stroke. When looking at honing steels, make sure the rod length is at least two inches longer than your longest kitchen blade. A sturdy handle with an integrated hand guard is also critical, ensuring that an errant stroke never slides down the rod into your fingers.
When the blade stops responding to a honing rod, you need a sharpening device that restores the primary bevel. Handheld pull-through sharpeners are the most practical solution for cooks who want shaving-sharp edges without mastering the freehand technique required by flat water stones. A quality manual pull-through tool typically offers multiple grit stages. The first stage uses crossed tungsten carbide blades or coarse diamond abrasives to strip away damaged metal and reshape a blunt edge. The second or third stage uses crossed ceramic rods to polish the newly formed bevel and remove fine burrs.
Before selecting a manual sharpener, check how it secures to your workspace. The safest models feature non-slip rubber bases or specialized V-shaped grips that hook over the edge of a kitchen counter. This design keeps the blade path clear of the tabletop and stops the unit from sliding around while you draw the knife through. Look for sharpeners that clearly indicate preset sharpening angles. A 20-degree preset matches most everyday pocket knives, cleavers, and Western chef blades, while adjustable or shallower slots cater to thin slicing knives. Having the proper tool in your kitchen drawer means you never have to risk your fingers or your fine cutlery scraping bare blades together in an emergency.

- TAR Score9.4
TAR Score is a ranking system developed by TopAppliancesReviews.com. TAR score has no relationship or impact from any manufacturers or sales agent websites. Learn more
- BrandACCUSHARP

- TAR Score9.0
TAR Score is a ranking system developed by TopAppliancesReviews.com. TAR score has no relationship or impact from any manufacturers or sales agent websites. Learn more
- BrandKITCHELLENCE
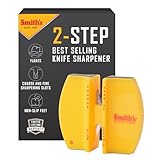
- TAR Score9.0
TAR Score is a ranking system developed by TopAppliancesReviews.com. TAR score has no relationship or impact from any manufacturers or sales agent websites. Learn more
- BrandSmith's

- TAR Score9.0
TAR Score is a ranking system developed by TopAppliancesReviews.com. TAR score has no relationship or impact from any manufacturers or sales agent websites. Learn more
- BrandIndependently Published

- TAR Score8.8
TAR Score is a ranking system developed by TopAppliancesReviews.com. TAR score has no relationship or impact from any manufacturers or sales agent websites. Learn more
- BrandKitchenIQ

- TAR Score8.8
TAR Score is a ranking system developed by TopAppliancesReviews.com. TAR score has no relationship or impact from any manufacturers or sales agent websites. Learn more
- BrandFANERFUN
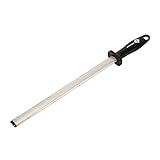
- TAR Score8.8
TAR Score is a ranking system developed by TopAppliancesReviews.com. TAR score has no relationship or impact from any manufacturers or sales agent websites. Learn more
- BrandKota Japan

- TAR Score8.6
TAR Score is a ranking system developed by TopAppliancesReviews.com. TAR score has no relationship or impact from any manufacturers or sales agent websites. Learn more
- Brandlongzon

- TAR Score8.0
TAR Score is a ranking system developed by TopAppliancesReviews.com. TAR score has no relationship or impact from any manufacturers or sales agent websites. Learn more
- BrandSHARPAL
Last update on 2026-10-04 / Affiliate links / Images, Product Titles, and Product Highlights from Amazon Product Advertising API
FAQs
Can I hone a serrated bread knife on another knife spine?
No, you should never try to hone a serrated knife against a knife spine. Serrated blades feature curved individual scallops that only touch a flat spine at the very tips of their teeth. Sliding a bread knife along a flat back will dull the pointed teeth without ever touching the curved cutting gullets inside. Serrations require a specialized round sharpening rod that fits directly inside each individual scallop.
Will sliding my knife along another blade spine scratch the finish?
Yes, there is always a risk of cosmetic scratches when sliding metal against metal. If your dull blade tilts slightly off angle, the side of the blade can drag across the corner of the guide spine and leave light scuff marks. You should only use this method on utilitarian kitchen knives or work tools, never on mirror-polished collector blades or knives with delicate decorative finishes.
How often can I use another knife spine before I need a real sharpener?
You can usually realign an edge two or three times before the steel stops responding. Each time you push the rolled apex back into place, the microscopic steel weakens slightly from repeated bending. After several cooking sessions, the thin edge metal breaks off completely, leaving a flat, blunt surface that only an abrasive stone or a dedicated two-stage sharpener can fix.


Top Rated Best Quality Range Hoods: 2026 Expert Picks

The 12 Best Small Solar Generators 2026

10 Best Quality Semi Automatic Washing Machine of 2026 For Leak-Free Laundry

11 Best Small Washer Machine of 2026 For Everyday Laundry

12 Best Vibration Pads For Washing Machine of 2026 To Stop Walking and Shaking

11 Best Selling Front Load Washing Machine of 2026 For Quiet Odor-Free Laundry

11 Best Washing Machine For King Size Bedding of 2026 To Prevent Cycle Errors

10 Best Small Front Loader Washing Machine of 2026 For Tight Closets






