
How to Sharpen a Knife With a Knife Sharpener Safely

Set the sharpener flat on a steady counter, rest the heel (the back of the blade near the handle) in the groove, and pull the knife smoothly toward you with light pressure. The starting step changes based on how blunt the steel has become. Dull knives need three to five slow pulls through a coarse slot, while slightly worn edges can skip straight to finishing. Never saw the blade back and forth, because dragging it both ways chews up the cutting edge.
A few practical details will guide the rest of the job. Manual pull-through tools require an even, gentle pace, whereas electric sharpeners turn their own motorized wheels. Straight blades slide cleanly through standard slots, but serrated bread knives require dedicated slots to avoid flattening the wavy teeth. Choosing the correct sharpening slot and using a controlled stroke will bring back a crisp edge in just a couple of minutes.
The Short Version
- Anchor the base: Place the sharpener on a flat, dry countertop with a firm grip on the handle to prevent dangerous slips.
- Pick the right slot: Use the coarse slot only if the blade is blunt; otherwise, start with the fine slot to polish the edge.
- Pull heel to tip: Insert the blade heel at a 90-degree angle and draw backward smoothly using light, gentle pressure.
- Clean the blade: Wipe away microscopic steel filings with a damp towel before cutting food.
Setting Up a Secure Work Area
A dull knife is dangerous, but a slipping sharpener creates an even bigger hazard. Before you bring a blade near an abrasive slot, prepare your workspace properly. You need a flat, waist-level surface like a clean kitchen counter or a solid wood cutting board. Clear away plates and food scraps so your arms have complete freedom of movement.
Use this quick preparation checklist before you begin:
- Dry the countertop completely so the rubber feet on the sharpener grip the surface firmly.
- Place a damp kitchen towel or a silicone mat under the sharpener if your counter has a slick stone surface.
- Wash and dry the knife thoroughly so grease or food oils do not coat the sharpening abrasives.
- Grip the sharpener handle firmly with your non-dominant hand, keeping your fingers safely behind the protective guard.
Taking thirty seconds to prepare stops the sharpener from sliding during use. A stable base also helps you maintain a steady sharpening angle from heel to tip.
Choosing Between Coarse and Fine Slots
Most pull-through sharpeners feature two or three slots labeled coarse, medium, or fine. These slots use different abrasive materials with varying grit, which refers to the roughness of the sharpening surface. Coarse slots contain tungsten carbide blades or coarse diamond plates. They scrape away metal quickly to reshape a blunt bevel, which is the slanted cutting edge that forms the knife point.
Use the coarse slot only when your knife is noticeably dull, slips off onion skins, or crushes soft fruit. If the edge has tiny nicks, the coarse abrasive will grind them out and re-establish a fresh cutting apex. Avoid using the coarse slot during every kitchen session, because running steel through carbide teeth too frequently removes unnecessary metal and shortens the usable lifespan of your knife.
The fine slot contains smooth ceramic rods. This slot focuses on honing, which means realigning the edge without removing significant amounts of steel. It smooths out microscopic ridges and polishes the blade into a clean cutting edge. Blade geometry also matters when choosing a tool. Many sturdy German high-carbon steel kitchen knives feature a robust 20-degree utility edge per side that matches standard pull-through sharpeners perfectly.
How to Pull the Blade Through the Sharpener Step by Step
Sharpening a knife with a manual pull-through tool requires steady motion and light pressure. Forcing the blade or rushing through the stroke will tear the metal rather than sharpen it.
Follow these steps to restore your blade cleanly:
- Seat the heel in the slot: Place the heel, which is the back of the blade closest to the handle, deep into the abrasive slot. Hold the blade straight up and down at a 90-degree angle to the counter. Avoid tilting the blade to either side.
- Apply light downward pressure: Push down with only the weight of your hand, similar to the pressure needed to slice through a ripe peach without bruising it. The abrasives need room to shave the steel cleanly. Pressing hard gouges notches into the edge.
- Draw the blade backward smoothly: Pull the knife toward your body in one continuous, even stroke. As you reach the curved belly near the tip, lift your wrist slightly so the curve stays in full contact with the stones. Never push the knife forward into the slot.
- Exit the tip gently: Let the tip glide out of the abrasive slot smoothly without snapping off the end, which can round off the sharp point. A single pass should take two to three seconds.
- Repeat three to five times: Make three to five gentle pulls through the coarse slot if the blade was blunt. Then move to the fine ceramic slot and complete three to five light pulls to polish the edge and remove metal slivers.
- Clean the blade thoroughly: Wipe the knife carefully with a damp cloth from the spine toward the edge to remove steel filings, then dry it completely before slicing food.
Safe Ways to Check Your New Edge
Never run your thumb or fingers across a cutting edge to check if it is sharp. That habit causes accidental cuts, and your skin cannot tell if the bevel is aligned cleanly. Use safe visual and cutting checks instead.
The standard printer paper slice check is the most reliable method. Hold a sheet of standard paper upright by one corner. Place the knife heel against the top edge of the paper and slice downward with light forward motion. A properly sharpened blade glides through the paper cleanly without tearing, snagging, or folding the page. If the blade snags halfway down, note which part of the edge caught and give that section two more light passes in the fine slot.
You can also check for a burr, which is the microscopic wire edge or curved sliver of metal that forms on the opposite side during sharpening. Look at the blade under a bright overhead kitchen light. Dull spots and bent burrs reflect bright flashes of light along the apex, while a clean, properly honed edge looks like a continuous dark line with zero glare.
Common Sharpening Mistakes That Damage Blades
Most damaged kitchen knives suffer from incorrect sharpening habits rather than normal cutting wear. Avoiding a few common mistakes will keep your blades straight, balanced, and sharp for years.
Keep these bad habits out of your kitchen routine:
- Sawing back and forth: Pull-through sharpeners work strictly in one direction. Pushing the knife forward into the abrasive teeth chips the steel and creates wavy divots along the cutting edge.
- Using heavy downward force: Pushing down hard strips off thick curls of steel, weakens the blade, and wears down the stones quickly. Light, smooth contact produces the cleanest edge.
- Dropping the tip off the end: Pulling the knife too fast causes the tip to snap downward against the counter, rounding off the fine point.
- Sharpening dirty knives: Food residues and grease transfer onto ceramic and diamond rods, clogging the abrasive surfaces. Always wash and dry blades first.
- Using carbide slots on delicate specialty knives: Premium Japanese Damascus steel blades use extra-hard steel that can chip against aggressive carbide teeth. Confirm your sharpener matches your blade hardness and angle before use.
How to Sharpen Serrated Bread and Utility Knives
Serrated knives feature individual scalloped teeth separated by curved gullets. Pulling a serrated knife through a standard V-shaped carbide slot will grind down the pointed tips, flatten the teeth, and ruin the slicing action of the knife.
Most basic kitchen sharpeners cannot sharpen serrated blades safely. However, some multi-stage sharpeners include a specialized ceramic slot with rounded profiles made for serrated edges. If your tool has this feature, place the serrated blade in the slot, apply almost no downward pressure, and draw the knife through slowly two or three times. The ceramic rods smooth the scalloped grooves without reshaping the teeth.
If your sharpener lacks a serrated slot, use a handheld ceramic honing rod instead. Match the tapered rod diameter to the size of each curved scallop. Rest the rod against the beveled face of each tooth at a matching angle, stroke outward away from the blade spine several times, and work down the blade tooth by tooth. Finish with one flat pass along the smooth back side to wipe away any lingering burr.
Choosing the Right Sharpening Tools for Your Kitchen
Maintaining sharp kitchen knives does not require complicated workshop gear. For everyday meal prep, a compact manual pull-through sharpener paired with a basic honing steel provides all the cutting performance a home cook needs. When choosing a sharpener, prioritize models with broad rubber feet or secure suction bases that remain completely motionless on your counter. A comfortable grip handle with an elevated knuckle guard is equally important to keep your guiding hand protected from accidental slips.
Look for multi-stage sharpeners that feature both coarse diamond or carbide abrasives and fine ceramic polishing rods. The coarse stage repairs neglected edges that struggle to cut meat, while the fine ceramic stage keeps your weekly prep knives tuned without wearing down the blade metal. If you slice crusty bread often, confirm the unit includes a dedicated serrated slot.
Proper storage is just as critical for edge retention. Storing unprotected knives inside a crowded drawer causes blades to strike against other utensils, dulling the cutting bevels quickly. Keeping your sharp blades stored securely in magnetic knife block sets with stable bases preserves your newly sharpened edges and prevents accidental blade damage between meals.

- TAR Score9.4
TAR Score is a ranking system developed by TopAppliancesReviews.com. TAR score has no relationship or impact from any manufacturers or sales agent websites. Learn more
- BrandACCUSHARP

- TAR Score9.2
TAR Score is a ranking system developed by TopAppliancesReviews.com. TAR score has no relationship or impact from any manufacturers or sales agent websites. Learn more
- BrandIntelitopia

- TAR Score9.0
TAR Score is a ranking system developed by TopAppliancesReviews.com. TAR score has no relationship or impact from any manufacturers or sales agent websites. Learn more
- BrandKITCHELLENCE

- TAR Score8.8
TAR Score is a ranking system developed by TopAppliancesReviews.com. TAR score has no relationship or impact from any manufacturers or sales agent websites. Learn more
- BrandFANERFUN
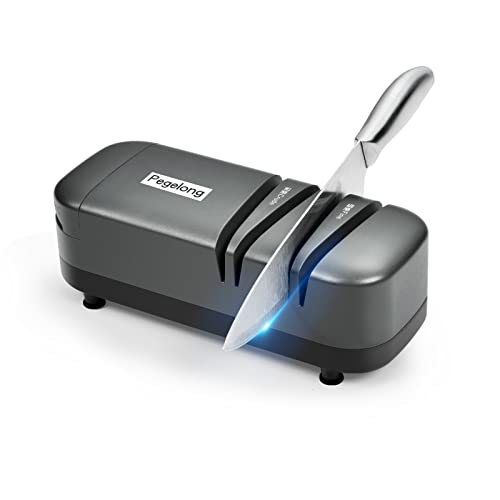
- TAR Score8.8
TAR Score is a ranking system developed by TopAppliancesReviews.com. TAR score has no relationship or impact from any manufacturers or sales agent websites. Learn more
- BrandPegelong

- TAR Score8.6
TAR Score is a ranking system developed by TopAppliancesReviews.com. TAR score has no relationship or impact from any manufacturers or sales agent websites. Learn more
- Brandlongzon

- TAR Score8.6
TAR Score is a ranking system developed by TopAppliancesReviews.com. TAR score has no relationship or impact from any manufacturers or sales agent websites. Learn more
- BrandSHARPAL

- TAR Score7.6
TAR Score is a ranking system developed by TopAppliancesReviews.com. TAR score has no relationship or impact from any manufacturers or sales agent websites. Learn more
- BrandAudible

- TAR Score7.0
TAR Score is a ranking system developed by TopAppliancesReviews.com. TAR score has no relationship or impact from any manufacturers or sales agent websites. Learn more
- BrandMajosta
Last update on 2026-10-02 / Affiliate links / Images, Product Titles, and Product Highlights from Amazon Product Advertising API
Frequently Asked Questions
How often should I sharpen my kitchen knives?
Most home cooks only need to use a coarse sharpening slot every three to six months, depending on how often they cook. If you use your chef knife daily, run it through the fine ceramic slot or across a honing rod every couple of weeks. Regular light honing keeps the edge straight and reduces how often you need to remove metal in the coarse slot.
Can I sharpen kitchen scissors in a knife sharpener?
Never run kitchen scissors through a standard V-shaped knife slot. Scissors have a single-sided bevel with a flat inner face, while kitchen knives have centered double bevels. Forcing scissors through a knife slot ruins the shearing angle. Only sharpen scissors if your tool features a dedicated scissor slot designed for single-edge grinding.
Why does my knife still feel dull after using a pull-through sharpener?
Knives stay dull after sharpening when you apply too much downward force, tilt the blade sideways, or skip the fine polishing stage. Heavy pressure tears ragged ridges into the metal instead of a smooth edge. Keep the blade upright at 90 degrees, use light pressure, and always finish with several passes through the fine ceramic slot to polish away the burr.
What is the difference between sharpening and honing?
Sharpening uses coarse abrasives like carbide or diamond to shave away metal and create a fresh cutting edge on a blunt knife. Honing uses fine ceramic or steel rods to push an existing, bent edge back into straight alignment without removing metal. Honing maintains sharpness week to week, while sharpening restores blades that have lost their edge completely.


Top Rated Best Quality Range Hoods: 2026 Expert Picks

The 12 Best Small Solar Generators 2026

10 Best Quality Semi Automatic Washing Machine of 2026 For Leak-Free Laundry

11 Best Small Washer Machine of 2026 For Everyday Laundry

12 Best Vibration Pads For Washing Machine of 2026 To Stop Walking and Shaking

11 Best Selling Front Load Washing Machine of 2026 For Quiet Odor-Free Laundry

11 Best Washing Machine For King Size Bedding of 2026 To Prevent Cycle Errors

10 Best Small Front Loader Washing Machine of 2026 For Tight Closets






