
How to Sharpen a Knife Using a Whetstone Without Scratching It

Set the whetstone on a damp kitchen towel or non-slip base before touching the blade. A stable stone lets you lock in a steady angle and sharpen cleanly without scratching the sides. Glide the knife across the wet surface until a tiny rough wire ridge, called a burr, forms along the edge. Once you feel that ridge, flip the blade to match the other side, then polish everything on a finer grit.
The exact angle depends on your knife style. Slender Japanese blades favor a 15-degree tilt, while sturdy Western knives hold up better at 20 degrees. Badly nicked edges also need a coarse grit to rebuild the shape before you refine it. Most water stones need soaking first, while oil stones need honing fluid. Here is how to steady your hands, protect the steel, and get a crisp edge from heel to tip.
Soak Your Water Stone and Build a Slip-Free Station
Before you bring steel to stone, you must prepare your workspace. Sharpening involves steady physical pressure, and any sudden slip can scratch the mirror finish of your blade or nick your fingers. Taking five minutes to arrange your counter ensures the stone remains completely immobile while you work.
Most common whetstones are water stones, which need moisture to create a lubricating fluid called slurry. Slurry is a mixture of water and loose stone particles that scrubs away microscopic bits of dull steel while floating them away from your blade face. If you use a soaking stone dry, metal filings will clog the tiny pores of the abrasive surface, creating deep scratches across your knife bevel (the angled slope that forms the cutting edge).
Submerge your whetstone in a bowl or baking dish filled with clean room-temperature water. You will see steady streams of tiny air bubbles float to the top. Keep the stone under water until the bubbling stops completely, which usually takes 10 to 15 minutes. Splash-and-go stones, which are denser ceramic models, do not need a full soak. You can simply splash clean tap water directly across the surface right before you begin.
Here is your quick station setup checklist:
- Anchor a wet kitchen towel: Fold a clean kitchen towel or paper towel flat on your countertop to catch runoff water and prevent table scuffs.
- Seat the stone in its holder: Place your soaked block firmly into its molded silicone sleeve, then set that sleeve inside a sturdy wooden or bamboo base.
- Verify non-slip footing: Push firmly against the ends of the stone with your palm. If it creeps across the counter at all, moisten the towel underneath or move to a drier section of the counter.
- Position a water supply nearby: Keep a small cup of water or a spray bottle right beside your dominant hand so you can splash the stone whenever the top begins to look dry or pasty.
Find and Lock Your Angle with Simple Finger Guides
Holding a consistent angle is the single most important skill when sharpening by hand. When beginners struggle to get a sharp edge, wobbling wrists are almost always the culprit. Lifting the spine too high blunts the edge into an axe-like shape, while dropping the spine too flat drags the side of your knife across the stone, scouring unsightly scuffs into the primary grind.
Most kitchen cutlery falls into two broad geometry camps. Sturdy European blades, including classic German high-carbon steel knife sets, typically use a 20-degree angle per side. That slightly broader bevel supports chopping through dense squash, root vegetables, and cartilage without chipping. On the other hand, thinner high-carbon Japanese chef knife sets normally run at a steep 15-degree edge per side for paper-thin vegetable cuts and clean fish prep.
You do not need a protractor to find these positions at your counter. To find 20 degrees, hold your knife upright at a 90-degree right angle against the stone, cut that distance in half by eye to 45 degrees, and cut that remainder roughly in half once more. As a physical spacer, 20 degrees is roughly the thickness of a standard matchbook, or the height of two stacked American quarters slid beneath the blade spine.
To find a 15-degree angle, lay the flat blade face against the stone, then lift the back spine just enough to slide the pad of your index finger underneath it until your fingernail touches the metal. The space between the stone surface and the spine should be roughly the thickness of a single quarter or pinky fingertip.
Once you set this gap, lock your wrist completely rigid. Sharpening is not a flick of the hand. Your wrists and elbows should remain frozen at that exact angle while your shoulders, hips, and torso sway back and forth to guide the steel across the abrasive surface.
Work the Coarse Grit Until You Feel a Continuous Burr
Start your sharpening routine on the rougher side of your stone. Whetstones use grit numbers to indicate surface roughness. A coarse grit under 1000 reshapes worn, rounded edges quickly, while a 1000-grit surface acts as the standard medium stone for regular edge maintenance. Starting on a super-fine polishing side when a knife is truly dull will force you to scrub for hours without reshaping the apex.
Your primary goal on this first side is raising a burr (the microscopic wire edge or curved sliver of metal that folds over to the opposite side during sharpening). If you do not raise a burr from the heel all the way to the tip, you have not ground away enough dull metal to create a brand-new cutting edge.
- Place the blade heel diagonally: Rest the heel of the knife across the top end of the stone at a 45-degree angle, pointing the sharp edge away from your body. Rest the fingertips of your non-dominant hand flat on the blade face, about a half-inch behind the cutting edge, to provide controlled downward pressure.
- Push smoothly across the stone: With your dominant hand holding the handle and locking your angle, push the blade forward and down the stone in a smooth stroke. Apply the pressure of two heavy fingers on the forward push, then release most of that downward pressure as you pull the blade back toward you.
- Work the blade in overlapping sections: Knives with long belly curves cannot be sharpened in one straight pass without lifting the handle and rolling the edge. Divide your blade mentally into three sections: the flat heel, the curving middle belly, and the pointed tip. Make 10 to 15 steady strokes on the heel section before shifting your non-dominant guide fingers forward to the middle section.
- Lift your elbow slightly at the curved tip: When working the delicate curved tip, raise your knife handle slightly toward the ceiling as you push forward. This keeps the stone flat against the sweep of the blade bevel instead of grinding the tip flat or missing the edge entirely.
- Verify burr formation along the entire side: Stop and turn the knife over. Lightly slide the dry pad of your thumb from the spine outward across the opposite, unsharpened side of the edge. Never slide your thumb lengthways along the sharp rim. You should feel a distinct, scratchy wire lip catching on your skin along every single inch from heel to tip. If any spot feels smooth, return to the stone and make five more passes on that exact section.
Flip the Blade and Refine the Bevel on Fine Grit
Once you confirm a solid wire burr across the entire length of your first side, flip the knife over to work the opposite bevel. Your goal on the reverse side is to grind an identical matching angle until the burr flips back the other way, centering the newly sharpened edge directly beneath the spine.
After both bevels meet at a crisp center line, flip the whetstone over to its fine side (typically 3000 to 6000 grit). Fine grits polish out the deep scratch grooves left behind by coarse stones, refining the toothy edge into a silky, razor-like bevel that glides through soft produce without tearing.
- Reverse the blade orientation: Turn the blade so the cutting edge now faces toward you, or switch the knife to your non-dominant hand if you prefer identical push strokes. Keep your guide fingers firmly pressed near the edge and verify your 15 or 20-degree gap before moving.
- Match your stroke count: Apply the exact same finger pressure and perform the same number of passes on each section as you did on the first side. If you made 15 strokes per section on side one, make 15 strokes per section on side two. This symmetry keeps your cutting bevel evenly balanced on both sides of the knife center.
- Wash away the heavy grinding slurry: Rinse both the stone and your knife blade thoroughly under cold water. Lingering coarse grit grains will contaminate the fine polishing surface and gouge random lines across your fresh edge.
- Polish with progressively lighter passes: Lay the knife onto your fine-grit stone. Make five sweeping passes from heel to tip along the first side, flip the blade, and make five passes on the other side. Drop down to three passes per side, then one alternating pass per side using only the feather-light weight of the knife itself to knock off remaining micro-burrs.
- Clean the apex on a leather strop: If you have a strop (a flat leather strip used to smooth off wire edges), pull the blade backward along the leather surface at your sharpening angle four or five times per side. This pulls away the last clinging microscopic foil fragments and leaves a gleaming, mirror-smooth cutting edge.
Check the Finished Edge and Clean Your Blade Safely
Never rely on a wild thumb swipe to find out if your knife is sharp. Checking an edge requires safe, controlled feedback that protects your hands while confirming that the bevel has zero flat spots left behind.
Take a loose sheet of standard printer paper or an old phone book page. Hold the top corner of the paper lightly with one hand, rest the heel of your knife on the top edge at a slight angle, and pull downward without pushing or sawing. A correctly sharpened blade will slide through the paper with a clean, quiet whispering sound. If the blade catches, snags, or tears the sheet, take note of where the paper ripped; that spot on your edge still has an unground burr or a dull flat section that needs two more passes on the stone.
You can also check sharpness on a ripe, shiny tomato. Rest the blade edge against the tomato skin without pressing down at all. Simply draw the knife backward using only its own weight. A sharp edge immediately bites through the smooth skin and begins slicing, whereas a rounded, dull edge slides sideways off the fruit.
Follow this checklist to clean up your tools and store your blades without risking corrosion:
- Rinse away all gray paste: Wash the blade under warm running water with the edge turned away from your body, using a soft sponge to remove stone grit. Never scrub back and forth along the cutting edge.
- Dry immediately from spine to edge: Lay a dry dish towel flat on the counter, rest the blade on it, and wipe downward starting from the spine past the cutting edge. For high-carbon steel (harder metal that stays sharp longer but requires dry wiping and light oiling to prevent rust spots), dry the metal instantly to keep moisture from spotting the steel.
- Never clean in the dishwasher: Dishwasher jets rattle knives against metal racks, chipping the fine bevel you just spent twenty minutes aligning, while harsh detergents pit the steel face.
- Air-dry your stones before storage: Rinse your whetstone clean of metal filings and let it sit on a wire rack in an open room for a full 24 to 48 hours. Storing a damp water stone inside an airtight cardboard box or plastic case breeds mildew and weakens the stone bonding agent.
Choose Beginner-Friendly Sharpening Kits with Non-Slip Bases
If you are gathering your first sharpening kit, picking forgiving tools takes the anxiety out of the learning curve. You do not need an entire shelf of specialty water stones to keep kitchen blades in peak cutting shape. A single dual-sided combination stone usually covers all household maintenance for years.
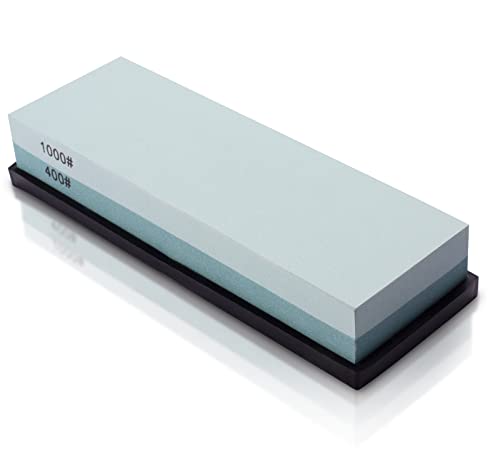
Look for a combination block that pairs a medium reshaping grit (such as 400 or 1000) on one side with a refining grit (such as 3000 or 6000) on the reverse. The lower grit works out minor edge roll and dullness from cutting boards, while the higher grit polishes the bevel for smooth slicing.
Beginners should prioritize kits that include a dense silicone shoe and a heavy bamboo or hardwood base equipped with continuous rubber pads on the bottom. These components stop stone wobble completely, allowing you to focus entirely on your finger placement and arm movements.
Many complete starter sets also include a plastic clip-on angle guide lined with ceramic protective pads. Slipping this guide onto the spine of your chef knife forces the blade to rest against the stone at an exact, fixed 15-degree pitch. Using an angle guide for your first three or four sharpening sessions trains your hands to recognize what proper clearance feels like before you transition to freehand sharpening.

- TAR Score9.4
TAR Score is a ranking system developed by TopAppliancesReviews.com. TAR score has no relationship or impact from any manufacturers or sales agent websites. Learn more
- BrandLeking

- TAR Score9.2
TAR Score is a ranking system developed by TopAppliancesReviews.com. TAR score has no relationship or impact from any manufacturers or sales agent websites. Learn more
- BrandIntelitopia

- TAR Score9.2
TAR Score is a ranking system developed by TopAppliancesReviews.com. TAR score has no relationship or impact from any manufacturers or sales agent websites. Learn more
- BrandHiramWare

- TAR Score9.2
TAR Score is a ranking system developed by TopAppliancesReviews.com. TAR score has no relationship or impact from any manufacturers or sales agent websites. Learn more
- BrandSharp Pebble

- TAR Score9.2
TAR Score is a ranking system developed by TopAppliancesReviews.com. TAR score has no relationship or impact from any manufacturers or sales agent websites. Learn more
- Brandryerum

- TAR Score9.0
TAR Score is a ranking system developed by TopAppliancesReviews.com. TAR score has no relationship or impact from any manufacturers or sales agent websites. Learn more
- BrandHMPLL
- TAR Score9.0
TAR Score is a ranking system developed by TopAppliancesReviews.com. TAR score has no relationship or impact from any manufacturers or sales agent websites. Learn more
- BrandMIDO Professional Abrasive
- TAR Score8.4
TAR Score is a ranking system developed by TopAppliancesReviews.com. TAR score has no relationship or impact from any manufacturers or sales agent websites. Learn more
- BrandStorey Publishing

- TAR Score7.6
TAR Score is a ranking system developed by TopAppliancesReviews.com. TAR score has no relationship or impact from any manufacturers or sales agent websites. Learn more
- BrandAudible
Last update on 2026-10-02 / Affiliate links / Images, Product Titles, and Product Highlights from Amazon Product Advertising API
FAQs
Do I need to soak every whetstone before sharpening?
No, only traditional water stones require a full 10 to 15-minute bath to saturate their internal pores. Dense ceramic stones, known as splash-and-go stones, only need a light spritz of water across their top surface right before you begin. Oil stones, which are often made from natural Arkansas novaculite or aluminum oxide, should never be soaked in water; they require a few drops of mineral honing oil to float away metal filings.
How can I tell if I am scratching the face of my blade?
You can verify your clearance by painting the entire bevel and a thin strip of the blade face with a black permanent marker before you begin. Take two light passes across your soaked whetstone, then lift the knife and inspect the ink. If the stone cleanly scrubs the marker off the very edge bevel, your angle is correct. If the marker is scrubbed off the wide flat face above the edge, your spine is held too low, and you are scratching the primary finish.
What should a burr feel like on my fingertip?
A burr feels like a subtle, rough wire ridge or sandpaper-like lip that gently catches on the ridges of your fingerprint. Always slide your dry thumb pad upward from the flat spine down past the edge; never slide your finger horizontally along the blade length. If the edge feels slick, smooth, and rounded on both sides, you have not sharpened long enough to reach the blade apex.
How often should I sharpen my kitchen knives on a stone?
Home cooks who prepare meals daily typically only need to sharpen on a whetstone every two to four months. Between stone sharpening sessions, realign the edge weekly with a smooth honing steel or leather strop to push minor edge rolls back into place without removing metal. When regular honing no longer restores clean slicing through a raw tomato, it is time to return to your water stone.


Top Rated Best Quality Range Hoods: 2026 Expert Picks

The 12 Best Small Solar Generators 2026

10 Best Quality Semi Automatic Washing Machine of 2026 For Leak-Free Laundry

11 Best Small Washer Machine of 2026 For Everyday Laundry

12 Best Vibration Pads For Washing Machine of 2026 To Stop Walking and Shaking

11 Best Selling Front Load Washing Machine of 2026 For Quiet Odor-Free Laundry

11 Best Washing Machine For King Size Bedding of 2026 To Prevent Cycle Errors

10 Best Small Front Loader Washing Machine of 2026 For Tight Closets






