
How to Sharpen a Knife Properly Without Ruining the Edge

Most cooks assume that fixing a dull knife requires aggressive grinding or a metal honing rod, but true sharpening simply means grinding away a tiny whisper of steel at a consistent angle. That steady stroke forms a fresh edge with a microscopic ridge of metal, which you then polish smooth on a finer stone. Keeping that angle steady stops the cutting bevel from rounding over and prevents scratches on the face of your blade.
The exact technique depends on your knife style, how dull the edge has become, and the tool you choose. Thinner Japanese blades slice best at a narrow fifteen-degree slope, while thicker Western knives need a wider twenty-degree angle for tough chopping. A chipped edge calls for a coarse grit to rebuild the bevel, whereas a blade that just slides off tomato skins only needs lighter maintenance. Learning how to control that angle keeps your fingers safe and brings effortless cutting back to your kitchen.
The Short Version
- Diagnose before you grind: If your blade slips on tomato skins, it might just need honing (realigning bent steel without removing metal) on a rod rather than a full sharpening session on a stone.
- Lock your cutting angle: Hold the blade tilted at a steady 15 degrees for thin Japanese knives or 20 degrees for sturdier Western knives, keeping your wrist firm throughout each stroke.
- Feel for the burr: Grind one side on an abrasive stone until you feel a burr (a tiny raised lip of metal along the opposite edge), which proves you have reached the very apex of the blade.
- Polish and deburr: Flip the knife to repeat the process on the other side, then finish on a fine-grit stone or leather strop to smooth away the rough wire edge.
Sharpening Versus Honing: Know Which One Your Blade Needs
When a kitchen knife starts sliding off an onion skin or squashing ripe tomatoes, most people assume the blade is completely dull. But blades lose their slicing ability in two distinct ways. Knowing which issue you face saves time and preserves the life of your blade steel.
Daily cutting forces thin blade edges to bend sideways microscopically. The steel is still sharp, but the apex is no longer pointing straight down at the cutting board. Honing fixes this issue. When you run a blade down a steel or ceramic rod, you do not grind away steel. Instead, you push that folded edge back into a straight line. Honing takes fifteen seconds and should happen every few cooking sessions.
Sharpening is completely different. Over weeks of chopping on cutting boards, the cutting edge eventually wears down, chips, or rounds off into a blunt U-shape. A honing rod cannot fix rounded metal. Sharpening uses abrasive stones to physically shave away steel from the bevel (the angled cutting edge), rebuilding a crisp, triangular point where the two sides meet.
You can quickly check which treatment your knife needs. Hold the knife under a bright overhead light with the cutting edge pointed directly up at your eyes. Look down the length of the edge. A sharp edge is so thin that it cannot reflect light. If you see bright glints, flat shiny spots, or dull silver lines running along the blade, the edge has worn flat. That blade requires sharpening. If the edge looks dark and even but still struggles to bite into food, a quick session on a honing rod will usually bring it back to life. Sturdier kitchen workhorses like German high-carbon steel knife sets respond exceptionally well to regular rod honing between stone sharpenings.
Finding and Holding the Right Angle
The single biggest reason people fail at sharpening is an unsteady hand. If your angle changes with every stroke, you will round off the edge instead of creating a flat, crisp bevel. You do not need robotic perfection, but you do need consistency.
Different kitchen knives demand different bevel angles. Most American and European chef knives use a 20-degree angle per side. That wider angle provides a tough, durable wedge that can handle dense winter squash, chicken bones, and heavy chopping without chipping. In contrast, delicate cutlery such as Japanese chef knife sets are crafted from harder steel ground to a steeper 15-degree angle per side. That narrower slope glides through meats and soft vegetables with virtually zero resistance, though it is more brittle.
You can find these angles easily at home without expensive measuring tools. Stand your knife vertically on the sharpening stone so the blade is at a 90-degree right angle. Tilt the spine of the knife halfway toward the stone to find 45 degrees. Tilt that distance halfway down once more to reach roughly 22 degrees. Lower the spine just a tiny hair further, and you are sitting right at a standard 20-degree Western angle.
If you prefer an exact physical guide, use common pocket change. Place two standard US quarters flat on the stone, then rest the spine of an eight-inch chef knife on top of them while the cutting edge touches the stone. That gap creates an angle of roughly 15 to 17 degrees. Three quarters will bring the spine up to roughly 20 degrees. Once you set that spacing, lock your wrist completely. Move your entire arm and torso from the shoulder so the angle never rocks or rolls as you push the blade across the abrasive surface.
Step-by-Step Sharpening on a Water Whetstone
Water whetstones are the gold standard for sharpening because they remove the minimum amount of metal while creating the cleanest, longest-lasting edge. Whetstones use grit ratings (the coarseness rating of the stone) to indicate how quickly they grind steel. A coarse 400-grit stone reshapes damaged edges, a medium 1000-grit stone sharpens dull blades, and a fine 3000-to-8000-grit stone polishes the steel until it glides effortlessly.
- Soak and secure the stone: Submerge your water stones in a bowl of room-temperature water for 10 to 15 minutes. When air bubbles stop rising to the surface, the stone is saturated. Place the stone on a firm countertop with a non-slip rubber base or a damp cotton dish towel beneath it so it cannot slide during use. Position the stone so the medium grit (around 1000 grit) faces up.
- Set your blade position: Place the heel of the knife on the far end of the stone, facing away from you, with the cutting edge resting on the surface. Set your chosen 15 or 20-degree tilt. Rest two or three fingertips of your non-dominant hand flat against the side of the blade, just above the cutting edge. These fingers apply light, steady downward pressure against the stone.
- Sweep from heel to tip: Push the blade forward across the stone while simultaneously drawing it slightly toward your body. Follow the natural curve of the blade so the entire edge, from heel to curved tip, contacts the stone evenly. Use moderate downward pressure on the pushing stroke, about the weight of a ripe orange, and release the pressure completely as you pull the knife back to reset. Repeat this sweeping stroke 10 to 15 times.
- Check for the burr: Stop and inspect the unground side of the blade. As the abrasive grit cuts away steel, it pushes a tiny wire edge of metal over the opposite side. To check for this, place your thumb pad flat against the back of the knife and slide it gently downward off the edge. If the steel feels rough, raspy, or catches your skin like a tiny hook along the entire length of the blade, you have created a full burr. If any section feels smooth, keep working that specific area until the burr runs continuously from heel to tip.
- Sharpen the opposite side: Switch the knife to your other hand, or turn the blade around so the unsharpened side faces the stone. Set the identical angle. Make the same number of sweeping strokes with identical pressure until you push that tiny ridge of metal back to the first side.
- Refine on the fine-grit stone: Flip the whetstone over to the fine polishing side (3000 grit or higher). Splash fresh water across the surface. Use very light, gentle sweeping strokes, alternating sides with every single pass. These light strokes polish the scratch marks left by the coarser stone and strip away the fragile burr.
- Wash and dry: Rinse the grey slurry of water and steel dust off your blade with warm water. Dry the knife thoroughly with a clean towel immediately. Never leave a damp blade on the counter, as even stainless steel (rust-resistant metal) can develop surface pitting if left wet.
Safe Ways to Check Blade Sharpness
Never test an edge by slicing your thumb across the blade. Professional cooks and sharpeners use safe, consistent materials to evaluate edge quality without risking cuts.
- The paper slice test: Hold a standard sheet of printer or notebook paper vertically by the top edge with your fingers. Place the heel of your knife at a 45-degree angle against the top paper edge and slice downward with a gentle forward push. A properly sharpened knife will slice through the paper silently and smoothly without catching, tearing, or crushing the paper fibers.
- The tomato skin test: Set a ripe, glossy tomato on your cutting board. Rest the belly of the blade on the tomato skin. Without pushing down with your hand, gently draw the knife backward across the fruit using only the blade's own weight. If the edge is keen, it will instantly bite into the smooth skin and begin slicing cleanly without popping or squeezing juice out of the tomato.
- The thumbnail catch test: Hold the knife lightly and place the cutting edge at a shallow angle against your thumbnail without applying downward force. A dull knife will skate and slide across the nail like ice. A properly apexed edge will instantly grab and bite into the keratin of the nail without slipping.
Using Manual Pull-Through Sharpeners Without Damaging Steel
Manual pull-through sharpeners are popular because they require no special angle practice. Most feature two or three internal slots housing shaped carbide blades or ceramic abrasive wheels. While convenient, improper use can chew deep notches into your blade or strip away excessive metal.
Pull-through sharpeners use fixed internal abrasive angles, typically set to roughly 20 degrees. This makes them unsuitable for delicate Japanese knives, which feature thinner, harder steel that can chip when wedged into aggressive carbide slots. Save pull-through units for everyday utility knives, pocket knives, and softer stainless kitchen blades.
To use one safely, plant the sharpener firmly on a flat countertop with your non-dominant hand behind the protective handle guard. Insert the heel of the knife vertically into the coarse slot. Keep the blade completely straight, avoiding any twisting or leaning to the side. Draw the knife smoothly backward toward you from heel to tip in one steady, continuous motion. Never push the blade forward in a sawing motion, as this will tear the cutting apex. Use light pressure; heavy downward force will strip curling ribbons of metal off your knife. Run the blade through the coarse slot three to five times, then finish with five to eight smooth passes through the fine ceramic slot to polish the bevel.
Everyday Habits That Keep Your Edge Sharp Longer
Proper sharpening takes time, so protecting your edge during daily kitchen prep keeps your knives performing well for months between stone sessions.
- Choose the right cutting board: Cut exclusively on end-grain or edge-grain wood, thick bamboo, or food-grade rubber cutting boards. Avoid glass, granite, ceramic, slate, or stainless steel prep boards. Hard, non-yielding surfaces act like dulling stones, rolling or chipping your sharp edge on the very first cut.
- Never scrape with the cutting edge: After dicing onions, garlic, or herbs, many cooks use the knife edge to scrape the chopped food sideways across the board into a pan. This sideways friction folds over the microscopic edge instantly. Always flip the blade over and use the flat, blunt spine to scoop and scrape food.
- Keep knives out of the dishwasher: Dishwashers destroy fine edges. The high-heat dry cycle can damage blade temper, harsh detergents pit the metal, and water jets rattle the sharp edge against hard plastic silverware baskets and metal racks. Always hand-wash your knives with mild dish soap and a soft sponge, then dry them immediately.
- Store blades safely: Tossing bare knives into a crowded utensil drawer knocks the edges against metal spoons and forks. Keep blades separated by using wooden edge guards, an in-drawer slotted tray, or secure wall-mounted magnetic knife block and knife set combos that hold blades firmly by their flats.
Sharpening Gear That Solves the Problem
Rebuilding a dull blade requires the right abrasive tools to remove blunt steel safely and polish the resulting edge. Water whetstone sets with dual grits provide the best balance of speed and control for home kitchens. A combination stone with a medium grit around 1000 and a fine grit between 3000 and 6000 allows you to handle everything from basic edge reshaping to mirror polishing.
When selecting sharpening gear, prioritize stability and angle control. Look for sharpening stones that include a fitted rubber base or a heavy bamboo block with non-slip feet to keep the stone from shifting on slick countertops. If you worry about keeping a steady wrist, clip-on plastic angle guides attach directly to the spine of your knife to keep the blade tilted at the exact correct slope throughout the stroke. A leather strop coated with fine polishing paste provides the ideal finishing tool to wipe away lingering wire burrs and leave your blades razor-sharp.

- TAR Score9.2
TAR Score is a ranking system developed by TopAppliancesReviews.com. TAR score has no relationship or impact from any manufacturers or sales agent websites. Learn more
- BrandIntelitopia
- TAR Score9.2
TAR Score is a ranking system developed by TopAppliancesReviews.com. TAR score has no relationship or impact from any manufacturers or sales agent websites. Learn more
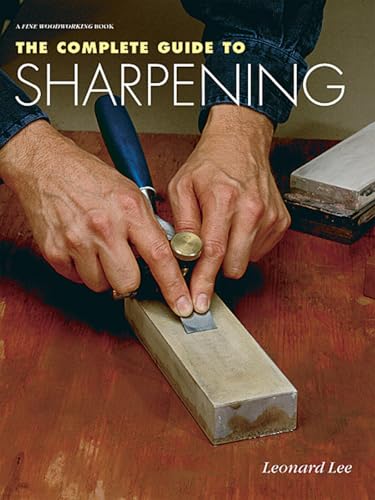
- BrandTaunton Press

- TAR Score9.0
TAR Score is a ranking system developed by TopAppliancesReviews.com. TAR score has no relationship or impact from any manufacturers or sales agent websites. Learn more
- BrandN/A

- TAR Score9.0
TAR Score is a ranking system developed by TopAppliancesReviews.com. TAR score has no relationship or impact from any manufacturers or sales agent websites. Learn more
- BrandHMPLL

- TAR Score9.0
TAR Score is a ranking system developed by TopAppliancesReviews.com. TAR score has no relationship or impact from any manufacturers or sales agent websites. Learn more
- BrandKITCHELLENCE

- TAR Score8.8
TAR Score is a ranking system developed by TopAppliancesReviews.com. TAR score has no relationship or impact from any manufacturers or sales agent websites. Learn more
- BrandLUFFEXX

- TAR Score8.2
TAR Score is a ranking system developed by TopAppliancesReviews.com. TAR score has no relationship or impact from any manufacturers or sales agent websites. Learn more
- BrandGeneric

- TAR Score7.0
TAR Score is a ranking system developed by TopAppliancesReviews.com. TAR score has no relationship or impact from any manufacturers or sales agent websites. Learn more
- BrandMajosta
Last update on 2026-10-01 / Affiliate links / Images, Product Titles, and Product Highlights from Amazon Product Advertising API
FAQs
How often should you sharpen a kitchen knife?
Most home cooks only need to sharpen their primary chef knife on an abrasive stone once or twice a year. If you cook daily and prepare lots of hard produce, sharpening every three to four months keeps the edge keen. In between stone sessions, a quick thirty-second touch-up on a honing rod every few uses keeps the steel aligned without grinding away metal.
Can you sharpen a serrated bread knife on a flat whetstone?
No, a flat whetstone will only grind down the high points of the serrations and ruin the blade profile. Sharpening serrated knives requires a narrow ceramic or diamond sharpening rod that fits inside each curved groove individually. You gently stroke the inside of each serration at its original factory angle, then make a single flat pass on the back of the blade to remove the resulting burr.
What should you do if your whetstone develops a hollow dip in the middle?
Repeated sharpening sweeps naturally wear down the center of a whetstone faster than the edges, creating a shallow dip or dish. A dished stone will change your sharpening angle and prevent you from forming a straight edge. You can flatten the stone using a coarse diamond flattening plate or a dedicated silicon carbide flattening stone, rubbing it with water across the whetstone until the surface is completely level again.
Why does a freshly sharpened knife sometimes still feel dull?
The most common culprit is an unremoved burr. When you sharpen on a stone, a thin wire lip of bent metal curls over the cutting edge. If you do not fully strip this burr away on a fine polishing stone or leather strop, the wire edge folds sideways the moment it touches food, making the knife slip as if it were completely dull. Another common mistake is stopping the coarse sharpening step before the burr forms completely from heel to tip, which means you never fully rebuilt the apex.


Top Rated Best Quality Range Hoods: 2026 Expert Picks

The 12 Best Small Solar Generators 2026

10 Best Quality Semi Automatic Washing Machine of 2026 For Leak-Free Laundry

11 Best Small Washer Machine of 2026 For Everyday Laundry

12 Best Vibration Pads For Washing Machine of 2026 To Stop Walking and Shaking

11 Best Selling Front Load Washing Machine of 2026 For Quiet Odor-Free Laundry

11 Best Washing Machine For King Size Bedding of 2026 To Prevent Cycle Errors

10 Best Small Front Loader Washing Machine of 2026 For Tight Closets






