
How to Sharpen a Knife on a Stone for a Clean Slicing Edge

Keep one steady angle across the stone. Wet the surface, tilt the blade between fifteen and twenty degrees, and glide the steel from heel to tip until a tiny ridge of curled metal forms on the opposite side. Flipping the knife to repeat those strokes cleans away dull metal without scratching the finish on your blade.
The exact routine shifts slightly depending on your tools. Thinner Japanese blades favor a tighter fifteen-degree tilt, while sturdy Western kitchen knives cut best around twenty degrees. Traditional water stones need a good soak in clean water, but oil stones take honing oil to keep shaved steel from clogging the surface. Deeply nicked blades also call for a coarse grit (a stone roughness rating) before moving to a fine polishing side. Setting up a stable workspace makes the entire hand motion safe and repeatable.
Stone Prep and Workspace Setup
Before placing a blade on an abrasive stone, you need to prepare the stone and secure your work area. A sharpening stone that slides across a wet counter can cause your fingers to slip into the cutting path. Setting up a stable workstation ensures clean sharpening and prevents accidents.
First, identify whether your block is a water stone or an oil stone. Most modern sharpening stones sold for kitchen and pocket knives are water stones (often called whetstones, where "whet" means to sharpen). Water stones use water to float away tiny metal shavings and loose abrasive grit. Oil stones, such as natural Arkansas stones, use honing oil instead. Never put oil on a water stone. The oil will soak into the open pores, seal them shut, and ruin the stone's ability to absorb water.
Use this quick checklist to set up your sharpening station before touching the blade:
- Soak or splash the stone: If you use a soaking water stone, submerge it in water for ten to fifteen minutes until bubbles stop rising. Splash-and-go stones only need a light spray of water across the top before use.
- Lock the stone in place: Set the stone into a fitted non-slip rubber base or a silicone holder. Place the holder on a sturdy counter over a damp, folded kitchen towel to keep it from sliding.
- Position your body comfortably: Stand at a counter roughly at elbow height. You need enough clearance to move your arms freely without hunching over.
- Keep water and towels nearby: Place a small bowl of water or a spray bottle beside your setup to keep the stone wet, along with a clean towel to dry the knife.
Finding Your Sharpening Angle with Everyday Guides
Sharpening a knife means grinding away metal to restore the bevel, which is the sloped edge leading down to the cutting line. The secret to a sharp edge is holding one consistent angle on every pass. If your hand wobbles, you will round off the cutting edge instead of grinding it flat.
Most everyday knives fall into two standard angle categories:
- A 15-degree angle per side: This narrow angle creates an exceptionally sharp slicing line. It is common on delicate blades, such as those found in high-carbon Japanese chef knife sets, where thin slicing matters more than chopping through bone.
- A 20-degree angle per side: This wider angle leaves more steel behind the cutting line to support the edge. It is standard for heavy-duty kitchen blades, such as the versatile chef knives in German high-carbon steel premium knife block sets, as well as outdoor pocket knives that tackle tough cutting chores.
You do not need digital measuring tools to find these angles. A simple trick uses standard pocket change. Lay your knife flat on the stone, then lift the spine (the thick top edge of the blade) just enough to slide two pennies underneath it. For an average chef knife, that two-penny gap sets the blade right at 15 degrees. Stacking three pennies sets the blade at roughly 20 degrees.
Another reliable guide is your thumb. Rest the knife edge on the stone, place your thumb flat against the stone, and lean the spine against your thumbnail. Once you find that height, lock your wrist rigid. Move your upper body from the torso rather than flexing your wrist. That locked wrist keeps your bevel flat from the first stroke to the last.
How to Sharpen the Blade Step by Step
Sharpening works best with a steady, repeatable pattern. Start on the coarser side of your stone (a grit rating between 400 and 1000, which indicates the stone roughness rating) to grind away dull steel and shape the cutting edge.
- Place the coarse grit stone facing up and wet the surface.
Reason: Coarse grit cuts away worn steel quickly to shape the edge, while water floats away metal particles so the stone does not clog. - Set the heel of the blade across the far end of the stone at your chosen angle.
Reason: Starting at the heel (the wide rear section closest to the handle) allows you to sweep the entire cutting line across the stone in one smooth stroke. - Rest two fingertips of your free hand flat on the knife face just above the edge.
Reason: Your guide fingers apply balanced downward pressure directly over the contact point without bending the blade. - Pull the knife across the stone in a smooth diagonal arc from heel to tip while pushing downward.
Reason: Sweeping in an arc ensures that the curved belly and pointed tip maintain flat, even contact with the abrasive surface. - Keep your hand pressure light and even, like pressing firmly on a ripe tomato.
Reason: Heavy downward pressure tilts your angle and rolls the delicate edge, while light pressure produces a clean, flat bevel. - Repeat this sweeping stroke five to ten times along the first side of the blade.
Reason: Making several even passes removes just enough dull metal to create a straight, uniform bevel along the entire length of the blade. - Flip the knife over and match the exact same angle on the opposite side.
Reason: Grinding both sides evenly centers the cutting apex, ensuring that the finished blade slices straight instead of drifting sideways. - Add a splash of water whenever the stone surface looks dry or grey sludge builds up.
Reason: Keeping a moist slurry on the stone lubricates the stroke and prevents friction heat from affecting the steel.
Checking for the Raised Burr to Confirm the Edge Is Ready
The biggest mistake beginners make is guessing when to stop sharpening the first side. If you switch sides too early, you leave dull steel at the cutting line. You do not need to guess because the steel gives you a clear physical signal called a burr.
A burr is a microscopic wire edge or curved sliver of metal that forms on the opposite side of the blade during sharpening. As the abrasive stone grinds away metal on the first side, it reaches the very tip of the bevel. The remaining ultra-thin sliver of steel bends over toward the opposite side. When that metal curls over, it proves that you have ground completely through the old, dull edge.
Check for the burr using your fingers, but always practice strict safety. Never run your finger along the sharp edge, as any sideways slip will slice your skin. Instead, place the soft pad of your thumb flat against the side of the blade that faced away from the stone. Gently brush your thumb pad downward, moving from the spine toward the edge and sweeping off into open air.
If you feel a rough, scratchy ridge that catches on your skin, the burr is present. Feel the blade from the heel, across the curved belly, out to the tip. If you feel that tiny rough lip along the entire length, the first side is finished. If one spot feels smooth, put the knife back on the stone and make three or four more passes on that area until the burr forms completely.
Polishing the Edge and Removing the Metal Burr
Once the burr is present along the full length of the blade on both sides, the knife is shaped. However, that thin curled ridge of metal is weak. If you try slicing food right now, the burr will fold over, making the knife feel dull again. The final stage removes the burr and polishes the edge to a clean slicing finish.
- Flip the stone to the fine grit side and splash it with water.
Reason: A fine grit (such as 3000 to 6000 grit) refines the coarse scratches left by the previous stone, smoothing the metal into a clean, low-friction surface. - Make light alternating strokes from heel to tip, switching sides after every pass.
Reason: Switching sides back and forth flexes the microscopic metal burr until it snaps off cleanly, leaving a crisp, bare cutting line. - Reduce your downward pressure until the blade moves under its own weight.
Reason: Gentle, feather-light strokes hone the cutting apex without bending the delicate edge. - Wash the knife with warm water and soap, then dry it immediately with a clean towel.
Reason: Thorough washing removes abrasive stone slurry and steel grit from the blade, while quick drying prevents rust spots on high-carbon steel.
Sharpening Gear That Simplifies the Process
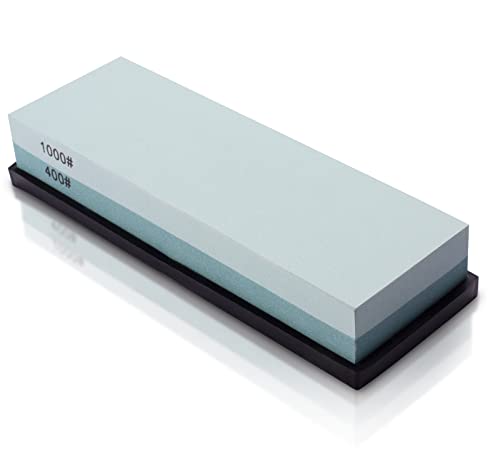
If you are setting up your first bench sharpening station, having the right basic gear eliminates most beginner frustration. A combination water stone featuring two different grit sides gives you everything needed to repair a dull edge and polish it to a clean finish without buying multiple individual blocks. Look for a stone that pairs a medium shaping grit with a fine polishing grit.
Stability and consistency are the two biggest hurdles when learning to sharpen by hand. A stone that comes with a non-slip silicone holder and a solid wooden base keeps your work surface firmly planted so the stone cannot shift mid-stroke. If you struggle to maintain a flat wrist, a clip-on plastic angle guide attached to the spine can train your muscle memory. It keeps the blade elevated at an exact angle until your hands learn the feeling naturally.

- TAR Score9.4
TAR Score is a ranking system developed by TopAppliancesReviews.com. TAR score has no relationship or impact from any manufacturers or sales agent websites. Learn more
- BrandLeking

- TAR Score9.2
TAR Score is a ranking system developed by TopAppliancesReviews.com. TAR score has no relationship or impact from any manufacturers or sales agent websites. Learn more
- BrandKEENBEST

- TAR Score9.2
TAR Score is a ranking system developed by TopAppliancesReviews.com. TAR score has no relationship or impact from any manufacturers or sales agent websites. Learn more
- BrandIntelitopia

- TAR Score9.2
TAR Score is a ranking system developed by TopAppliancesReviews.com. TAR score has no relationship or impact from any manufacturers or sales agent websites. Learn more
- BrandHiramWare

- TAR Score9.2
TAR Score is a ranking system developed by TopAppliancesReviews.com. TAR score has no relationship or impact from any manufacturers or sales agent websites. Learn more
- Brandryerum

- TAR Score9.2
TAR Score is a ranking system developed by TopAppliancesReviews.com. TAR score has no relationship or impact from any manufacturers or sales agent websites. Learn more
- BrandSharp Pebble

- TAR Score9.2
TAR Score is a ranking system developed by TopAppliancesReviews.com. TAR score has no relationship or impact from any manufacturers or sales agent websites. Learn more
- BrandSD.TIANPENG

- TAR Score9.0
TAR Score is a ranking system developed by TopAppliancesReviews.com. TAR score has no relationship or impact from any manufacturers or sales agent websites. Learn more
- BrandHMPLL
- TAR Score9.0
TAR Score is a ranking system developed by TopAppliancesReviews.com. TAR score has no relationship or impact from any manufacturers or sales agent websites. Learn more
- BrandMIDO Professional Abrasive

- TAR Score9.0
TAR Score is a ranking system developed by TopAppliancesReviews.com. TAR score has no relationship or impact from any manufacturers or sales agent websites. Learn more
- BrandWhetstone Cutlery
Last update on 2026-10-03 / Affiliate links / Images, Product Titles, and Product Highlights from Amazon Product Advertising API
FAQs
How do I know if my stone needs water or oil?
Check the packaging or manufacturer label to see whether the stone is listed as a water stone or an oil stone. Most dual-grit stones made of aluminum oxide or white corundum are water stones that require a water soak or splash. If you place a drop of water on a dry stone and it sinks into the surface within seconds, it is a water stone. Traditional dense natural stones, such as hard Arkansas stones, require mineral honing oil to float away metal shavings.
How do I tell if my knife is sharp without cutting myself?
The safest way to check sharpness is the paper slicing test. Hold a single sheet of standard printer paper vertically by the top corner and rest the heel of the knife against the top edge. Slice downward through the paper using light pressure and no sawing motion. A sharp blade will glide cleanly through the sheet without tearing, snagging, or catching on rough spots.
Which grit should I start with if my blade is not chipped?
Start on a medium grit around 1000 if your knife is simply dull from normal kitchen or utility use. A 1000-grit stone removes enough metal to create a fresh apex quickly without stripping away unnecessary blade steel. Reserve coarse grits below 600 for severely damaged blades with visible chips, rolled edges, or broken tips that require extensive reshaping.
How often should I sharpen my knife on a bench stone?
Most home cooks only need to sharpen their knives on a stone every three to six months, depending on how often they cook and what cutting boards they use. You can maintain that edge between stone sessions by using a smooth honing steel or leather strop every few weeks to straighten the edge. When the knife begins squishing soft tomatoes instead of slicing cleanly through the skin, it is time for the stone again.


Top Rated Best Quality Range Hoods: 2026 Expert Picks

The 12 Best Small Solar Generators 2026

10 Best Quality Semi Automatic Washing Machine of 2026 For Leak-Free Laundry

11 Best Small Washer Machine of 2026 For Everyday Laundry

12 Best Vibration Pads For Washing Machine of 2026 To Stop Walking and Shaking

11 Best Selling Front Load Washing Machine of 2026 For Quiet Odor-Free Laundry

11 Best Washing Machine For King Size Bedding of 2026 To Prevent Cycle Errors

10 Best Small Front Loader Washing Machine of 2026 For Tight Closets






