
How to Sharpen a Knife on a Sharpening Stone Step by Step

A ripe tomato squishes under the kitchen knife instead of slicing clean, pushing juice across the cutting board. Getting that crisp edge back means you need to wet the sharpening stone and hold the blade at a steady angle as you glide it across the surface. When a tiny rough ridge of metal forms on the back side, flip the knife, repeat the strokes, and polish the edge on a finer grit.
The exact routine shifts depending on your gear. Waterstones need a splash or a full bath before you start, while oilstones require a few drops of honing oil. Japanese blades generally favor a lower fifteen-degree tilt, whereas heavier Western kitchen knives do best around twenty degrees. Truly beat-up edges must begin on a coarse surface, but a slightly tired blade can jump straight to medium. Here is how to steady your hands, set the tilt, and sharpen with confidence.
How Do You Prepare Your Stone And Countertop?
Sharpening a knife safely begins with building a firm, steady workstation. A sharpening stone that slides across the counter while you push a sharp blade forward is dangerous and ruins your bevel (the slanted cutting edge). Waterstones, which are the most common stones for home kitchens, need water to float away tiny steel particles so the grit does not clog. If you use an oil stone, apply a few drops of mineral honing oil instead of water. Never use cooking oil, as organic oils turn gummy and ruin the stone.
Before placing your knife on the stone, run through this quick setup checklist:
- Soak the stone: Submerge your waterstone in clean tap water for 10 to 15 minutes. When air bubbles stop rising to the surface, the stone has absorbed enough water. Splash-and-go stones only need a quick surface spray before you start.
- Anchor your workspace: Place a damp dish towel, silicone mat, or rubber stone base flat on your counter. This stops the stone from slipping or vibrating under hand pressure.
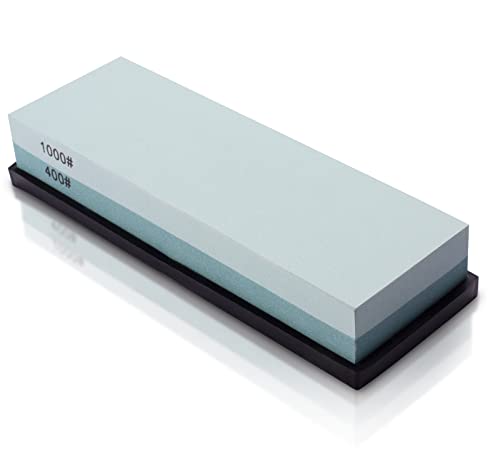
- Position the stone: Set the stone in its holder with the coarse grit (the lower number, such as 400 or 1000) facing up. Point the short end toward your chest so your arms can move naturally.
- Keep water nearby: Fill a small spray bottle or shallow bowl with tap water to splash on the stone whenever the top looks dry.
- Dry your hands: Wipe the knife handle and your fingers dry so your grip never slips while working.
How Do You Find And Hold The Right Angle?
The angle at which the blade meets the stone determines how sharp the knife becomes and how well that edge holds up over time. If your angle is too steep, the blade pushes through food like a blunt wedge. If your angle is too shallow, the cutting edge becomes paper-thin and chips against hard cutting boards.
Different knife styles need different angles:
- Japanese kitchen knives: These blades use hard steel made for thin slicing. Hold them at a steep 15-degree slicing edge per side. This angle works best on delicate blades like high-carbon Japanese chef knives.
- Western kitchen knives: German and French chef knives use tougher steel built for chopping. Sharpen these at a sturdy 20-degree utility edge per side.
- Pocket and utility knives: Everyday carry pocket knives and hunting blades also benefit from a 20-degree angle per side to resist chipping against hard materials.
Finding that angle is easy with coins. Lay the blade flat on the stone with the spine facing away from you. Lift the spine until you can slip two standard quarters under it. For a typical chef knife, two stacked quarters match roughly 15 degrees. Three quarters create roughly 20 degrees.
Once you set that angle, lock your wrist like a solid clamp. Beginners often rock their wrist as they push the blade, which rounds the edge into a blunt curve. Move your entire forearm and shoulder instead. A clip-on angle guide attached to the spine can also hold the knife steady while you build muscle memory.
What Is The Proper Stroke Across The Stone?
Sharpening works through smooth, repeatable contact across the edge, not brute force. Heavy downward pressure gouges the stone and rolls the thin metal. Use light pressure, roughly equal to resting your hand on a computer mouse.
Follow these steps to sweep the knife across the stone:
- Set your grip: Hold the knife handle firmly with your dominant hand, resting your thumb against the blade flat for stability.
- Place your guide fingers: Place the fingertips of your index and middle fingers from your other hand flat on the blade face, just above the cutting edge. They provide gentle downward pressure against the stone.
- Start at the heel: Place the blade heel across the far end of the stone at your chosen angle, angling the blade diagonally across the stone surface at roughly 45 degrees.
- Sweep toward you: Pull the knife smoothly toward your chest. Sweep sideways as you pull so the stone contacts the heel, moves through the belly, and finishes at the tip. Picture shaving a thin layer of butter off the stone.
- Follow the curve: Lift your elbow slightly as you reach the curved tip so the apex stays flush against the grit.
- Repeat rhythmically: Ease off the pressure and glide the blade back to the starting point. Repeat this smooth motion across the stone. Long blades can be sharpened in three overlapping zones: heel, middle, and tip.
How Do You Know When To Flip The Knife?
Do not guess when to switch sides by counting strokes. The only reliable sign that a side is finished is feeling a burr (the microscopic wire edge or curved sliver of metal that forms on the opposite side during sharpening).
When you grind away enough steel from one side of the bevel, the thinned cutting edge folds over away from the stone. That tiny folded lip confirms the edge meets at a crisp apex. If you flip the blade before forming a burr, the edge stays dull.
Check for the burr safely:
- Wipe the blade: Pull the knife from the stone and wipe the wet residue off the steel with a damp cloth.
- Place your thumb pad: Turn the knife so the unground side faces up. Place the soft pad of your thumb flat against the side of the blade near the spine.
- Slide outward off the edge: Slide your thumb pad slowly downward and straight off the cutting edge. Never slide your finger along the blade length, which will cut you. Move only outward, perpendicular to the edge.
- Feel for the catch: You will feel a rough, scratchy little hook catching your skin, like the edge of torn foil.
- Check the full length: Confirm the burr runs from heel to tip. If the tip feels smooth, sharpen that section more before flipping the blade.
How Do You Polish And Finish The Edge?
Once you flip the blade and raise a burr on the second side, your knife is sharp but has a rough, saw-like edge. Polishing smooths out scratch marks, cleans off the wire edge, and helps the blade glide effortlessly through food.
Follow these steps to refine and polish the edge:
- Switch to fine grit: Turn your stone over to the fine-grit side, usually 3000 to 6000 grit, and splash it with water. Fine grit removes almost no metal; it simply polishes grind marks left by coarse stone. This polishing step restores clean slicing power to German high-carbon steel knives without grinding away excess steel.
- Keep the slurry: As you work, a gray paste forms on the stone surface. This slurry is a blend of water and fine abrasive particles. Leave it alone. It acts like a buffing paste that speeds up polishing.
- Buff both sides: Sweep both sides of the blade across the fine grit at your established angle, making 10 to 15 light passes per side.
- De-burr with alternating strokes: Remove the delicate wire edge by making single alternating strokes. Make one light pass on the right side, flip the knife, and make one pass on the left side. Repeat five times with feather-light pressure.
- Strop the finished edge: Pull the knife spine-first across a leather strop (a flat strip of leather used for final polishing) or a sheet of smooth cardboard. Trailing the blade removes remaining micro-burrs and leaves a hair-popping edge.
How Do You Test Sharpness And Avoid Common Mistakes?
Before putting your gear away, verify that the cutting edge is sharp and even. Never test an edge by pressing your thumb against the blade. Professional sharpeners rely on two quick kitchen tests to confirm the edge is ready.
Use these reliable sharpness checks:
- The paper slice check: Hold a piece of copy paper vertically by one corner. Place the knife heel against the top edge and push gently downward and forward. A sharp blade will glide silently through the sheet without catching, tearing, or snagging.
- The tomato skin check: Set the blade on top of a ripe tomato. Pull the knife backward without pushing down. A sharp edge punctures the slippery skin under the knife's own weight.
Watch out for these common rookie mistakes:
- Rocking your wrist: Tilting your hand as you sweep rounds the bevel into an oval shape, making the knife duller than when you began. Keep your wrist locked.
- Pressing too hard: Heavy pressure gouges soft waterstones and creates a thick burr that resists removal. Let the stone do the cutting.
- Sharpening dry: Rubbing steel on a dry stone creates friction heat and clogs the stone pores with metal filings. Keep the surface wet.
- Lifting the blade on return passes: Bumping the edge down onto the stone can chip hard steel. Keep every stroke controlled.
What Kind Of Sharpening Stone Kit Works Best?
If you are setting up your sharpening station for the first time, you do not need an entire cabinet of specialty stones. A double-sided waterstone offers the ideal balance of shaping power and fine polishing in a single convenient block.
When choosing a sharpening stone setup, look for these practical features:
- A practical dual-grit balance: Choose a combination stone with a medium grit (around 1000 grit) on one face to rebuild worn edges and a fine grit (around 3000 to 6000 grit) on the back to polish the bevel. If your blades have chips, a 400-grit coarse stone helps reshape them first.
- A secure, non-slip base: Safe sharpening requires complete stability. Look for kits that feature a snug silicone rubber holder that rests inside a solid bamboo or wooden base with rubber feet.
- An angle guide: If you are nervous about keeping your angle steady by eye, a plastic clip-on guide snaps onto the blade spine to help maintain the correct tilt while you practice.
- A flattening stone: Waterstones wear down faster in the middle over time. A coarse flattening stone levels the surface flat so your blades always meet an even plane.

- TAR Score9.4
TAR Score is a ranking system developed by TopAppliancesReviews.com. TAR score has no relationship or impact from any manufacturers or sales agent websites. Learn more
- BrandLeking

- TAR Score9.2
TAR Score is a ranking system developed by TopAppliancesReviews.com. TAR score has no relationship or impact from any manufacturers or sales agent websites. Learn more
- BrandKEENBEST

- TAR Score9.2
TAR Score is a ranking system developed by TopAppliancesReviews.com. TAR score has no relationship or impact from any manufacturers or sales agent websites. Learn more
- BrandIntelitopia

- TAR Score9.2
TAR Score is a ranking system developed by TopAppliancesReviews.com. TAR score has no relationship or impact from any manufacturers or sales agent websites. Learn more
- BrandHiramWare

- TAR Score9.2
TAR Score is a ranking system developed by TopAppliancesReviews.com. TAR score has no relationship or impact from any manufacturers or sales agent websites. Learn more
- BrandSharp Pebble

- TAR Score9.2
TAR Score is a ranking system developed by TopAppliancesReviews.com. TAR score has no relationship or impact from any manufacturers or sales agent websites. Learn more
- Brandryerum

- TAR Score9.2
TAR Score is a ranking system developed by TopAppliancesReviews.com. TAR score has no relationship or impact from any manufacturers or sales agent websites. Learn more
- BrandSD.TIANPENG

- TAR Score9.0
TAR Score is a ranking system developed by TopAppliancesReviews.com. TAR score has no relationship or impact from any manufacturers or sales agent websites. Learn more
- BrandHMPLL
- TAR Score9.0
TAR Score is a ranking system developed by TopAppliancesReviews.com. TAR score has no relationship or impact from any manufacturers or sales agent websites. Learn more
- BrandMIDO Professional Abrasive
Last update on 2026-10-02 / Affiliate links / Images, Product Titles, and Product Highlights from Amazon Product Advertising API
FAQs
How often should you sharpen your kitchen knives on a stone?
Most home cooks only need to sharpen their kitchen knives on a stone two or three times a year. In between sharpening sessions, a few passes on a honing rod or leather strop keeps the edge straight. When the blade starts sliding off onion skins instead of biting cleanly, it is time for the stone.
Can you ruin a knife by sharpening it on a stone?
It is very difficult to ruin a knife permanently on a manual stone because it removes steel slowly and gently. The worst mistakes are superficial scratches on the blade face or a rounded bevel from a wobbly wrist. Both issues are easily corrected during your next sharpening session by holding a steady angle.
Should you wash off the muddy gray water while sharpening?
No, do not wash away the gray liquid that gathers on the stone face. That muddy slurry is a blend of water and loose abrasive particles that acts like a buffing paste. It accelerates the sharpening process and produces a smoother bevel than clear water alone.
What is the difference between water stones and oil stones?
Water stones use plain tap water for lubrication, sharpen blades quickly, and polish edges cleanly, but they dish out over time and require occasional flattening. Oil stones use mineral honing oil, cut steel more slowly, and have harder surfaces that stay flat for many years without dishing.


Top Rated Best Quality Range Hoods: 2026 Expert Picks

The 12 Best Small Solar Generators 2026

10 Best Quality Semi Automatic Washing Machine of 2026 For Leak-Free Laundry

11 Best Small Washer Machine of 2026 For Everyday Laundry

12 Best Vibration Pads For Washing Machine of 2026 To Stop Walking and Shaking

11 Best Selling Front Load Washing Machine of 2026 For Quiet Odor-Free Laundry

11 Best Washing Machine For King Size Bedding of 2026 To Prevent Cycle Errors

10 Best Small Front Loader Washing Machine of 2026 For Tight Closets






