
How To Sharpen A Knife By Hand And Hold The Right Angle

A kitchen knife presses into a ripe tomato, but instead of sliding through the skin, the blade slips and crushes the fruit flat. Restoring that clean slice comes down to gliding the blade across a stone at a steady angle until a tiny metal ridge forms, then smoothing that rough edge away on a finer surface. Keeping your wrist locked ensures the steel stays crisp instead of rounding off.
The exact work depends on your blade and your sharpening block. Slender Japanese knives favor a narrow fifteen-degree tilt, while thicker Western cutlery and pocket knives hold up best around twenty degrees. Nicked steel calls for a coarse grit to reshape the metal, whereas routine dullness only needs a medium stone. Some blocks soak in water first, while diamond plates need only a quick splash. Here is how to steady your hands, shape both sides, and bring back a clean edge safely.
Set Up A Stable Work Surface And Prepare Your Stone
A sharpening stone that slides across the counter will ruin your angle and gouge your blade. Before bringing steel to the stone, build a solid foundation on a flat, dry counter. Place a damp dish towel or a silicone mat directly under your sharpening base. Set your whetstone (a rectangular sharpening stone block) into its non-slip rubber holder on top of the cloth. Press down on both ends with your hands to confirm that it does not slide, wobble, or rock.
Prepare the stone according to its material. Standard water stones need soaking in cool tap water for ten to fifteen minutes until air bubbles stop rising to the surface. Splash-and-go stones and diamond plates do not require soaking, but they need a light splash of water across the top to lubricate the surface and carry away metal dust. Never use a dry stone, because dry abrasive pores clog instantly with shaved metal dust.
Keep a small bowl of clean water nearby to splash the stone whenever the surface looks dry. Wipe your knife blade with a clean rag to remove grease, food residue, and loose grit before you begin. Working with clean steel ensures that you remove only the blade metal you intend to shape.
Match Your Blade Angle And Lock Your Wrists
Every knife has a bevel (the slanted surface of steel that tapers down to create the sharp cutting edge). To restore that edge, you must match the angle ground at the factory. For most knives, that angle sits between 15 and 20 degrees per side. As a general rule, sturdy German high-carbon steel kitchen knives perform best at a 20-degree bevel because the thicker shoulder supports heavy chopping. In contrast, delicate Japanese chef knife sets typically use a steeper 15-degree edge designed for paper-thin slicing.
You can find this angle without specialized gear. Rest your knife on the stone with the blade standing straight up at 90 degrees. Tilt the spine halfway toward the stone to reach 45 degrees. Tilt the spine halfway down again to reach roughly 22 degrees. Lower the spine just slightly further to rest at the ideal 15 to 20-degree window. This gap matches the height of two stacked quarters or a standard matchbook placed under the spine.
Wobbling your wrists is the most common sharpening mistake. If your wrist rolls as you slide the blade across the stone, you round off the apex and leave the edge duller than before. Lock your wrist solid like a rigid clamp. Hold the handle firmly and power the sweeping motion using your shoulder and elbow joints instead of your hands.
Glide The Edge Across The Coarse Grit In Smooth Sweeps
Sharpening stones rely on grit (the roughness number of the stone surface). Start with a coarse or medium grit rated between 400 and 1000. A 400-grit surface removes damaged steel quickly to repair dull or chipped edges, while 1000 grit reshapes normally worn knives. Follow these steps to work the first side:
- Position the blade across the stone: Hold the handle in your dominant hand with your index finger resting on the spine. Place the knife heel near the far end of the stone at your chosen 15 to 20-degree angle. Rest two fingertips from your other hand flat on the blade face just above the edge to guide contact.
- Sweep the knife forward and across: Slide the blade diagonally toward your body in an edge-leading stroke, as if slicing a thin sheet off the stone surface. Move from heel to tip in one continuous arc. Pushing the cutting edge forward against the stone prevents loose steel flakes from catching under the blade.
- Maintain light, steady pressure: Press down with two to three pounds of force, about the effort needed to firmly wipe a countertop. Never use full upper body weight. Heavy pressure gouges softer stones and bends thin steel out of shape.
- Work the blade in zones: Divide an eight-inch blade into three sections: the flat heel, the curved belly, and the tip. Sweep each zone across the stone with five to ten matching strokes. When working the curved tip, lift your elbow slightly so the edge stays flat against the stone.
Feel For The Burr To Know When To Flip The Blade
You cannot guess when a blade is ready to be flipped; you must confirm it by touch. As abrasive particles grind away steel along the bevel, the cutting edge tapers into a microscopically thin apex. Eventually, the thinned steel bends away from the stone toward the unground side. This bend creates a burr (a tiny rough ridge of bent metal that forms along the opposite side of the blade during sharpening).
The burr proves you have ground completely through the worn steel all the way to the cutting apex. If you stop before raising a burr from heel to tip, you leave a flat plateau at the edge, and the knife will still crush food rather than slice it cleanly.
Check for the burr carefully to avoid injury. Never run your fingers horizontally along the sharp edge. Instead, place the soft pad of your thumb flat against the side of the blade that faced away from the stone. Gently glide your thumb pad upward, moving from the spine down and off the cutting edge into the air. If the burr has formed, you will feel a scratchy wire ridge catch lightly on your fingerprint. Once that catch runs continuously from heel to tip, flip the knife over and repeat the exact same strokes on the other side.
Refine And Polish The Edge On A Finer Grit
Once you raise a burr on both sides with your medium stone, your edge profile is formed. However, that edge is still covered in micro-scratches. To refine it into a durable, clean slicing edge, polish it on a fine grit rated between 3000 and 6000.
- Rinse your blade and clean the stone: Wash the knife with warm water to remove coarse grit and metal slurry. If using a combination stone, flip to the fine side. Rinse the surface clean so stray coarse grit does not scratch the polishing stone.
- Reset your precise angle: Place the blade on the fine stone at the exact same 15 to 20-degree angle. Lifting the spine too high blunts the apex, while dropping it too low polishes the knife face instead of the edge.
- Lighten your downward pressure: Cut your hand pressure in half, using barely more than the weight of the knife itself. Light pressure lets fine abrasive particles smooth out scratch lines without bending the fragile wire edge.
- Perform alternating single strokes: Make one smooth diagonal sweep on the first side. Flip the knife immediately and make one matching sweep on the opposite side. Complete eight to ten light alternating passes. This alternating sweep snaps the tiny burr cleanly off the blade.
- Hone or strop the finished edge: Draw the blade backward along a leather strop or fine ceramic rod three or four times per side. Honing (straightening a bent edge without grinding away metal) aligns the microscopic teeth of the steel and strips away any remaining metal foil.
Verify Your New Edge Without Risking A Cut
Checking sharpness by running your thumb over an edge is unsafe and inaccurate. A dull blade with a jagged burr can cut skin while still failing miserably on food prep. Use these three safe checks to confirm your edge quality:
- The standard paper slice check: Hold a sheet of copy paper vertically by the upper corner. Rest the heel of your knife on the top edge and glide the blade forward and downward without forcing it. A sharp knife will slice through the paper in an effortless glide from heel to tip without snagging or tearing.
- The tomato skin grip check: Place a ripe tomato on your cutting board. Rest the belly of the knife against the skin without pushing down. Draw the blade backward using only the weight of the knife handle. A sharp edge catches and slices the slick skin immediately, while a rounded edge slides off the side.
- The overhead light reflection check: Hold the knife directly under a bright light with the cutting edge pointing straight up toward the ceiling. Look down along the apex from heel to tip. A dull edge has flat spots that catch light, showing up as bright silver glints. A razor-sharp edge has no measurable thickness, meaning it reflects zero light and looks completely dark.
Choose The Right Manual Sharpening Tools For Your Knives
Getting dependable results by hand requires simple, well-made tools rather than powered grinding wheels. When selecting manual sharpening gear, prioritize double-sided whetstones that combine two grit levels in one block. A combination stone with a medium grit around 1000 for restoring dull edges and a fine grit between 3000 and 6000 for polishing covers all standard kitchen needs.
Look for stones measuring at least seven to eight inches long so you can sweep full-sized chef knives in single, smooth strokes. Ensure the set includes a heavy non-skid rubber base that locks onto wet countertops. If you struggle to maintain a consistent wrist angle, pick up a simple clip-on angle guide that attaches to the blade spine. The guide maintains a fixed bevel while you build reliable muscle memory.

- TAR Score9.4
TAR Score is a ranking system developed by TopAppliancesReviews.com. TAR score has no relationship or impact from any manufacturers or sales agent websites. Learn more
- BrandACCUSHARP

- TAR Score9.4
TAR Score is a ranking system developed by TopAppliancesReviews.com. TAR score has no relationship or impact from any manufacturers or sales agent websites. Learn more
- BrandACCUSHARP

- TAR Score9.2
TAR Score is a ranking system developed by TopAppliancesReviews.com. TAR score has no relationship or impact from any manufacturers or sales agent websites. Learn more
- BrandN/A
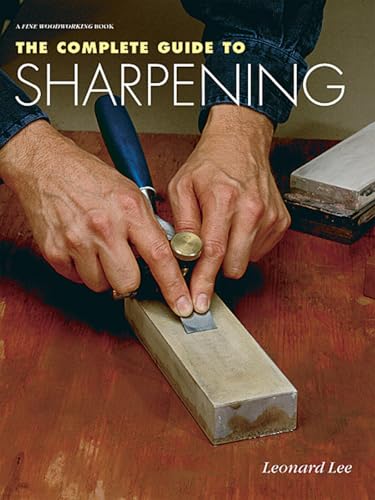
- TAR Score9.2
TAR Score is a ranking system developed by TopAppliancesReviews.com. TAR score has no relationship or impact from any manufacturers or sales agent websites. Learn more
- BrandTaunton Press

- TAR Score9.2
TAR Score is a ranking system developed by TopAppliancesReviews.com. TAR score has no relationship or impact from any manufacturers or sales agent websites. Learn more
- BrandIntelitopia

- TAR Score9.0
TAR Score is a ranking system developed by TopAppliancesReviews.com. TAR score has no relationship or impact from any manufacturers or sales agent websites. Learn more
- BrandKITCHELLENCE
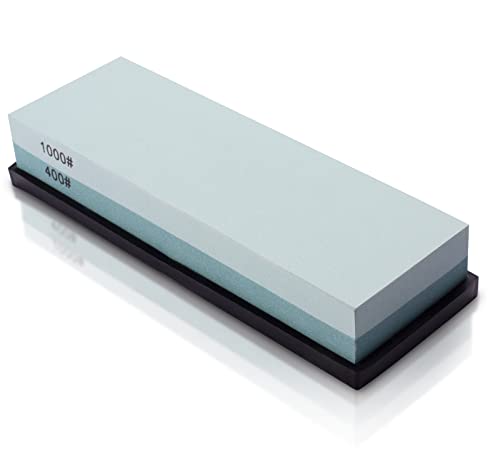
- TAR Score9.0
TAR Score is a ranking system developed by TopAppliancesReviews.com. TAR score has no relationship or impact from any manufacturers or sales agent websites. Learn more
- BrandMIDO Professional Abrasive

- TAR Score8.8
TAR Score is a ranking system developed by TopAppliancesReviews.com. TAR score has no relationship or impact from any manufacturers or sales agent websites. Learn more
- BrandSHARPAL

- TAR Score8.6
TAR Score is a ranking system developed by TopAppliancesReviews.com. TAR score has no relationship or impact from any manufacturers or sales agent websites. Learn more
- BrandHonoson

- TAR Score8.6
TAR Score is a ranking system developed by TopAppliancesReviews.com. TAR score has no relationship or impact from any manufacturers or sales agent websites. Learn more
- BrandLUFFEXX
Last update on 2026-10-04 / Affiliate links / Images, Product Titles, and Product Highlights from Amazon Product Advertising API
FAQs
Should I push the blade forward into the stone or pull it backward?
Pushing the cutting edge forward across the stone in an edge-leading sweep gives you the cleanest cutting apex. Forward strokes slice off micro-burrs and prevent a heavy wire edge from rolling over. Pulling the blade backward in an edge-trailing motion works well on leather strops, but pushing forward is safer and more effective on sharpening stones.
How often should I sharpen my knife on a whetstone?
Most kitchen knives only need a full whetstone session every three to six months, depending on how often you cook. Between stone sessions, use a smooth honing steel or ceramic rod once a week to straighten the apex without removing metal. Return to your stone only when the knife begins slipping off tomato skins or requires extra force to cut.
Can I use cooking oil or dish soap on my water stone?
Never put vegetable oil, olive oil, or motor lubricant on a water stone. Heavy oils clog the microscopic pores of the stone, permanently destroying its ability to absorb water and grind steel. Always use plain tap water for water stones. If you use traditional oil stones, apply only food-safe mineral oil designed specifically for cutlery stones.
Why does my knife feel duller after sharpening it on a stone?
A knife typically feels duller after sharpening because your wrist wobbled during the stroke, which rounded off the bevel instead of forming a flat apex. Another common cause is leaving the thin wire burr bent over the edge rather than removing it on a fine stone. Keep your wrist rigid, lower your pressure, and make light alternating passes on your finest grit until the burr snaps away.


Top Rated Best Quality Range Hoods: 2026 Expert Picks

The 12 Best Small Solar Generators 2026

10 Best Quality Semi Automatic Washing Machine of 2026 For Leak-Free Laundry

11 Best Small Washer Machine of 2026 For Everyday Laundry

12 Best Vibration Pads For Washing Machine of 2026 To Stop Walking and Shaking

11 Best Selling Front Load Washing Machine of 2026 For Quiet Odor-Free Laundry

11 Best Washing Machine For King Size Bedding of 2026 To Prevent Cycle Errors

10 Best Small Front Loader Washing Machine of 2026 For Tight Closets






