
How to Sharpen a Kitchen Knife With a Whetstone Step by Step

Sharpening a kitchen knife on a whetstone means holding the blade at a steady angle and sliding it across the surface until a tiny metal ridge forms along the edge. The exact tilt you hold depends on the style of blade in your kitchen. Many cooks worry about ruining the steel, but consistent hand placement matters far more than pushing hard. Smooth, repeatable passes bring back a crisp edge without chewing through the metal.
Japanese blades generally favor a slim 15-degree tilt, whereas heavier Western chef knives perform best around 20 degrees. Your stone setup also changes the prep, because common water stones require a thorough soak, while diamond plates work right away. Deep nicks or neglected edges also call for a coarse surface before moving to fine polishing. Here is the calm way to set up your station and guide the blade with confidence.
Prep Work: Soaking the Stone and Securing Your Workspace
Sharpening a knife begins before the blade touches abrasive grit (the roughness number of the stone surface). Setting up your station properly keeps the whetstone stable and prevents dry friction that could scratch your blade.
- Check your stone type: Most combination whetstones are water stones. Submerge the stone in cool water for 10 to 15 minutes until air bubbles stop rising to the top. Oil stones and diamond plates do not need soaking.
- Seat the stone in its rubber holder: Slip the wet stone into its silicone or rubber sleeve. This protects brittle stone edges and stops the block from rattling against hard counters.
- Anchor the base on a damp towel: Place the rubber-mounted stone into its bamboo base, then set the assembly over a damp kitchen towel. A firm grip stops the stone from shifting while you push the knife.
- Keep clean water nearby: Keep a small bowl or spray bottle of water next to your board. Adding a few drops when the surface dries keeps the stone slick and clears loose metal filings.
- Position yourself squarely: Stand with your shoulders relaxed and your feet apart. Point the stone straight ahead or turn it slightly at an angle to match the natural sweep of your arm.
Finding the Right Angle: Japanese Versus Western Kitchen Knives
Maintaining a steady bevel (the angled slope leading down to the cutting edge) is the secret to a razor-sharp knife. Tilting your wrist up and down rounds off the edge instead of sharpening it. Different knife styles require specific angles to balance cutting ease with long-term edge durability.
Traditional Western blades, such as those found in classic German high-carbon steel knife sets, use thicker steel designed for heavy chopping. A sturdy 20-degree utility edge per side gives these blades the strength to handle dense squash and hard root vegetables without chipping.
Delicate Japanese blades, such as those in high-carbon Japanese chef knife sets, use harder steel that holds a steep 15-degree slicing edge per side. This narrow bevel glides through fish and soft vegetables with minimal friction, but requires a steady hand to avoid chipping.
To find your angle without fancy tools, hold the knife upright at 90 degrees, tilt it halfway to 45 degrees, and cut that space in half again to find roughly 22 degrees. Lower the spine slightly more for 20 degrees, or a touch further for 15 degrees. Stacking two pennies under the spine of an eight-inch blade roughly matches 20 degrees, while one penny represents about 15 degrees. Beginners can also clip a plastic angle guide onto the knife spine to hold this slope automatically.
The Sharpening Stroke: Sweeping the Blade to Raise a Burr
- Start on the medium-grit side: Place the stone with the 1000-grit side facing up and splash it with water. Reason: Medium grit cuts away worn steel to reshape an edge without removing excess metal.
- Grip the handle and lock your wrist: Hold the handle with your dominant hand, place your index finger along the spine, and keep your wrist stiff. Reason: A rigid wrist stops the blade from rocking, preserving a flat bevel.
- Place helper fingers on the blade face: Rest two fingertips of your free hand on the blade face just above the cutting edge. Reason: Your fingertips direct downward pressure right onto the contact zone between blade and stone.
- Set your angle at the heel: Rest the heel of the knife across the stone at your target 15 or 20 degree angle. Reason: Starting at the heel ensures you work the entire cutting edge evenly from handle to tip.
- Push across the stone in a smooth diagonal sweep: Glide the blade forward across the stone while sliding diagonally from heel to tip. Reason: An arcing diagonal stroke covers the natural curve of the knife in balanced passes.
- Apply light pressure only on the forward push: Press down with gentle force as you push away, then release pressure as you glide back. Reason: Scrubbing back and forth with heavy pressure gouges the stone and tilts your angle.
- Lift the handle slightly at the tip: Raise your hand an inch as the stroke reaches the curved belly and tip. Reason: Because kitchen knives curve upward, lifting the handle keeps the edge tip flat against the abrasive grit.
- Work in overlapping sections: Spend 10 to 15 strokes each on the heel, belly, and tip of the blade. Reason: Segmenting long blades guarantees equal sharpening across the entire profile.
- Feel for the burr on the opposite side: Slide your thumb from the spine downward over the unsharpened side to feel for a rough catch. Reason: The burr (the tiny raised metal ridge along the sharpened edge) confirms you ground enough steel to reach the true edge apex.
Flipping and Refining: Balancing the Second Side and Polishing on Fine Grit
Once a burr runs from heel to tip, flip the blade to sharpen the opposite bevel. Working both sides equally keeps your edge centered so the knife cuts straight.
- Flip the blade to the second side: Turn the knife over so the unsharpened face rests on the stone, keeping your dominant hand on the handle. Reason: Maintaining your primary grip preserves muscle memory while your other hand controls downward contact.
- Match your angle and stroke count: Use the same 15 or 20 degree angle and match the stroke count used on the first side. Reason: Symmetrical strokes ensure both bevels meet at an even center point.
- Confirm the burr has flipped: Check the first side with your thumb to verify the metal wire has rolled over. Reason: A flipped burr proves you fully apexed both sides of the blade.
- Switch to the fine polishing grit: Rinse the knife, flip the stone to the 6000-grit side, and add clean water. Reason: Fine grit removes rough scratches left by coarse stone, producing a mirror finish.
- Perform light alternating strokes: Make gentle trailing strokes across the fine stone, alternating sides after each pass. Reason: Alternating feather-light strokes polishes the bevel while weakening and shedding the fragile wire burr.
- Strop the edge clean: Pull the blade backward across a leather strop (a leather strip used to wipe away leftover metal burrs). Reason: Stropping wipes away microscopic metal foil, leaving a clean edge that glides through food.
Safe Edge Checks and Blade Care
Always verify your edge using safe checks rather than risking a finger cut. Finish your sharpening session with proper blade cleaning and stone care.
- The paper slice check: Hold a loose sheet of printer paper upright and slice downward with the knife heel. A sharp edge glides silently through the sheet without tearing or catching on paper fibers.
- The tomato skin check: Rest the blade against a ripe tomato and pull backward with zero downward pressure. A properly apexed knife bites instantly through the slick skin under its own weight.
- The safe thumb check: Never slide your bare finger along the edge lengthwise. Touch your thumb pad lightly across the edge at a 90-degree angle; a sharp blade feels distinctly grabby against your fingerprint ridges.
- Wash and dry the blade: Clean the knife with warm soapy water and a soft cloth, wiping away from the cutting edge. Dry it immediately with a towel to prevent surface rust, especially on high-carbon steel.
- Dry the whetstone completely: Rinse metal sludge off the stone under cool running water. Let the stone air dry on an open rack for 24 to 48 hours before storing it in a closed box to prevent mold growth.
Choosing the Right Sharpening Stone Setup
Sharpening at home is simple when your tools provide proper support. Beginners often struggle because a wobbling stone or inconsistent angle turns every stroke into guesswork. Selecting a stable setup eliminates these hurdles right away.
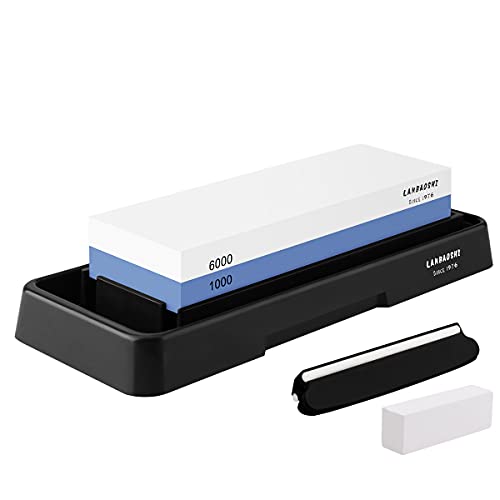
A dual-sided water stone offers the best versatility for kitchen cutlery. A combination of 1000 grit for restoring dull edges and 6000 grit for polishing covers normal maintenance. Look for stones packaged with a non-slip silicone holder and a solid bamboo base to keep the block firmly anchored on wet counters. Included clip-on angle guides are also valuable, giving you a physical guide to build muscle memory without fear of scratching your blade.

- TAR Score9.4
TAR Score is a ranking system developed by TopAppliancesReviews.com. TAR score has no relationship or impact from any manufacturers or sales agent websites. Learn more
- BrandLeking

- TAR Score9.2
TAR Score is a ranking system developed by TopAppliancesReviews.com. TAR score has no relationship or impact from any manufacturers or sales agent websites. Learn more
- BrandIntelitopia

- TAR Score9.2
TAR Score is a ranking system developed by TopAppliancesReviews.com. TAR score has no relationship or impact from any manufacturers or sales agent websites. Learn more
- BrandHiramWare

- TAR Score9.2
TAR Score is a ranking system developed by TopAppliancesReviews.com. TAR score has no relationship or impact from any manufacturers or sales agent websites. Learn more
- BrandSharp Pebble

- TAR Score9.2
TAR Score is a ranking system developed by TopAppliancesReviews.com. TAR score has no relationship or impact from any manufacturers or sales agent websites. Learn more
- BrandKEENBEST
- TAR Score9.2
TAR Score is a ranking system developed by TopAppliancesReviews.com. TAR score has no relationship or impact from any manufacturers or sales agent websites. Learn more
- BrandLANBAOSHI

- TAR Score9.2
TAR Score is a ranking system developed by TopAppliancesReviews.com. TAR score has no relationship or impact from any manufacturers or sales agent websites. Learn more
- Brandryerum

- TAR Score9.0
TAR Score is a ranking system developed by TopAppliancesReviews.com. TAR score has no relationship or impact from any manufacturers or sales agent websites. Learn more
- BrandHMPLL

- TAR Score9.0
TAR Score is a ranking system developed by TopAppliancesReviews.com. TAR score has no relationship or impact from any manufacturers or sales agent websites. Learn more
- BrandWhetstone Cutlery
- TAR Score9.0
TAR Score is a ranking system developed by TopAppliancesReviews.com. TAR score has no relationship or impact from any manufacturers or sales agent websites. Learn more
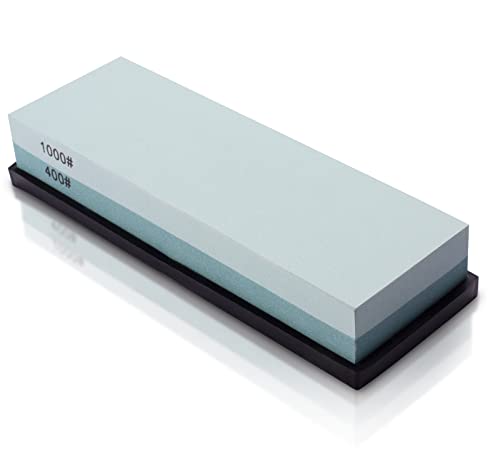
- BrandMIDO Professional Abrasive
Last update on 2026-10-03 / Affiliate links / Images, Product Titles, and Product Highlights from Amazon Product Advertising API
FAQs
Do I need to soak my whetstone before every sharpening session?
Standard water stones made of white corundum or silicon carbide must soak in cool water for 10 to 15 minutes before sharpening. They are ready when air bubbles stop rising. Splash-and-go stones or diamond sharpening plates only require a quick mist of water across the top before use.
How often should I sharpen my kitchen knife on a whetstone?
Most home cooks only need to use a whetstone every two to four months for their main chef knife. Using a honing steel between whetstone sessions keeps the cutting edge aligned during daily cooking. When the knife starts sliding off tomato skins rather than cutting them, it is time to return to the stone.
What should I do if my knife has small chips along the edge?
Small chips require starting on a coarse stone, such as 400 grit, to grind away damaged metal and reset the bevel line. A medium 1000-grit stone is too fine to remove chips efficiently without excessive time. Once the chip disappears and an even burr forms, proceed to 1000 and 6000 grits to finish the edge.
Can I use vegetable oil or mineral oil on a water stone?
Never put cooking oil, mineral oil, or motor oil on a water stone. Oil permanently clogs the porous grit structure, preventing water absorption and ruining the stone. Only use honing oil on stones explicitly manufactured and labeled as oil stones or Arkansas natural stones.


Top Rated Best Quality Range Hoods: 2026 Expert Picks

The 12 Best Small Solar Generators 2026

10 Best Quality Semi Automatic Washing Machine of 2026 For Leak-Free Laundry

11 Best Small Washer Machine of 2026 For Everyday Laundry

12 Best Vibration Pads For Washing Machine of 2026 To Stop Walking and Shaking

11 Best Selling Front Load Washing Machine of 2026 For Quiet Odor-Free Laundry

11 Best Washing Machine For King Size Bedding of 2026 To Prevent Cycle Errors

10 Best Small Front Loader Washing Machine of 2026 For Tight Closets






